Maintenance Mode
Maintenance Mode is used to lock out all IntelliDealer and VitalEdge functions for most users. Its intent is to give administrators a way to ‘turn down’ the system without completely turning it off. This is useful for dealers trying to perform major maintenance or updates (such as customer merge, conversion activities, part re-numbering/FXPNO, and so on). Maintenance Mode keeps most users out, but leaves the system up for administrators.
Maintenance Mode does NOT limit or control ODBC functions or reports setup via outside reporting software (MS Query, Excel, Crystal Reports, etc).
Putting IntelliDealer into Mainteance Mode also puts MyDealer into Maintenance Mode. See MyDealer Settings: System Tab.
Warning: VitalEdge recommends that you read this entire section, in full, before using or configuring Maintenance Mode. Additionally, you should test the Maintenance Mode process, and the steps to bring IntelliDealer back online, in a test system or while the system is acquiesced after hours.
This section includes these topics:
IntelliDealer Maintenance Mode Behavior
Warning: Maintenance Mode impacts IntelliDealer, Interfaces, ID MobileAccess and MyDealer by locking the system for everyone other than the users configured in the Allowed List.
When Maintenance Mode is activated, users who are not on the allowed list are not able to sign into any portion of the application (IntelliDealer, ID MobileAccess, MyDealer, green screen, OEM interfaces). Users who are already signed in are not able to perform any other functions.
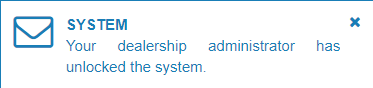
Any users signed into the system when Maintenance Mode is activated are shown a pop up message on screen that says "Your dealership administrator has locked the system." If the system is locked, and a user who is not on the allowed list attempts to click an option or sign into the system, they receive this message :

If users in the allowed list sign on while Maintenance Mode is active, they receive this message:

Users who get this message should be aware of why the system is in Maintenance Mode.
Configuring Allowed Users
Allowed users continue to have access to the system when IntelliDealer is locked by Maintenance Mode. You must configure the allowed users before activating Maintenance Mode.
To set up the list of allowed users:
-
Navigate to Administration > Settings > Security.
-
Add or edit system 994 (WebAdmin), and check the Access System Settings option, if it is not already checked.
-
If you made changes to security, you must sign off and sign back on for the changes to take effect.
-
Navigate to Administration > Settings > IntelliDealer Settings.
-
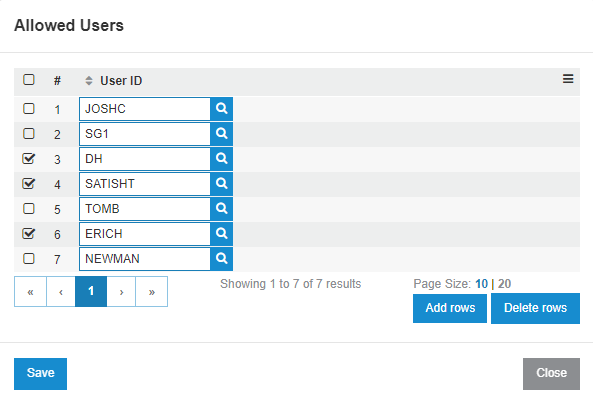
Click Allowed Users to open a listing screen.
-
Click the Add rows hyperlink to add users manually, or by searching for their User ID.
The list is stored in the WEBUSRW file. Groups cannot be setup up, only individual users.
-
You MUST add the CDKJOBSCH user to the allowed list.
-
This ensures that billing runs, database, day-end, and other scheduled jobs can run while Maintenance Mode is active, as CDKJOBSCH is the starting user behind the scenes. By default no users are in the allowed list, so Maintenance Mode can’t be accidentally activated from IntelliDealer.
-
Add any user that is tied to any runs you want to allow while Maintenance Mode is active.
-
This could be the database user from the job schedule command itself, the Job Scheduler User from Configuration > Miscellaneous > Other > System Settings, and so on. For ASP Cloud server dealers, usually there is a user like FxxxxDB for nightly runs that you may or may not want to add to the allowed list.
-
Add VitalEdge employees as a backup mechanism so someone always has access.
-
Dealers with a server on site should review all job schedule entries with user ‘CDK*’ on them and determine if the user should be changed or if the job is can be allowed to run while Maintenance Mode is active.
-
Add any other user that is expected to use Maintenance Mode.
-
Click Save to save your changes, or Close to exit without saving.
Activating Maintenance Mode
Maintenance Mode is NOT part of the database reorganize or any other function. It is handled as a separate flag that is turned on and off. If you turn the flag on, it must be turned off later on.
The buttons to enable and disable Maintenance mode toggle in this fashion:
System is in locked state:
System is in unlocked state:
Prerequisites: There must be at least one user in the Allowed List. See Configuring Allowed Users
-
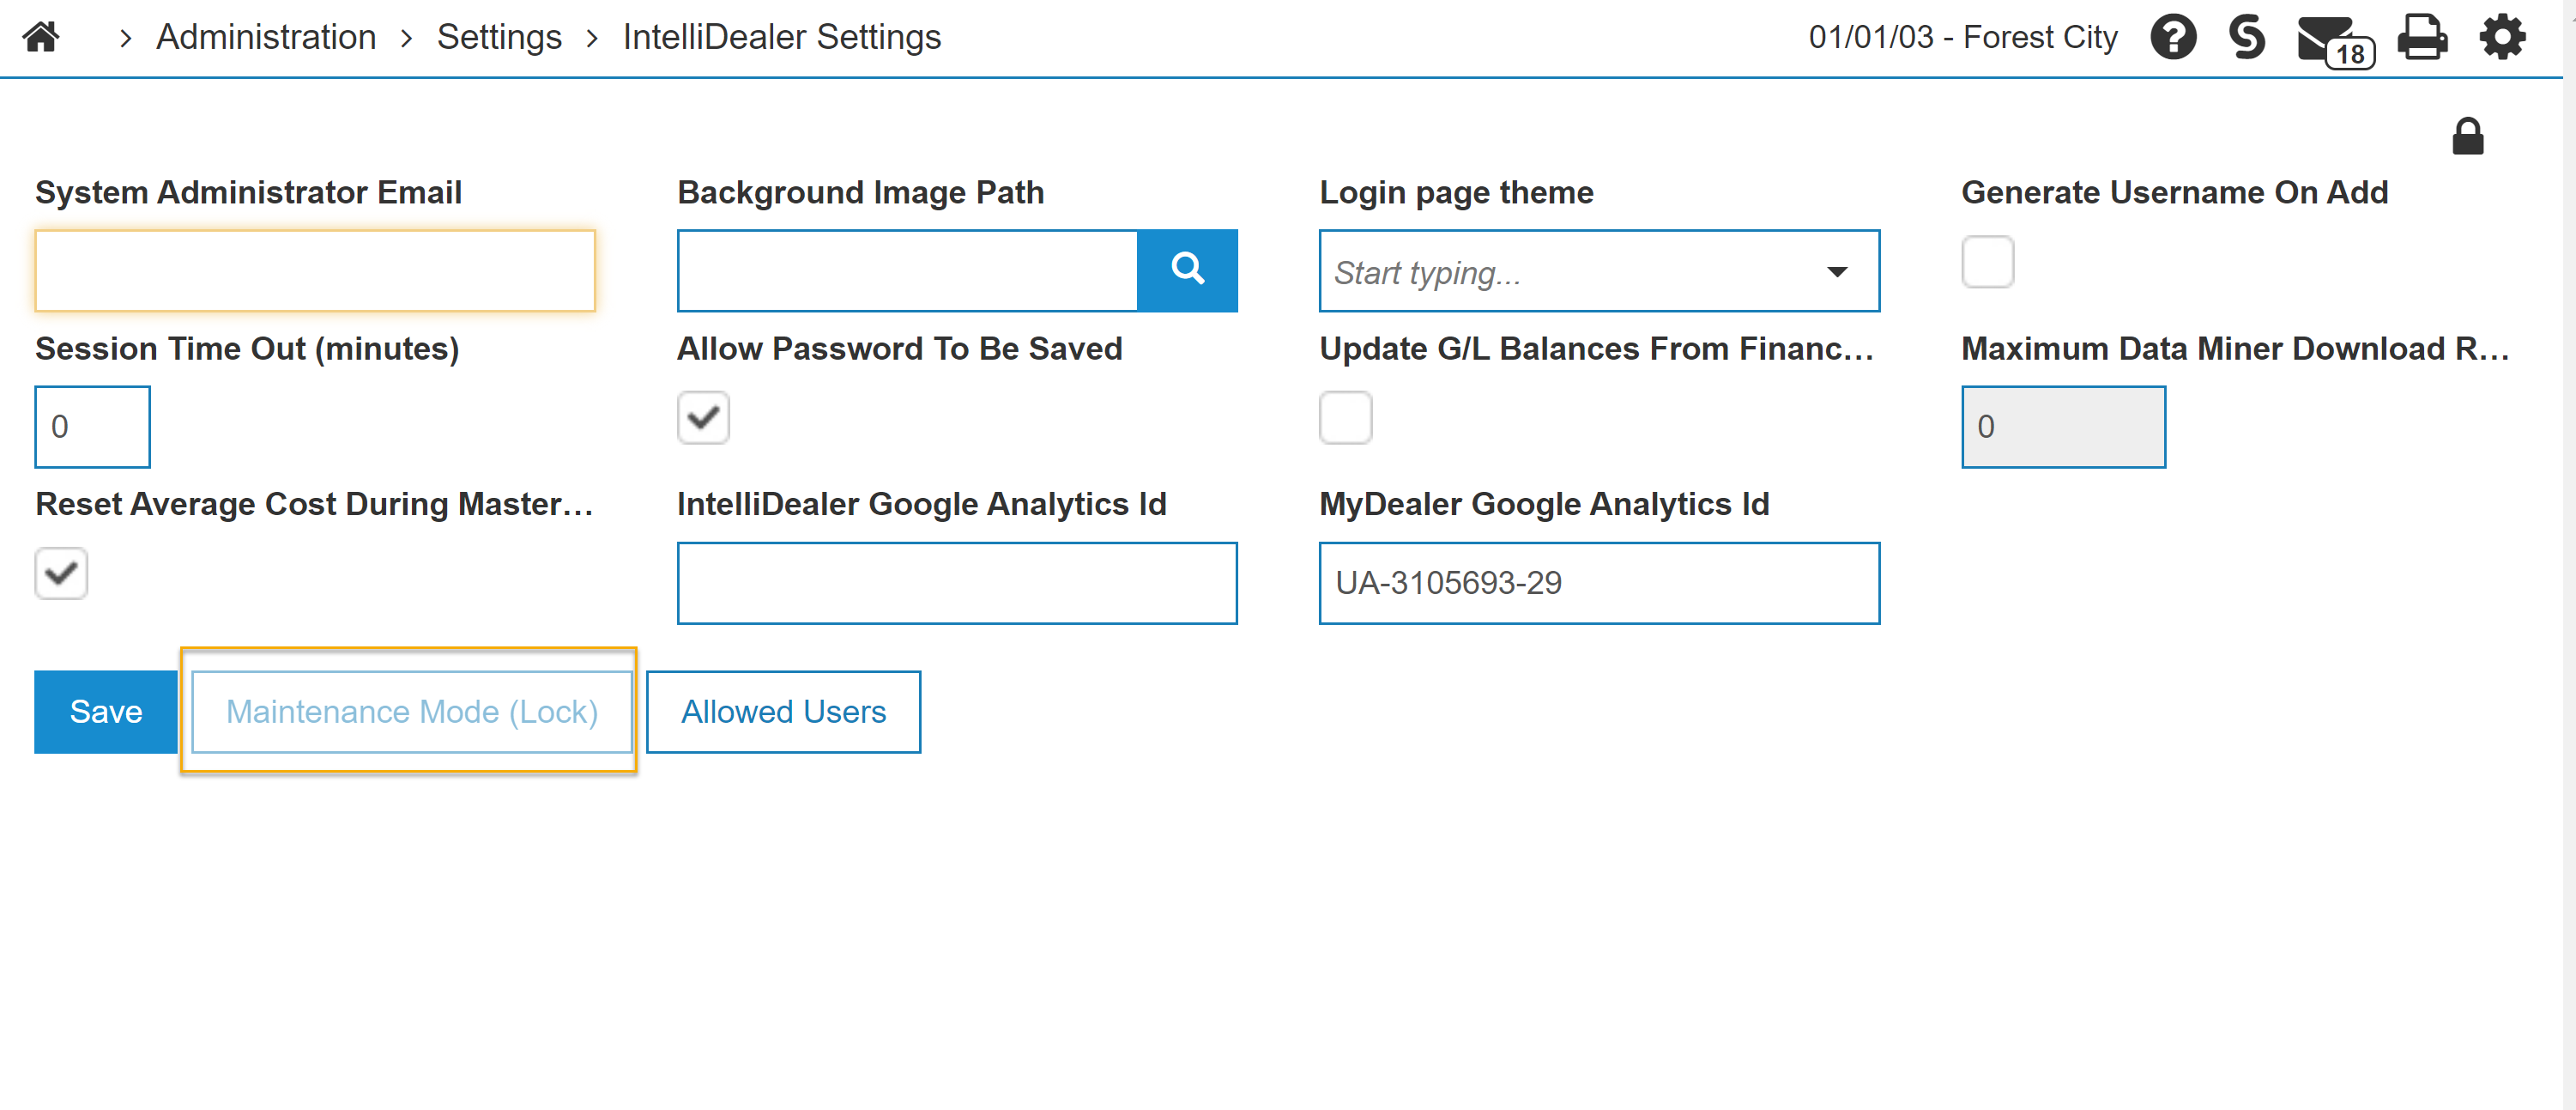
In IntelliDealer, navigate to Administration > Settings > IntelliDealer Settings. At the bottom of the screen you should see a button that says ‘Maintenance Mode (Lock)’.
-
To lock most users out of the system, click the ‘Maintenance Mode (Lock) button to activate Maintenance Mode immediately .
Warning: There is no warning or secondary screen. Clicking the button immediately disables the system for almost all users.
-
To unlock the system ( turn off Maintenance Mode) and bring the system back online, in IntelliDealer, navigate to Administration > Settings > IntelliDealer Settings.
-
Click the Maintenance Mode (Unlock) button.
The system is available again for users. Anyone who was in and tried to click on options may need to sign back into the system again. If they didn’t click on anything and just had a screen signed into IntelliDealer they could see another message pop up on screen:
Activating Maintenance Mode from the Job Scheduler
Maintenance Mode can be activated from the job scheduler for any dealer.
Maintenance Mode can be set during ASP maintenance hours.
Prerequisites: There must be at least one user in the Allowed List. See Configuring Allowed Users
For Dealers using the ASP Cloud Server
-
Contact Client Services by phone or by opening a case via the VitalEdge Support Portal at: http://support.vitaledge.com, and request that Maintenance Mode be added to the scheduler.
-
Provide the dates and times the jobs should be set up to run and also indicate if you need any potential conflicting jobs to be checked or reviewed in advance.
VitalEdge will configure the jobs GxxxxMMON for Maintenance Mode activation, and GxxxxMMOFF for deactivation, through the Advanced Job Scheduler (where xxxx is your library number).
For Dealers with an On-Site Server
-
Within IntelliDealer, navigate to Configuration > Utilities > Scheduled Jobs.
-
Add a job with a relevant name for your system/configuration that denotes the Maintenance Mode activation. The name, date, time, etc are up to you. Make sure the command that’s run is:
MAINTMODE SETSTATUS(*ON) -
Set up a second job for Maintenance Mode deactivation similar to the first but make sure the command run is this:
MAINTMODE SETSTATUS(*OFF)) -
Save your changes.
Legacy Command Line Option (Server onsite only)
Provided that a user is in the allowed list, running the command MAINTMODE SETSTATUS(*ON) puts the system into user-Initiated Maintenance Mode.
If the user is in the allowed list, they can also deactivate Maintenance Mode by running MAINTMODE SETSTATUS(*OFF).
ASP Cloud Server dealers do not have command line access and cannot run the Maintenance Mode activation and deactivation commands above.
Security: 994 - WebAdmin
Revision: 2025.10