Quick Adding a Part Profile from Within a Parts Invoice
-
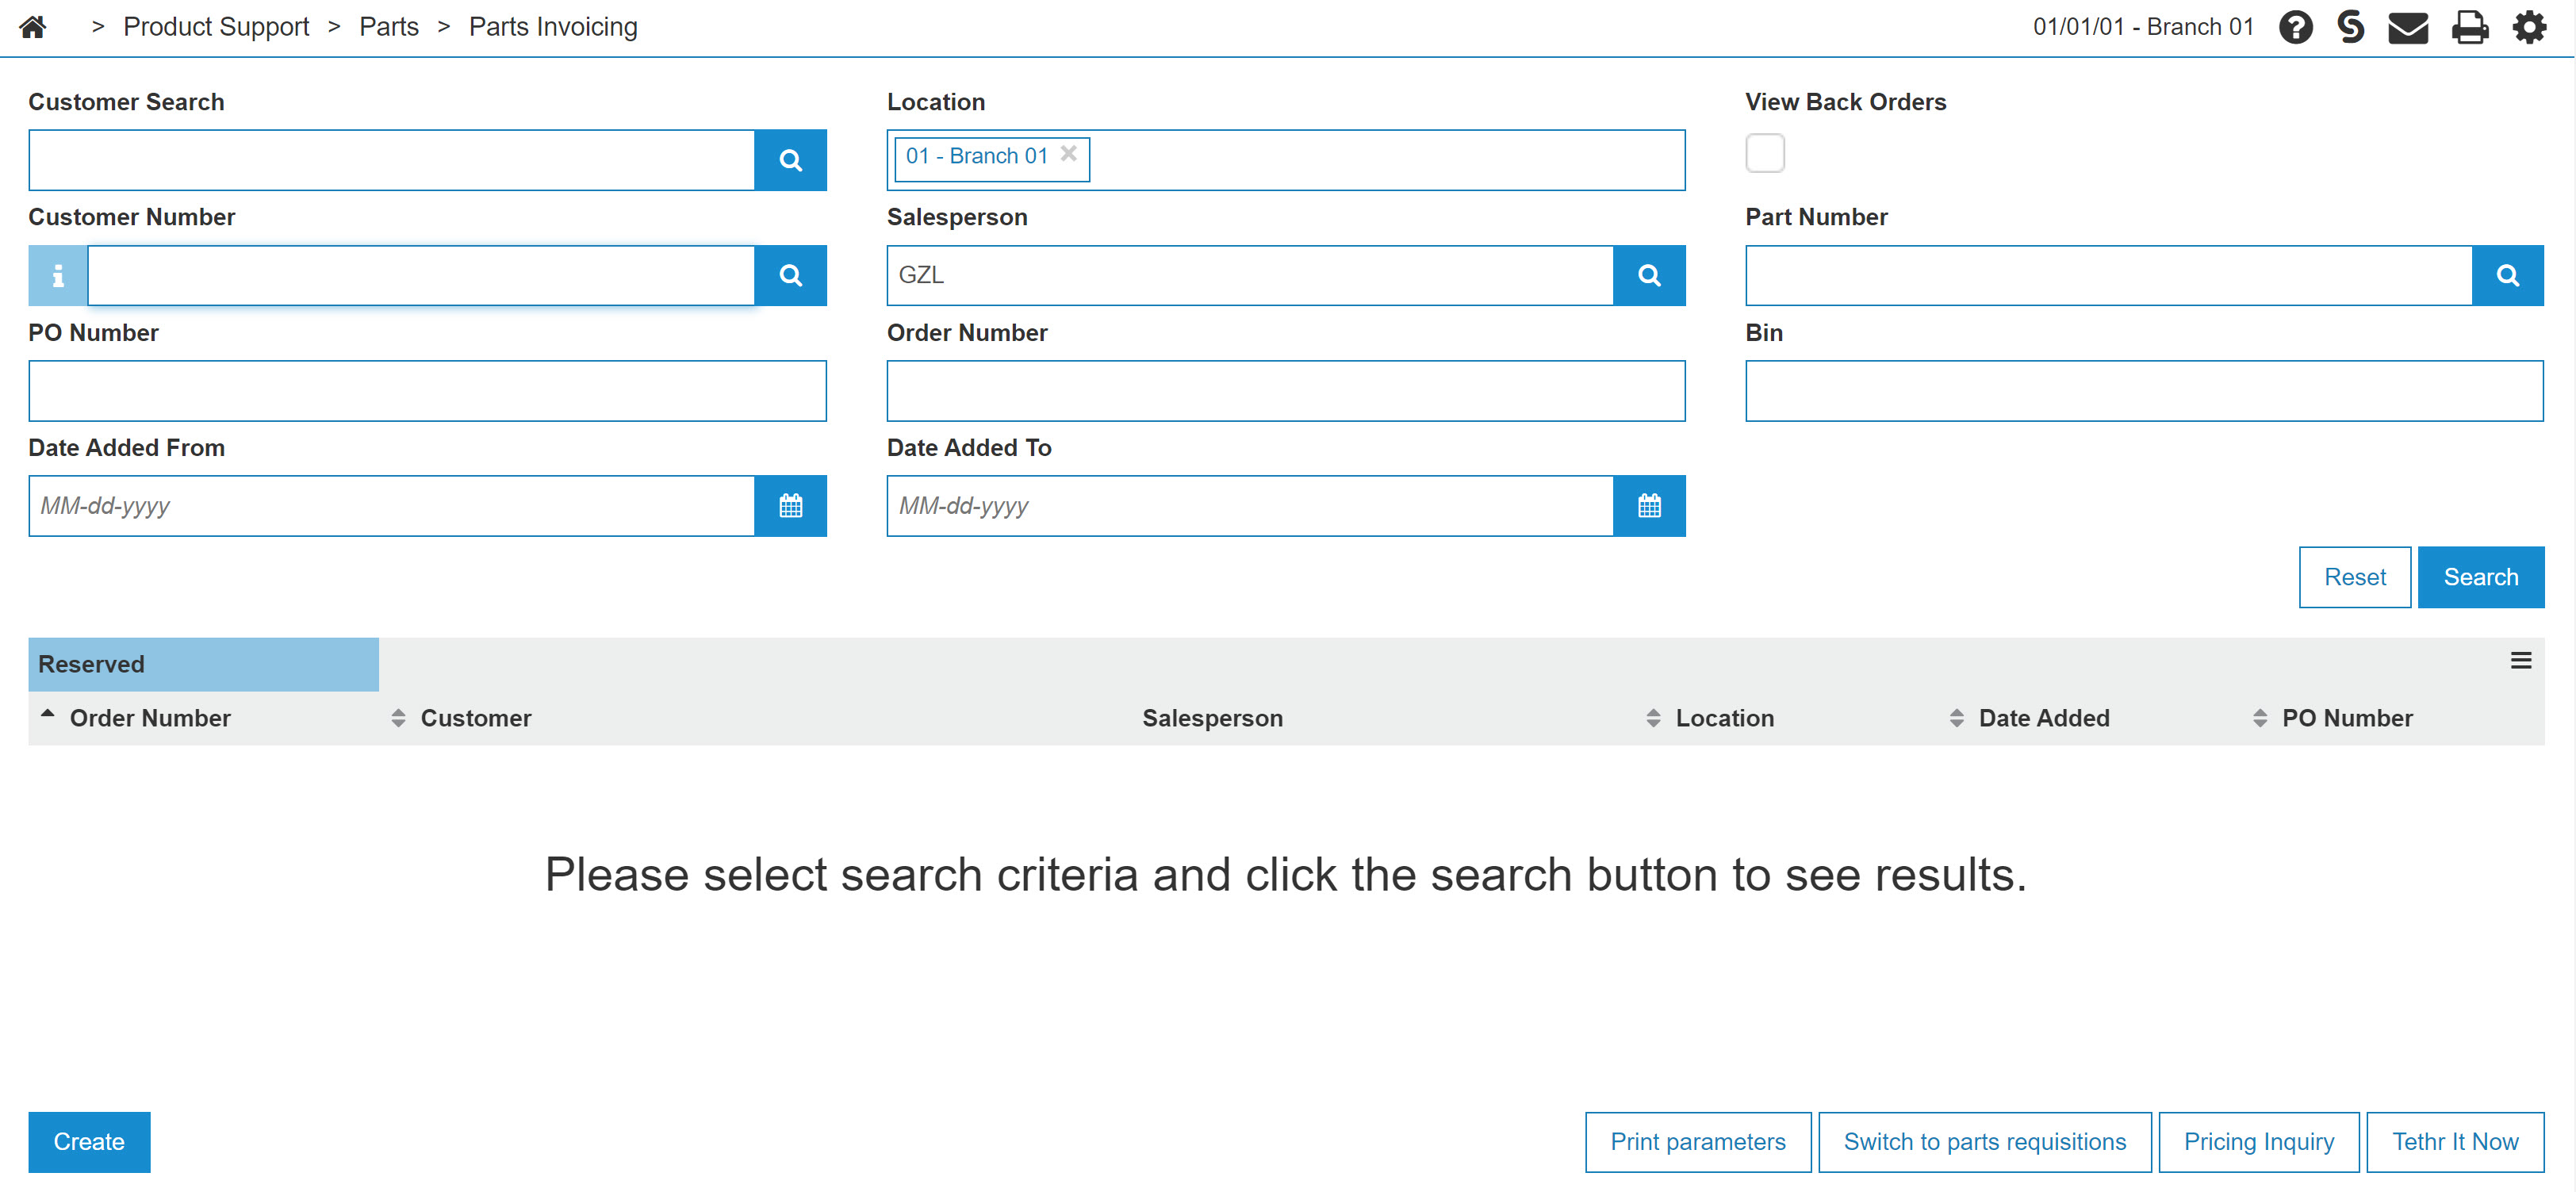
Navigate to the Product Support > Parts > Parts Invoicing.
The Parts Invoicing screen appears. -
Click Create.
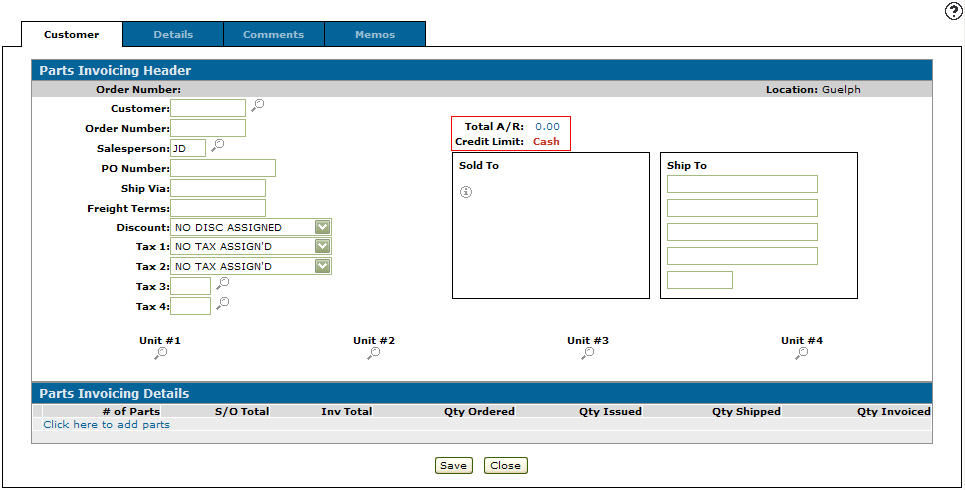
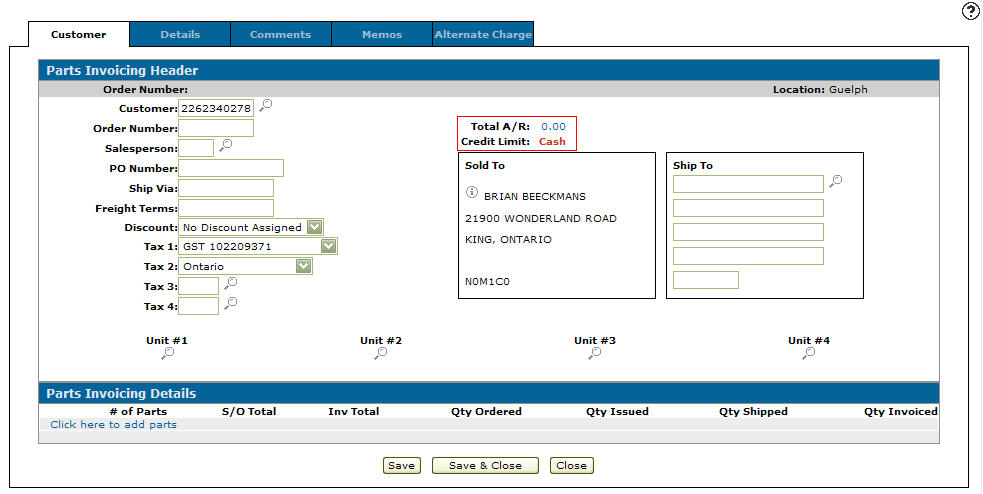
The Customer - Parts Invoicing Header tab appears. -
Enter the customer number in the Customer field, or click the Search
 icon to search for and select a customer.
The Customer - Parts Invoicing Header tab refreshes and adds any customer information found in the customer’s profile.
-
Enter a Salesperson or click the Search
icon to search for and select a salesperson. -
Click the Details tab or click on the Click here to add parts link.
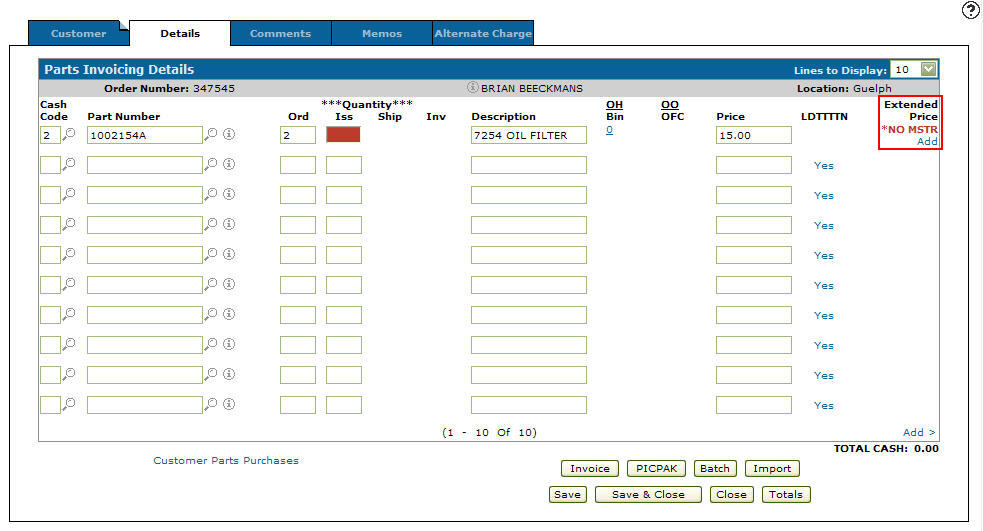
The Parts Invoicing Details tab appears. -
Enter a cash code in the Cash Code field or click the Search
icon to search for and select a cash code. -
Enter a Part Number.
The part number can be up to 15 digits consisting of alpha, numeric or blank characters. The part number cannot not contain more than 10 special characters ('<', '>', '&' and '"'). VitalEdge recommends that you do not use blanks in the part number.
-
(OPTIONAL) enter a Ord and Iss quantity.
-
(OPTIONAL) enter a brief Description of the part number.
-
(OPTIONAL) enter a Price.
-
Click the Save button.
The Parts Invoicing Details tab refreshes listing *NO MSTR (no part master), indicating that the part does not exist within the Part Profile.
An Add link also appears under the Extended Price field.

Using the Add link for a part not in Parts Profile
From the Parts Invoicing Details tab, when a part has been entered that does not exist in the Parts Profile, *NO MSTR (no part master) and an Add link appear under the Extended Price field.
-
Click the Add link.
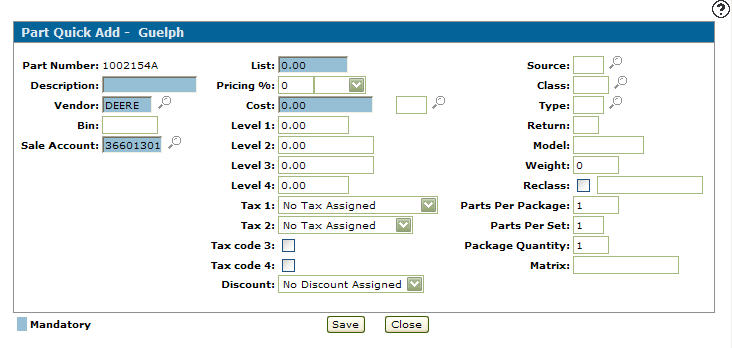
The Part Quick Add screen appears. -
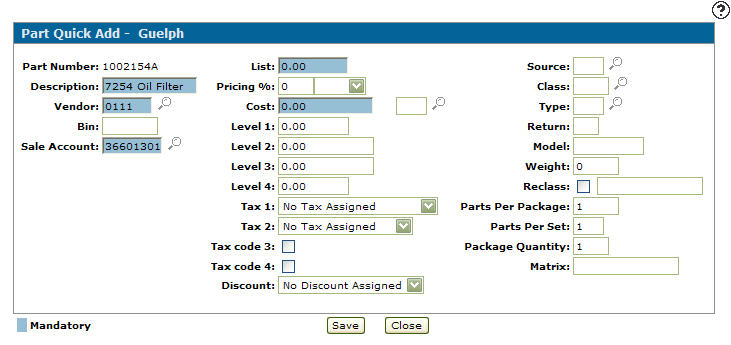
Enter a brief part Description.
-
Enter a Vendor Number or click the Search
icon to search for and select a vendor number. -
Click on the vendor number, the Add Parts screen appears with the selected vendor number in the Vendor Number field.
-
Enter a part Bin number.
-
Enter a Sales Account.
-
Enter a List price.
-
(OPTIONAL) enter a Pricing % for the new part.
-
Enter a Cost.
-
Enter a Cost Code.
- or -
Click on the Search icon and select a cost code from the list. -
(OPTIONAL) enter the part's pricing Level 1-4.
-
(OPTIONAL) select Tax Codes 1-4.
-
(OPTIONAL) select a Discount code.
-
(OPTIONAL) enter a Source code.
-
(OPTIONAL) enter a Class code.
-
(OPTIONAL) enter a Type code.
-
(OPTIONAL) enter a Return code.
-
(OPTIONAL) enter a part Model number.
-
(OPTIONAL) enter the part's Weight.
-
(OPTIONAL) select the Reclass checkbox and type in a reclass code.
-
(OPTIONAL) enter the amount of Parts Per Package.
-
(OPTIONAL) enter a quantity of Parts Per Set.
-
(OPTIONAL) enter a price Matrix code.
-
On the Part Quick Add screen, enter the details of the part. Mandatory fields are highlighted.
If the part exists on a price file or was previously added to another location, the fields on the Part Quick Add screen are automatically populated with the related information.
-
Click the Save button.
The Parts Invoicing Details tab appears.