CNH eParts Catalog 4.0
Topics in this section are:
IntelliDealer Setup for the CNH Parts Catalog
-
Navigate to Configuration > Interfaces > CNH > eParts 4.0.
-
Click on the Vendors tab and validate all your CNH vendors are there.
-
Click on the Dealer Numbers tab and validate your CNH dealer numbers are correct.
-
Click on the Users tab.
-
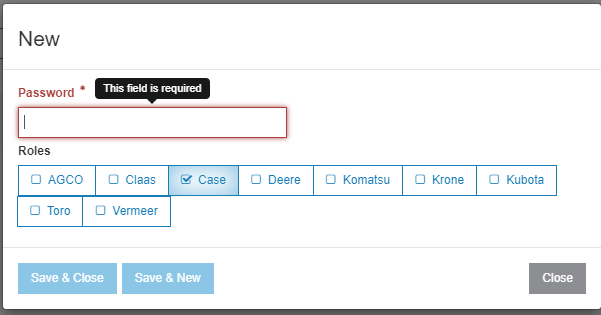
If there are no users specified, click the Create button to create a non-expiring third-party userID that can be used by CNH Parts Catalog.
-
Enter in a unique, difficult-to-guess password and make sure the role Case is selected.
-
Click Save and Close.
The user name is auto-generated.
-
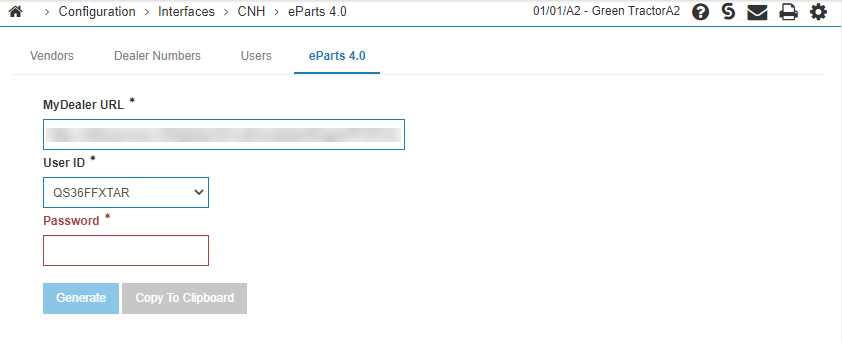
Click on eParts 4.0 tab.
-
Enter your MyDealer URL.
-
Select the user you just created and enter the password you used.
-
Click Generate, then click Copy to Clipboard. You will use the generated URL in the CNH Parts Catalog Setup procedure.
CNH Parts Catalog Setup
Note: The following sections describe CNH's eParts 4.0 application and is NOT under the control of VitalEdge. Therefore these instructions could become out of date and not exactly as depicted. They are correct as of November 30, 2020 in the test servers.
-
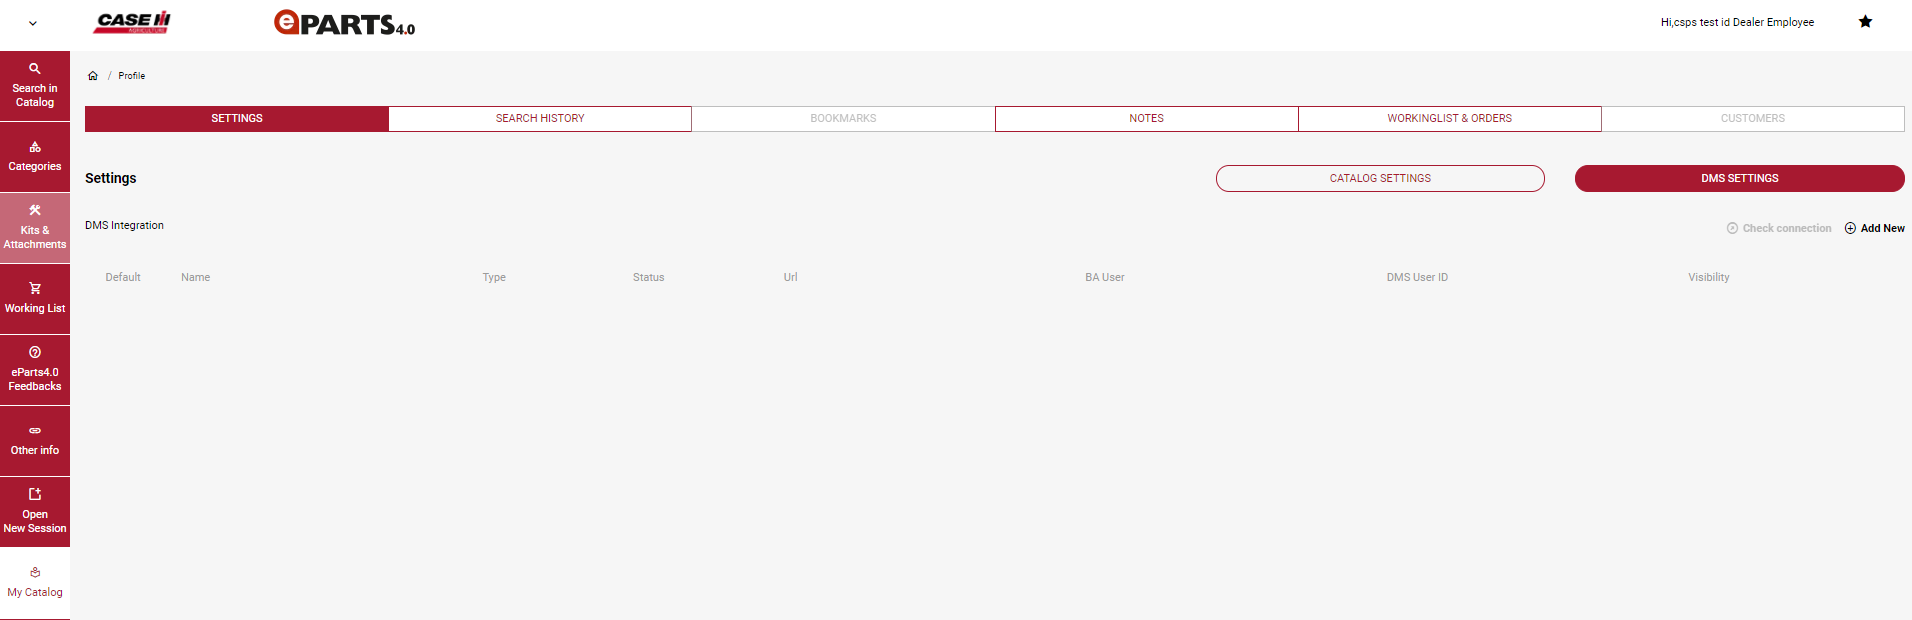
Sign into CNH eParts 4.0, and click My Catalog.
-
Click DMS Settings, then click Add New.
-
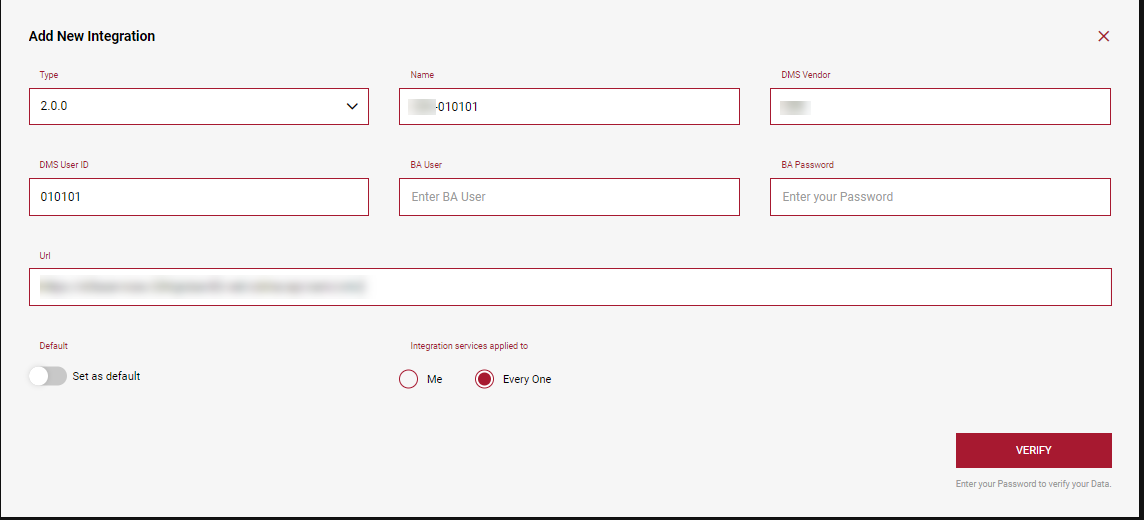
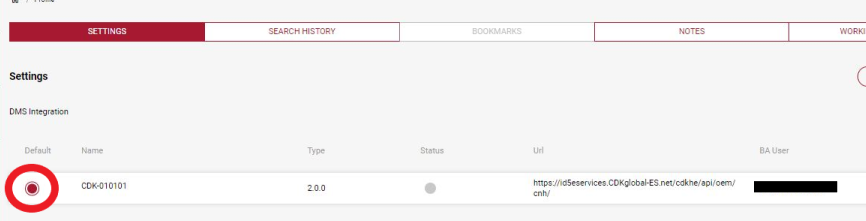
Enter a name for this configuration. In the example above ***-010101 is used. Whatever you choose, it does not affect the interface to IntelliDealer.
-
Enter DMS vendor. Whatever you choose, it does not affect the interface to IntelliDealer.
-
For DMS User ID, enter the company, division, branch for the data you are interested in. This must be a valid company, division, branch in IntelliDealer. This affects the part availability, bin locations and locations that are displayed in eParts 4.0.
-
For a BA User, enter the user ID that was auto-created in the IntelliDealer Setup for the CNH Parts Catalog procedure.
-
For the BA Password, enter the password you choose in the IntelliDealer Setup for the CNH Parts Catalog procedure.
-
Paste the URL that was generated for you the IntelliDealer Setup for the CNH Parts Catalog procedure.
-
Choose if you want this to be the default.
-
Choose if you want this to be the default for everyone or just you.
Note: The previous two steps must be completed on the initial setup in order for the configuration to be visible to other eParts 4.0 users. If you edit the integration to add it in after creating it, it does not populate for other users. If you have already created the configuration and need to edit these values, you must remove the configuration from eParts 4.0 and re-create it.
-
Click Verify.
If successful, the screen provides you with a Save button.
-
Click Save.

-
If successful, the DMS Integration appears with a green status indicator.
You can now proceed to repeat this CNH eParts 4.0 setup for each location you want to have access to data within eParts 4.0, simply changing the DMS User ID to the company, division, and branch you are configuring.
For other users to use this same integration, they can navigate to the DMS Settings area and check the default integration for the location they’re most interested in.
Note: At least one of the integration records must be marked as the default (even if there's only one setup) in order for the integration to work.
Using CNH Parts Catalog
-
In CNH eParts 4.0, navigate to where you can search for parts and select a part you are interested in.
-
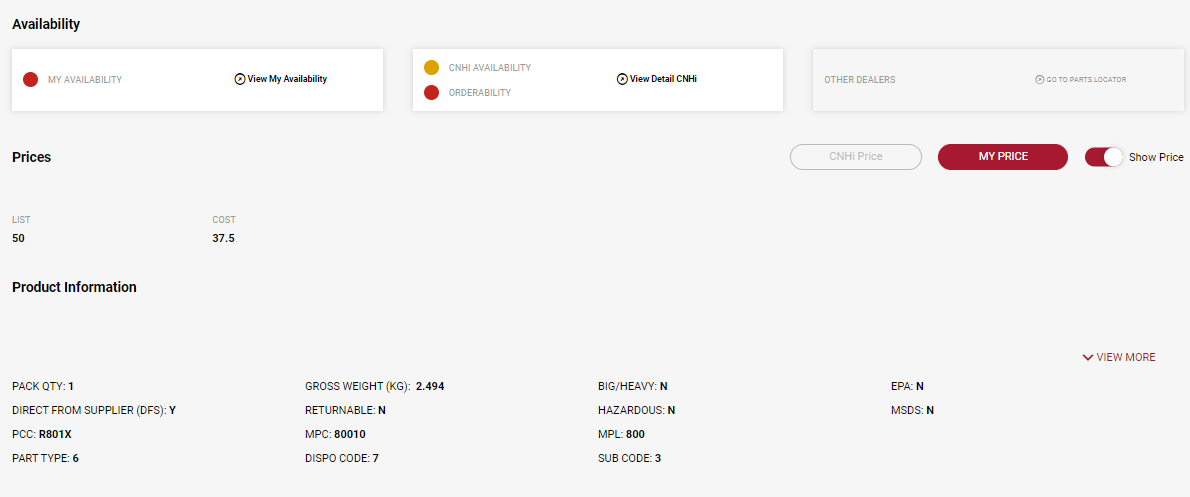
To view prices, click the My Price button.
-
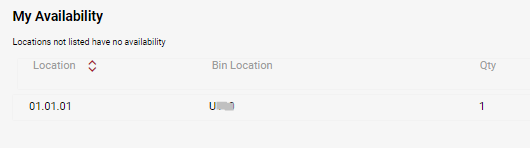
To view net on hand quantities, click View My Availability.
-
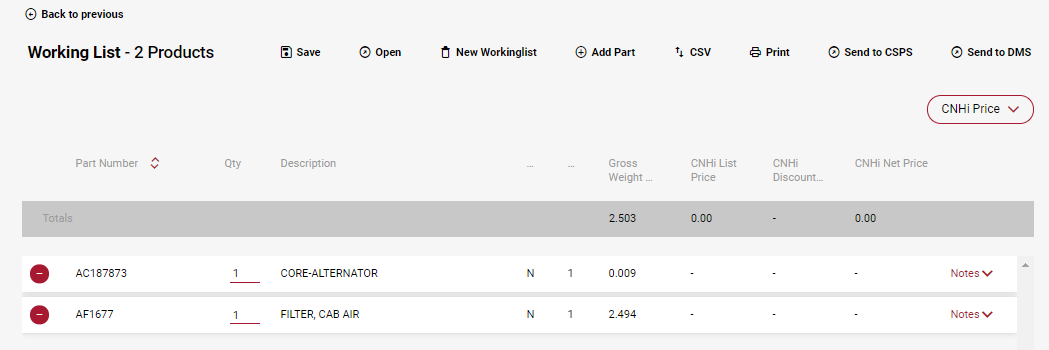
To set up a picklist, click the Add to Working List button. In the Working list tab, you will see:
-
To send it to IntelliDealer, click the Send button on the Send to DMS window.
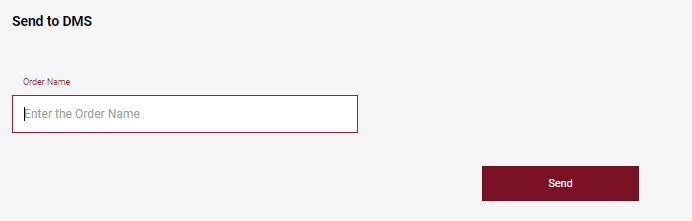
-
Enter the name of your picklist. In IntelliDealer it will become EPC-xxxxxx, where xxxxx is the name you entered in CNH Parts Catalog.
Importing a CNH Parts Catalog Picklist
The import is in a few spots in IntelliDealer, the most common ones being Parts Invoicing and Parts Ordering.
The part listing detail screen has an Import button.

Then click Parts Catalog/PC File.
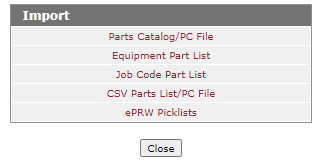
Either key in EPC-xxxxx, where xxxx is the actual name you used, or use the magnify glass to search for your file. It will start with EPC-.
Start Digits
The Start Digits tab allows you to map different vendor brands to the corresponding start digits of their vendor ID in the CNH eParts 4.0 catalog. Mapping the start digits is required to view part information in CNH eParts 4.0.
The fields on the Start Digits screen are:
| Field | Description |
|---|---|
| Brand | The vendor brand name. |
| Start Digit | The start digits of the vendor ID number. |
Use the search field to locate a specific Brand or Start Digit.
Click Create to add a new entry.