John Deere: Warranty
The primary goal of this interface is to retrieve warranty claim credit data (credit memos) from the John Deere warranty web service and post the credit to the appropriate warranty sub-ledgered or receivable accounts. The credit memo contains parts, labor, travel, other, sales tax, and total allowance amounts where applicable. A scheduled task runs periodically (approximately every eight hours) and downloads the previous five days of warranty credit information. IntelliDealer stores the data and displays it on a listing screen. On that screen, the user creates an A/P voucher for a location using the default warranty, parts, labor, travel, other, and sales tax accounts from configuration.
There are two main components to the interface. First, the John Deere Warranty interface that transmits the claim to John Deere from an IntelliDealer work order saves the requested warranty amounts into a warranty credits record. Second, the scheduled John Deere Warranty Credits task retrieves approved warranty credit information from John Deere. IntelliDealer matches that data to the record created when the claim was submitted from the work order. When a match is found, approved warranty credit memo values are added to the record and the user creates a voucher for the warranty credit. Depending on system settings, IntelliDealer uses the current John Deere warranty integration or the legacy integration when retrieving credit memos and related claim data.
Topics in this section include:
Setup Requirements
PFW.6241 - John Deere Warranty Credits must be licensed to use the Warranty Credits configuration tab, the warranty credits listing, imports, and voucher creation.
PFW.6200 - John Deere Warranty Web Service must be licensed to use the Warranty Dates configuration tab. The top-level Main tab (Use new warranty APIs) appears only when both PFW.6200 and PFW.6241 are licensed.
To open Configuration > Interfaces > John Deere > Warranty Credits, the user needs access to configuration and a license for PFW.6241 or PFW.6200.
Security controls which users access voucher creation for John Deere Warranty Credits. The switch is in system 601 - Accounts Payable: Other - Allow JD Warranty Credits Voucher Creation.
Walkthrough
Configuration
-
Open Configuration > Interfaces > John Deere > Warranty.
-
The screen contains up to three top-level tabs. Which tabs appear depends on licensing:
- Main — Use new warranty APIs (visible only when both PFW.6200 and PFW.6241 are licensed).
- Warranty Credits — voucher-related defaults and account mapping (visible when PFW.6241 is licensed).
- Warranty Dates — scheduled and manual warranty date updates from John Deere (visible when PFW.6200 is licensed).
-
If the top-level Main tab is visible (both PFW.6200 and PFW.6241 licensed), select Use New Warranty when the dealer uses the current John Deere warranty integration for credit memo and claim retrieval. Clear the check box to use the legacy integration. Click Save.
-
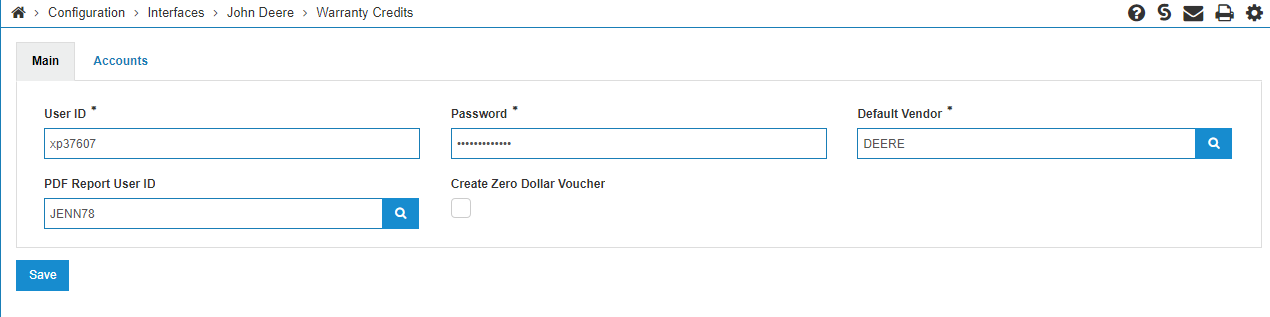
On the Warranty Credits tab, the inner Main tab holds options that apply across locations:
- Use the PDF Report User ID field for the user ID required for John Deere warranty PDF and related access.
- Configure a default vendor. IntelliDealer uses this vendor when creating vouchers from John Deere warranty credits if no location- and dealer-specific voucher vendor is set on the Accounts tab.
- Use the Create Zero Dollar Voucher check box to create either a zero-dollar or a non-zero-dollar voucher, based on dealer preference.
- Use Use Claim Number as Description to drive voucher line descriptions from the claim. When this check box is cleared, use Include Segment in Description to include the segment in the description.
-
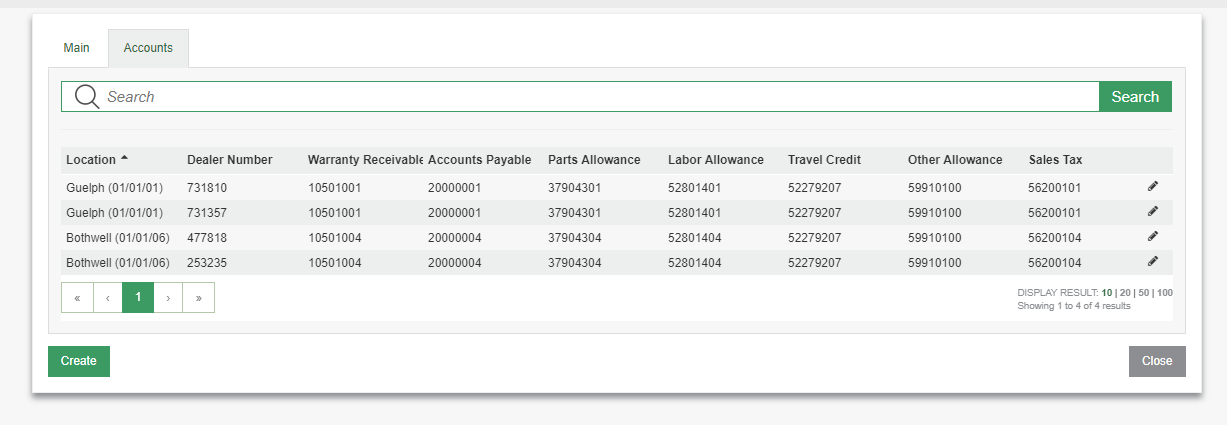
On the Warranty Credits tab, the inner Accounts tab lists location and dealer-specific default accounts and optional voucher vendor:
-
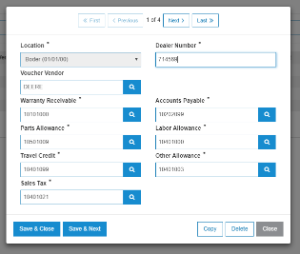
Click Create to add a row:
- Set location and dealer number.
- Use the optional Voucher Vendor field for a vendor that applies to that dealer code and location. If the user leaves Voucher Vendor blank, IntelliDealer uses the default vendor from the inner Main tab.
- Enter G/L accounts for warranty, accounts payable, parts allowance, labor allowance, travel credit, other allowance, and sales tax.
-
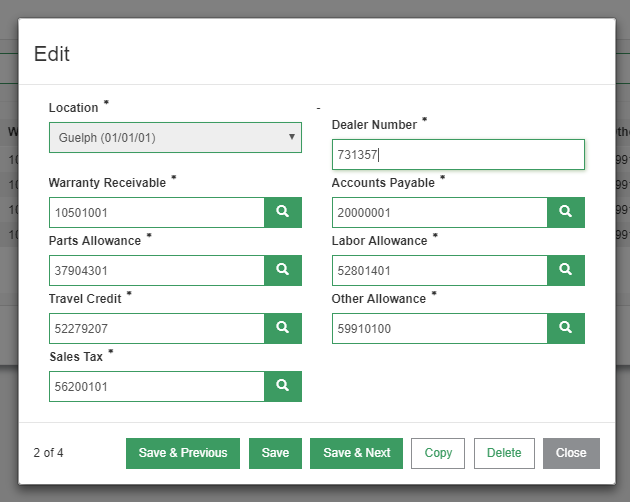
Click the edit icon to change an existing row:
-
-
On the Warranty Dates tab, configure scheduled retrieval of warranty date changes from John Deere and optional notifications:
- Select Scheduled Warranty Updates to enable the scheduled job.
- When scheduled updates are enabled, specify the user who receives PDF error reports and whether that user receives all notifications.
- Click Save.
- When scheduled updates are enabled, use Manual Warranty Updates to run a one-time sync: choose the John Deere account (dealer) or All, select the month and year, then click the button to sync manual updates. Read the on-screen warning before running a manual sync.
See also: John Deere Credentials.
Setup
-
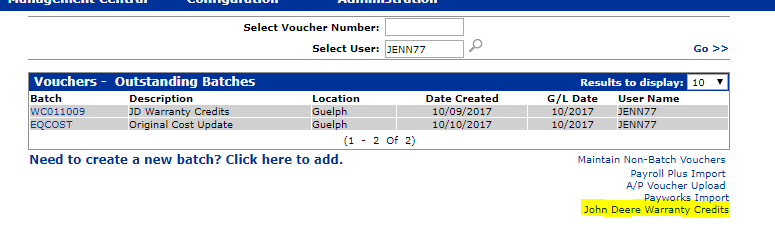
Open Financial Management > Accounts Payable > Vouchers. The John Deere Warranty Credits link appears below the Outstanding Batches table:
-
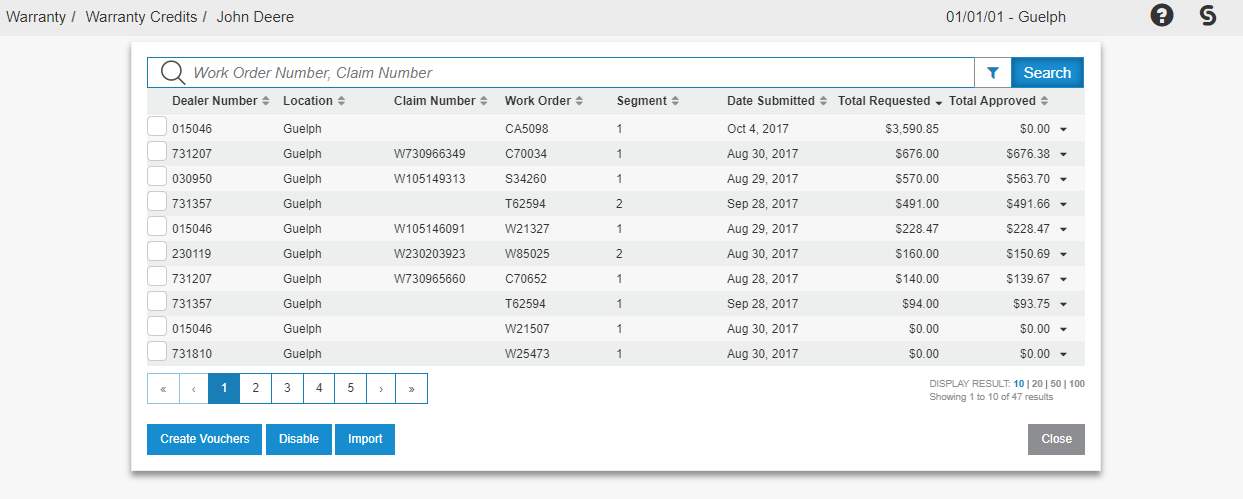
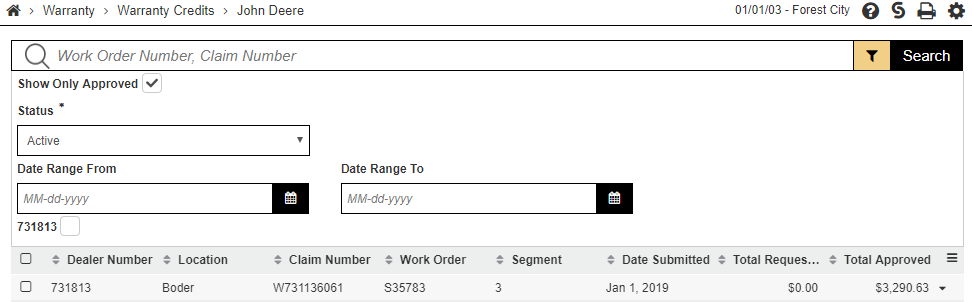
Click the link to open the warranty credits listing:
- The above screen shot is a test environment, some columns may be empty. In production, requested and approved amounts typically contain values.
- If the Create Vouchers button does not appear, assign security Other - Allow JD Warranty Credits Voucher Creation (see Setup Requirements).
- By default, the list shows active warranty credits. To hide credits without removing them from the database, select the rows, then click Disable.
-
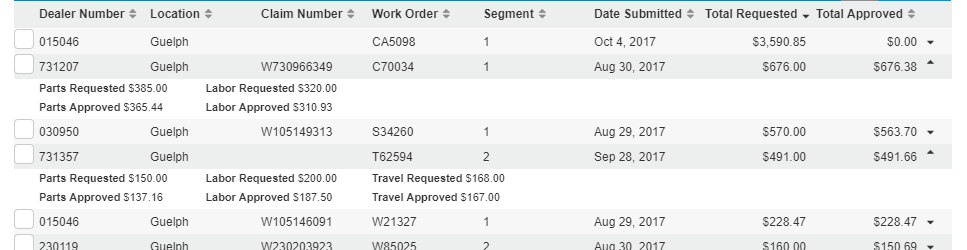
Click the expand control on the right side of a row to view part, labor, travel, other, and sales tax requested and approved amounts:
- A section appears only when at least one requested or approved amount in that category is non-zero. For example, if there is no travel amount, the travel lines do not appear.
-
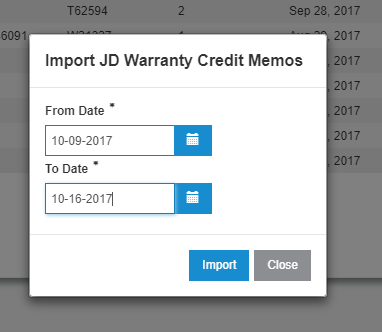
The scheduled task downloads approved warranty credits from John Deere. To import manually, click Import and specify the date range (and dealer where prompted):
- Import retrieves warranty credit information for claims already submitted to John Deere after the dealer started using the John Deere Warranty Credits interface.
-
Click Import Single to import one claim by dealer, work order number, and segment.
-
Use the filter icon on the right side of the search bar to refine the list:
- Use the search bar to find a warranty credit by work order number or claim number.
- Use the dealer filter to limit rows to selected dealer codes. The list of dealer codes includes values that already appear on downloaded warranty credits. If no credits exist for a dealer number, that dealer number does not appear in the filter list.
- Use the location filter to limit rows to selected locations.
- By default, Show Only Approved is selected so only credits approved by John Deere appear. Clear the check box to include claims that are submitted but not yet returned.
- Use the submitted date range to limit rows by the date the claim was submitted.
- Use the returned date range to limit rows by the date the credit was returned.
-
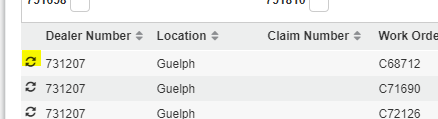
Set the status filter to Disabled to work with deactivated warranty credits. Select rows and click Enable to reactivate them:
-
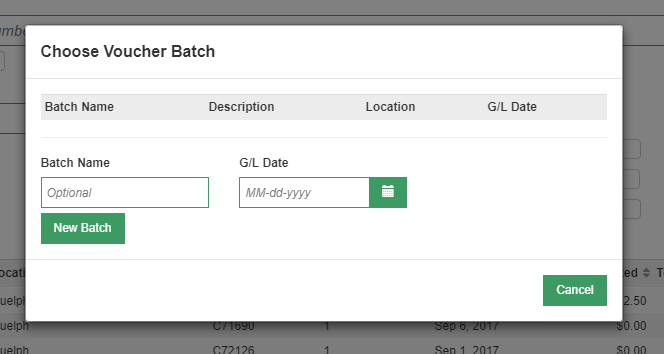
Select the warranty credits to include, then click Create Vouchers.
-
The batch selection screen opens:
- Choose an existing batch or create a new batch.
- Batches in the list belong to the current user. Click a batch name to add vouchers to that batch.
- To create a batch, enter a name and G/L date and click New Batch. If those fields are blank, IntelliDealer generates values. Generated batch names use the format WC + branch + month + day.
-
After IntelliDealer creates the vouchers, open them like any other vouchers from the batch selection screen.
- If a message indicates that a dealer number was not found, verify the Warranty Credits configuration so each dealer has the required accounts.
-
Run Voucher Update in IntelliDealer to post the voucher to the G/L and update the sub-ledger or A/R, depending on which process the dealer uses for warranty claims and credits.
-
In Subledger, or in Accounts Receivable Cash Receipts, match and clear the related warranty credit and claim entries.
Warranty Dates tab
Use the Warranty Dates screen to manage how the system consumes the John Deere Warranty Date PINs API. This interface ensures equipment warranty records are synchronized with John Deere’s official database.
To open Warranty Dates screen Configuration > Interface > John Deere > Warranty Dates.

Scheduled Warranty Updates
Use Warranty Updates to configure the automated retrieval of warranty information.
| Field | Description |
|---|---|
| Scheduled Warranty Updates | If selected, the system automatically checks for and downloads warranty updates at regular intervals. |
| PDF Error Reports Recipient | The user or email address that receives a notification report if the API fails to process specific PINs. |
| Receive All Notifications | If selected, the recipient receives reports for every sync attempt, including successful ones. |
Click Save to save the settings recorded in the Warranty Updates section.
Manual Warranty Updates
Use Manual Warranty Updates to fetch warranty data immediately outside of the scheduled window.
| Field | Description |
|---|---|
| John Deere Account ID | The specific dealer number for which to sync data. Select All Dealer Numbers to sync data for the entire organization. |
| Month | The specific month and year for which warranty records are requested. |
Only one sync request for manual warranty updates can be performed at a time and may take up to several hours to complete.
Click Sync Manual Updates to initiate the request to the John Deere API.
Feature: 6200 - John Deere Warranty Web Service; 6241 - John Deere Warranty Credits
Security: 999 - Configuration and 601 - Accounts Payable, Other - Allow JD Warranty Credits Voucher Creation
Revision: 2026.04