Scheduled Job
The Scheduled Job screen allows you to add a new scheduled a job.
Topics in this section include:
Add a Scheduled Job
-
Navigate to Configuration > Utilities > Scheduled Jobs.
-
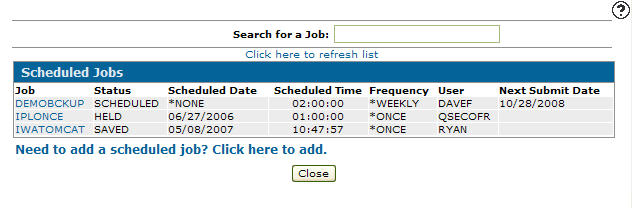
On the Scheduled Jobs screen, click the Need to add a scheduled job? Click here to add link.
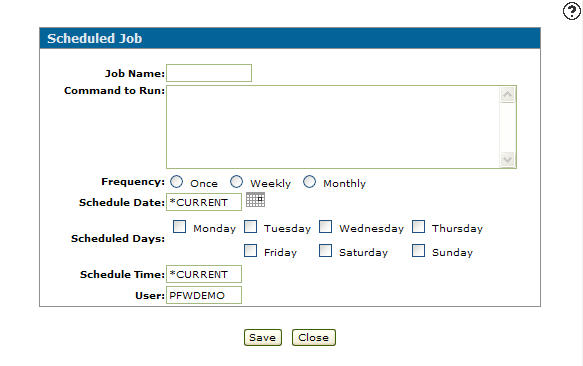
The Scheduled Job screen appears. -
Fill in the fields, referring to the Screen Description.
-
When you are satisfied with your entries, click Save, then Close.
-
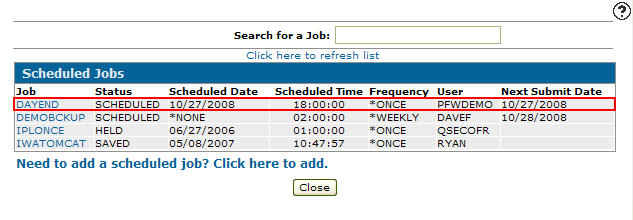
Click the Click here to refresh list link.
The Scheduled Jobs screen refreshes listing the newly added scheduled job.
Screen Description
The fields on the Scheduled Job screen are:
| Field | Description |
|---|---|
| Job Name | Enter the name of the new scheduled job. |
| Command to Run | Enter the command that the scheduled job will run. |
| Frequency |
The amount of times the job is scheduled to run:
|
| Scheduled Date |
Select a date the job is to be scheduled to run. Or enter one of these commands:
|
| Scheduled Days | The day or days of the week the job is to be scheduled to run, if *NONE is specified in Scheduled Date. |
| Scheduled Time |
The time the job is scheduled to run, in the format HH:MM:SS. Or enter one of these commands:
|
| User | The user ID of the user who created the job. |
| Save |
The Save field allows you to save the scheduled job for future use by selecting Yes after it is completed. This field only appears when you have selected Once in the Frequency field. |
Use these buttons to complete your work on the Scheduled Job screen:
| Button | Function |
|---|---|
| Save | Saves changes made on the Scheduled Job screen. |
| Close | Closes the Scheduled Job screen without saving and returns to the Scheduled Jobs screen. |
Data Source: not applicable
Security Switch: 999 - Configuration, Utilities - Access Scheduled Jobs
Revision: 2024.01