Adding a Custom Screen to IntelliDealer
-
Navigate to Administration > Settings > Custom Screens.
The Custom Screen Fields tab will appear.
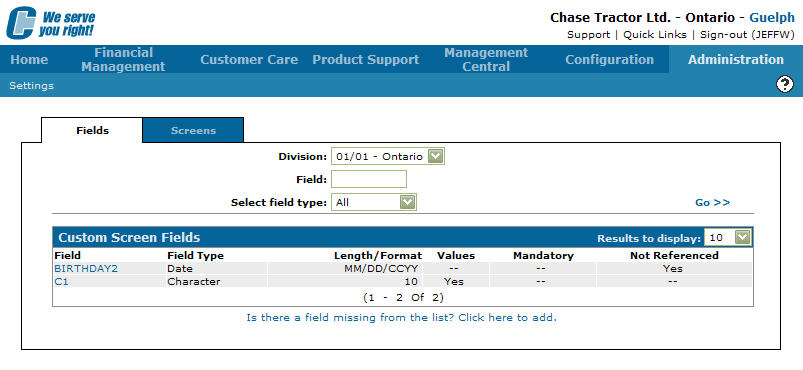
Custom Screen Fields tab
-
On the Custom Screen Fields tab, click on the Screens tab.
The Screen Selection tab will appear.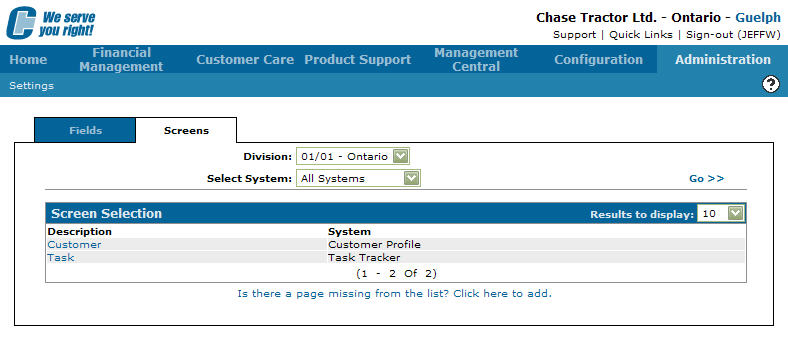
Screen Selection tab
-
On the Screen Selection tab, click on the Is there a page missing from the list? Click here link.
The Create Page screen will appear.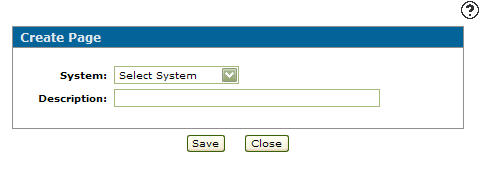
Create Page screen
-
On the Create Page screen, select an IntelliDealer System from the drop down list.
-
Type in a brief description of the custom page you are creating.
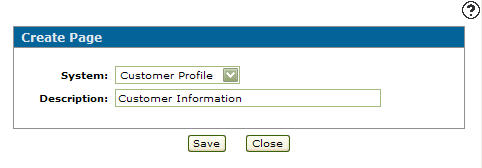
Updated Create Page screen
-
Click the Save button.
The Screen Edit/Preview screen will appear.
Screen Edit/Preview screen
-
On the Screen Edit/Preview screen, click on the arrow head in the top left corner of the custom screen or next to a Column or Row number to add a column or row to the custom screen.
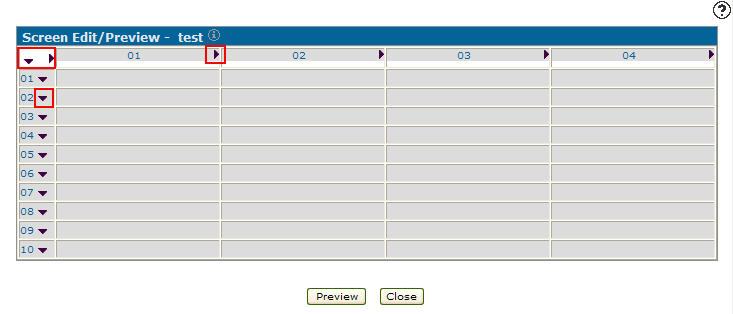
Screen Edit/Preview screen
-
Click on a Column or Row number to delete it from the screen.
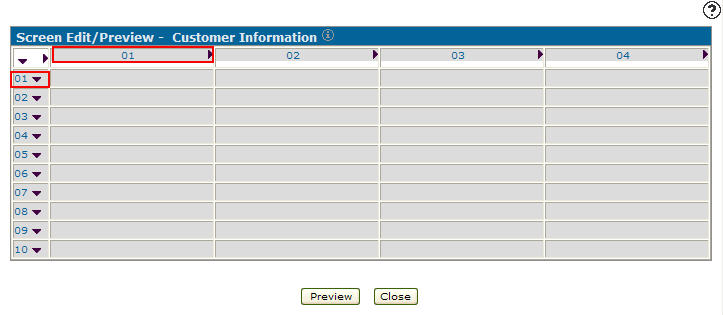
Screen Edit/Preview screen
-
Click on a Cell on the screen.
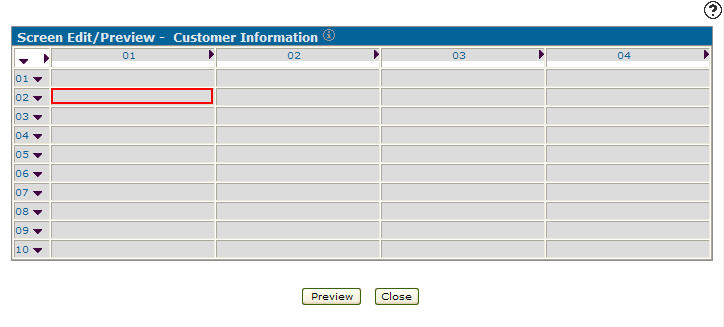
Screen Edit/Preview screen
-
The Custom Screen Field Properties screen will appear.
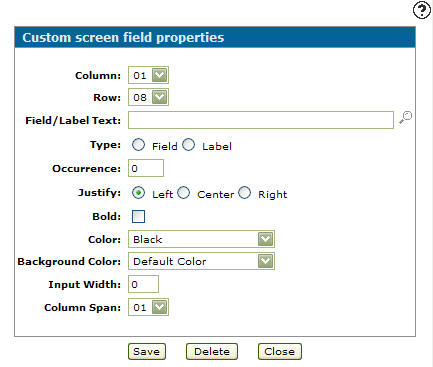
Custom Screen Field Properties screen
-
On the Custom Screen Field Properties screen, select the number of the column of the field you wish to edit.
-
Select the number of the row of the field you wish to edit.
Note:
If you did not click on the field you wanted to edit, the Column and Row fields allow you to select a different field on the screen.Note:
A field location consists of both a Column number and Row number. -
Type in Field/Label Text.
-
Select a Type.
-
Type in an Occurrence amount.
-
Select a Justification for your field/label text.
-
Click on the Bold checkbox to bold field/label text.
-
Select a text Color from the drop down list.
-
Select a field Background Color.
-
Type in an Input Width.
-
Select a Column Span from the drop down list.
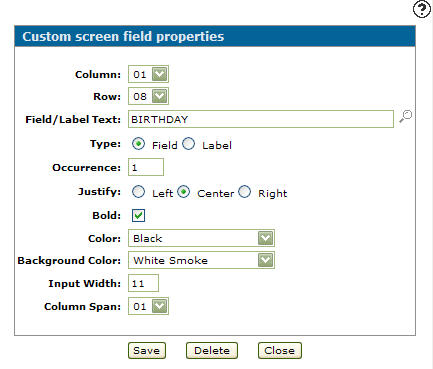
Custom Screen Field Properties screen
-
Click on the Save button.
The Screen Edit/Preview screen will appear with the new field.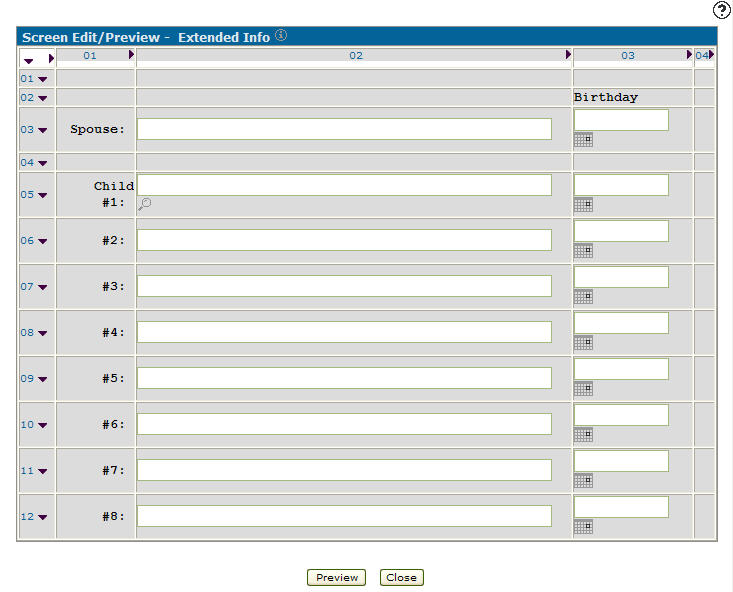
Updated Screen Edit/Preview screen
-
Click on the Preview button to view your custom screen.
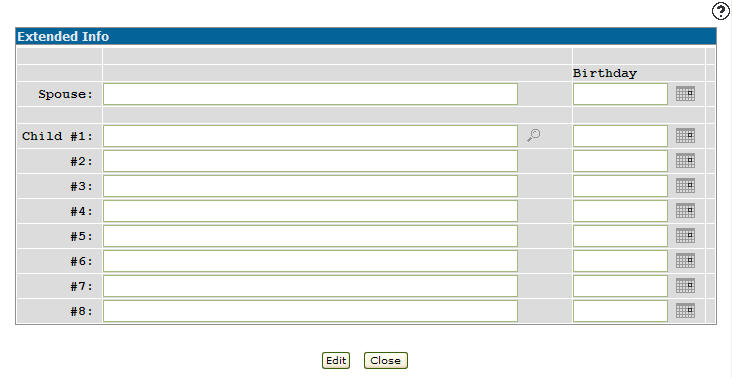
Preview Custom screen