Adding a Part Class Code
-
From any IntelliDealer screen, click on the Configuration tab.
The Configuration Quick Links screen will appear.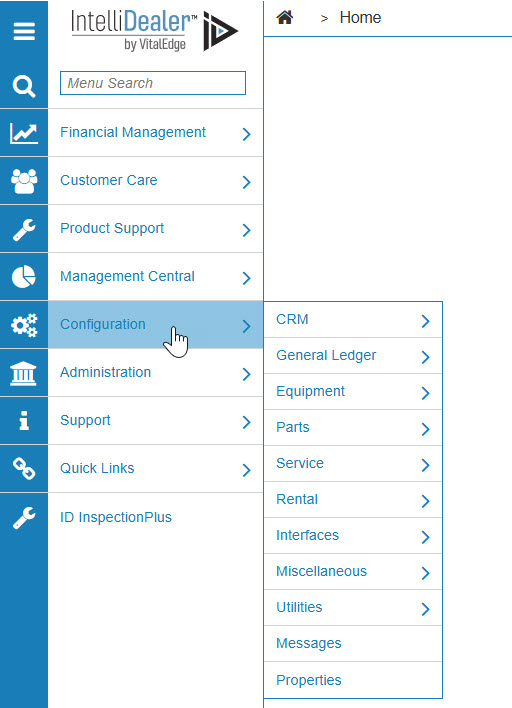
Configuration Quick Links screen
-
From on the Parts list, click the Profile link and select Classes from the drop down list.
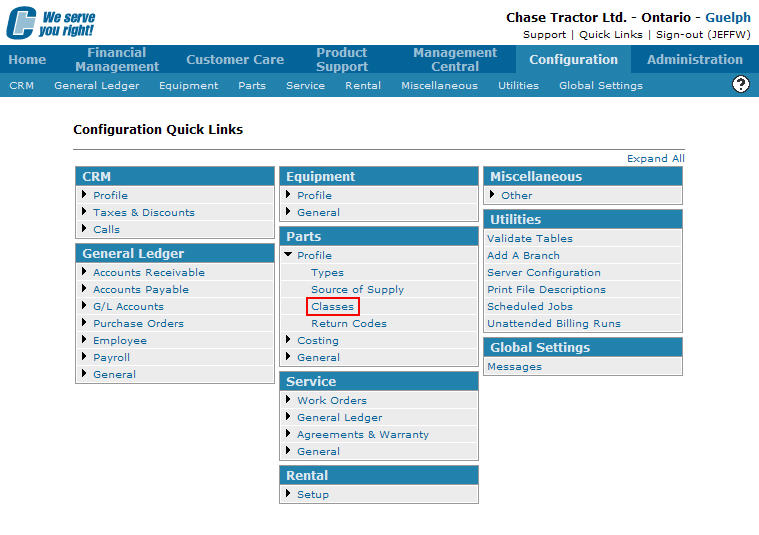
Configuration Quick Links screen
-
The Classes screen will appear.

Classes screen
-
On the Classes screen, click on the Need to create a new class? Click here to add link.
The Classes screen will appear.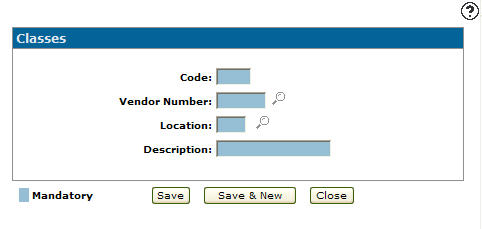
Classes screen
-
On the Classes screen, enter a 3 character alphanumeric class Code.
-
Enter a Vendor Number.
- or -
Click on the Search icon.
icon.
The Vendor Selection screen will appear.
Vendor Selection screen
-
On the Vendor Selection screen, fill out the appropriate fields and click the Go >> link.
The Vendor Selection screen will refresh listing the generated search results.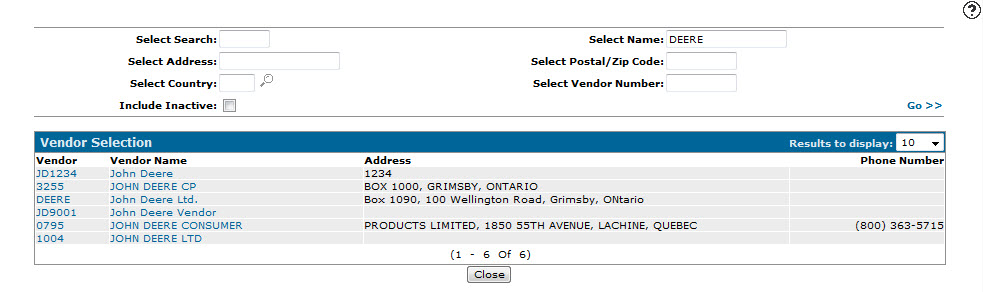
Vendor Selection screen
-
Click on a Vendor.
The Classes screen will appear listing the selected vendor in the Vendor Number field.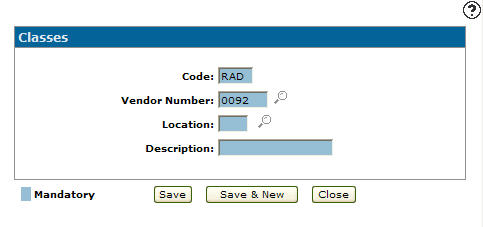
Classes screen
-
Enter a Location.
- or -
Click on the Search icon and select a location from the Location Selection screen.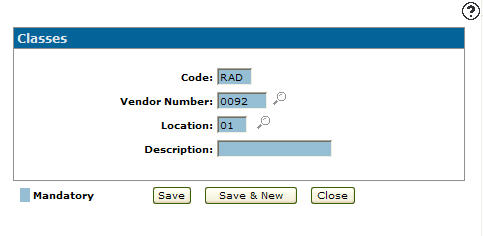
Classes screen
-
Enter a brief Description of the class code.
-
On the Classes screen, click the Save button to save the new class code and return to the Classes screen.
- or -
Click the Save & New button to save the new class code.
The Classes screen will refresh allowing you to add another class code without closing the screen.