-
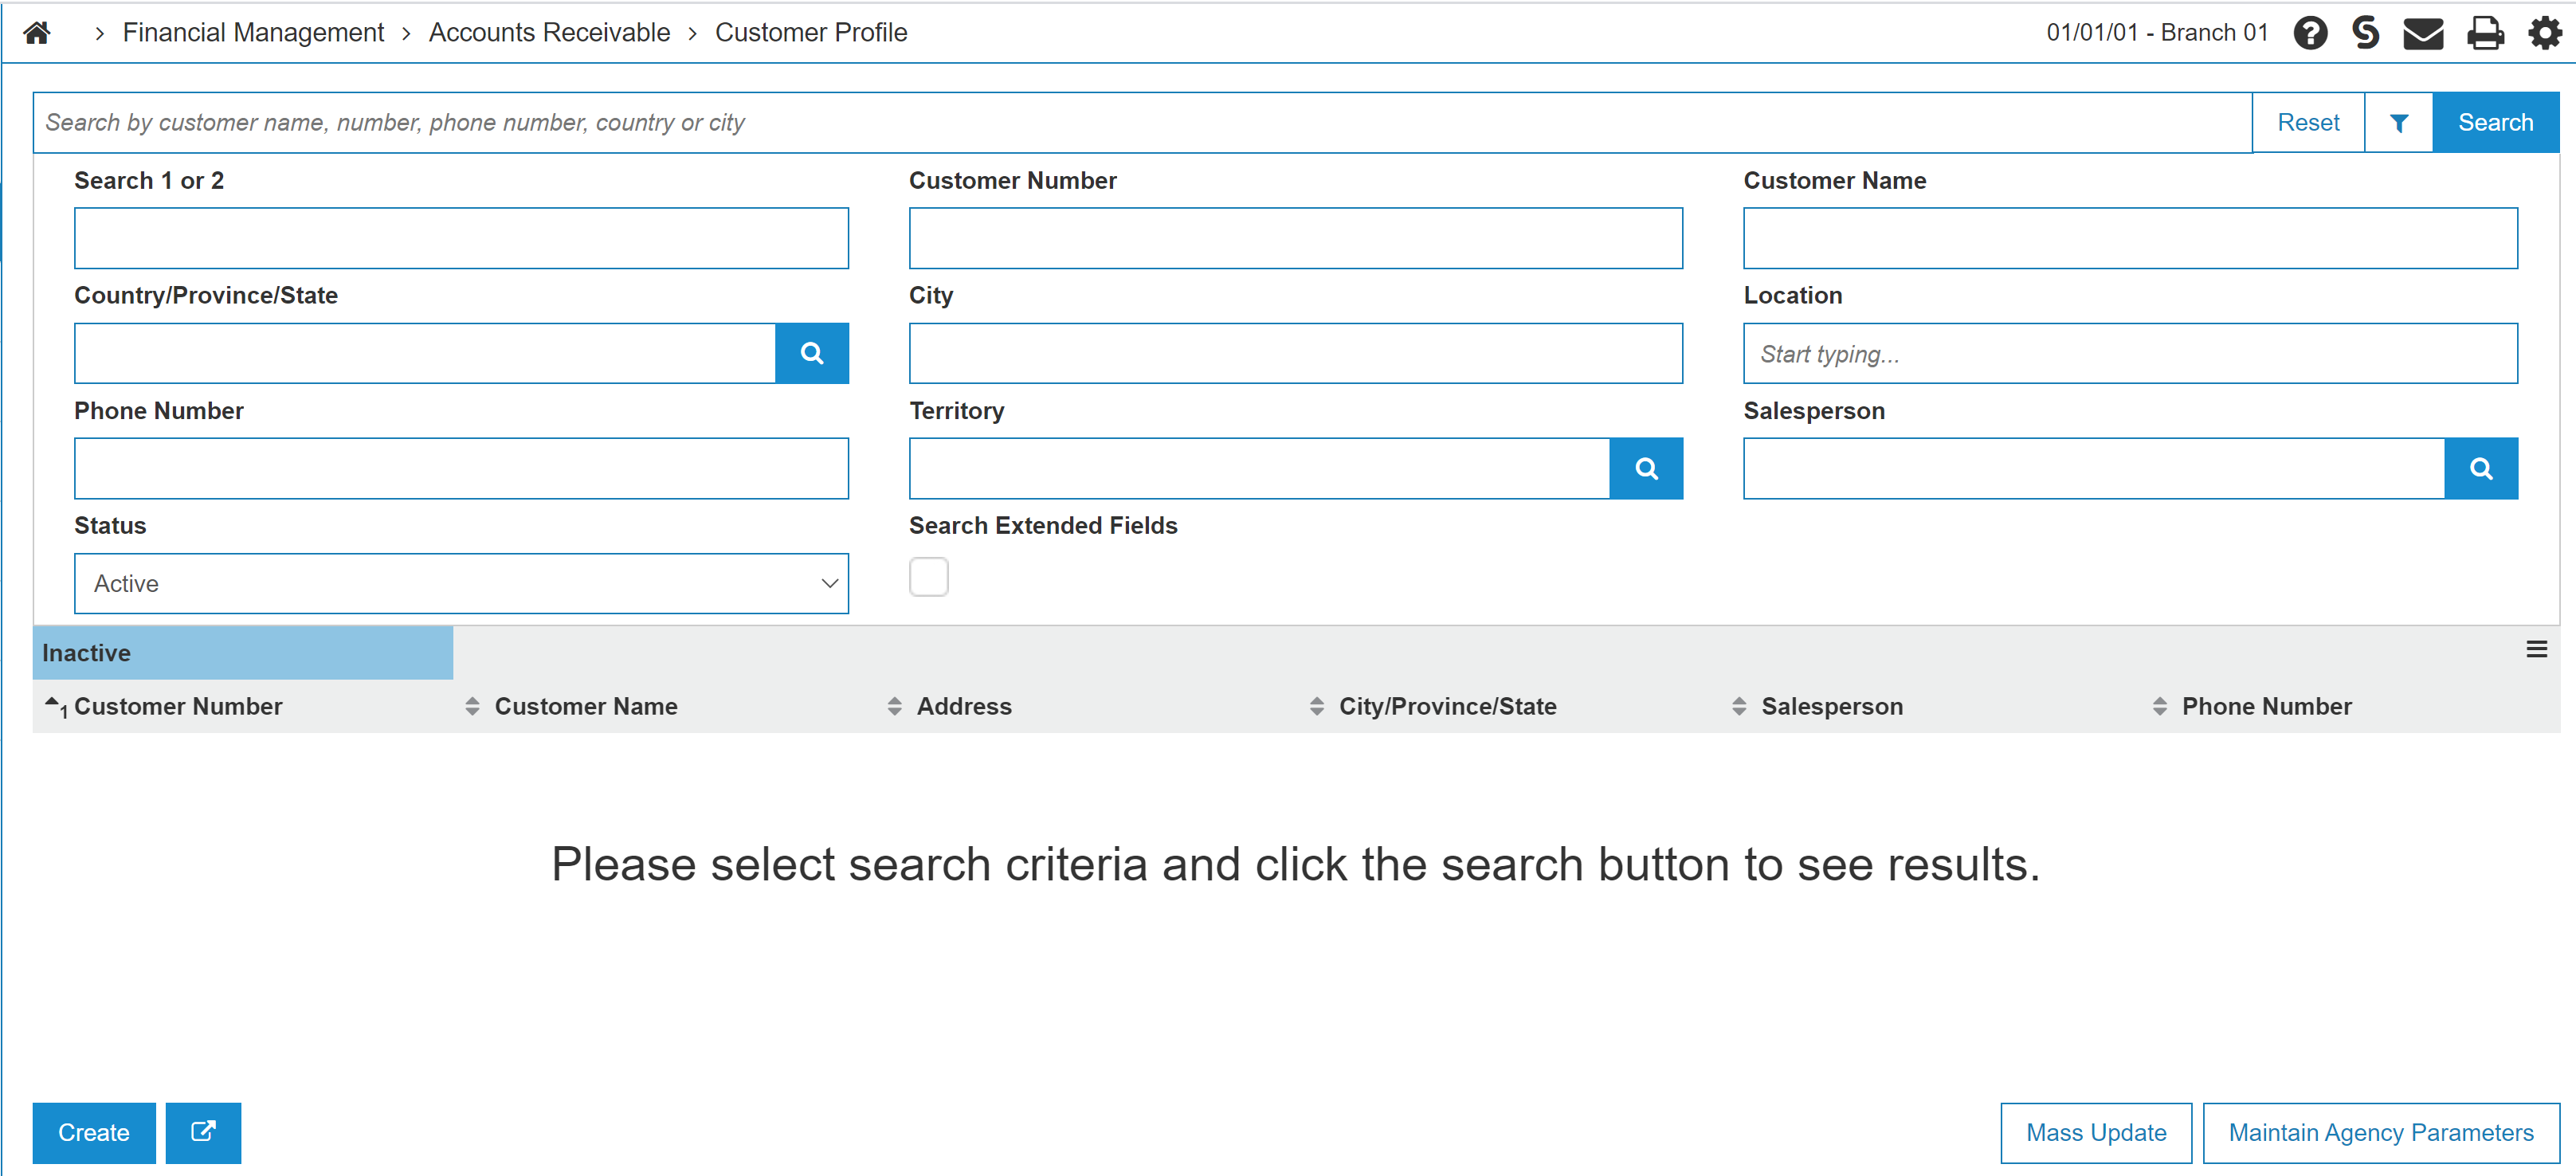
Navigate to Financial Management > Accounts Receivable > Customer Profile tab.
-
Click Mass Update.
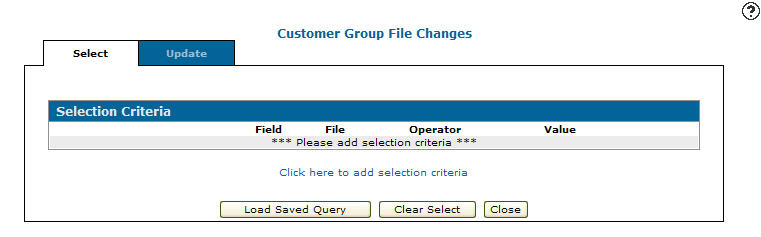
The Selection Criteria tab appears. -
Click the Click here to add selection criteria link.
The Selection Criteria screen appears. -
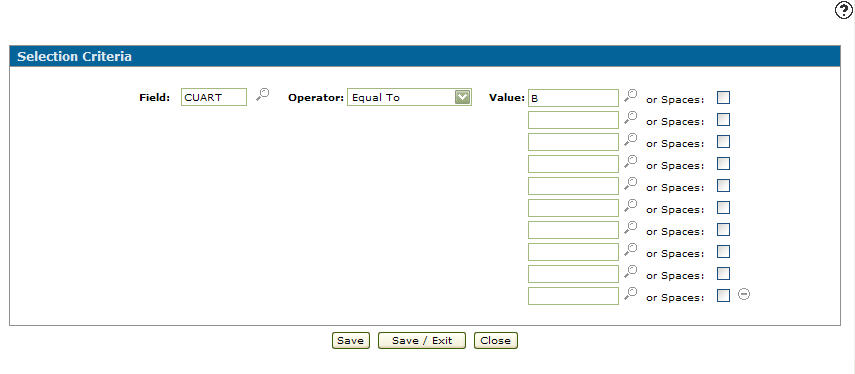
Enter a Field or click the Search
 icon to search for and select a criteria.
 -
Select an Operator from the drop down list.
-
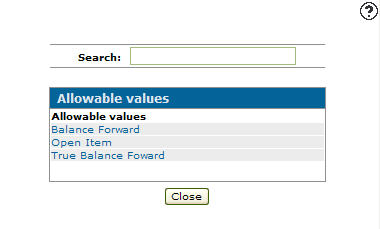
Enter a Value or click on the Search
icon to search for and select a value from the Allowable Values screen. -
(OPTIONAL) Click the checkbox to select or Spaces. This causes IntelliDealer to search only for values that are blank. Selecting this checkbox ignores any entered value and only searches for blanks.
-
(OPTIONAL) click on the More
 icon to add more values.
 -
Click one of these buttons:
-
Save—to save your selection criteria and remain on the Selection Criteria screen.
-
Save/Exit—to save your selection criteria and return to the Selection Criteria tab.
-
Close—to exit without saving.
-
-
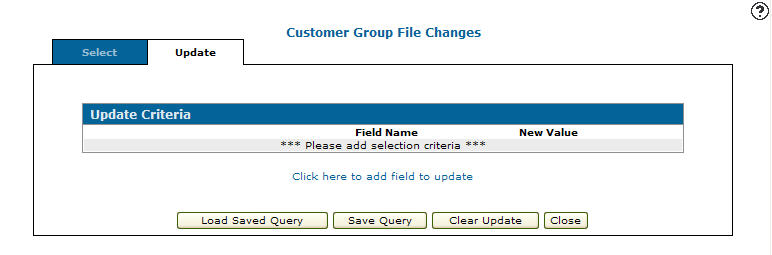
On the Selection Criteria tab, click on the Update tab.
The Update Criteria tab appears. -
Click the Click here to add field to update link.
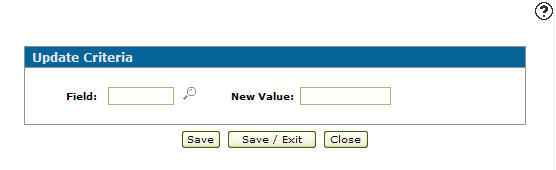
The Update Criteria screen appears. -
Enter a Field code or click the Search
icon to search for and select a Field. -
Enter a New Value or click the Search
icon to search for and select a New Value. -
(OPTIONAL) select to Blanks by clicking on the checkbox.
-
Click one of these buttons:
-
Save—to save your update criteria and remain on the Update Criteria screen.
-
Save/Exit—to save your update criteria and return to the Update Criteria tab.
-
Close—to exit without saving.
-
-
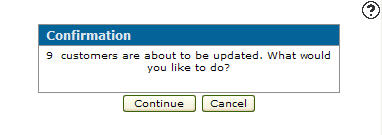
To run the selected group file update, click Run Update.
A Confirmation screen appears telling you how many customers will be updated by the group file update.
-
Click the Continueto update the customers or click Cancel to stop the procedure.