Configuration: Account Profiles Listing
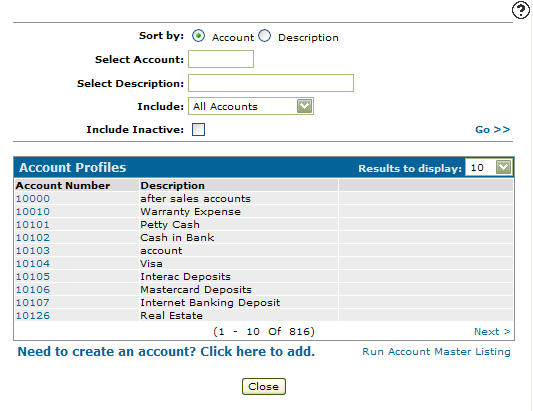
Use the Account Profiles screen to search for an account, create an account and run an account master listing . An account added to the system appears on the Account Lookup screens and can be used as a valid account throughout the system. The Account Lookup screen can be accessed by clicking on the Search![]() icon next to any searchable Account field.
icon next to any searchable Account field.
To open the Account Profiles screen, navigate to Configuration > General Ledger > G/L Accounts > Account Profile.
Topics in this section are:
Adding an Account to the System
-
Navigate to Configuration > General Ledger > Accounts Payable > G/L Defaults.
-
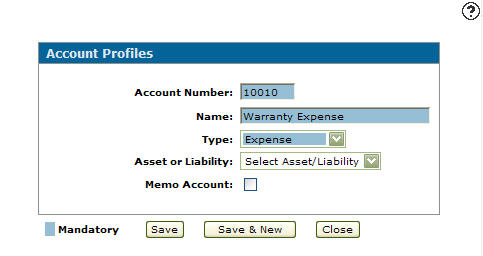
Click Need to create an account? Click here to add.
-
Enter an Account Number and Name of the account.
-
Select the Type of account.
-
Select whether the account is an Asset or Liability account from the drop down list.
-
Select the Memo Account checkbox to add a memo account onto the account profile.
-
Click the Save button to save the new account profile and return to the Account Profiles screen.
- or -
Click the Save & New button to save the new account profile.
The Account Profiles screen refreshes, allowing you to add another account profile without closing the screen.

Deactivating an Account
-
Navigate to Configuration > General Ledger > Accounts Payable > G/L Defaults.
-
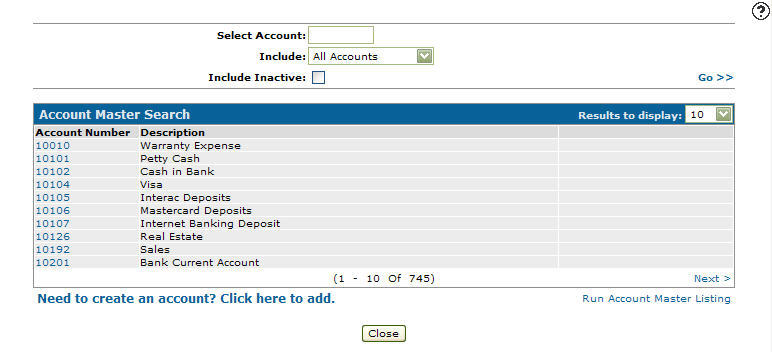
Fill out the appropriate field and click Go >> .
-
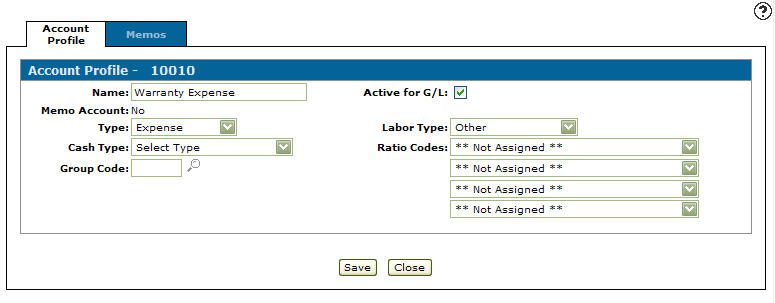
Click an Account Number.
-
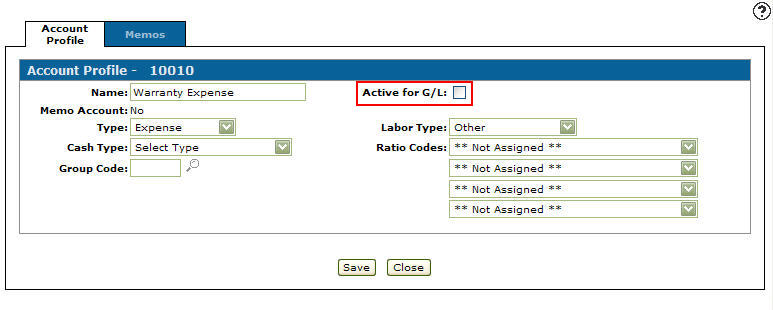
Select the Active for System checkbox, removing the checkmark.
-
Click on the Save button in order to deactivate the account within the general ledger.Deactivated accounts will still appear on financial reports for two years. Keep this in mind before proceeding with deactivation.
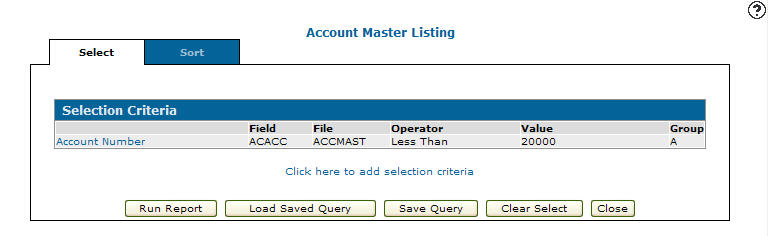
Running an Account Master Listing
-
From anywhere in IntelliDealer screen, click on the Configuration tab.
-
Click Run Account Master Listing link.
-
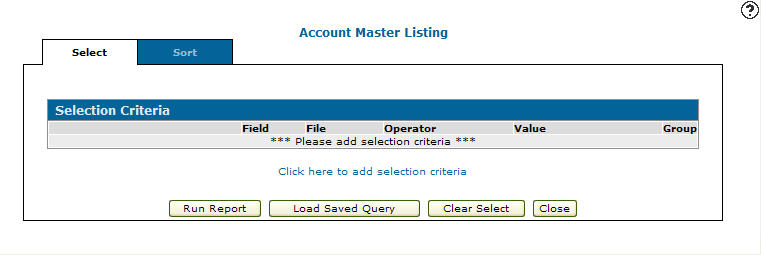
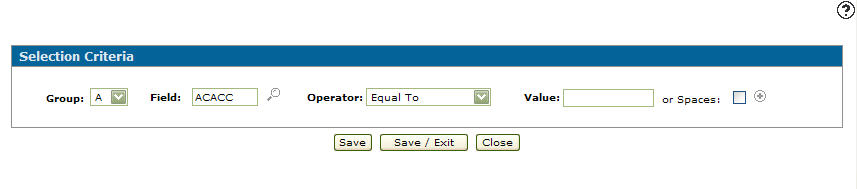
Select the Click here to add selection criteria link.
-
Select a Group from the drop down list.
-
Enter a Field value.
- or -
Click the Search icon.
icon. -
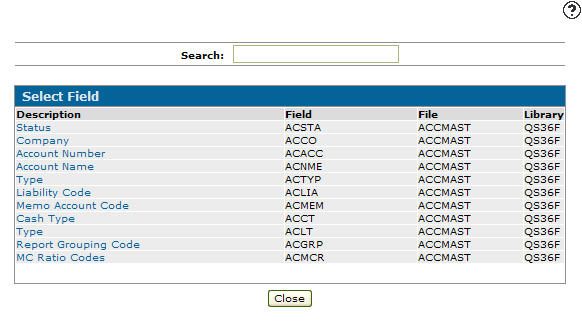
Click Description of the field you would like to select.
-
Select an Operator from the drop down list.
-
Enter a Value.
- or -
Select the Spaces checkbox. -
Click the Save/Exit button.
-
Click Run Report button.
-
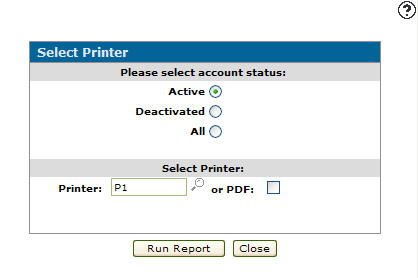
Select the type of account(s) you wish to include in the account master listing.
-
Click the Run Report button to create the account master listing report.

Screen Description
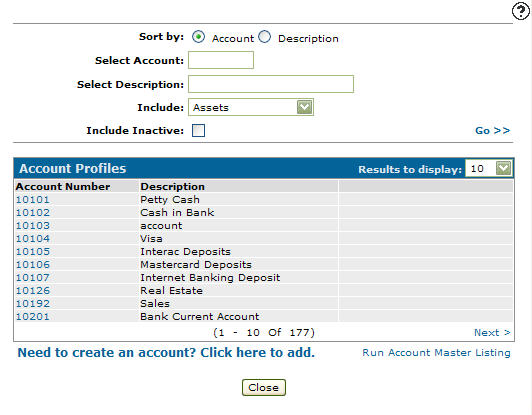
The sorting options on the Account Profiles screen are:
| Sort by | |
|---|---|
| Field | Description |
| Account | Sort the search results by account number. |
| Description | Sort the search results by account description. |
The search fields appear on the Account Profiles screen are:
| Field | Description |
|---|---|
| Select Account | Search for an account by entering a complete or partial account number. |
| Select Description | Search for an account by entering an account description. |
| Include | Select the account types you wish to include in your search from the drop down list (e.g. assets, liabilities, balance sheet, sales, expense & other or profit/Loss). |
| Include Inactive | If selected, includes inactive accounts within the search results. |
The fields on the Account Profiles screen are:
| Field | Description |
|---|---|
| Account Number | The base account number. |
| Description | A brief description of the account. |