Adding a New Time Off Code
-
From any IntelliDealer screen, click on the Configuration tab.
The Configuration Quick Links screen will appear.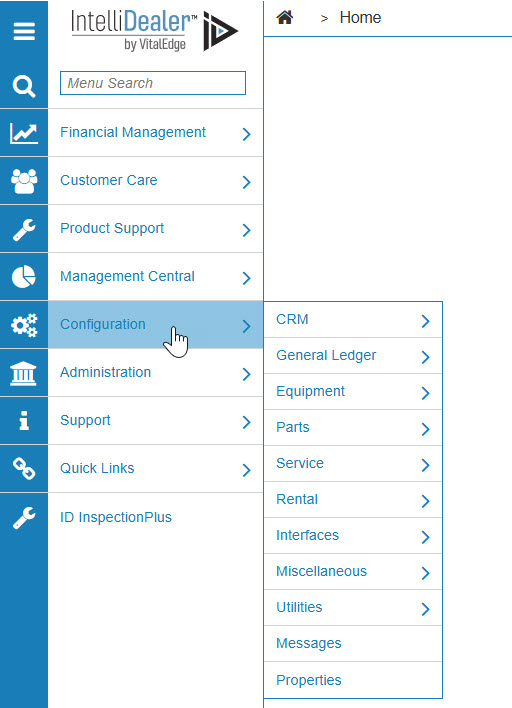
Configuration Quick Links screen
-
From the Miscellaneous list, click the Other link and select Time Off from the drop down list.
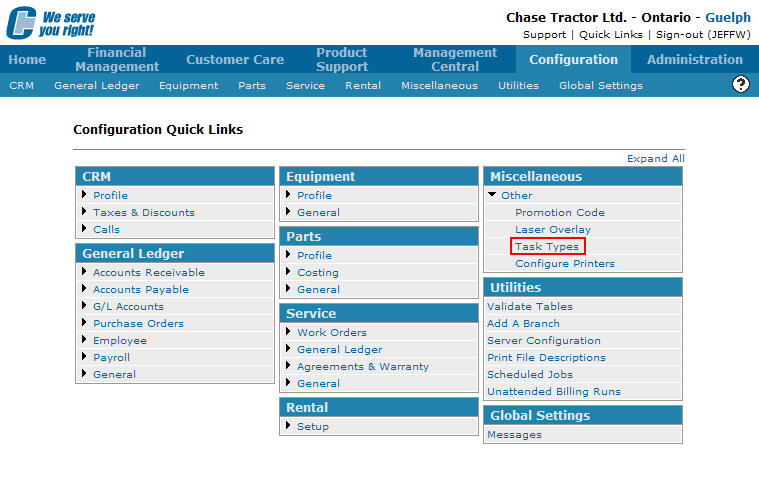
Updated Configuration Quick Links screen
-
The Task Types screen will appear.
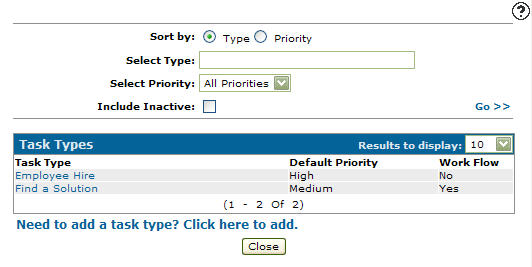
Task Types screen
-
On the Task Types screen, click on the Need to add a task type? Click here to add link.
The Task Type Maintenance tab will appear.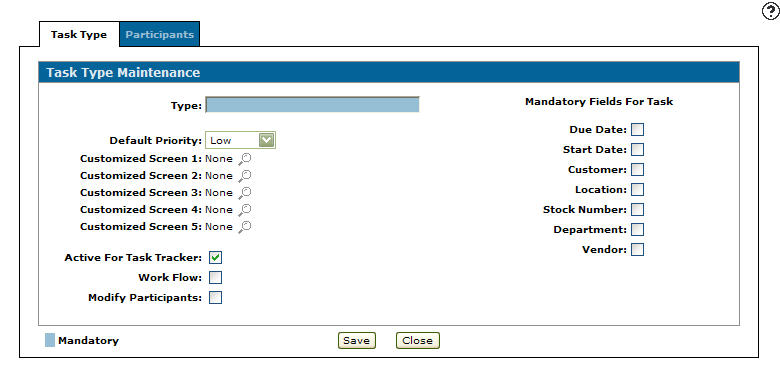
Task Type Maintenance tab
-
On the Task Type Maintenance tab, enter a Type name that represents the task type within the IntelliDealer system.
-
Select a Default Priority for the task from the drop down list.
-
Low
-
Medium
-
High
-
-
Click on the Search
 icon next to a Customized Screen field to attach a customize screen to your task type.
Note:
You must first create a custom screen within IntelliDealer Administration Create Page screen for a custom screen to appear as a tab option on the Add Task/Action tab.Note:
The task types that appear on the drop down list can be added or configured on the Task Types screen found by going through the Configuration Quick Links screen and selecting the Other link on the Miscellaneous list and by selecting Task Types from the drop down list. -
Select Active For Task Tracker to activate the task type to be used within the task tracker system.
Note:
Only a task type that has the Active For Task Tracker checkbox selected will appear on the Task drop down list on the Add Task/Action tab. -
Select Work Flow to manipulate the participant work flow on the Participants tab when adding a new task.
-
Select Modify Participants to modify the user's authority for any custom screen or any attachment from on the Participants tab, when adding a new task.
- Select whether the following field options will appear as a mandatory field on the Add Task/Action tab when a specific task type is selected from the Task drop down list.
Due Date
Start Date
Customer
Location
Stock Number
Department
- Vendor
-
Once you have entered a Type you can set default participant authority settings on the Participants tab.
-
From on the Task Type Maintenance tab, click the Participants tab.
The Participants tab will appear.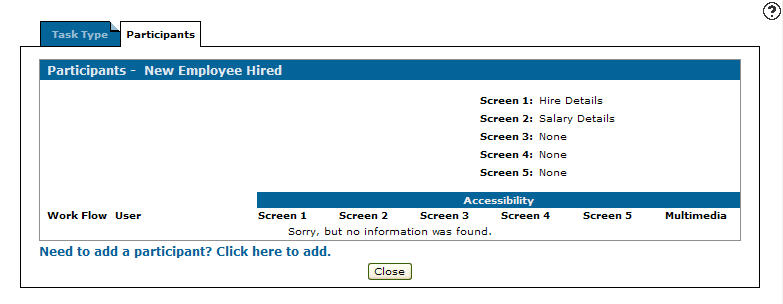
Participants tab
-
On the Participants tab, click on the Need to add a user? Click here to add link.
The User Accessibility screen will appear.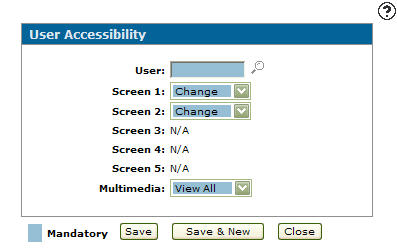
User Accessibility screen
-
On the User Accessibility screen, enter a User ID.
- Select the user's authorization for each custom screen that applies to the task from the Screen drop down list.
Change: The participant has the ability to apply changes to the associated custom screen
Display: The participant can only display the associated custom screen
No Access: The participant has no access to the associated custom screen
- Select the user's authorization for any attachments that may apply to the task from the Multimedia drop down list.
View All: Allows the participant to view all added attachments
Individual: Allows the participant to view only attachments added by them individual attachments
No Access: The participant has no access to any of the attachments
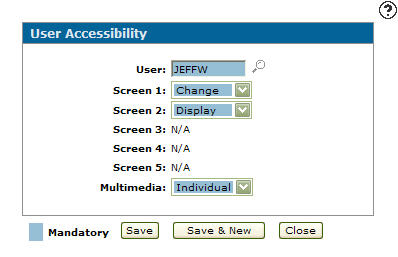
User Accessibility screen
-
Click the Save button to save the new user authorization and return to the Participants tab.
- or -
Click the Save & New button to save the new user authorization.
The User Accessibility screen will refresh allowing you to add another user without closing the screen.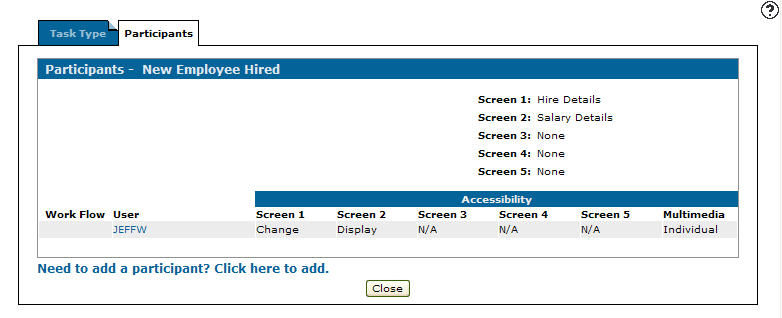
Participants tab
-
Repeat steps 14 through 18 to add more participants to the task type.
-
When more than once participant is add and the Work Flow checkbox has been selected on the Task Type tab you can change the order of the participants by manipulating the up and down arrows under the Work Flow field.
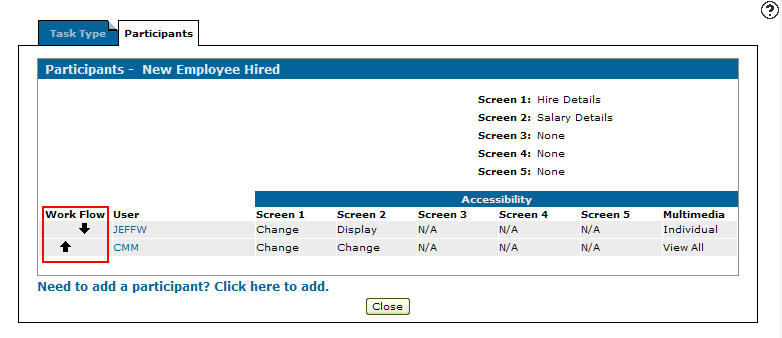
Participants tab
-
On the Participants tab, click the Task Type tab.
The Task Type Maintenance tab will appear.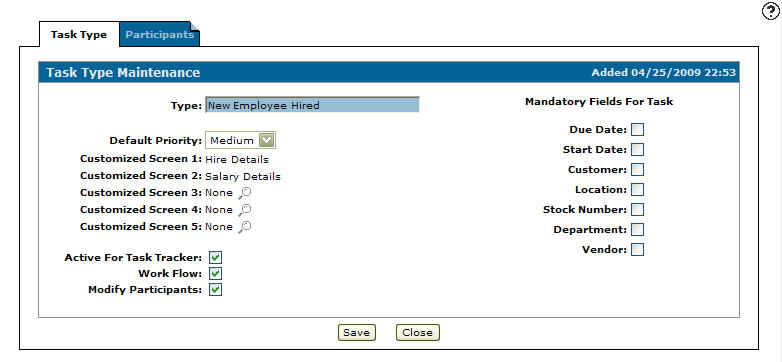
Task Type Maintenance tab
-
Click the Save button to save the newly added task type.
The Task Types screen will appear with the newly add task type listed.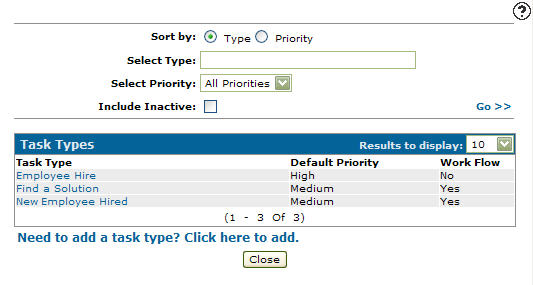
Updated Task Types screen