Correcting a Parts Order
Note:
Corrections can only be applied to the order after it has been receipted, updated, and moved into history.
-
From any IntelliDealer screen, click the Product Support tab.
The Product Support Quick Links screen will appear.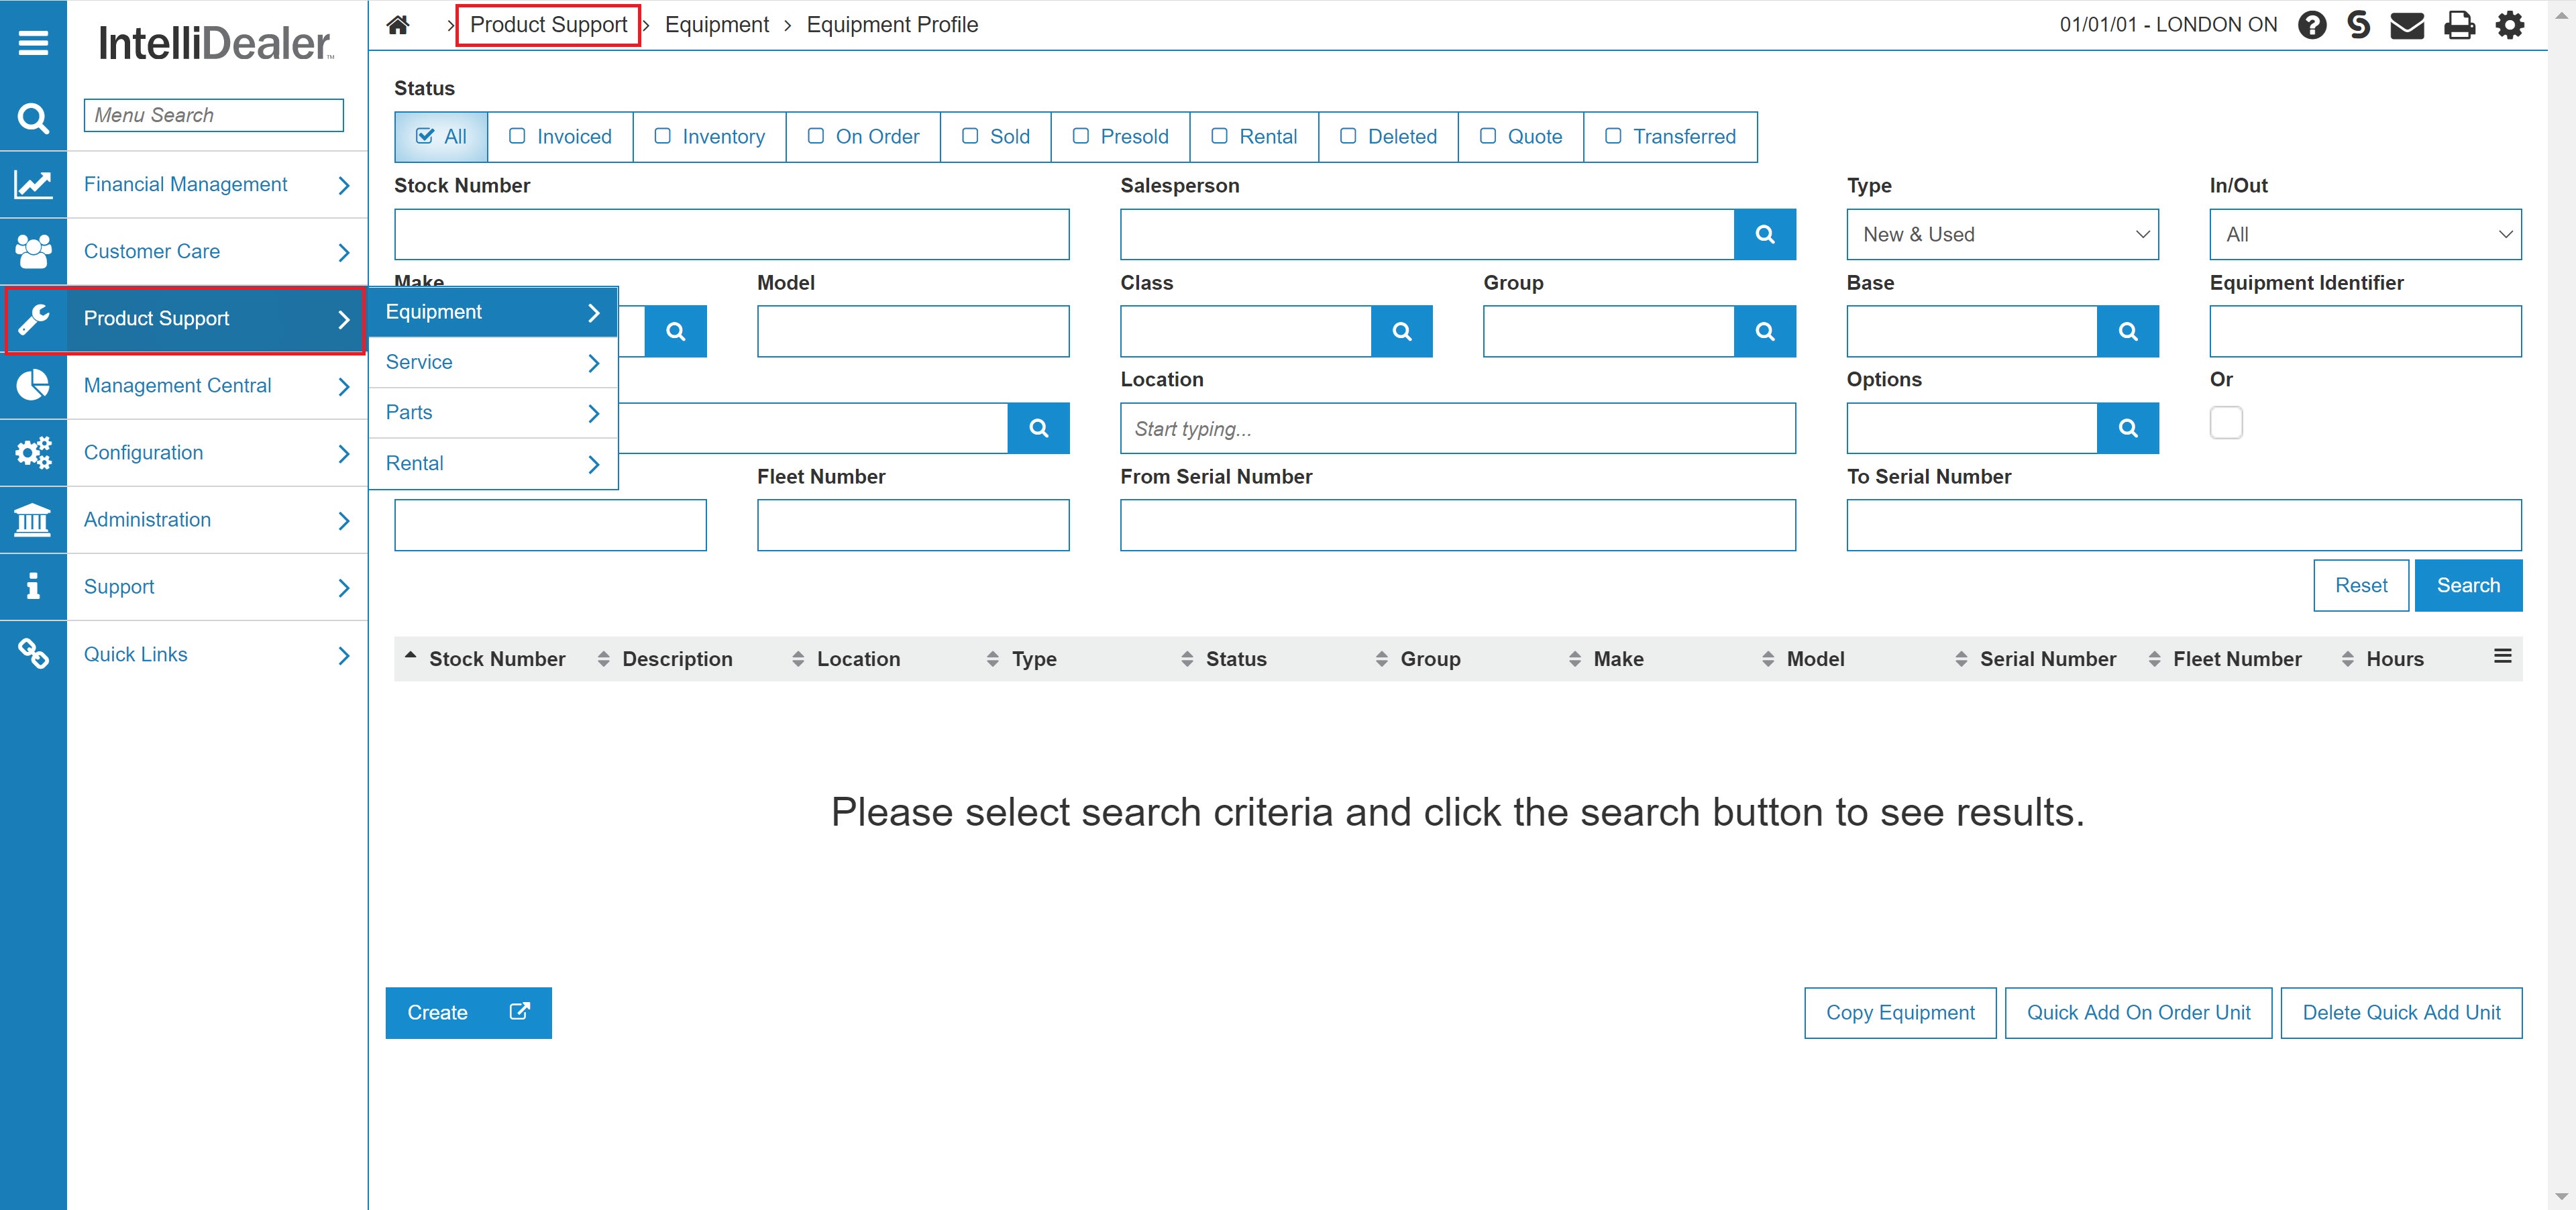
Product Support Quick Links screen
-
From the Parts list, click the Parts Ordering link.
The Parts Ordering screen will appear.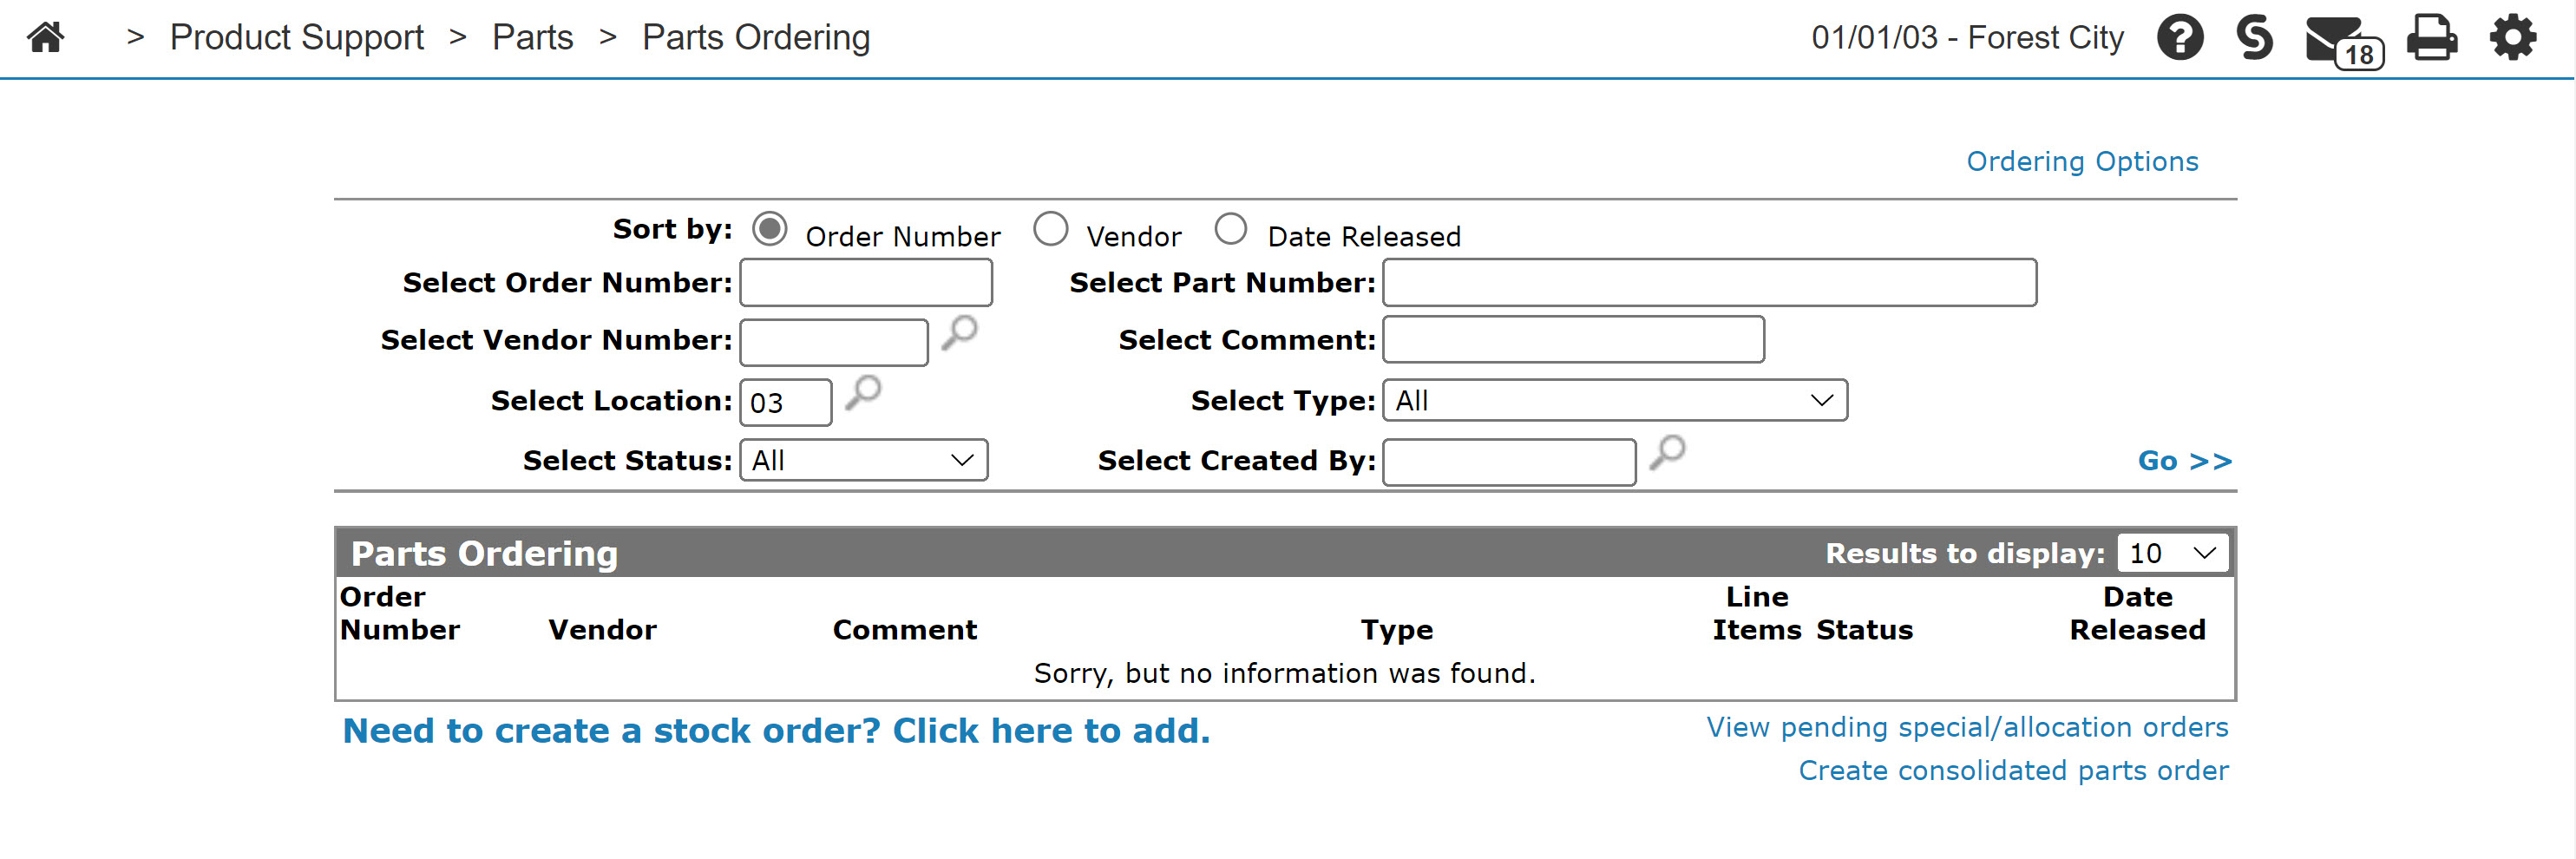
Parts Ordering screen
-
On the Parts Ordering screen, move the cursor over the Ordering Options link and select Ordering Correction from the pop-up menu.
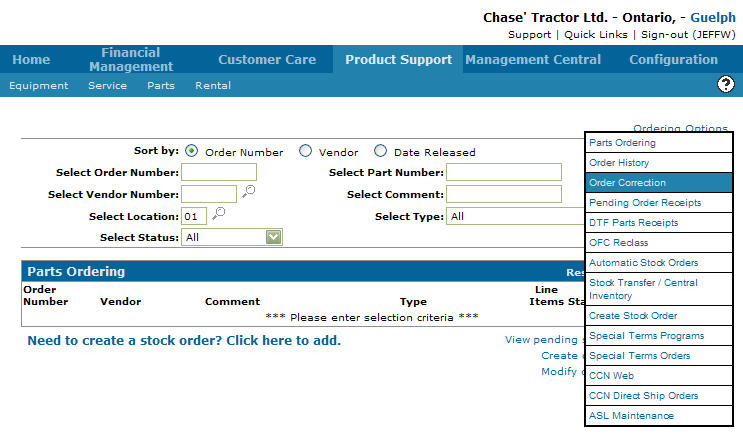
Parts Ordering screen
-
The Order Correction screen will appear.
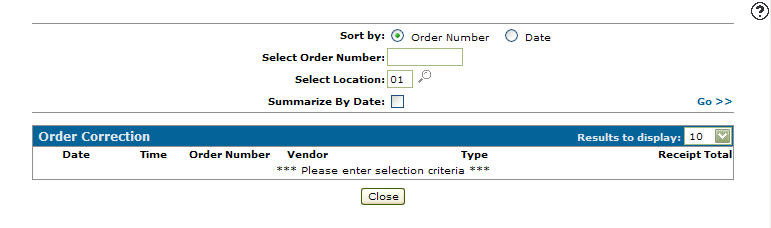
Order Correction screen
The order correction application is used to make corrections to a parts order after you have receipted and updated it. The order must already be in history before you can make changes to it. you can change the quantity and cost of the parts.
Note: PO's that are tied to parts transfers cannot be corrected using this option for if the vendor on the PO is in the POTOSO configuration another method must be used.
The quantity can only be changed for stock orders, and the new quantity must be equal to or less than what was receipted. If you enter a value that is less, the difference in the quantity will be placed on back-order. This would be used if you receipted in the parts and then realized after, that you didn't actually receive them. If the order still exists as an open order for the same vendor, the parts will be added to it. If the order does not exist, it will be recreated and placed on back-order. If there is an existing order with the same order number, but the type or vendor are different, you will not be allowed to change the quantity.
-
On the Order Correction screen, enter an order number in the Select Order Number field.
-
Enter a location in the Select Location field.
- or -
Click on the Search icon and select a location from the Location Selection screen.
 -
(OPTIONAL) select the Summarize by Date checkbox to summarize the search results by date.
-
Click the Go >> link.
The Order Correction screen will refresh listing the generated search results.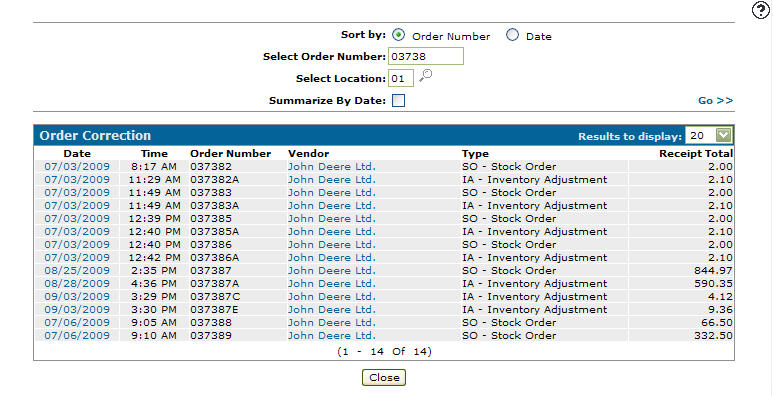
Order Correction screen
-
Click on the Date of the order you wish to correct.
The Order Correction screen will appear.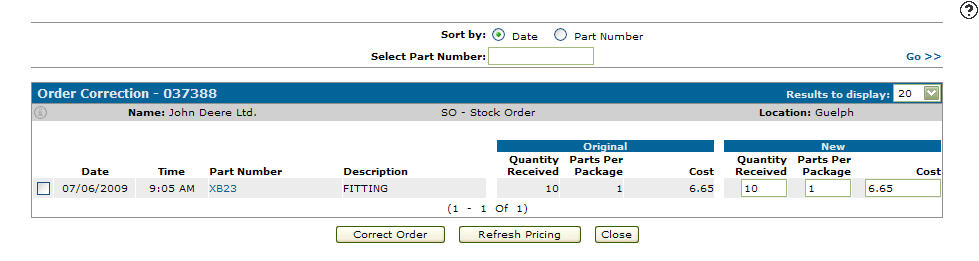
Order Correction screen
-
On the Order Correction screen, select a Sort by option allowing you to sort the parts on the order by either Date or Part Number.
-
For orders with multiple parts, enter a part number in the Select Part Number field and click the Go >> link to search the selected order for a particular part.
-
Select the part number you wish to apply corrections to by selecting the corresponding checkbox.
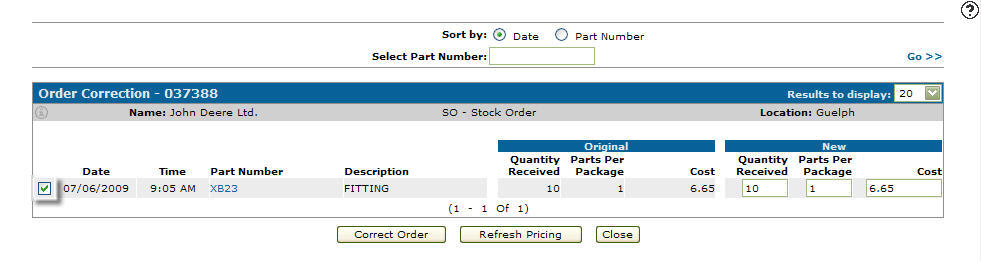
Order Correction screen
-
Under the New section heading make an adjustment to either the Quantity Received and/or Cost.
Note:
The quantity on special order types (MD, FI, T$, etc.) cannot be changed.Note:
If you enter a zero or a blank for the new cost, the current cost will be loaded for the part.Note:
If you click the Refresh Pricing button, the current cost will be loaded for all parts on the order.
In this example we are adjusting the Quantity Received from 10 to 8.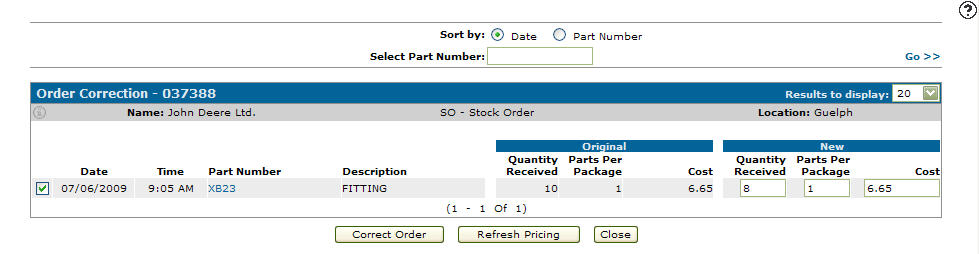
Order Correction screen
If the parts per package does not equal the current value on the part, the value will be highlighted as 'mismatched'.
The cost can be changed to the new cost of the part in case you receipted it using the wrong cost. If you enter the cost as zero, or blank out the cost, the current cost will be loaded for that part. You can click on the 'refresh pricing' button to reload the current cost for ALL parts. The 'refresh pricing' option will also automatically select any parts where the refreshed cost is different from the cost displayed on the screen. Keep in mind if you're using cost codes at all the system will try to calculate the amount by taking the amount in the PARTHIST file (landed cost) and dividing it by the COSTCODU (receipting) factor configured for this vendor/part and order type. If there is a cost code on the vendor it will be used first, otherwise the cost code on the part will be used.
Select the parts you want by placing a check mark in the checkbox for the part. Change the values you want. When you are done and want to perform the correction, click on the 'correct order' button.
When you click on the 'correct order' button, it will create one or two orders. The order numbers for these will be the original order number, followed by a letter from A to Z. The first order will be created if you have entered a new quantity greater than zero for any of the selected parts. This will put the new values into history. The second order will use the original values for each part selected, but all the quantities will be negative. This will reverse the incorrect parts from history. You may also get the original order 're-opened' if you have any new quantities that are less than the original quantities for any selected parts.
The one or two correction orders will be completed orders and will only show in history. They will not be orders that you can edit. The original order, if 're-opened', will be in a back-ordered status. You will need to finish receipting this order when you have received the parts, or clear it if the parts are not coming in.
-
Click on the Correct Order button.
The Confirmation screen will appear.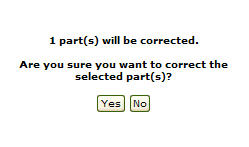
Confirmation screen
-
(OPTIONAL) If the corrections you make to the order causes the average cost of the part(s) involved to be less than zero, the system will automatically change the cost of the parts to the current cost and display the subsequent increase to the inventory account in the Inventory Adjustment window.
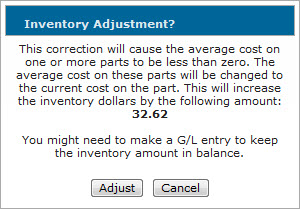
Inventory Adjustment window
To confirm the inventory adjustment and complete the order correction, click Adjust.
-
On the Confirmation screen, click on the Yes button.
The Order Correction screen will appear indicating that the order was corrected successfully.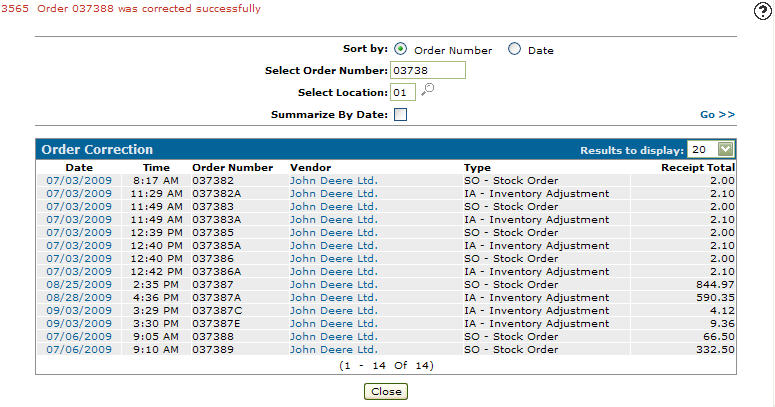
Order Correction screen
-
Click the Go >> link to refresh the screen.
The order correction will be listed below the original order.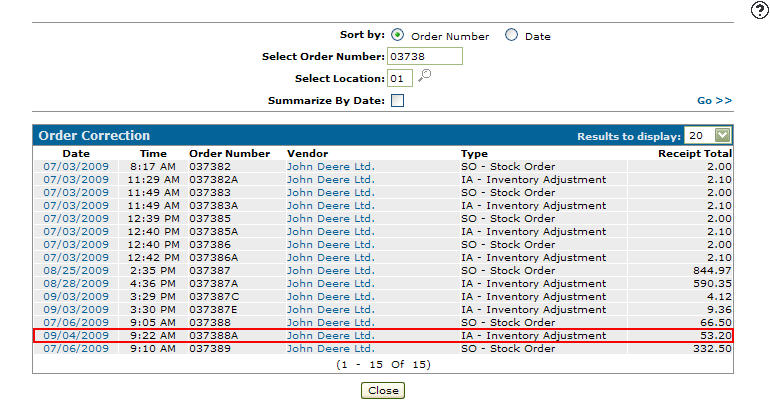
Order Correction screen
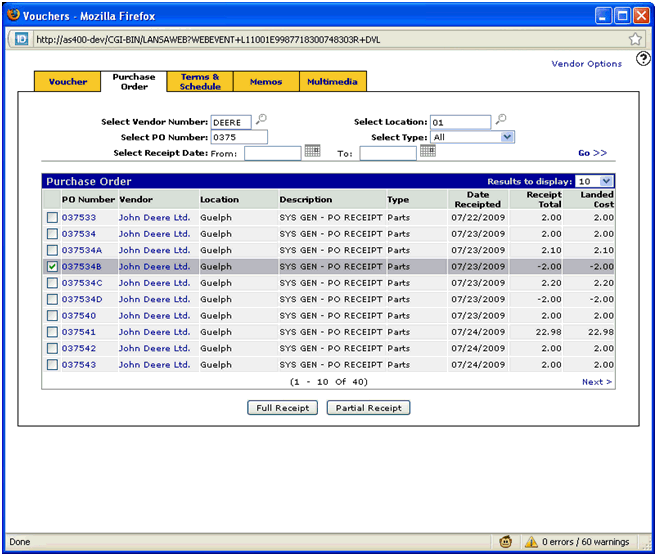
The vouchers system was also changed to show the 'reversed' parts orders. These will show with a negative receipt total. In order to get your voucher amount correct you will need to select the main PO and every correction PO.
If you do a PO correction and change the cost of a part that currently has zero on hand (zero inventory), your parts inventory goes out of balance by the difference in the cost correction.
Consider the following examples:
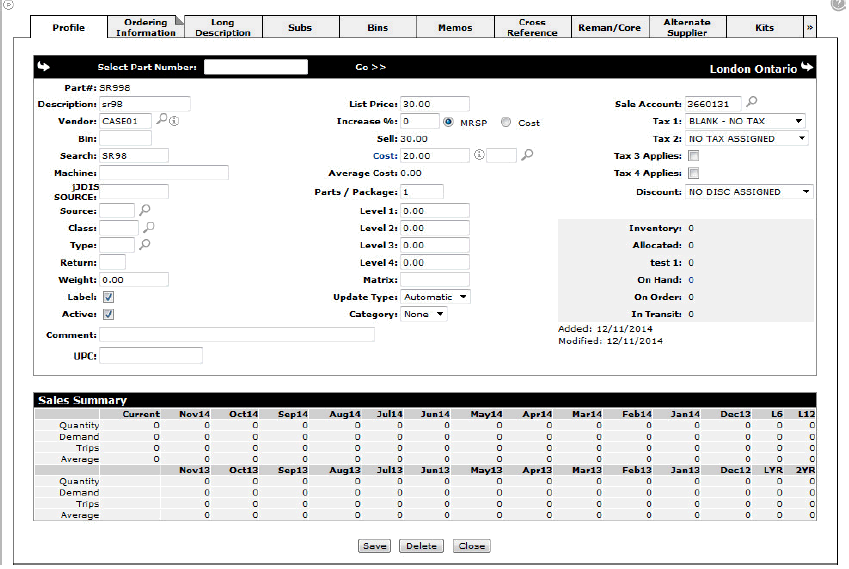
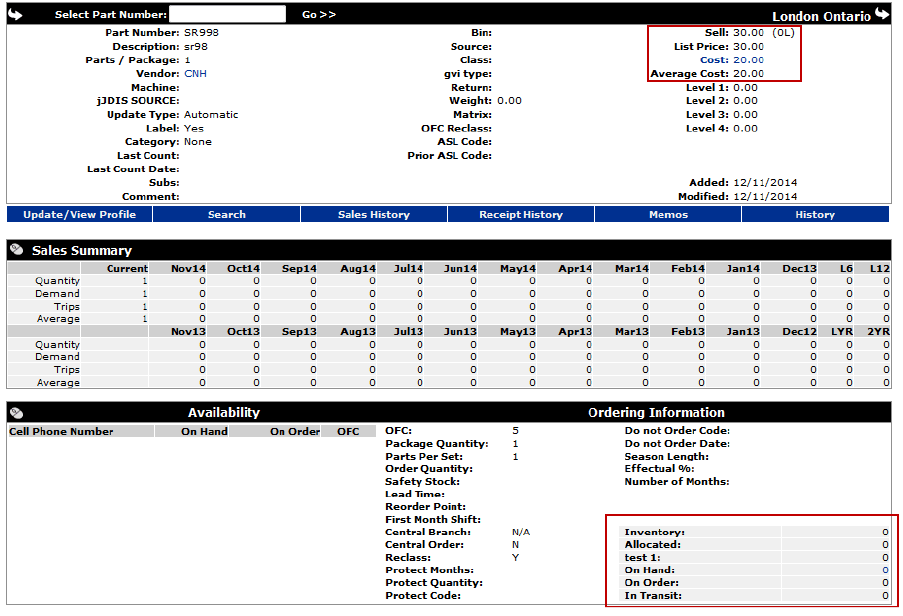
Part number SR998 with a cost of 20.00:
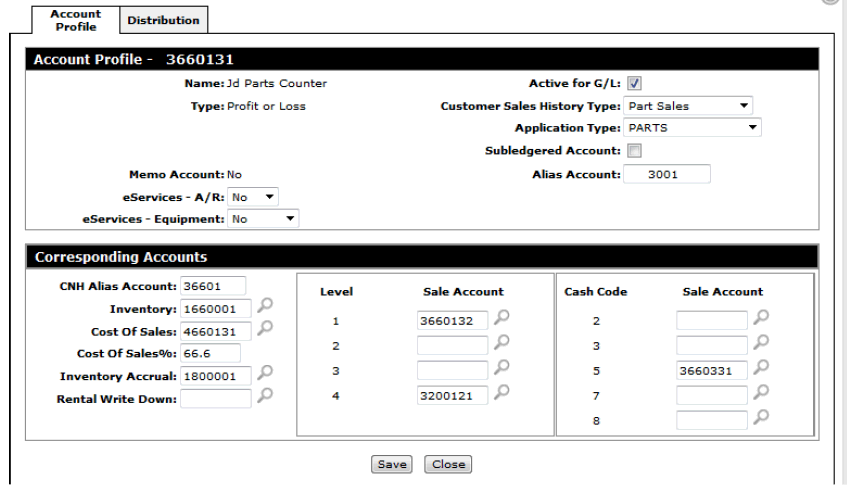
Sale account is 3660131, inventory account is 1660001 and inventory accrual account is 1800001:
Receipt the part in on a PO, invoice the part and run a parts billing run.
Part now has zero in inventory with an average cost of 20.00:
Do a PO correction and change the cost from 20.00 to 25.00:
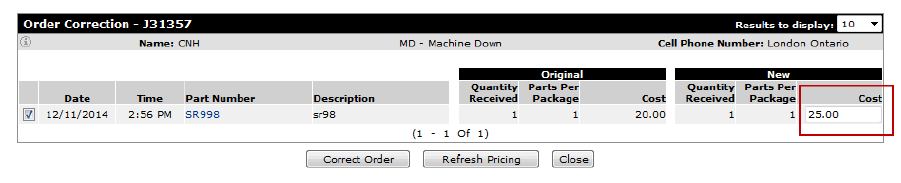
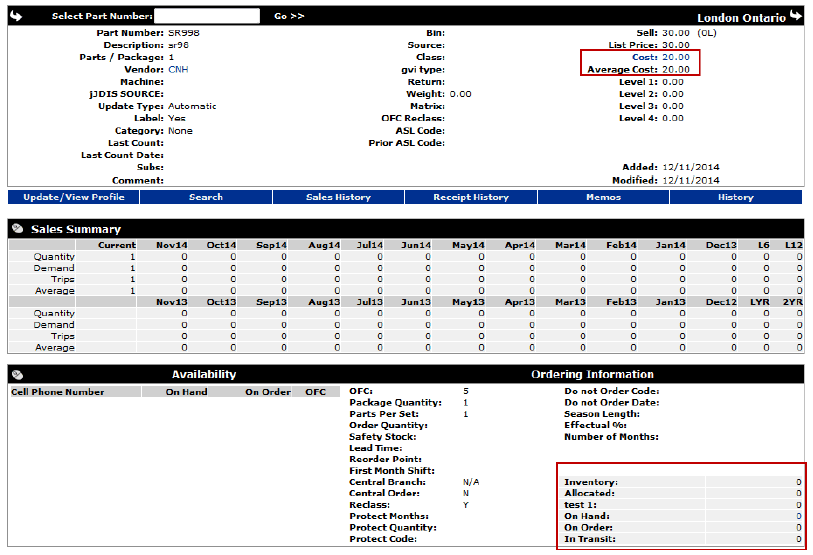
Part profile remains the same with the average cost showing as 20.00 and zero in inventory:
Parts accrual account 1800001 reflects the -25.00 waiting to be paid in through accounts payable:

The problem is that the parts inventory account 1800001 now shows the 25.00 but it was only relieved by 20.00 when the part was sold as it was sold before the correction was done:
Receipting:

Selling:

This leaves 5.00 left in the inventory account for a part that has zero on hand so your parts inventory would be out of balance by 5.00.
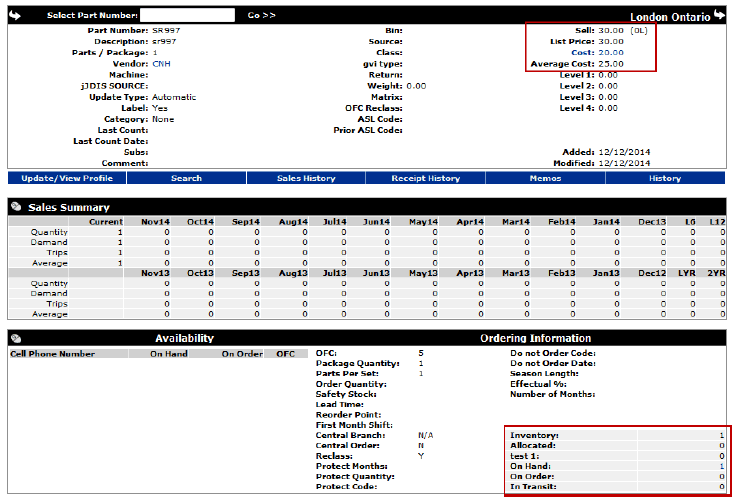
When performing the same test but where the part still had 1 left in inventory, the average cost updated to 25.00 to compensate so the system should be in balance:
Part number SR997, same sale account and therefore the same inventory and inventory accrual account as the previous test:
Parts accrual account 1800001 reflects the -45.00 waiting to be paid in through accounts payable:
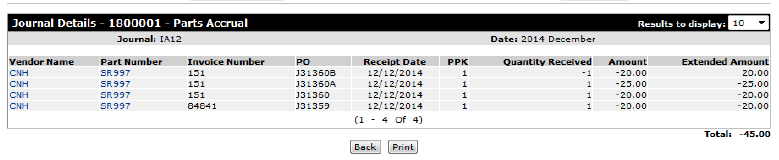
Parts inventory account reflects the 45.00 and it was relieved by 20.00 when it was sold leaving 25.00 left in inventory:
Receipting:
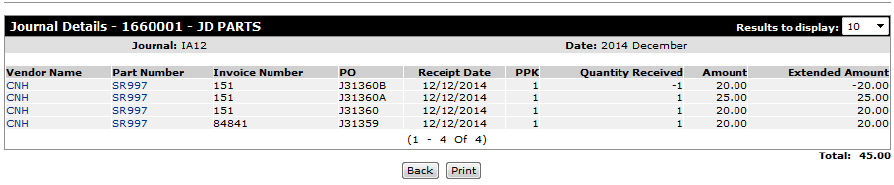
Selling:

This leaves 25.00 left in inventory and currently there is 1 one on hand with an average cost of 25.00 so the system is in balance.
If you do a PO correction and change the cost of a part that currently has zero on hand (zero inventory), your parts inventory instantly goes out of balance by the difference in the cost correction. The difference in this case should be posted to the corresponding cost of sale account.