Configuration: Late Charges Listing
Use the Late Charges screen allows you to set the parameters for applying late charges to overdue accounts receivable amounts. Valid late charge codes configured on this screen appear on the Late Charge drop down list on the Customer Profile tab and on the Late Charge Codes screen when applying late charges to invoices.
To open the Late Charges screen, navigate to Configuration > General Ledger > Accounts Receivable > Late Charges.
"Late Charge” is a default description assigned to late charges on A/R statements. This Accounts Receivable statement description can be changed if desired by defining the “Late Charge” field in table ARTRAN01 with the desired description.
Topics in this section are:
Adding a Late Charge Code
-
Navigate to Configuration > General Ledger > Accounts Receivable > Late Charges.
-
Click Need to create a new late charge? Click here to add link.
-
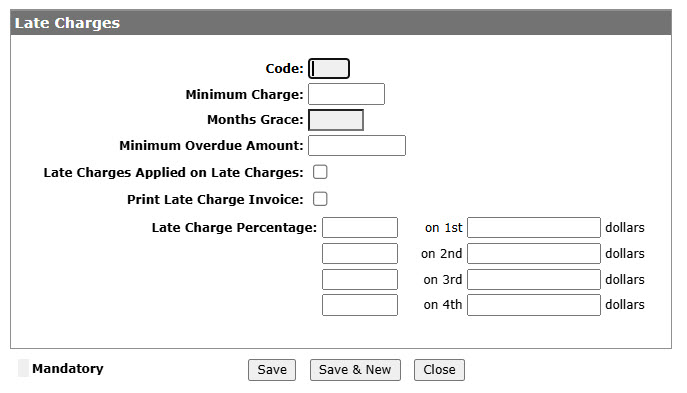
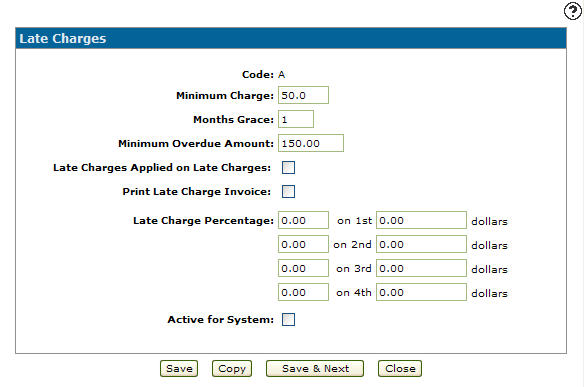
On the Add Late Charges screen, enter a one character Code used to represent the late charge code throughout the system.
-
Enter a Minimum Charge amount. The minimum late charge amount applied to overdue A/R accounts each month.
-
Enter the Months Grace amount. The number of months an account must be overdue before late charges can be applied.
-
Enter the Minimum Overdue Amount. The minimum amount an A/R accounts must be over by before late charges can be applied.
-
Select the Late Charges Applied on Late Charges checkbox, indicating that your dealership applies late charges on top of late charges.
-
Select the Print Late Charge Invoice checkbox, to print a separate late charge invoice for each account when printing A/R statements.
-
Enter a Late Charge Percentage and corresponding Dollar amount, applying a late charge percent to an A/R account overdue by the specified Dollar amount.
-
Click the Save button to save the new late charge code and return to the Late Chargesscreen.
- or -
Click the Save & New button to save the new late charge code.
The Add Late Charges screen refreshes, allowing you to add another late charge code without closing the screen.

Deactivating a Late Charge Code
-
Navigate to Configuration > General Ledger > Accounts Receivable > Late Charges.
-
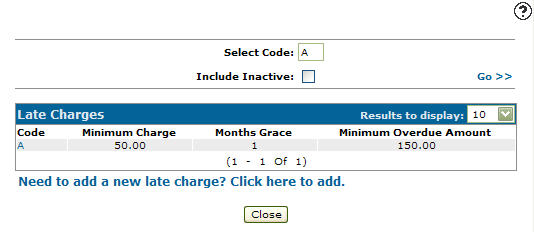
Fill out the appropriate fields and click the Go >> link.
-
Click Code.
-
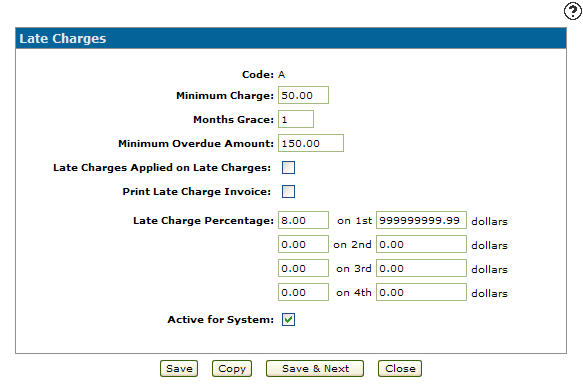
Select the Active for System checkbox, removing the checkmark.
-
Click on the Save button in order to deactivate the late charge code within the system.
Screen Description
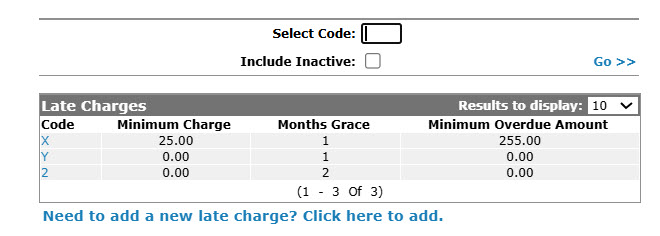
The search fields on the Late Charges screen are:
| Field | Description |
|---|---|
| Select Code | Search for a late charge by entering a late charge code. |
| Include Inactive | If selected, includes inactive late charge codes within the search results. |
The fields on the Late Charges screen are:
| Field | Description |
|---|---|
| Code | A one character code used to represent the late charge within the A/R system. |
| Minimum Charge | Represents the minimum late charge amount to apply to overdue A/R accounts each month. |
| Months Grace |
The number of months an invoice must be overdue before late charges are applied. In conjunction with the Posting Date specified on the Apply Late Charges screen, the number of Months Grace determines the Cutoff Date that is populated when applying late charges. For example, if the Posting Date is November 30th and the late charge code has a two month grace period, the Cutoff Date is September 30th and only invoices dated September 30th and earlier will have late charges applied to them. |
| Minimum Overdue Amount |
The minimum amount an account must be overdue by for late charges to be applied. |