EFT Overview
Electronic Funds Transfers (EFTs) are Accounts Payable payments made through electronic means instead of printing a physical check. If the A/P Electronic Funds Transfer feature is activated IntelliDealer can then be configured to generate a file containing the EFT payment information (only for those vendors you designate to receive payment by EFT instead of check) in the format prescribed by the bank. Once generated, the dealer transmits this file to their bank who use the information contained in the file to electronically distribute the payments to vendors. There is also an option to email vendors the details of the payment that will soon be deposited into their account.
Topics in this section include:
See also:
Supported Formats
This interface is available only for NACHA (U.S.), CPA 1464-byte (Canada) and Active Pay formats. There are 10 variations of the NACHA format and 10 variations of the CPA format available for configuration. The formats are named with the format name and a number. For example, NACHA 1, NACHA 2, etc.
The dealer must contact their VitalEdge salesperson to contract for the EFT interface and a copy of the EFT file specifications and bank contact details. These specifications are reviewed by development to determine if changes are required to support that format. Even if the EFT formats provided by the bank say it is a NACHA or CPA 1464-byte specification, these documents still need to be submitted. It has been VitalEdge's experience that most banks use a variation of the NACHA or CPA 1464 byte layouts which VitalEdge has had to customize for that bank.
This list represents banks that VitalEdge dealerships are downloading EFT payments for. It is important to note that for all of the NACHA and CPA-1464 byte formats that modifications had to be made to support each of these banks' EFT formats.
| Bank | Format | Release | PPU # |
|---|---|---|---|
| CIBC | CPA-CIBC (1464 byte layout) | Insight and later | 739 |
| RBC | CPA-RBC (1464 byte layout) | Insight 2.0 | 450 |
| Bank of Montreal | CPA (1464 byte layout) | 7.3 and later | 317 |
| Any other Canadian chartered bank that supports the CPA 1464 byte format (must be tested first to ensure compliance) | CPA (1464 byte layout) | 7.3 and later | 317 |
| Wells Fargo |
NACHA Standard Entry Class: CTX |
7.3 and later | 334 |
| Washington Trust Bank | NACHA | 7.2 and later | 497 (7.2), 435 (7.3) |
| SunGard | SunGard | Insight and later | 488 |
| Busey Bank | NACHA | Insight 2.0 | 512 |
| Active Pay | custom CSV | Insight 3.0 | TBD |
Even the interface's listed above must be tested with the bank before being deployed. The testing must be done at least 30 days before the dealer plans to put it in production to allow time to make changes to the interface and to load any changes on the ASP.
Ideally, the dealer should setup one vendor for testing purposes, which could be an internal vendor. This approach ensures that the test is completed sooner and that it won't impact business.
Note: If a vendor is a miscellaneous vendor (VMMISC = '?' in VMASTR) it proceeds as a normal check run.
FAQ
EFT data is generated during an Accounts Payable Check Run for any vendor coded (as described in Set Up Vendor EFT Payment Options) as an EFT vendor. The EFT data is stored in the EFTD file for details and EFTH file for the header. These files contain vendor banking details and points to the inherent voucher data stored in IntelliDealer. Each check run adds to the EFT files. When the user runs the "Send EFT Payments" option, records in the EFTD and EFTH files get changed to 'H' for History so that they don't get downloaded the next time the "Send EFT Payments" option is run.
Additional reports for EFT Statements (report AP6000 with forms type UEFT for U.S. and CEFT for Canada ) and EFT Register (AP5051 with forms type *STD) are generated during an Accounts Payable check run when EFT records are generated.
Warning: The EFT Statements report uses the same format as checks but they are not to be printed on check forms. If you choose to print it, it should be on plain paper for audit purposes only.
Note: In check runs and related reports, EFT payments can appear alongside printed checks. EFT transactions can be identified by a reference number beginning with "E".
If you want to prevent checks from printing and transmitting to the bank then only the step Set Up Vendor EFT Payment Options needs to be completed. Vouchers for these vendors are processed during a normal check run, except physical checks are not printed for these vouchers. This may be useful in those situations where you are not using the EFT interface to communicate with their bank. It is important that a customer discuss doing this with Client Services before proceeding with this option. EFT must still be licensed in order to use this option.
If you click "Save" on the EFT Download screen, and the file does not appear or is accidentally deleted in some way you can always recover the file from the IFS. It is located in the Integrated File System under the root in the Lansaimg folder under the "EFT" directory, and should be the newest file created. On the shared server you may not have authority to the IFS but you can contact support for assistance. On the shared server each dealer's LANSAIMG is split out by library so you'd have to look under LANSAIMG_xxxx or LANSAIMG_xx for older dealers with library numbers like PFWF00xx.
How EFT Payments Are Identified
EFT (Electronic Funds Transfer) payments are automatically assigned a reference number that begins with the letter "E".
This prefix distinguishes EFT payments from traditional printed check payments within IntelliDealer.
For example:
- E12345 → EFT payment
- 12345 → Printed check
Note: EFT payment numbers may appear in the same fields, check runs, and reports as regular check numbers. The "E" prefix is the key indicator that the transaction was processed electronically rather than by printed check.
Set Up Vendor Contact Options for EFT E-mail
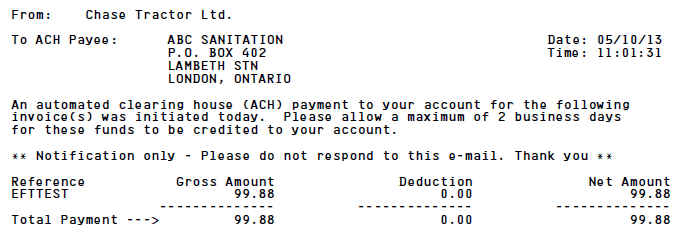
This option allows vendors to be emailed a payment notification when the "Send EFT Payments" (see below) is run.
Note: EFT E-mail is not applicable with the Active Pay format.
-
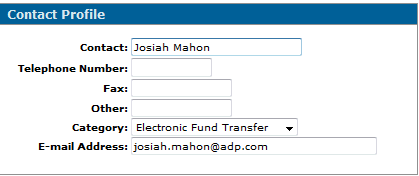
Navigate to Financial Management > Accounts payable > Vendor Profile, then click the Contacts tab.
-
Select the Vendor Contact tab.
-
In the Category dropdown, select "Electronic Fund Transfer".
-
Enter an e-mail address to receive all notifications when you create the EFT File. The notification email will be from the generating user's profile.
-
If there are multiple invoices that are being paid it shows them under the reference field with each invoice having its own line.
-
Some of the verbiage in the e-mail is editable in IntelliDealer via the Text Variables option in Administration.
-
There is a separate numbers entry for the check# APEFT Electronic funds transfer Loaded by CO/DIV. EFT transactions are typically assigned a reference number beginning with "E", which distinguishes them from printed checks.
-
The regular check run is used to run these EFT transactions, and if the vendor is setup this way it processes them as EFT's versus checks.
-
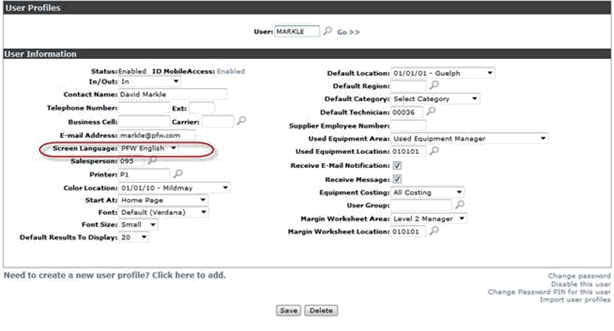
Setting Up the Payment Notification in a Different Language
The payment notification email can be set to a different language.
-
Create an EFT payment notification language variable for the other language.
-
Open the User Profile for the user who downloads the EFT payments, and set the Screen Language to that language.
Seting up EFT Downloads for SunGard
SunGard functions slightly differently than the other EFT options - it only downloads basic electronic check information in a CSV format and does not require any banking information.
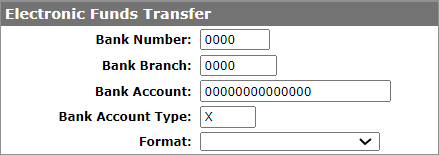
The setup on the EFT configuration screen should look like:
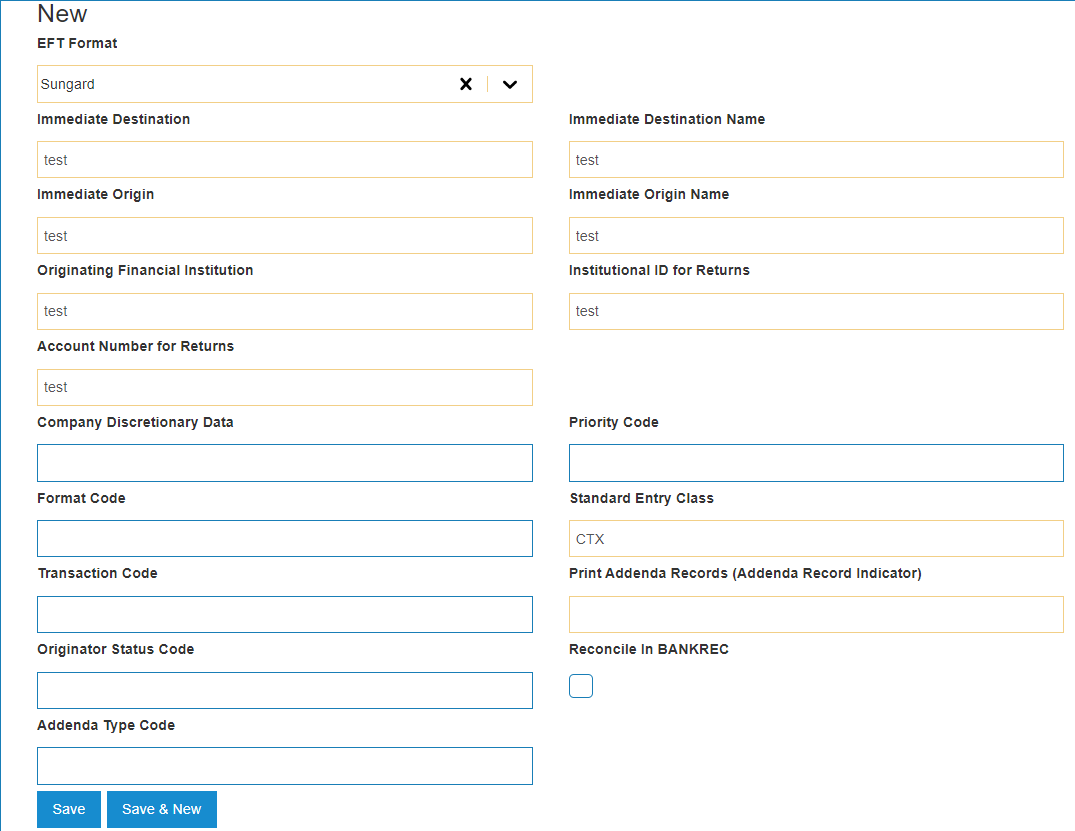
The only other setup required for SunGard is for the necessary vendors to be marked for special handling by putting an "X" in their Bank Account Type. This can be accessed through Vendor Profile > Payment Terms.
Enter the following if the vendor is "special handling":
The SunGard download should now function properly, and is run in the same way as the other formats, as detailed below.
Set up EFT downloads for Active Pay
Active Pay also functions differently than the typical EFT options. It only downloads basic electronic check information in a CSV format and does not require any banking information.
The following two configuration screens still need to be completed, but using the "dummy" (or placeholder) data in the mandatory fields.
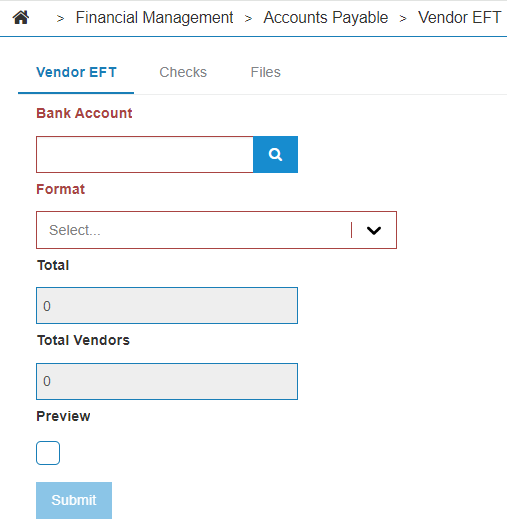
On the Vendor EFT screen, place Xs as shown below.
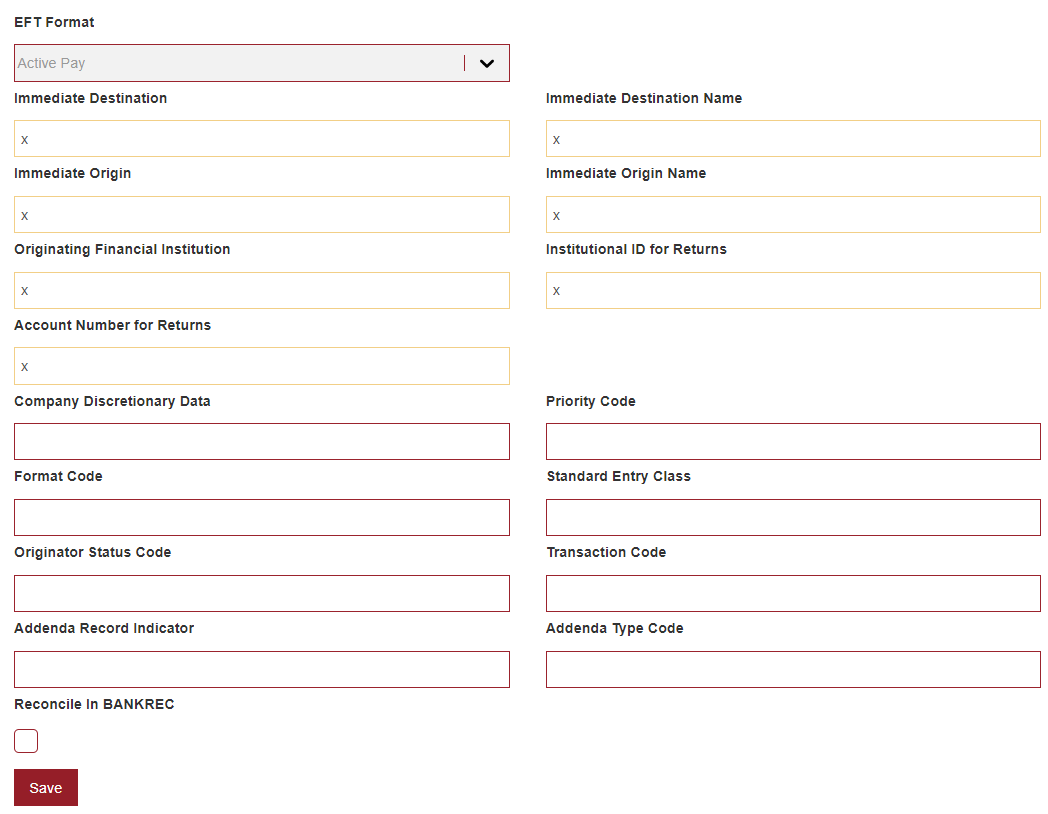
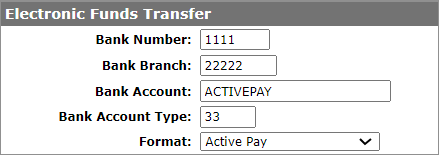
On the Electronic Funds Transfer screen (accessed from the Vendor Profile on the Payment Terms tab), for vendors who are going to be paid via Active Pay, the setup on the Electronic Funds Transfer screen in Vendor Profile must be marked using the values shown below. This can be .
Send EFT Payments
This option downloads EFT data to a file chosen by the user. The user is then responsible for uploading this file to the dealer's financial institution.
-
Financial Management > Accounts Payable > Check Run

-
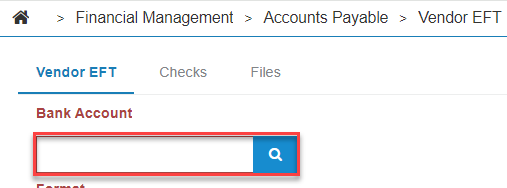
Select Vendor EFT
-
Click the magnifying glass to choose a bank account using the Account Lookup screen:
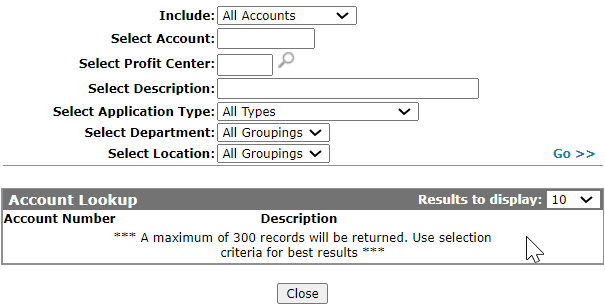
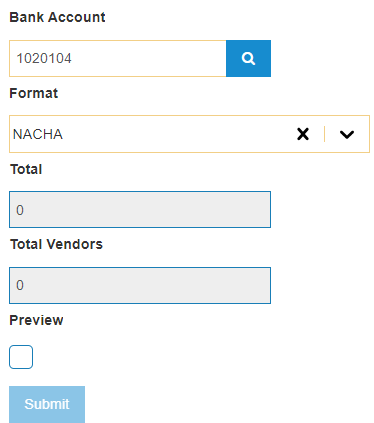
-
You can then select the format of the EFT file you'd like to download. When you're ready to download the file, click Submit.
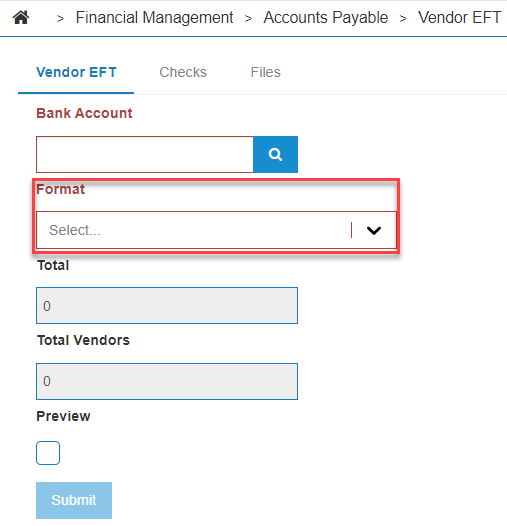
-
You should get an EFT File downloaded to your desktop, which you can then upload to the financial institution that uses the format you selected.
To Create the EFT payment
Prerequisites: Ensure proper steps were followed to set up the vendor correctly.
-
Create a Voucher
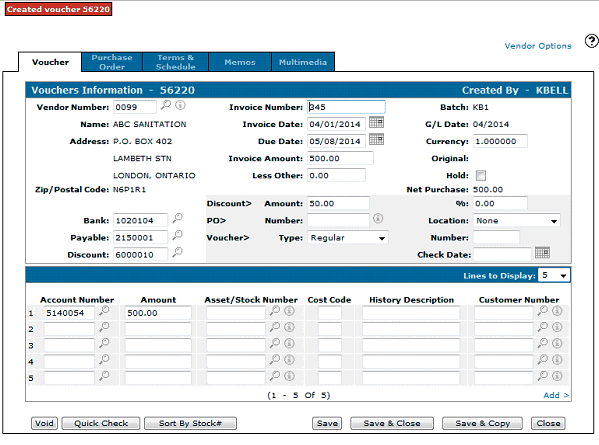
-
Update voucher
-
Create Check Batch (Financial Management > Accounts Payable > Check Run)
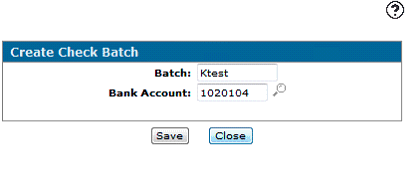
-
Add voucher to check batch
-
Do a check Run and reply to message on your home screen
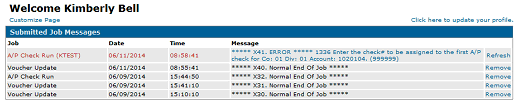
-
Go back into Financial Management > Accounts Payable > Check Run
-
Select EFT payment and select Bank Account #.
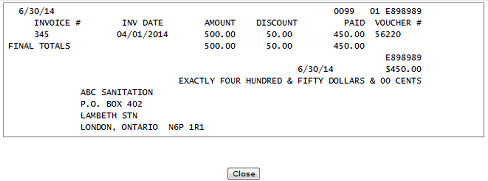
EFT Details will appear
This is the information you would use to reverse the check
Note: Processing vouchers as quick checks does not create EFT checks even if the vendor is an EFT vendor! Quick checks create printable checks right away. The fastest way to create EFT records is to follow the above process.
To Reverse a Payment
-
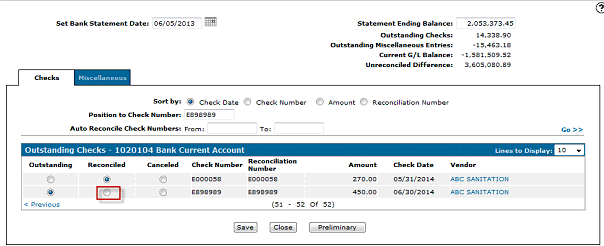
Navigate to Financial Management > General Ledger > Bank Reconciliation.
-
Open the voucher to reverse and change the status of the voucher from Reconciled to Outstanding.
-
Reverse the check using the reverse a check option in IntelliDealer.
-
To adjust the voucher and reissue it be sure to select the reissue voucher option.
-
If you have multiple vouchers being issued in the same EFT you must manually remove the line in question from the file. The reversal voucher creates its own EFT file.
Revision: 2026.04