Location Transfer Guide
Location transfers track stock moving between locations. For example, when creating a parts invoice if the dealership has insufficient parts to fulfill the order parts can be transferred from another location.
To perform a location transfer, for each location, you must have configured:
- a transfer customer
- a transfer vendor profile
- a location transfer record
Topics in this section are:
See also: Location Transfers: Records
Location Transfer Process
Parts orders are used to fulfill transfers and every parts order must have a customer and a vendor. Therefore, in a location transfer the requesting store (Store A) is the customer and the fulfilling store (Store B) is the vendor.
A transfer record links together the elements of the transfer:
-
A parts invoice in Store B. This records the parts moving out of that store's inventory. Every invoice must have a customer (Store A).
-
A parts order receiver in Store A. This records the vendor (Store B) in the parts profile.
The location transfer process is:
-
Store A (the customer) creates a parts order containing a list of parts to be transferred from Store B (the vendor).
-
Store B creates a parts invoice and a picpak is automatically printed at Store B. You can specify which printer should issue the picpak on the Printer field of the Location Transfers screen.
-
Store B prints the invoice.
-
Store B performs a billing run, creating General Ledger entries.
For a transfer between locations, the General Ledger entry affects the parts inventory account and the transfer asset account defined for Cash Code 1 in Accounts Receivable Cash Codes for the Sending Store. When the transfer is between divisions, the entries involve the parts inventory and payable/receivable General Ledger accounts defined on the Location Transfers screen.
The transfer can occur without having to wait on the billing run, however the transfer will happen without the associated General Ledger entry.
-
The inventory count is updated when Store A receives the parts, receipts them into inventory, and updates the order into a parts order receiver.
Configuring a Transfer Customer
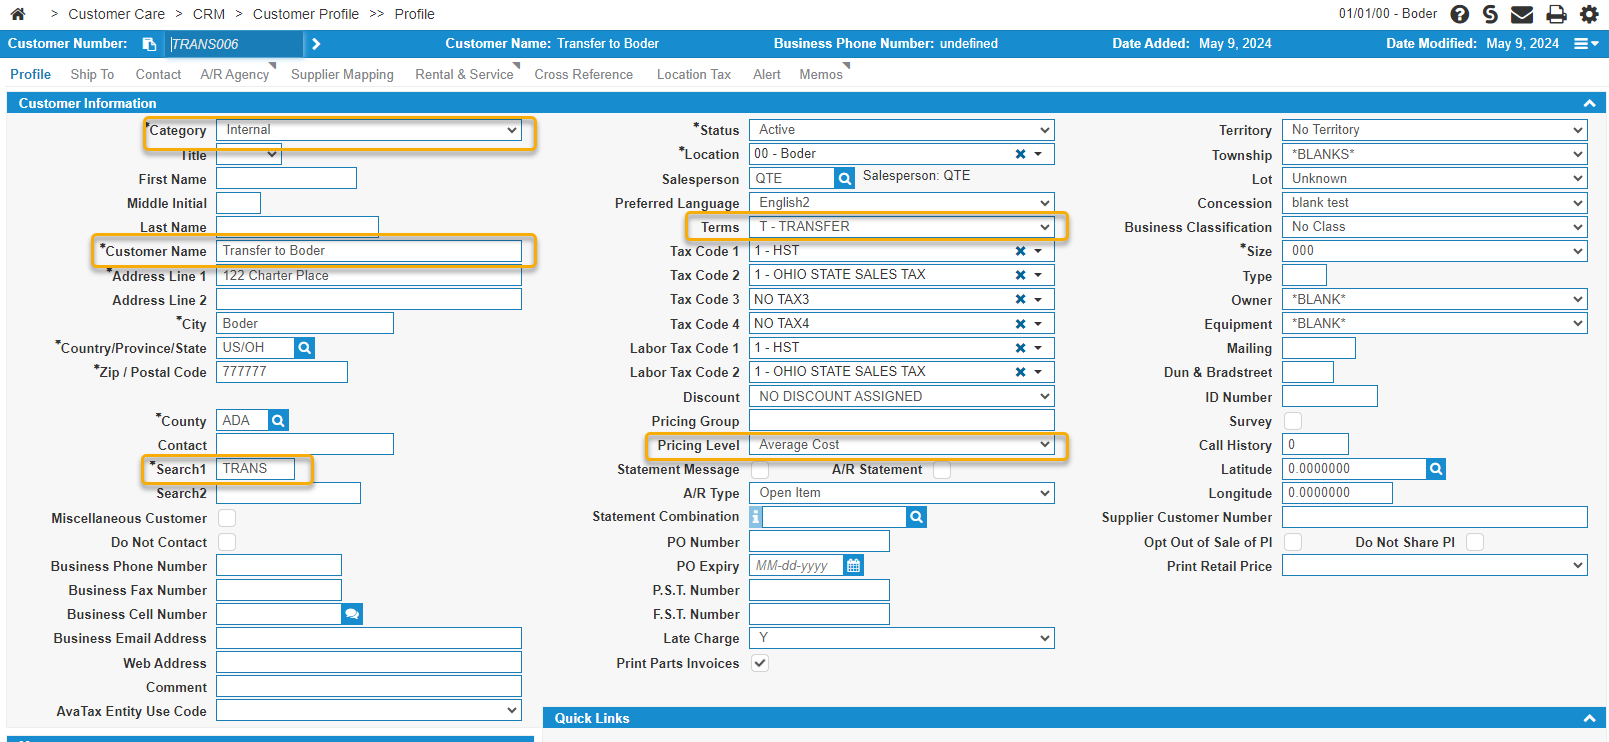
Transfer customers must have a tax code set to exempt, either in the main profile or on the Location Tax tab. If you have dealerships in different states or provinces, use the Location Tax tab to set the exempt code, otherwise you can set it in the main profile.
For each dealership that can request a location transfer, configure a transfer Customer Profile with these criteria:
| Field | Recommended Input | Examples and Notes |
|---|---|---|
| Category | Internal | |
| Customer Name | name of location | Transfer to Boder |
| Search 1 | TRANS | Makes it easier to search for transfer customers. |
| Terms | T-TRANSFER | |
| Pricing Level | Average Cost | |
| A/R Agency | 1 | Use cash code 1 and ensure the checkboxes for Active and Default Agency are selected. |
| Tax Code | X- EXEMPT | If not using Location Tax, then on the Profile tab Tax Code 3 and Tax Code 4 should be set to exempt. Use when all locations are in the same state or province. |
| Location Tax tab | X-EXEMPT | When using Location Tax, on the Location Tax tab, mark the customer as exempt for every other location. Use when locations are in different states or provinces. |
Configuring a Transfer Vendor Profile
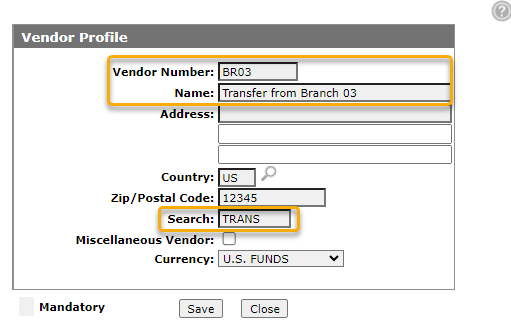
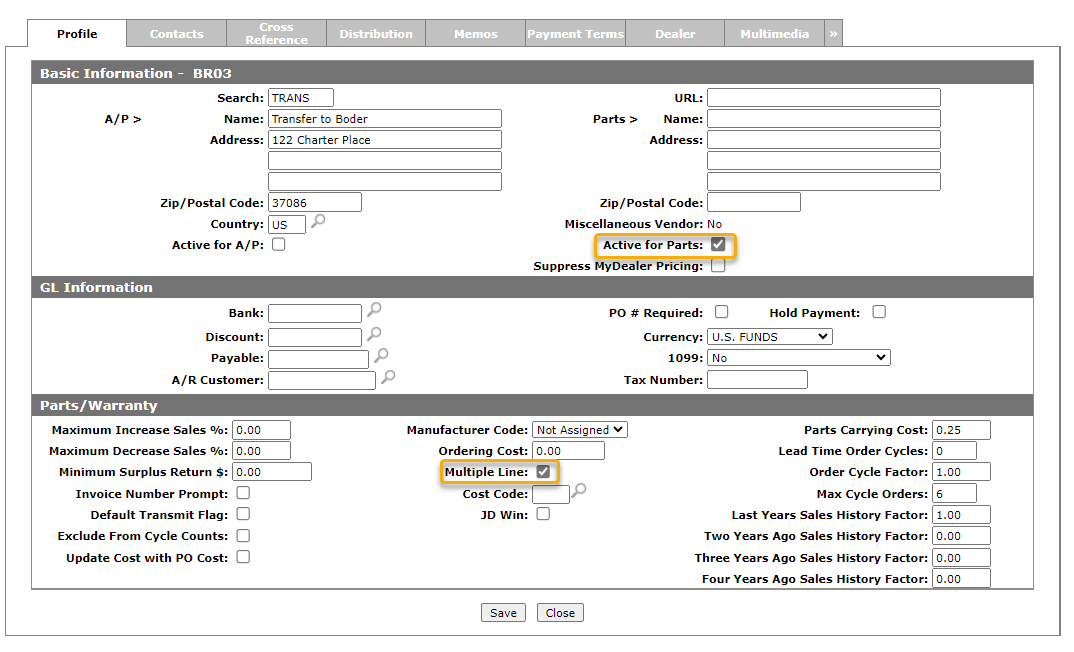
For each dealership that can fulfill a location transfer, configure a transfer Vendor Profile with these criteria:
| Field | Recommended Input | Examples and Notes |
|---|---|---|
| Vendor Number | BR** | All transfer vendor profiles should start with the prefix BR followed by the location number. This makes them easier to find in a search. For example, BR03. |
| Name | TRANSFER FROM BRANCH ** | Use a name that clearly identifies the vendor profile as being used for transfers. |
| Search | TRANS | |
| Active For Parts | enabled | |
| Multiple Line | enabled |


