Setting Up a Customer Pricing Record
-
From any IntelliDealer screen, click on the Product Support tab.
The Product Support Quick Links screen will appear.
Product Support Quick Links screen
-
From the Parts List, click the Customer Pricing link.
The Customer Pricing screen will appear.
Customer Pricing screen
-
On the Customer Pricing screen, click on the Need to create a new customer pricing record? Click here to add link.
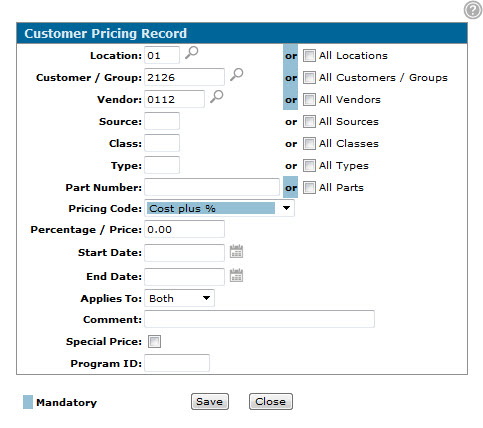
The Customer Pricing Record screen will appear.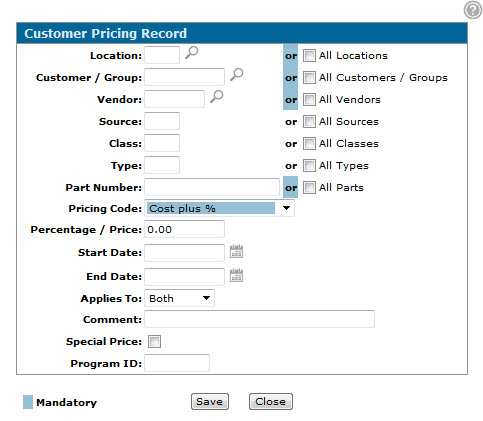
Customer Pricing Record screen
-
On the Customer Pricing Record screen, enter a branch Location code.
- or -
Click on the All Location checkbox to include all locations.
- or -
Click on the Search icon and select a branch location from the list.
 -
Enter a Customer/Group number.
- or -
Click on the All Customers/Groups checkbox to include all customer and groups.
- or -
Click on the Search icon.
The Your Customers screen will appear.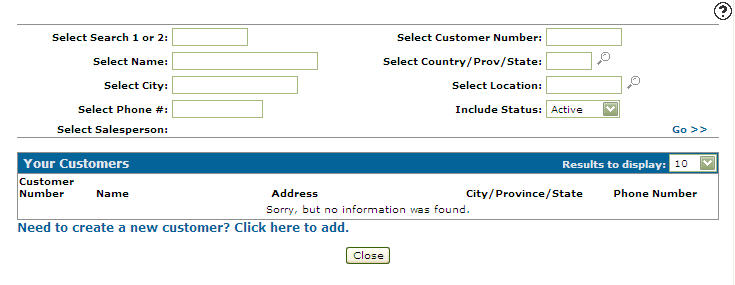
Your Customers screen
-
Enter the search criteria and click the Go>> link to locate the desired customer.
-
Click on the customer number, the Customer Pricing Record screen will appear with the selected vendor number in the Customer/Group field.
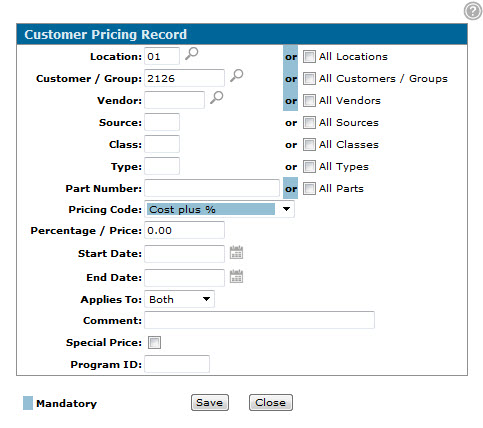
Customer Pricing Record screen
-
On the Customer Pricing Record screen, enter a Vendor number.
- or -
Click on the All Vendors checkbox to include all vendors.
- or -
Click on the Search icon.
The Vendor Selection screen will appear.
Vendor Selection screen
-
Enter the search criteria and click the Go>> link to locate the desired vendor.
-
Click on the vendor number, the Customer Pricing Record screen will appear with the selected vendor number in the Vendor field.
Updated Customer Pricing Record screen
-
On the Customer Pricing Record screen, enter a Source code.
- or -
Click on the All Sources checkbox to include all sources. -
Enter a Class code.
- or -
Click on the All Classes checkbox to include all classes. -
Enter a Type code.
- or -
Click on the All Types checkbox to include all types. -
Enter a Part Number.
- or -
Click on the All Part Numbers checkbox to include all part numbers. -
Select a Pricing Code from the drop down list.
-
Enter a Percentage/Price value.
-
Enter a Start Date.
- or -
Click on the Search icon.
The Calendar screen will appear.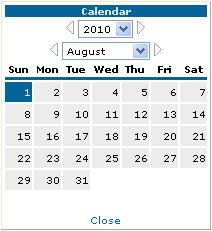
Calendar screen
-
On the Calendar screen select a month and a year from the appropriate drop-down list.
-
Select a day by clicking the appropriate date button.
The Calendar screen will close and you will be returned to the Customer Pricing Record screen. -
On the Customer Pricing Record screen, enter an End Date.
- or -
Click on the Search icon and select a date from the Calendar screen. -
In the Applies To field, select whether the pricing record will apply only to Shop sales, Counter sales, or Both.
-
(OPTIONAL) on the Customer Pricing Record screen, enter any information about the customer pricing record in the Comments field.
-
(OPTIONAL) click on the Special Price checkbox.
Note: If the Special Price checkbox is selected, all other pricing will be over written.
-
Enter a Program id.
-
Click on the Save button to save the new customer pricing record.