CNH CSPS Promotions Inquiry
Use the CSPS Promotion Inquiry system to access to CSPS Promotion data.
Prerequisites: To use this screen, you must first set up the CNH CSPS interface. See CNH CSPS Interface.
See also CNH CSPS FAQ and Troubleshooting.
Not all promotions are used in all regions. Below are the promotion types and the names used in North America (NA):
| Type | Used in NA? | Description |
|---|---|---|
| 1 | No | Promotional discount applied before the basic discount |
| 2 | Yes, Promotional Discount | Promotional discount applied after the basic discount |
| 3 | No | Promotional price applied on the list, so basic discount is applied |
| 4 | Yes, Promotional Price | Promotional price applied on the net, so basic discount is not applied |
| 5 | No | Order urgent, but pay as normal |
| 6 | No | If you order A, you will get a promotional price on the list for B |
| 7 | Yes, Co-Product Price Promotion | If you order A, you will get a promotional price on the net for B |
| 8 | No | If you order A, you will get a promotional discount on the list for B |
| 9 | Yes, Co-Product Discount Promotion | If you order A, you will get a promotional discount on the net for B |
| 10 | Yes, Commitment Program | Dealer commits for a certain sales amount, then will get a discount all year |
| 11 | Yes, Direx Promotion | Discount promotion on Direct Invoicing parts |
To access Promotions Inquiry, navigate to Product Support > Parts > Parts Ordering. In the top right corner of the screen, hover over Ordering Options and select CSPS Promotions Inquiry.

You can select a different dealer by clicking on the Dealer Code dropdown. You will see all the dealer codes you have access to. Once you select a dealer code (or leave it defaulted), you can press Search to retrieve all promotions info for that dealer code.
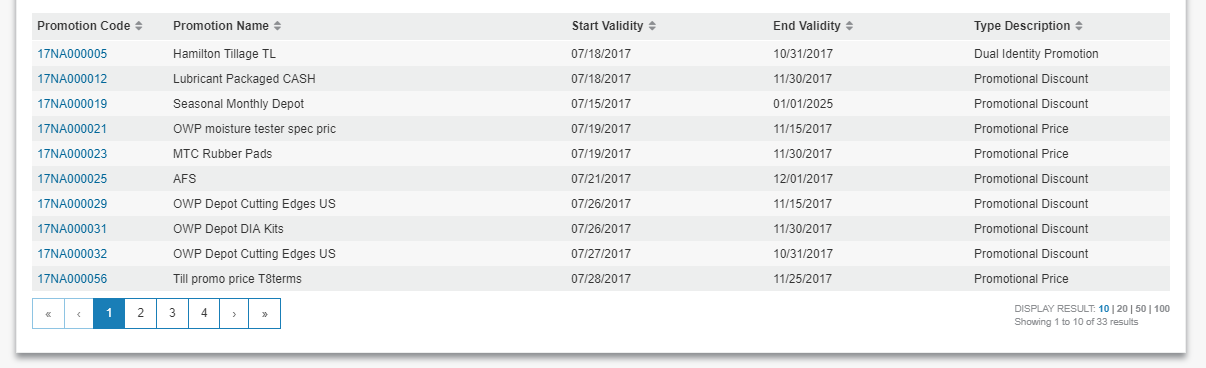
Once the information is retrieved, the table at the bottom of the page will be filled with all the promotions for that specific dealer. You can filter the selection by Promotion Code by just typing the code(s) you are looking for inside the box with the label Promotion Code.

To get more information on a specific promotion, you can click the Promotion Code in the leftmost column of the landing screen table.

Once you select a promotion from the landing page table, the Promotion Group Details screen appears.

This screen displays all the information related to a promotion code.
The promotion group is a collection of parts relating to a promotion. A promotion group has a Promotion Group Name and it falls under a specific Promotion Code.
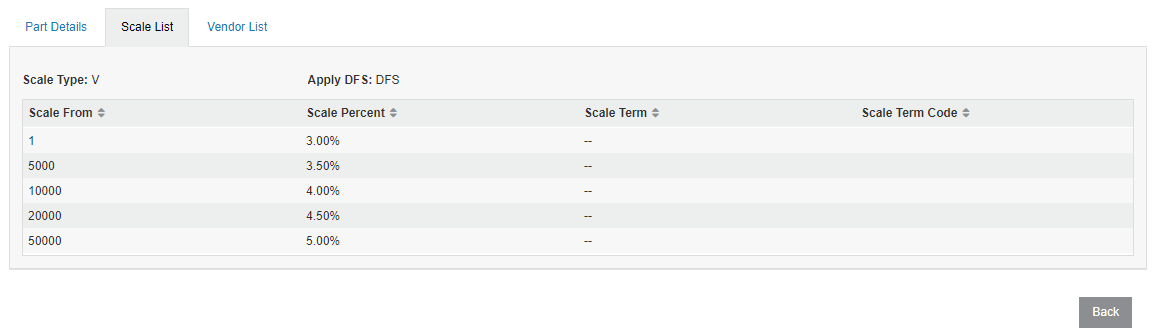
At the bottom of the Promotion Details page is a Promotion Group List table that has more info on each of the promotion's groups. To get more details on the promotion group, click the promotion group name.
At the top of the resulting screen, there are several tabs. Part Details is always be present. Scale List and Vendor List are only visible when there is info on those pages. Each tab displays further details for the group name that was selected. Examples of these tabs are below.


Updating Parts Profiles with CSPS Promotion Codes
You can perform a mass update of either the Machine or Model field in the Part Master file, populating the CSPS promotion code in the chosen field for all parts listed in that promotion that exist on the business system.
Open the Promotion Code Details screen, and in the following text box enter the dealer code for the dealership to be updated:
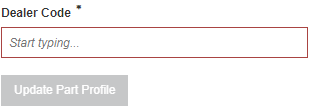
Click Update Part Profile and confirm your choice on the popup. If you click Yesthen all parts that exist both on the business system and in the promotion for all locations entered will be updated with the promotion code in either the Machine or Model field depending on which was configured.
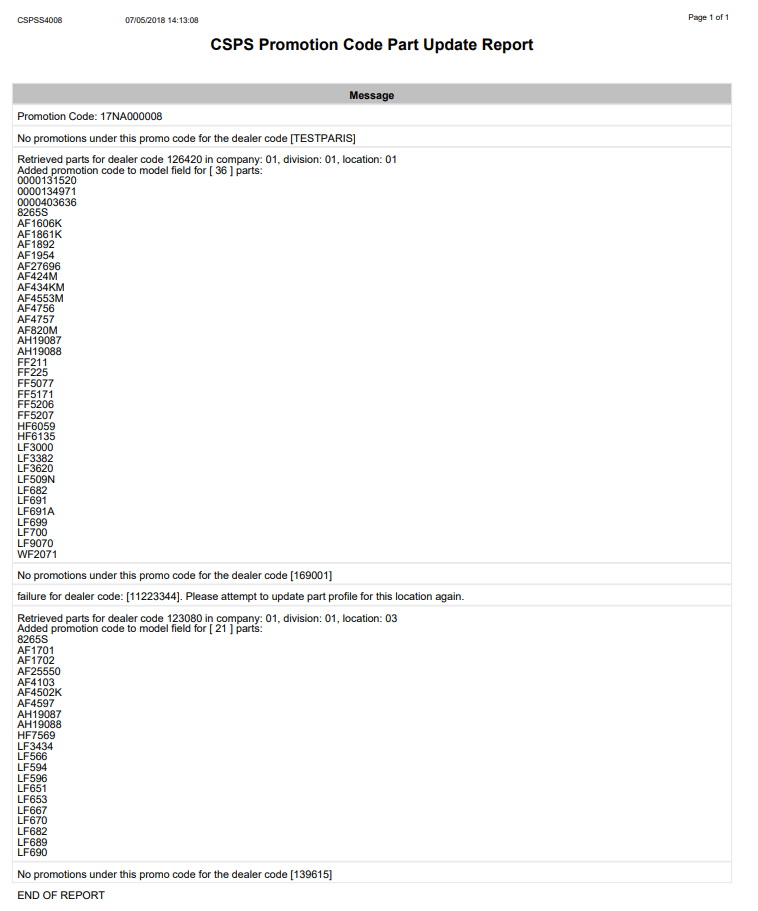
An IntelliDealer message is sent to the user running this job notifying them of its completion, and a PDF report (CSPSS4008) is generated, noting all parts that were updated and any exceptions the job encountered.
Claims Management
The Claims Management web service provides the same functionality available in online Claims transactions: claim insertion and claim inquiry.
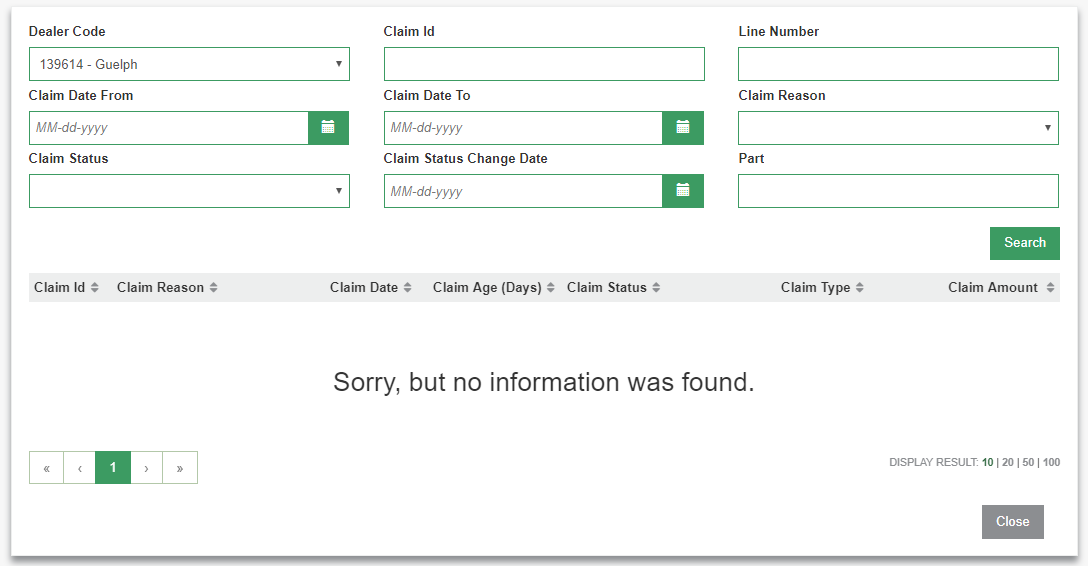
Fill in the Claim Date From and Claim Date To parameters and click Search.
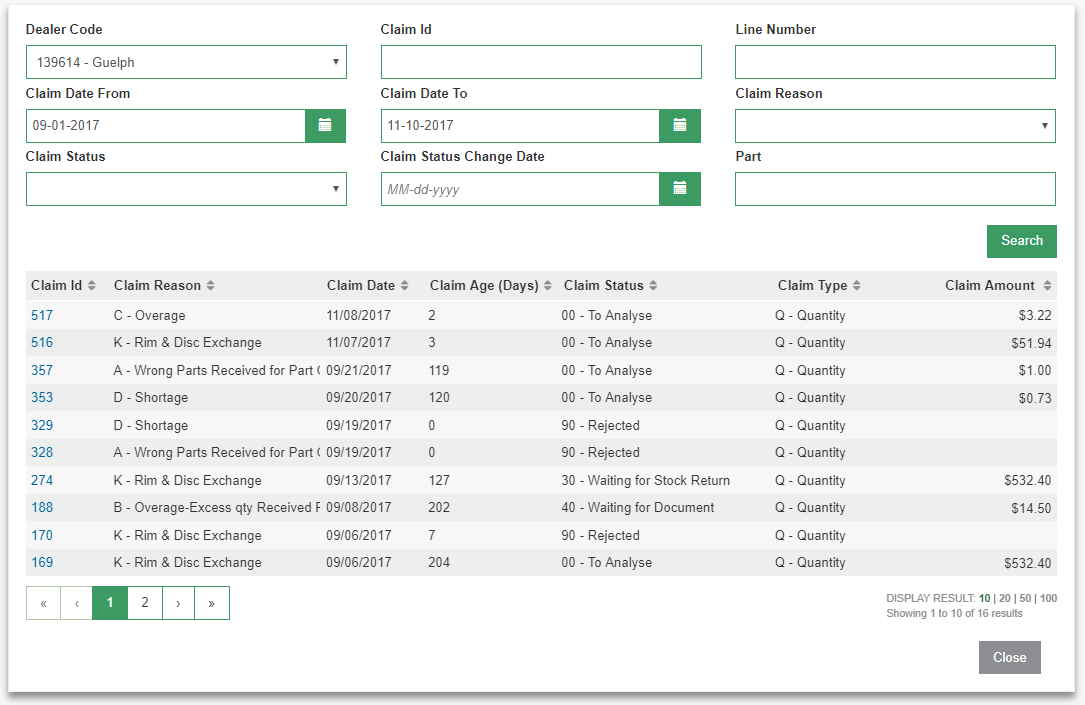
Select a Claim Id
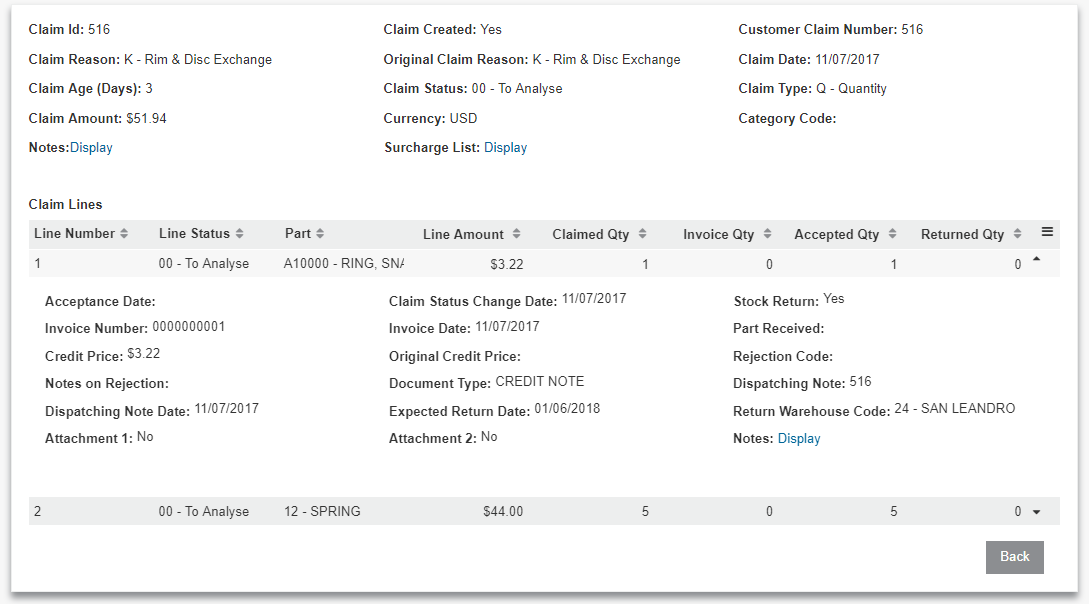
Click the arrows at the end of each row expand the row to show more information specific to the line.
Notes
At the time of insertion, the user has the option to fill out a note for each line they are claiming in addition to a note at the header level.
By clicking the Notes link, the user will open the notes discussion that is respective to the location that it was pressed at.
For example, by clicking the Notes button that is above the claim lines section, a pop up opens.

From here they can add a note or read existing notes sent between them and the CSPS claims analyst.
They can also select on the "notes" located in the line level to open the notes discussion for that specific line.
Claims Entry
The user arrives to the claims entry page by clicking on the Create Claim button in the parts order menu.
All the order lines are imported into the claims screen, at which point the user can edit the lines or remove them as per their need.
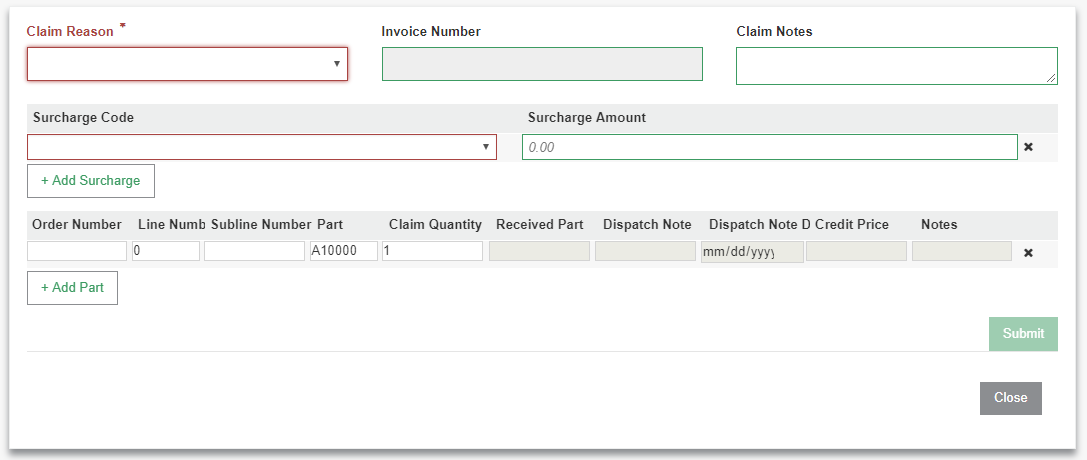
The driver behind this page is the Claim Reason located in the top-left corner. Depending on the claim reason selected, some fields are either disabled, mandatory, or optional. By cycling through the different claim reasons these fields are updated in real-time.
The user cannot submit a claim until all the mandatory fields are filled. If the claims submission was successful the system displays a success message. At this point the user can navigate to the claims inquiry screen to check the progress of their newly created and other buybacks.
Troubleshooting Tips
When entering a surcharge item the code and amount are always required.
"Part" and "Claim Quantity" are always required except for claim reason L - Freight Charge Discrepancy (Credit).
If the Submit button is grayed out, all required fields are not complete. Surcharge Code and Surcharge Amount are always required. Delete the line if it is not required.