Job Jacket Request
Use the Job Jacket Request screen to create a job jacket.
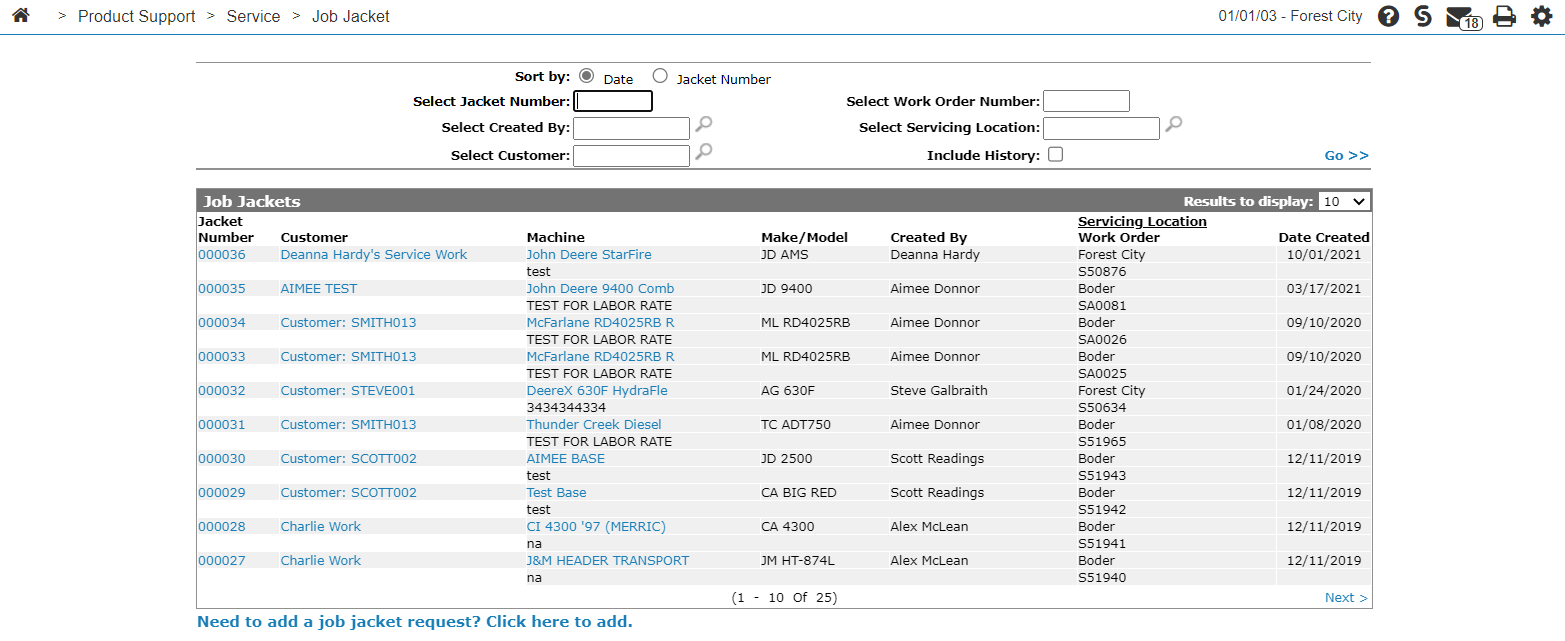
To open the Job Jacket Request screen, click the Need to add a job jacket request? Click here to add link on the Job Jackets Listing screen,
-or-
If you have the appropriate security settings, click the Quick Add Work Order/ Request link on the Open Work Orders screen.
-or-
On a Service Agreement Contract Details tab, hover over the Details line and select Add Work Order/Request from the drop down list.
Topics in this section are:
Creating a New Job Request
-
Navigate to Product Support > Service > Job Jacket tab.
-
Click the Need to add a job request? Click here to add link.
-
Fill in the fields, referring to the table below.
-
Click Save to finish your work on this screen and create the Job Jacket. Or click Close to exit without saving.
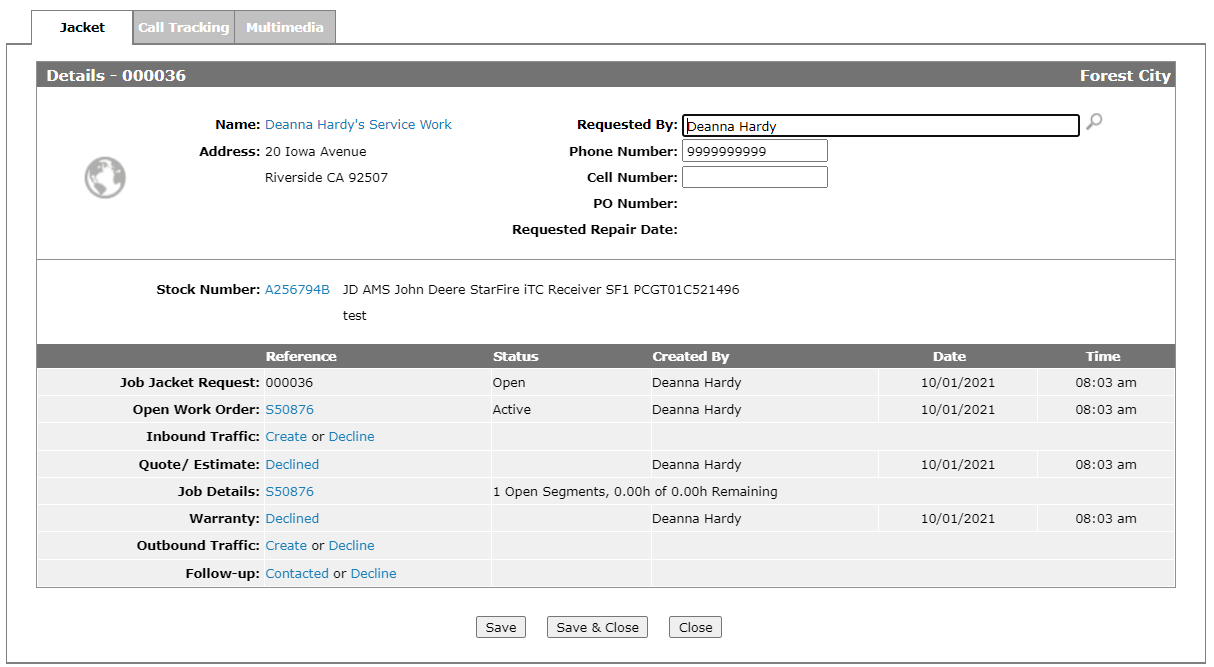
Once the newly requested Job Jacket has opened in the Jacket tab, you can manage this service transaction from the Job Jacket.
Screen Description
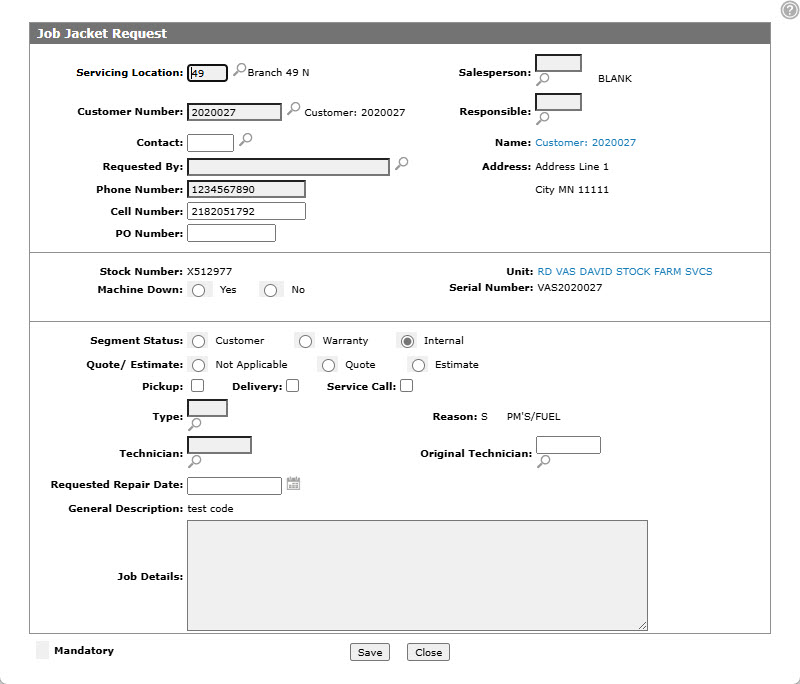
The fields on the Job Jacket Request screen are:
| Field | Description |
|---|---|
| Servicing Location |
Enter or select the location where the machine will be serviced. The system defaults to the location assigned to the user. |
| Salesperson | Enter or select the salesperson associated with the job jacket request. |
|
Customer Number |
Enter or select the customer number associated with the job jacket request. |
| Responsible | The salesperson responsible for the job jacket. This field is for informational purposes only, however it will be included on print-outs related to the jacket. |
| Contact | The customer contact associated to the job jacket request. Any print outs related to the job jacket request will include this name. |
| Name | The customer name is automatically populated when the Customer Number is selected. |
| Requested By |
The contact name associated with this job jacket request. The default entry is the Primary Contact associated with the selected Customer Profile. |
| Address | The customer address is automatically populated when the Customer Number is selected. |
| Phone Number |
The customer phone number. The default entry is the Phone Number associated with the Primary Contact from the selected Customer Profile. |
| Cell Number | The customer's cell phone number. |
| PO Number | The customer provided purchase order for this job jacket request. |
| Stock Number |
Enter or select the unit number for the machine to be serviced. If you are licensed for feature number 6218, a PreCise link appears next to this field. Click the link to locate the selected unit using the PreCise Mobile Resource Management tool. |
| Unit | The name, and make/model of the machine will be automatically populated once the Stock Number is selected. |
| Machine Hours |
Enter the current hours on the machine. This field only appears if you are creating the jacket for a unit that has at least one hour meter, as specified by the group code assigned to the unit. See the Group Code screen help topic for more information. You will only be able to enter a value that is lower than the current number of hours recorded for the selected unit if the Update Equipment Hours if Less Than Original parameter is selected on the System Settings - Division screen. |
| Serial Number | The machine's serial number is automatically populated once the Stock Number is selected. |
| Repair Status |
Select the type of work to be performed; either Active, Customer, Warranty, or Internal. The Active status is only available if your system security is set appropriately by your Administrator. |
| Quote/Estimate | Indicate if the segment will be a Quote, Estimate, or if it should be Not Applicable to the segment. |
| Pickup | Select Pickup to create an inbound traffic ticket for this machine. |
|
Delivery |
Select Delivery to create an outbound traffic ticket. |
| Service Call |
Select Service Call to automatically decline the creation of traffic tickets and indicate that a technician will be traveling to the machine. Choosing Service Call unselects Pickup and Delivery. |
| Type |
Enter or select the work order type. If the job jacket is being created as part of a service agreement, the Type configured on the service agreement will be the default Type entered in this field. |
| Reason | Enter or select the work order reason. |
| Technician | Enter or select the technician. |
| Original Technician | Enter or select the original technician if this is a rework job. |
| Requested Repair Date | Enter or select the customer's Requested Repair Date. |
| General Description |
Enter a General Description of the Job Jacket Request. This description automatically populates the Job Code Description field of the first segment on the work order. |
| Job Details/Complaint |
Enter a detailed discussion of the actual job jacket request. This description automatically populates the Complaint field of the first segment on the work order. |
Use these buttons to complete your work on the Job Jacket Request screen:
| Button | Function |
|---|---|
| Save | Saves the changes made on this screen and create the Job Jacket Request. |
| Close | Closes the screen and returns to the previous screen. |
Security: 805 - Product Support, SAM
Revision: 2025.05