Labor Entry
Use the Labor Entry screen to create labor entry for a selected segment and to manually enter labor hours. As labor is posted, the total charges for the corresponding work orders immediately reflect the labor posting.
All transactions entered on one screen must regard the same labor date. The field is initially displayed with the current date.
You can measure the labor efficiency of shop technicians by differentiating between the Hours Worked and Hours Charged fields.
To open the Labor Entry screen, click the Click here to add labor hours link on the Labor in Progress tab or the Scanned WIP Labor tab.
Topics in this section are:
Manually Entering Labor Hours Through the Supervisor System
-
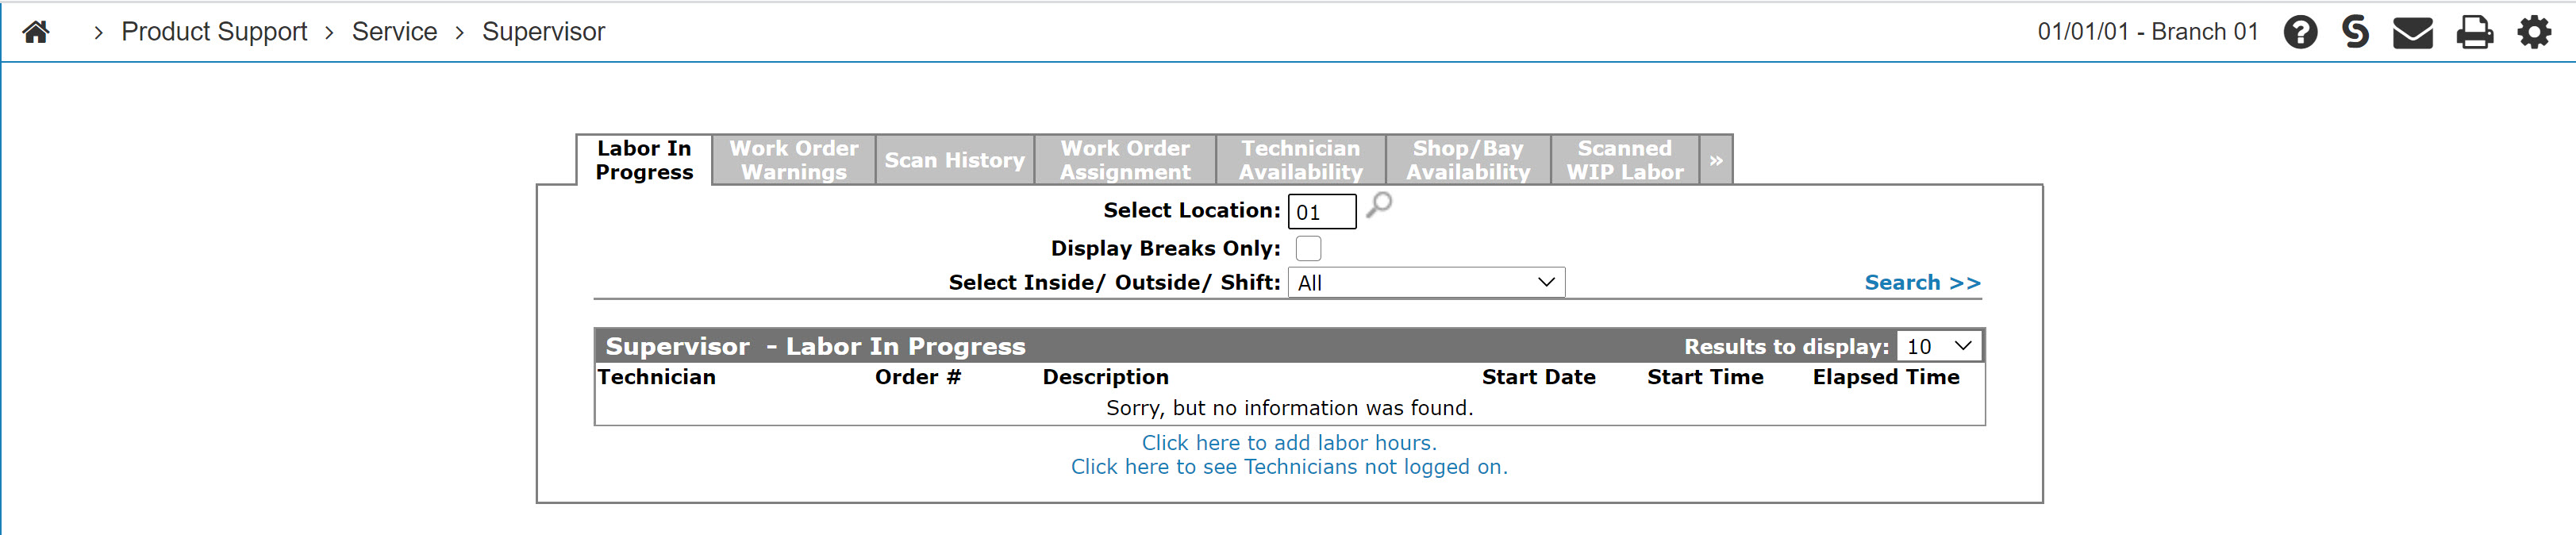
Navigate to Product Support > Service > Supervisor.
-
Click the Click here to add labor hours link.
-
Enter the Labor Date (Start Date & Stop Date).
All transactions entered on one screen must have the same labor date.
-
Select whether or not to make an Immediate Update.
Note: The Immediate Update checkbox is recommended for advanced users only.
-
Fill in the rest of the fields, referring to the tables below.
-
Click Save.
The Labor Entry screen refreshes allowing you to review the transactions. If you make changes, click Save again and the screen refreshes again. The transactions are only posted against the corresponding work order when you click Save after making no changes (unless Immediate Update is selected).
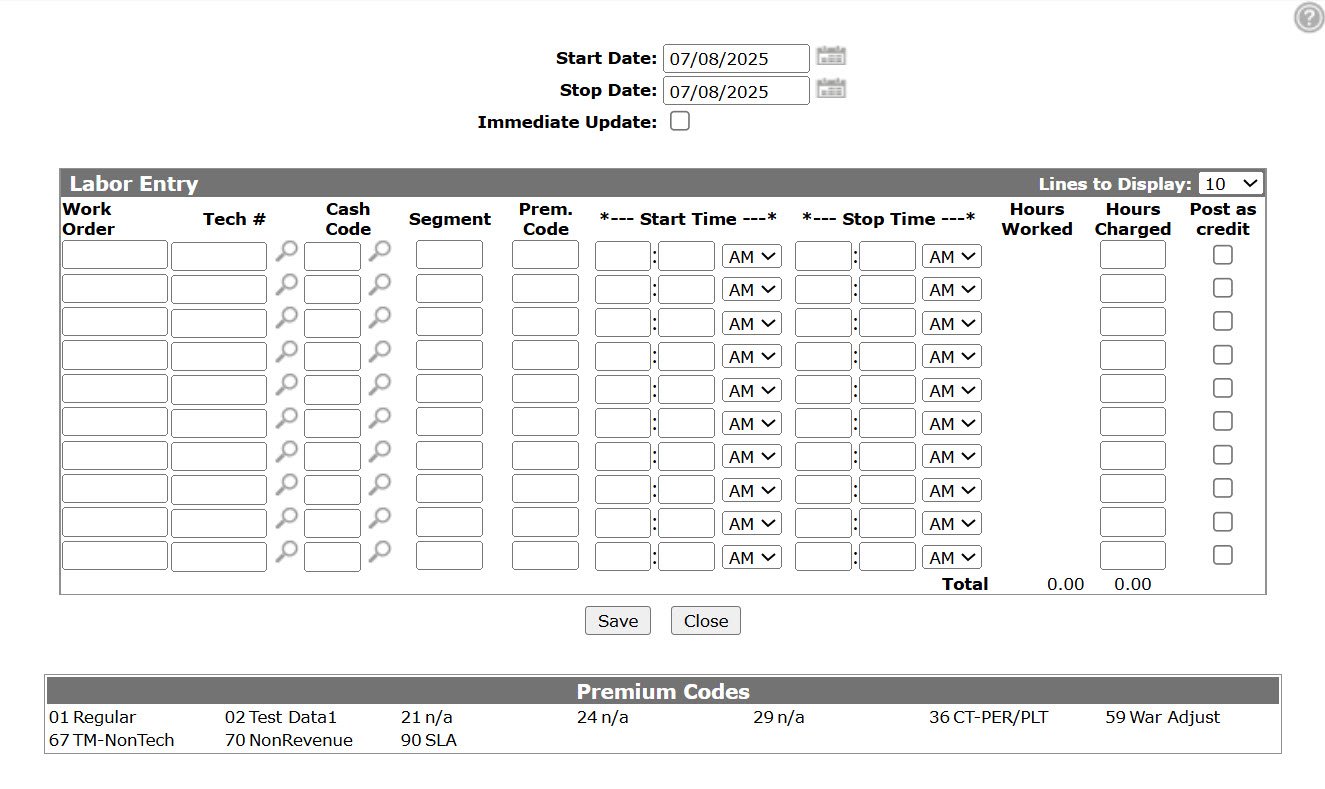
Screen Description
The sort fields on the Labor Entry screen are:
| Field | Description |
|---|---|
| Start Date | The date the labor transaction is scheduled to start. |
| Stop Date | The date the labor transaction is completed. |
| Immediate Update | Select this checkbox to have transactions immediately posted to the work order. |
The fields on the Labor Entry screen are:
| Field | Description |
|---|---|
| Work Order | The work order number. |
| Tech # | The ID number of the technician assigned to the work order. |
| Cash Code | The cash code for the selected work order customer, warranty or internal. If left blank, the system automatically defaults the field value to the Segment Status on the segment number entered in the Segment field. |
| Segment |
The segment number that the labor hours are being charged to. For example, segment 01 on a work order is entered as 01. If the segment being posted to has been closed, parts and labor can not be charged to the work order. Any other status allows parts and labor to be charged to the segment of the work order (even if other segments on the same work order are already closed). |
| Prem Code |
The premium code to be used to calculate the total labor charge. The available premium codes are listed at the bottom of the screen. The adjustments to the rate/hr resulting from the premium code used is made when the transaction is posted to the W/O. This means that the default rate/hr will always display on the screen even though it is being adjusted by the premium code |
| Start Time |
The start time of the labor transaction. |
| Stop Time |
The stop time of the labor transaction. Defaults to the current time. |
| Hours Work | The amount of hours worked on the segment. |
| Hour Charged |
The amount of hours charged to the segment. If left blank defaults to hours worked. You cannot create a negative credit unless you use the Post as Credit checkbox. |
| Post as Credit | Used to create a negative labor credit. |
| Total | The total of the Hours Work field and Hours Charged field. |
The Cash Code of the labor hours transaction. Values include:
| Code | Description |
|---|---|
| 5 | Customer shop charge. |
| 7 | Warranty shop charge. |
| 8 | Internal/reconditioning shop charge. |
Use these buttons to complete your work on the Labor Entry screen:
| Button | Function |
|---|---|
| Save | Saves changes made on the Labor Entry screen. |
| Close | Closes the Labor Entry screen without saving and returns to the previous screen. |