Creating a New Parts Invoice
-
From any IntelliDealer screen, click the Product Support tab.
The Product Support Quick Links screen will appear.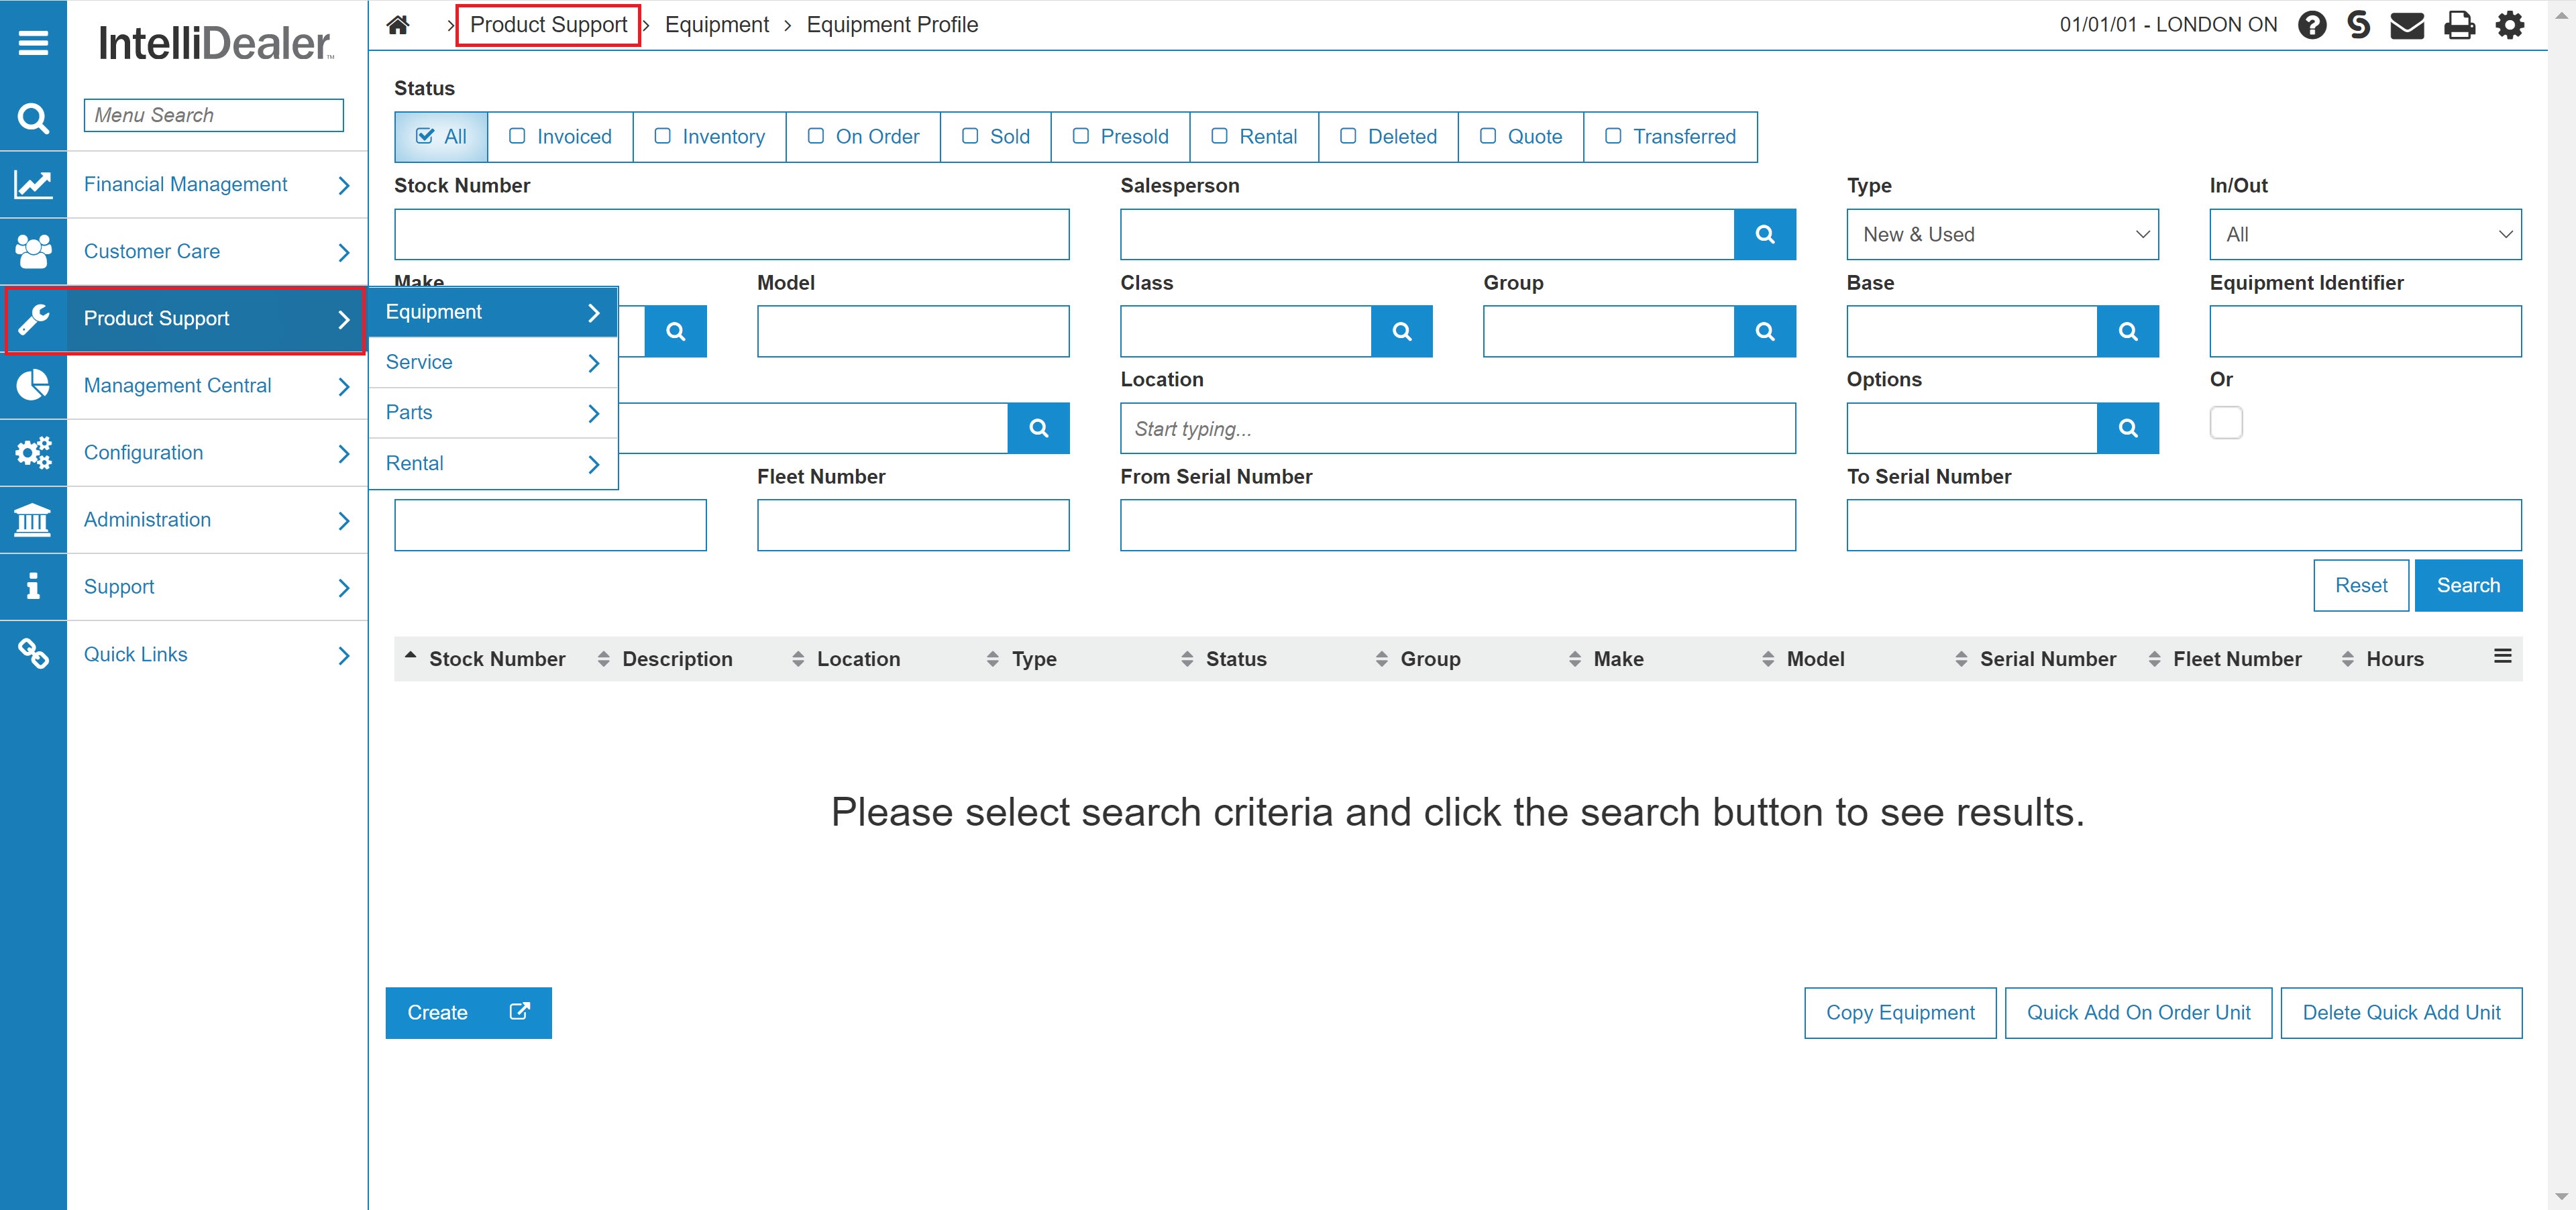
Product Support Quick Links screen
-
From the Parts list, click the Parts Invoicing link.
The Parts Invoicing screen will appear.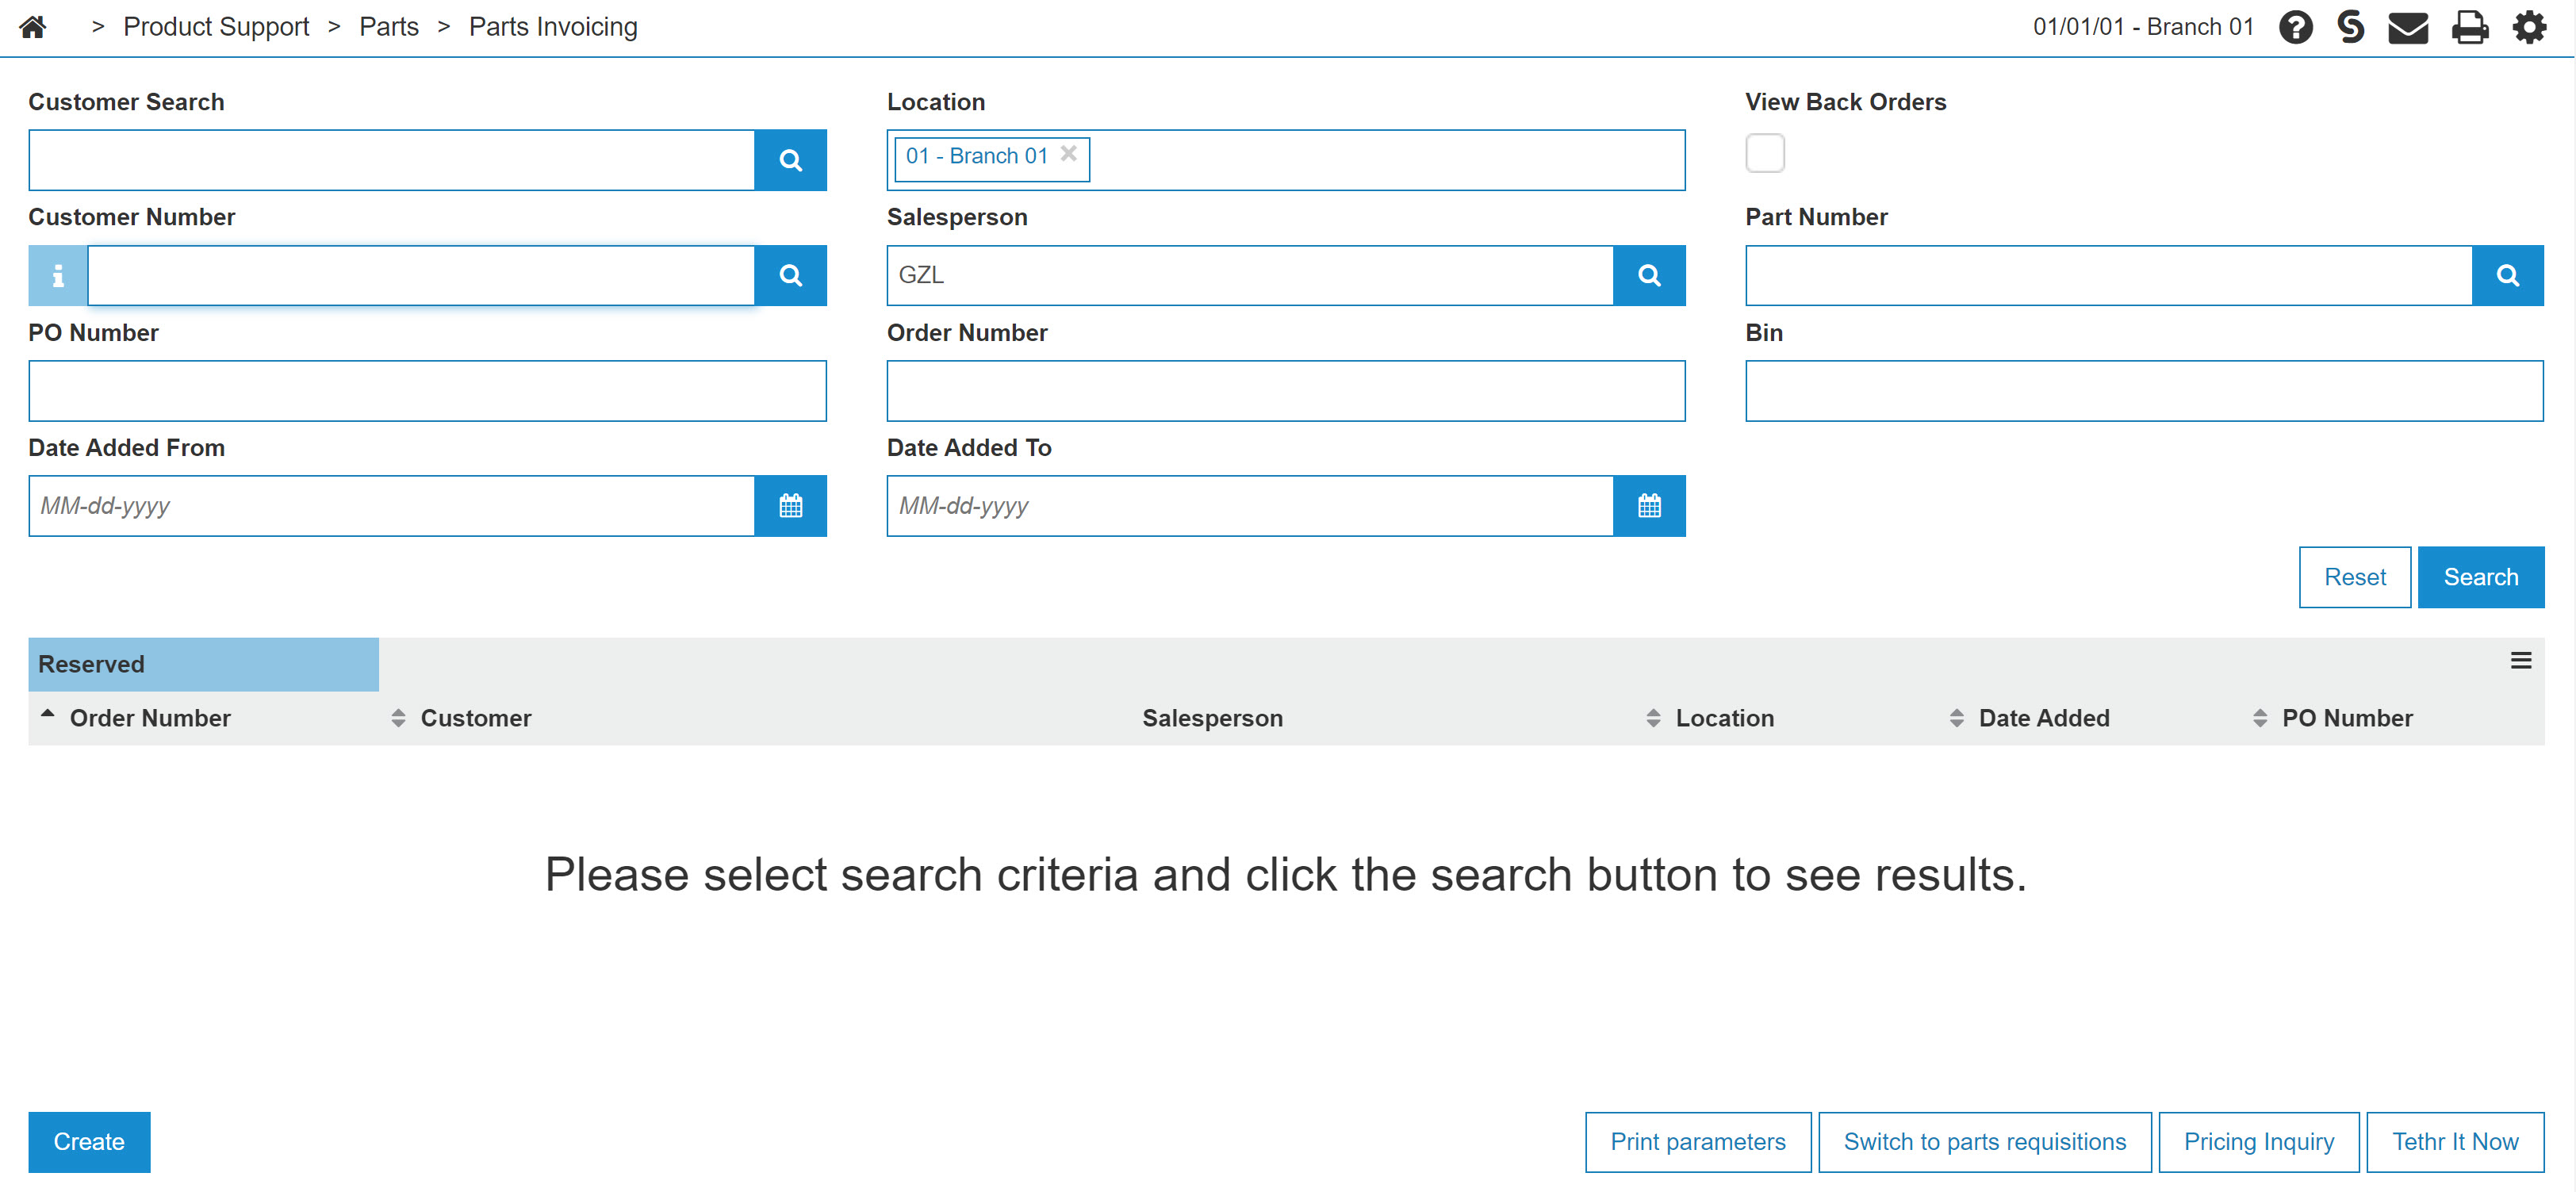
Parts Invoicing screen
-
On the Parts Invoicing screen, click on the Create button.
The Customer - Parts Invoicing Header tab will appear.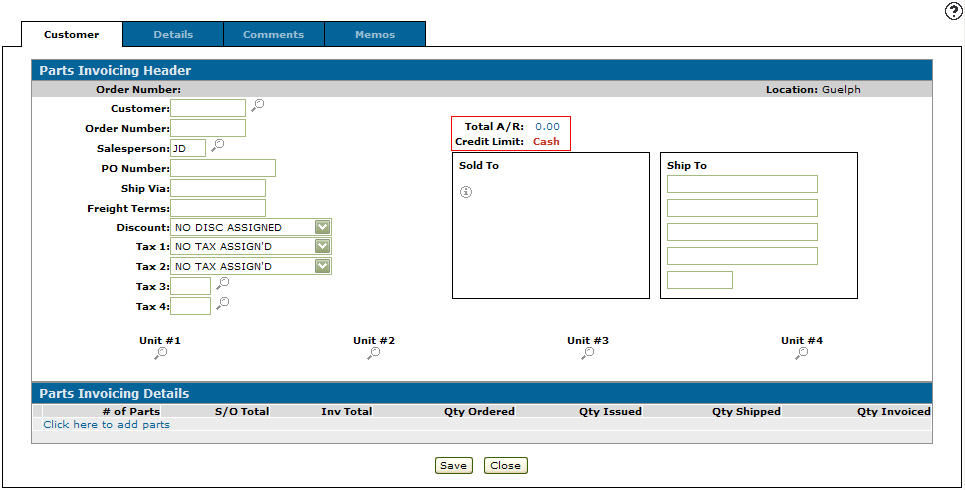
Customer - Parts Invoicing Header tab
-
On the Customer - Parts Invoicing Header tab, type the customer number in the Customer field.
- or -
Click the Search icon to open the Your Customers screen in a new browser window and locate the appropriate customer.
 -
After entering or selecting a customer number, the Customer - Parts Invoicing Header tab will refresh and add any customer information found in the customer’s profile.
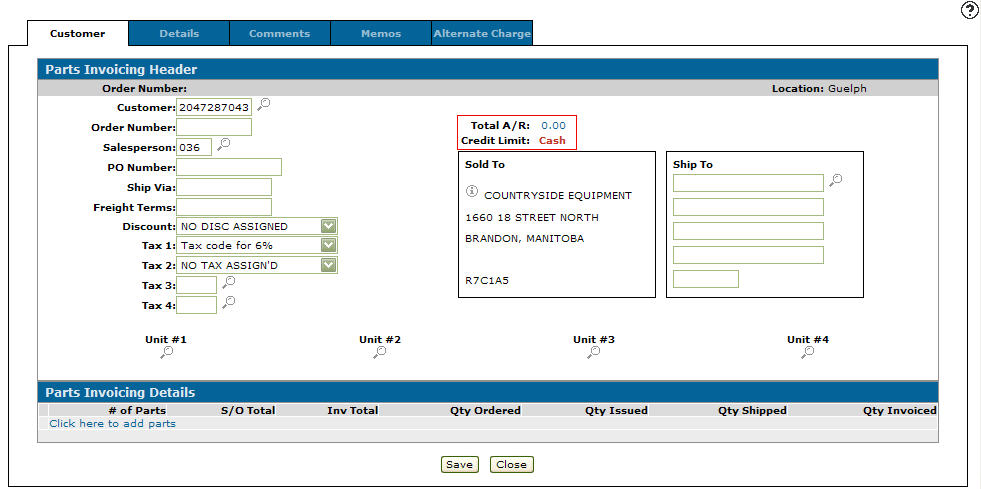
Updated Customer - Parts Invoicing Header tab
-
On the Customer - Parts Invoicing Header tab, enter the salesperson id in the Salesperson field.
- or -
Click the Search icon to open the Salesperson Selection screen in a new browser window and select the appropriate salesperson from the list.Note: The Salesperson field may have been filled in automatically, depending on your User and Group settings.
-
(OPTIONAL) Select a Discount from the list.
-
(OPTIONAL) Select your Tax (1,2,3, and 4) settings from each list.
Note: The taxes you select on the Customer - Parts Invoicing Header will be used as the default taxes for any parts added to this invoice.
-
(OPTIONAL) Select a Unit by clicking the related Search
icon to open the Unit Selection screen in a new browser window and locate the desired equipment unit that the parts invoice is related to. -
(OPTIONAL) (Complete only if the shipping location is different than the Sold to location)
Type a Ship to address.
- or -
Click the Search icon to open the Ship to Selection screen in a new browser window and select the appropriate shipping location from the list of shipping locations associated to the selected customer profile. -
Click the Details tab.
- or -
Click the Click here to add parts link.
The Parts Invoicing Details tab will appear.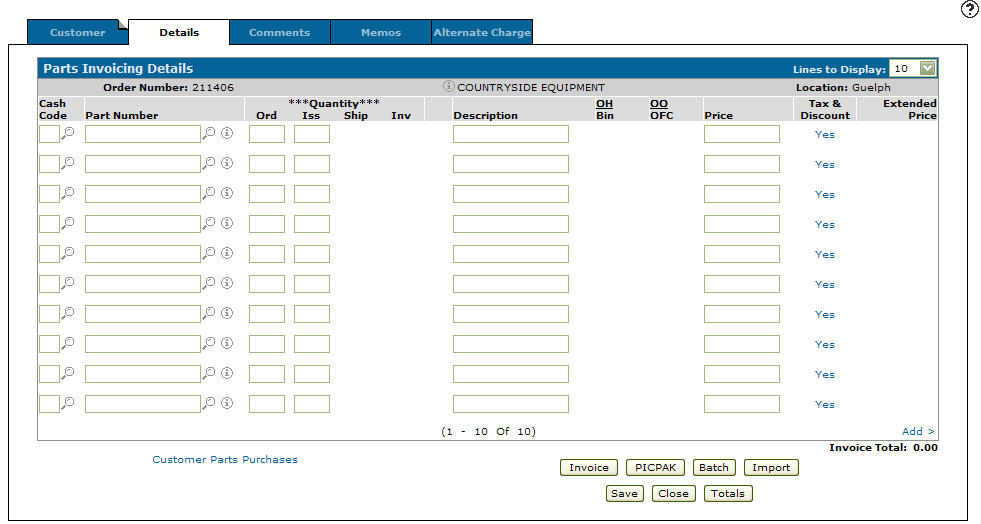
Parts Invoicing Details tab
-
On the Parts Invoicing Details tab, enter a cash code in the Cash Code field.
- or -
Click the Search icon to open the Select Cash Code screen in a new browser window and select the appropriate cash code from the list.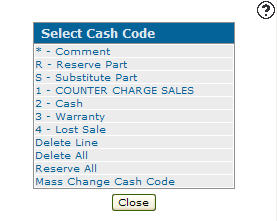
Select Cash Code screen
Note: If a default cash code was set in the selected Customer Profile, it will automatically be populated the Cash Code field.
-
Enter the part number in the Part Number field.
- or -
Click the Search icon to open the Parts Search screen in a new browser window and locate the correct part.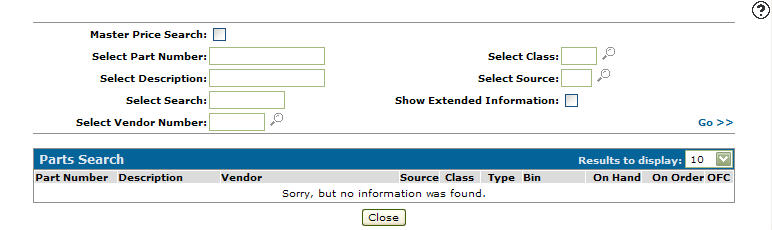
Parts Search screen
-
Enter an order quantity in the Ord field.
-
Click the Save button to save the part number and update the information fields with inventory and pricing information about the added part.
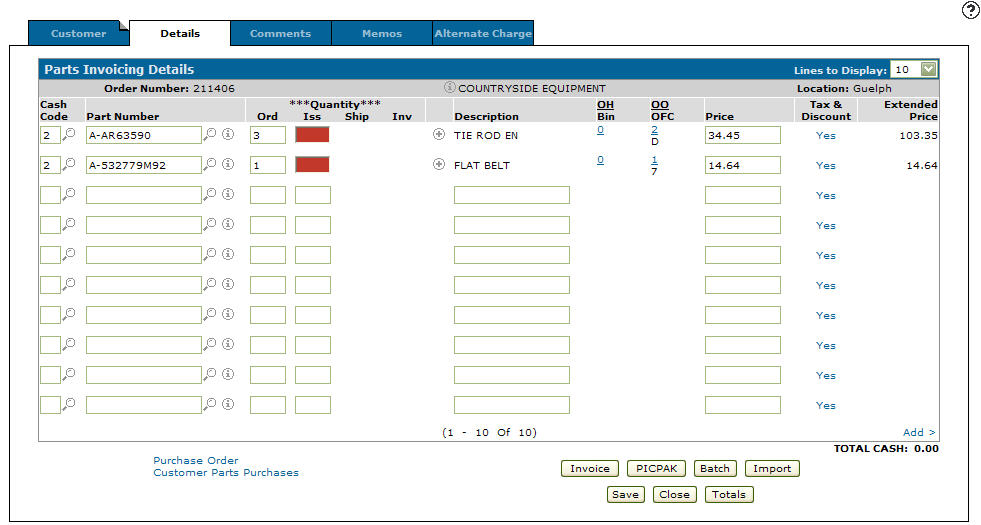
Updated Parts Invoicing Details tab
For more detailed information about each column and entry on the Parts Invoicing Details tab, review the IntelliDealer Online Help.
-
Once you have finished adding parts to the invoice you can complete your work in many possible ways:
To Do This Invoice all the parts and print the invoice. Click the Invoice button. Create and print a Packing Slip. Click the PICPAK button. Produce an invoice during the next billing run. Click the Batch button. Import a parts list from another source. Click the Import button. Save changes to the invoice and continue working and refreshes the fields on the screen. Click the Save button. Save changes to invoice and exit. Click the Save/Exit button. Close the invoice without saving changes. Click the Close button. Display charge, cash, warranty, tax, and discount totals for both the requisition and the invoice. Click theTotals button.