Configuration: CNH Data Exchange Platform
Use this screen to authorize CNH Data Exchange Platform (DEP) communications by adding your dealer credentials.
Topics in this section are:
See also:
Prerequisites
-
Feature 6429 - CNH Data Exchange Platform must be enabled
-
A User ID from CNH which has access to eWarranty.
Configuring the CNH DEP
-
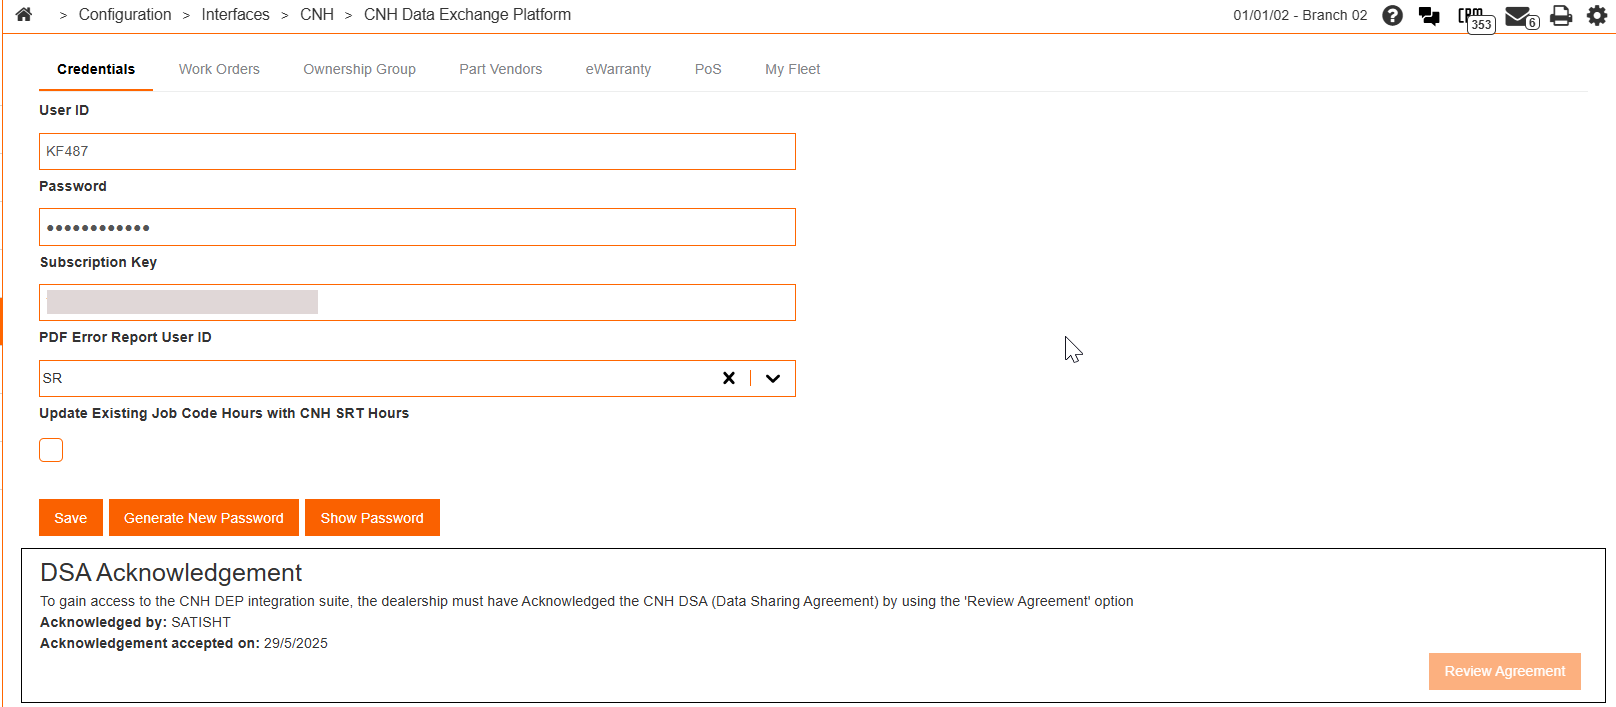
Ensure the correct credentials are provided on the Credentials screen at Configuration > Interfaces > CNH > Credentials.
-
Navigate to Configuration > Interfaces > CNH > CNH Data Exchange Platform.
-
Fill in these fields:
-
PDF Error Report User ID—select an IntelliDealer user ID from the drop-down. The selected user receives a PDF report from the nightly and manual CNH DEP processes (for example, work order, parts, and equipment invoice transmits). The report confirms successful transmissions and lists any errors that occurred so the recipient can follow up. Choose a user who actively monitors the CNH integration, such as the system administrator or the CNH integration owner. The user must already exist in IntelliDealer. If no user is configured, review run status from Administration > Settings > Batch Jobs instead.
-
Update Existing Job Code Hours with CNH SRT Hours—if selected, when CNH SRT (Standard Repair Time) job codes are imported into a Work Order or Work Order Quote through the CNH: SRT Codes Lookup, any matching job code that already exists in IntelliDealer has its allotted hours overwritten with the SRT hours returned by CNH. If cleared, the existing job code keeps its current hours and the SRT hours returned from CNH are not applied to it. Enable this option when you want CNH job code hours to stay in sync with CNH's published repair times rather than using locally adjusted hours. This setting only affects the hours field; other job code details continue to follow the normal import behavior.
-
-
Click Save. Then click the Work Orders tab.
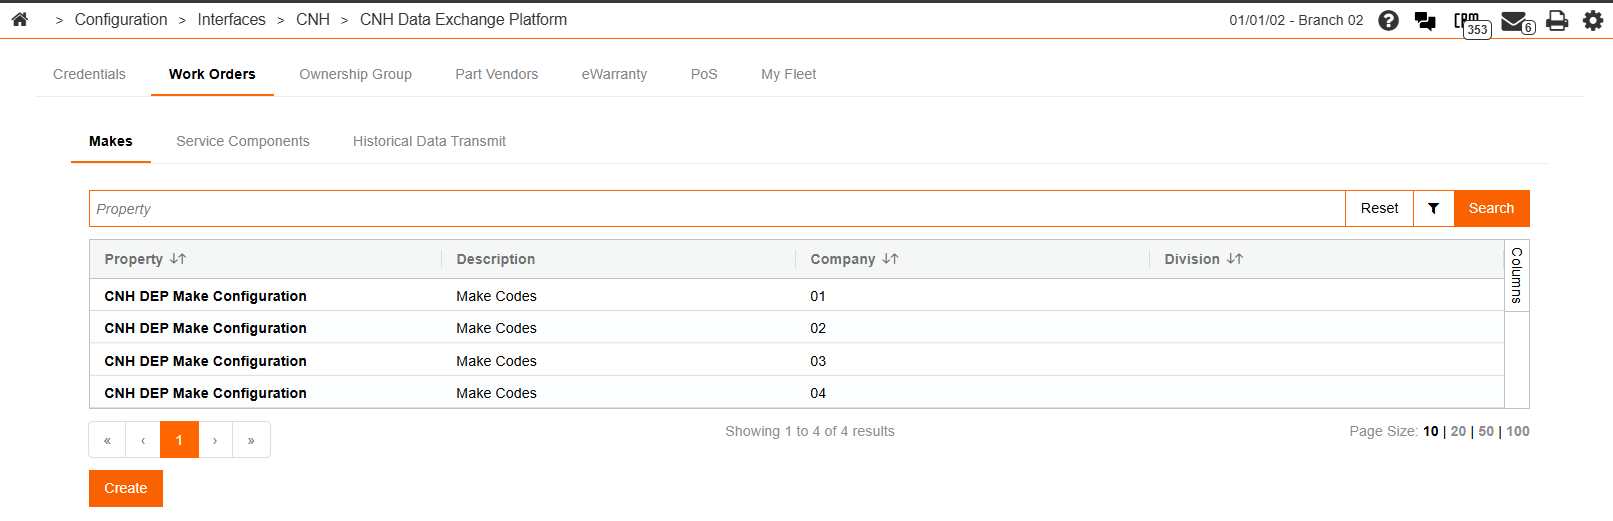
On the Makes sub-tab, you specify the data to be transmitted to CNH.
-
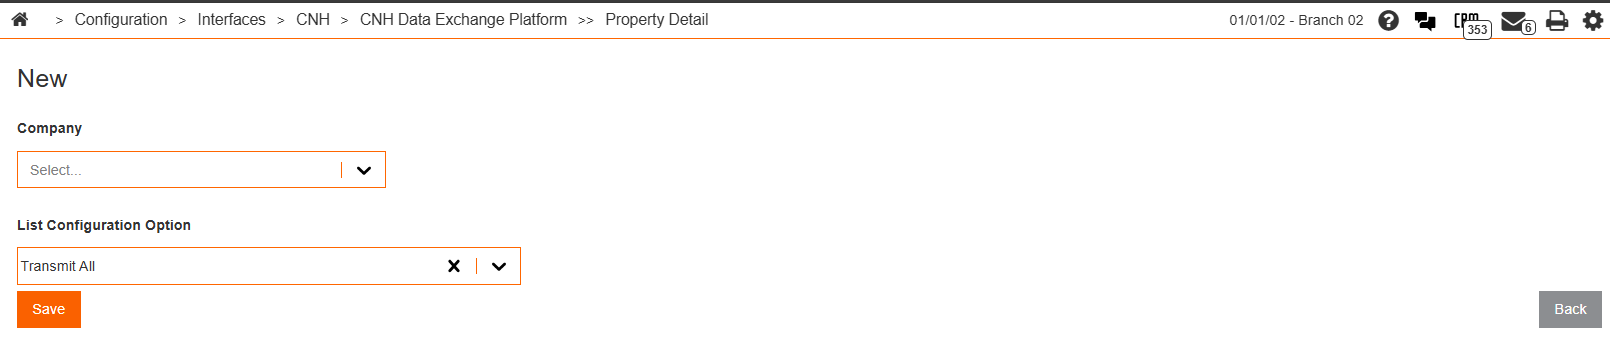
Click Create.
-
Select a Company from the drop-down. Then select a List Configuration Option. The options are:
-
Transmit All—if selected, data is transmitted for all makes of equipment. Configuration on this screen is complete and you can now click Save.
-
Transmit All Excluding Configured Options—use this option to specify a list of equipment make codes that should be excluded from the work order transmit.
-
Transmit Only Configured Options—use this option to specify which equipment make codes should have work order data transmitted.
-
-
In the last field, select the makes to be included or excluded. You can select makes from the drop-down, or enter text into the field.
-
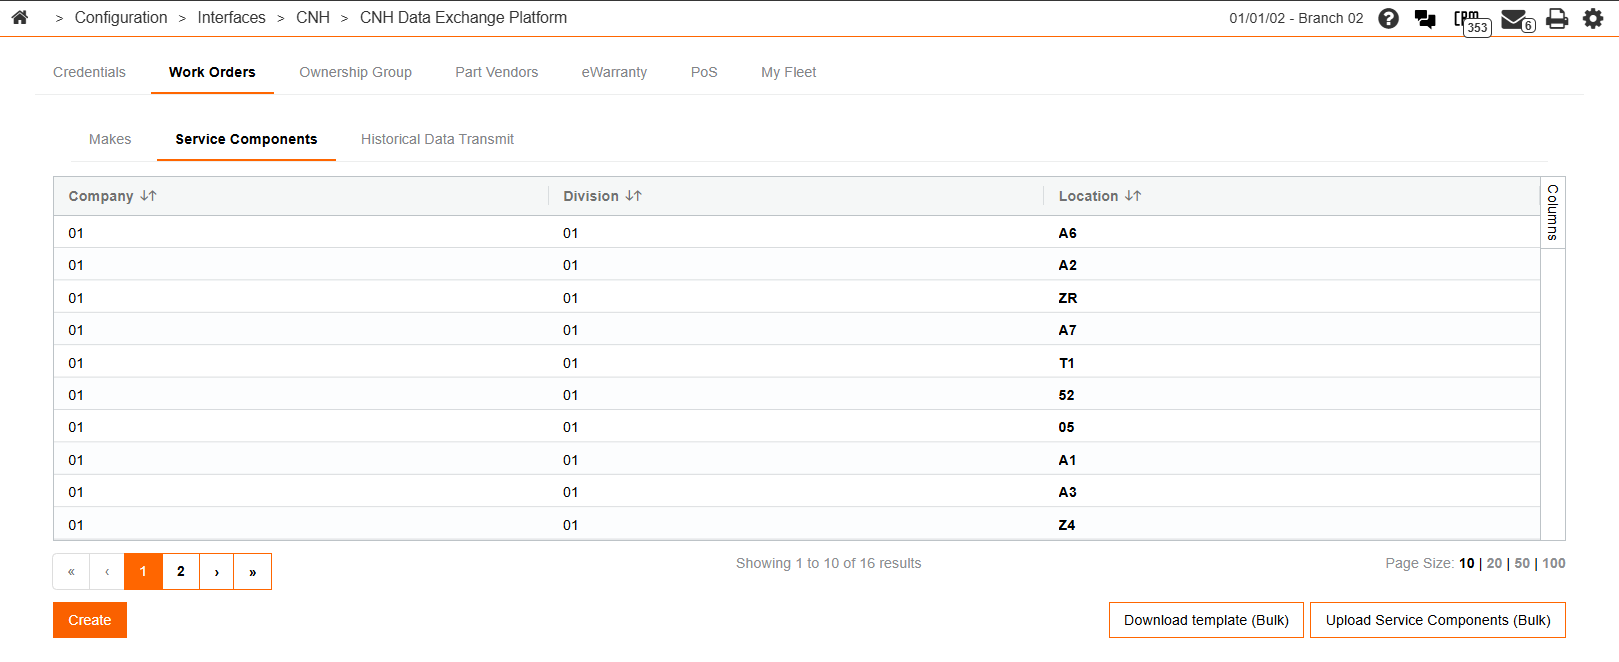
On the Service Components sub-tab, you can track miscellaneous charges on CNH equipment units.
You map IntelliDealer part numbers to CNH service components by location. Use the grid to add or edit rows individually, or use bulk download and upload to maintain many mappings at once.
Use these buttons to complete your work on the Service Components sub-tab:
Button Description Download template (Bulk) Downloads an Excel workbook of the current service component mappings. The file name is cnh-service-component-mapping.xlsx. The workbook includes columns Company, Division, Branch, Part Number, and CNH Service Component. The CNH Service Component column uses a drop-down list so each value matches a valid CNH option. When the download starts, a success message appears. Upload Service Components (Bulk) Opens a dialog where you select a .csv file. The file must include a header row with columns Company, Division, Branch, Part Number, and CNH Service Component. After you choose a file, IntelliDealer submits a batch job to validate and apply the data, and a message confirms that the batch job was submitted. To build a file from the Excel template, edit the workbook and use Save As to save a comma-separated values (.csv) file, then upload that file with Upload Service Components (Bulk). Validation is all-or-nothing: if any row is invalid, none of the rows from that file are applied. When the job completes, open Administration > Settings > Batch Jobs to review the job and read any validation or processing details in the job information for that run.
Each CNH Service Component value in the upload file must match one of these names (spelling and punctuation as shown):
-
Extra Charge
-
Material
-
Travel
-
Freight
-
Antifreeze
-
Oil
-
Refrigerant
-
Tire
-
Diagnostics / Electronic Service Tool
-
Disposal Fee
-
Miscellaneous
-
Inspections
-
Dynamometer
-
Rental
-
Lease
-
Sublets
-
Sublet as Indicator
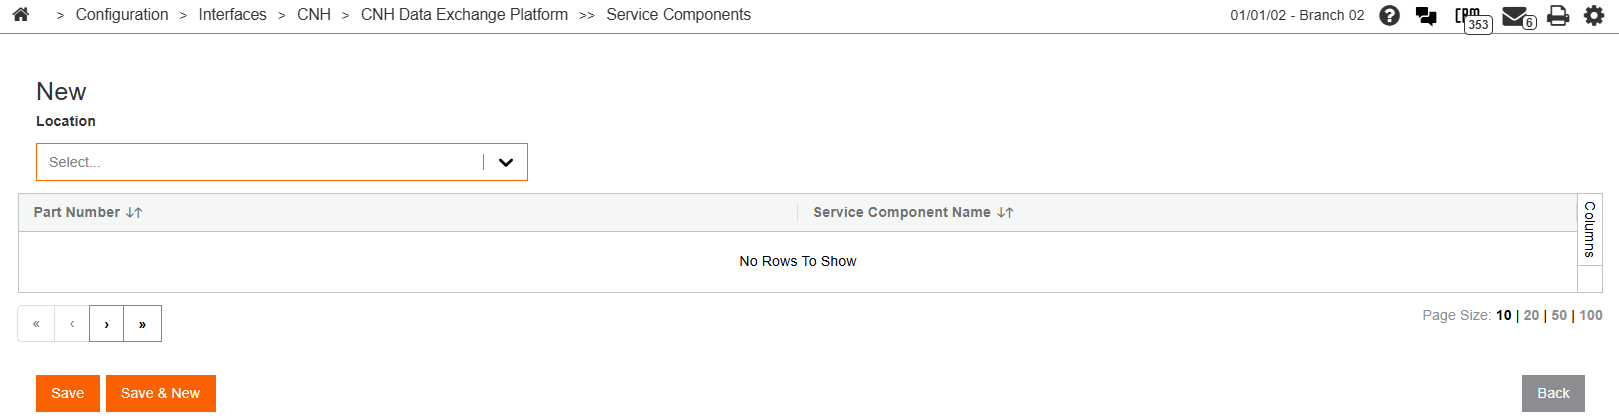
Click Create to open a window where CNH equipment units can be added by Location.
-
-
Click Save, then click the Ownership Group tab.
On this tab, you configure the dealership's account ID that are used in the work order data transmit.
-
Click Create.
-
Select the Division which you are configuring for DEP, then enter your CNH primary Ownership Group account.
If you are unsure, you can confirm this information with CNH during the onboarding process.
-
Click Save, then click the eWarranty tab.
-
You can configure the behavior of the CNH eWarranty interface using these checkboxes:
-
Automatically Search PIPs/PPP on Work Order—if enabled, the system notifies the user when a unit has a PIP (Product Improvement Program) or PPP (Purchased Protection Plan) available.
-
By default, the search uses the machine's serial number. You can enable one or more of these additional serial number fields: Engine Serial Number, Transmission Serial Number, and Sound Guard Serial Number.
Tip: Additional serial number searches can add time to searches when looking for PIPs/PPP information. Unless you require the additional serial number fields, it is recommended to leave these unchecked.
-
-
To define the equipment make codes for which the interface should lookup the PIP/PPP, click the Create button to add a new record.
-
Select the Division you are configuring, then search for or enter the make code for the CNH equipment that you are adding to the eWarranty searches.
-
Click one of the Save buttons.
-
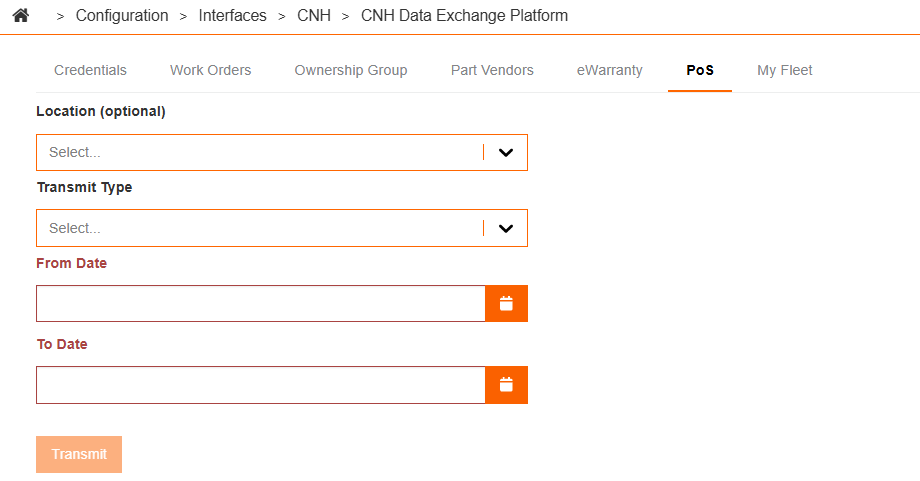
On this tab, you submit a manual job to transmit parts or equipment invoice data to CNH for a date range. Fill in these fields:
-
Location—optional. Select a company, division, and branch to limit the transmit to that location. If you leave this blank, the job runs for all locations.
-
Transmit Type—select PARTS , WHOLE_GOODS or ALL to choose whether parts invoice data or equipment (whole goods) invoice data is transmitted.
-
From Date—the start date of the date range for the transmit.
-
To Date—the end date of the date range for the transmit.
Click Transmit. The system submits the job; when the job is queued, a success message appears. The actual file is created and sent to CNH by a batch process.
The data is delivered through Azure Event Hub, in the same fashion as the work order historical transmit.
Use this when you need to provide a historical extract or back-fill point of sale invoices outside the standard DEP transmit process. Fill in these fields:
Click Transmit. The system submits the job; when the job is queued, a success message appears. To cover more than six months (for example, several years of history), run additional transmits. Set To Date to the end of each earlier period so each run's six-month window lines up with the next without gaps or overlaps.
See also: Historical Work Order Data Transmit for the equivalent work order historical pattern.
-
-
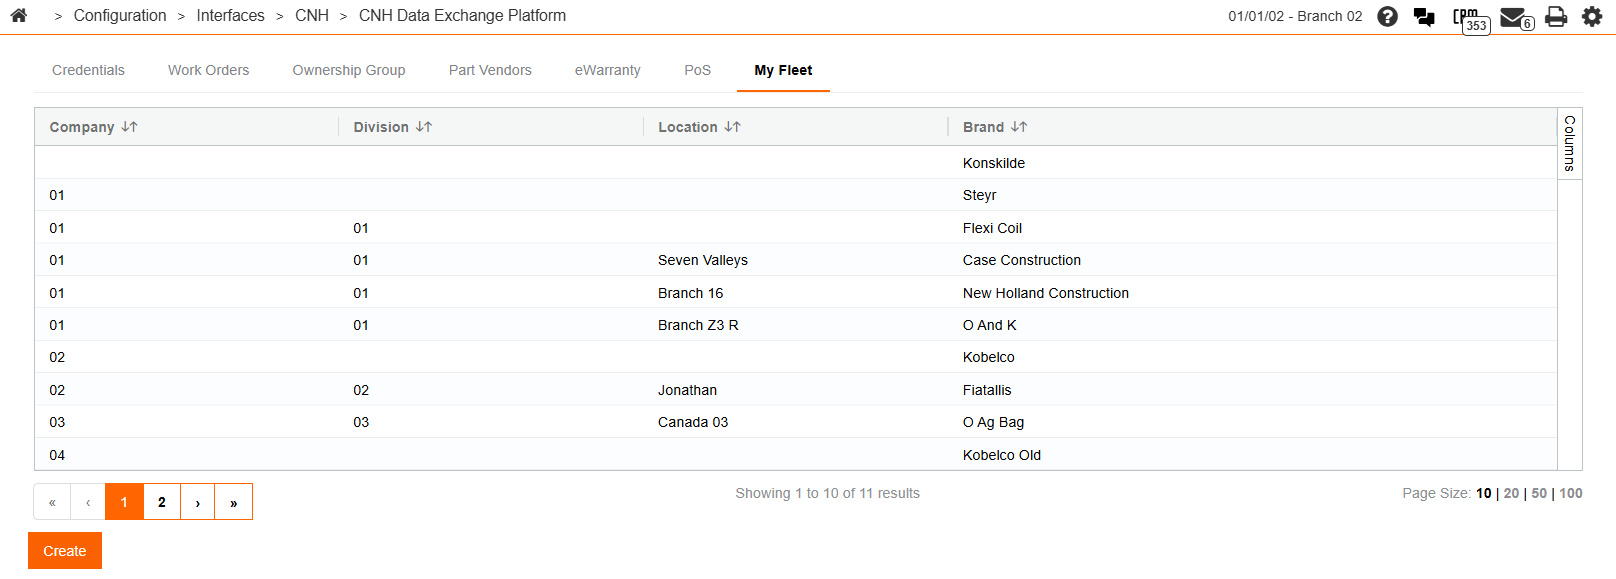
Click the My Fleet tab.
On this tab, you configure the default CNH brand used when users open CNH My Fleet. The default brand is stored per location (company, division, and branch). The grid lists each location and its default brand.
Click Create to add a new default brand. In the window, select Company, Division, and Location, then select a Brand from the drop-down (for example, Case IH, New Holland, Steyr).
Click the Save button to store the setting.
You can edit or delete existing rows from the grid.
When a user opens CNH My Fleet from the menu, an Equipment Profile, or a Work Order, the system uses the default brand for that user's location so the correct CNH brand data is displayed.


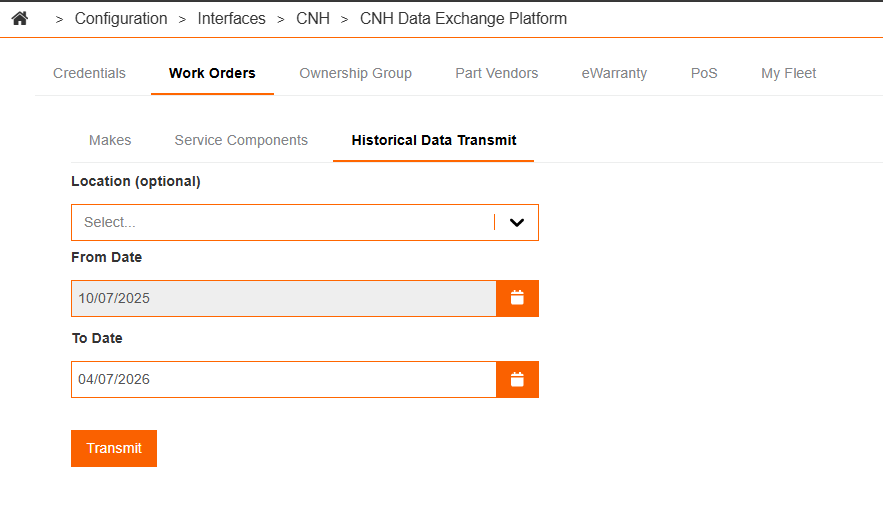
Historical Work Order Data Transmit
Use the Historical Data Transmit sub-tab on the Work Orders tab to submit a job that sends closed work order history to CNH for a rolling six-month window.
Use this when you need to provide a historical extract or backfill work orders outside the standard DEP transmit process.
-
Navigate to Configuration > Interfaces > CNH > CNH Data Exchange Platform.
Click the Work Orders tab, then click the Historical Data Transmit sub-tab.
-
Fill in these fields:
-
From Date—read-only. This date is always six months before To Date so each run covers at most six months of closed work orders.
-
To Date—the end date of the range. You cannot select a date after today. When you change To Date, From Date updates to six months before the new To Date.
-
-
Click Transmit. The system submits the job; when the job is queued, a success message appears. CNH receives the extract through the agreed historical delivery path.
Each transmit uses the same work order rules you configure on the Work Orders tab: equipment makes on the Makes sub-tab determine which closed work orders are included, and Service Components mapping applies when the payload is built. Lines that are not mapped to a service component are sent as they are for the standard work order transmit.
To cover more than six months (for example, several years of history), run additional transmits. Set To Date to the end of each earlier period so each run’s six-month window lines up with the next without gaps or overlaps.
See also: Configuring the CNH DEP (Work Orders tab), and PoS tab for the comparable manual transmit pattern for parts and whole goods invoices.
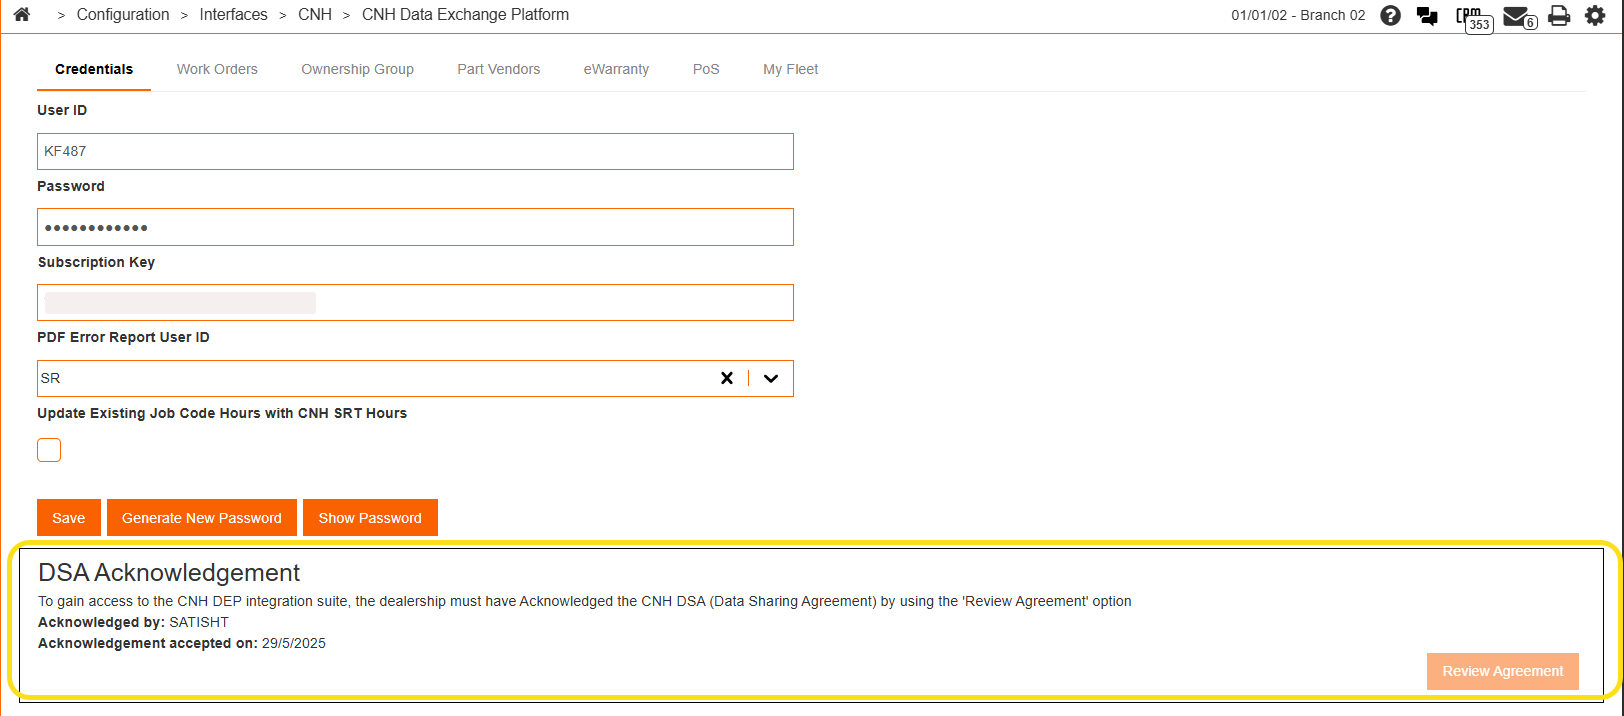
DSA Acknowledgment
At the bottom of the screen is the DSA Acknowledgment. Please review the text by clicking the Review Agreement button. Review of this agreement is required for work order data to be transmitted to CNH.
Post-requisite
The dealer must ensure that they have included the CNH Privacy Statement on their quotes and invoices.
If you wish to embed a QR code directly into the overlay, contact the IntelliDealer forms team for a quote. Or, follow the steps below to embed the privacy URL into invoices and quotes. You cannot embed a QR code with this method.
-
Navigate to Configuration > General Ledger > General > Invoice Quote Messages.
The Invoice/Quote Messages screen opens.
-
Select the Equipment Invoice/Quote link.
The Equipment Invoice/Quote Message screen opens.
-
Add the following text:
“By making this purchase, you acknowledge and agree to CNH Industrial’s privacy practices as described in our Privacy Notice available here (https://www.mycnhistore.com/us/en/default/privacynotice).”
Or, for dealers in Quebec:
"En effectuant cet achat, vous reconnaissez et acceptez les pratiques de CNH Industrial en matière de confidentialité telles que décrites dans notre declaration de confidentialité disponible ici (https://www.mycnhistore.com/ca/fr/default/privacynotice)."