VitalEngage Text: Configuration
Use this page to configure phone numbers that can receive text messages. VitalEngage Text is a messaging service that allows you to connect with customers via one-way and two-way SMS and MMS messages. See VitalEngage Text.
To access the Alert Phone Number Configuration screen, navigate to Configuration > Interfaces > VitalEngage Text > Alert Phone Number Configuration.
Pre-requisites:
-
The location must have phone lines provisioned for texting.
-
The dealer must have purchased VitalEngage Text and be licensed for feature 6267
Topics in this section include:
One Phone Number, Multiple Configurations
You can configure multiple locations or users to a single phone number. Some scenarios that could use this type of configuration are:
-
A 1-800 number for sending text messages to customers via the Alert Management System, for example to notify them that their warranty is about to expire. In this instance, you want to use the same number for all locations to provide cohesive branding for your company.
-
A team of service technicians all use the same number so everyone on the team is aware of customer interactions.
However, a user or location cannot be configured with multiple numbers.
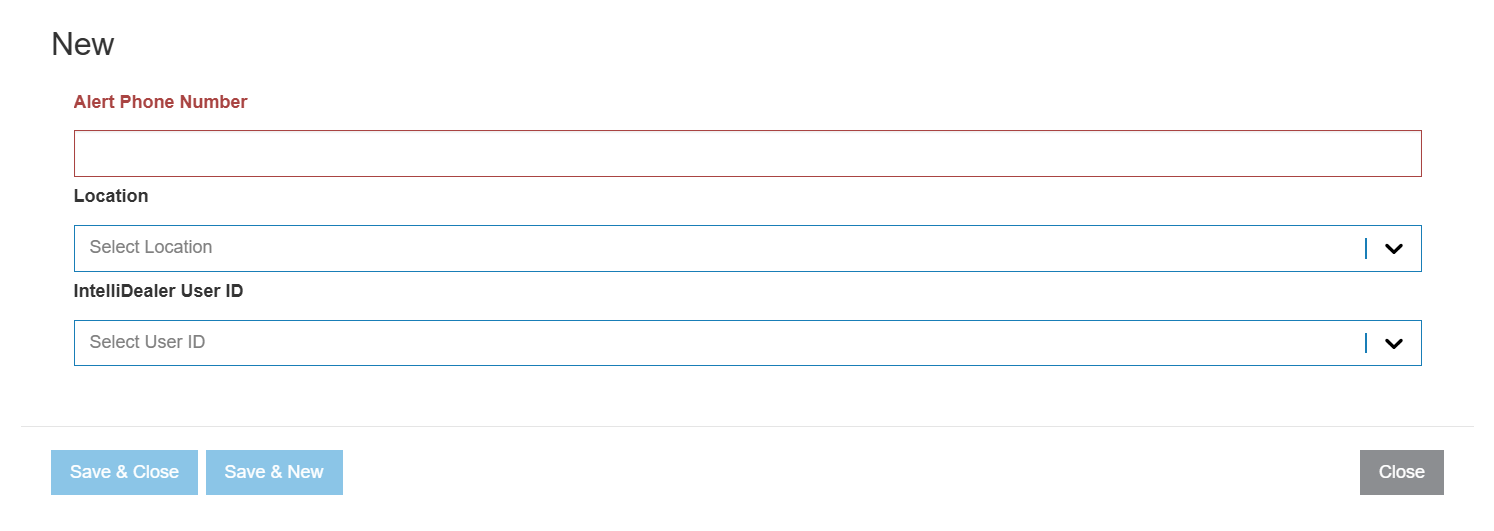
Adding a New Alert Phone Number
-
Navigate to Configuration > Interfaces > VitalEngage Text > Alert Phone Number Configuration.
-
Click Create.
-
Enter the phone number that is to receive the alerts.
-
Select the Location or IntelliDealer User ID of the person using that phone number.
-
When you are done, click one of these buttons:
-
Save & Close—saves your changes and exit.
-
Save & New—saves your changes and lets you enter another phone number.
-
Close—exits without saving.
-
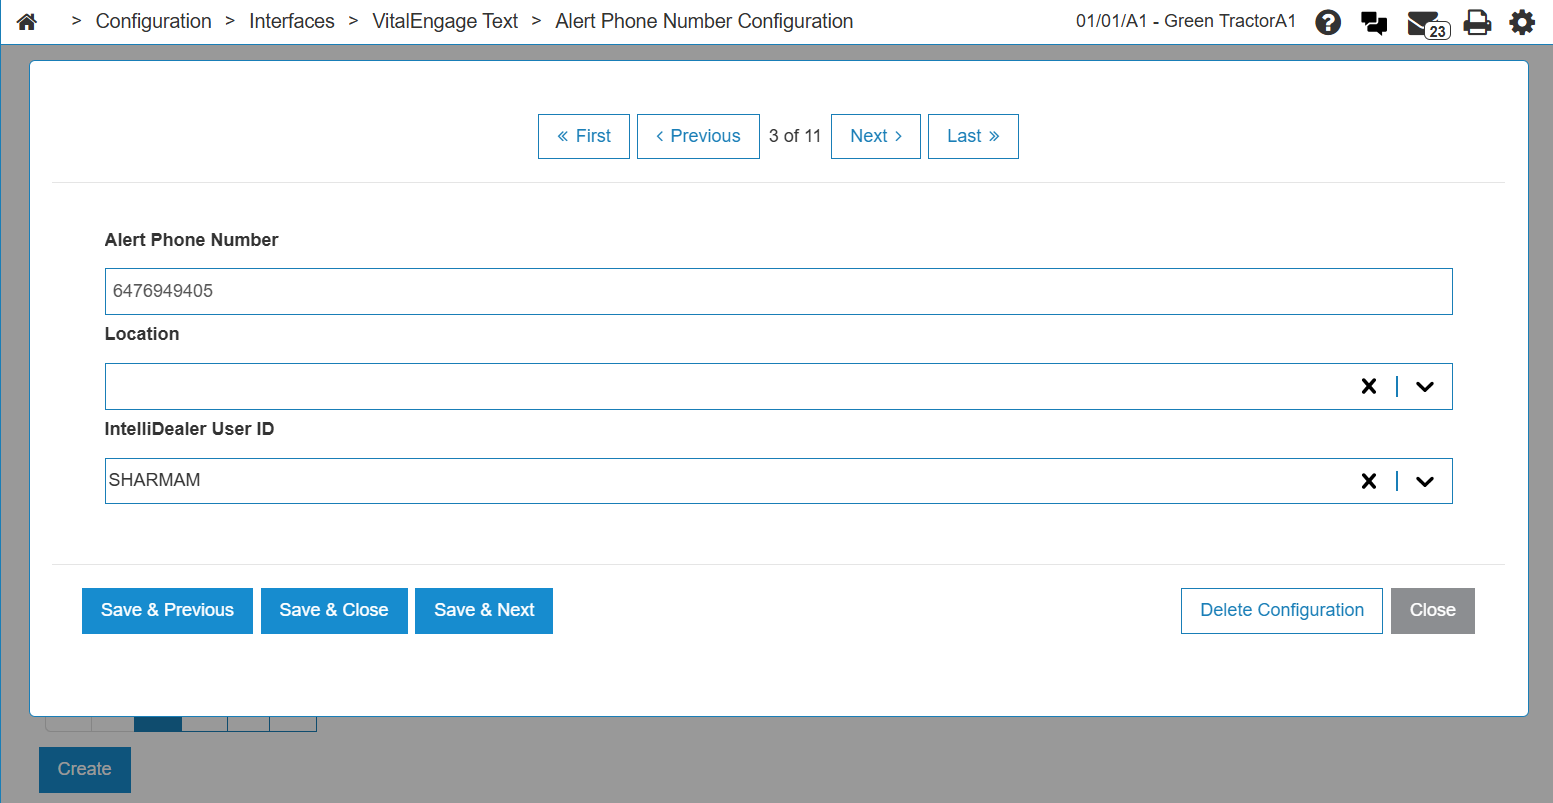
Editing an Alert Phone Number Configuration
-
Navigate to Configuration > Interfaces > VitalEngage Text > Alert Phone Number Configuration.
-
Click the edit icon
 next to a name.
 -
Adjust the settings as required, then click one of these buttons:
-
Save & Previous—saves the changes on this entry and navigates to the one before it.
-
Save & Close—saves the changes and closes the window.
-
Save & Next—saves the changes on this entry and navigates to the one after it.
-
Delete Configuration—deletes this configuration.
-
Close—exits without saving.
-
Auto Reply Messages
Use this screen to view and edit messages that are automatically sent during a configured time period. An auto reply message is only sent once during a 24 hour period.
The fields on the Auto Reply Messages screen are:
| Field | Description |
|---|---|
| Auto Reply Description | A description of the auto reply message. |
| Auto Reply Schedule | When the message is automatically sent. |
| Date Created | The date the message was created. |
| Created By | The user who created the message. |
| Status | Whether the message is Active or Inactive. |
Click the Add Auto Reply Message button to add a new message. See Adding a New Auto Reply Message.
Click Close to exit this window and return to the Alert Phone Number Configuration screen.
Select one or more messages, then click one of these buttons:
-
Edit Selected—opens the selected message for edit.
-
Delete Selected—deletes the selected message immediately. If multiple messages are selected, all selections are deleted.
Auto Reply Messages Cannot Overlap
The schedules of the auto reply messages cannot overlap. For example, say you have scheduled an out-of-office auto reply that runs from Monday to Friday from 8PM until 12AM. Now you want to create a new auto reply message because the dealership is closing early on Fridays and you want to schedule it to run until 12PM until 12AM.
The new Friday message overlaps with the existing out-of-office message so IntelliDealer displays an error message at the top left of the screen when you try to save. The message tells you which auto-reply the new message overlaps with, but not what the overlapping timing is. You must open the existing message to determine what the overlap is, and try again.
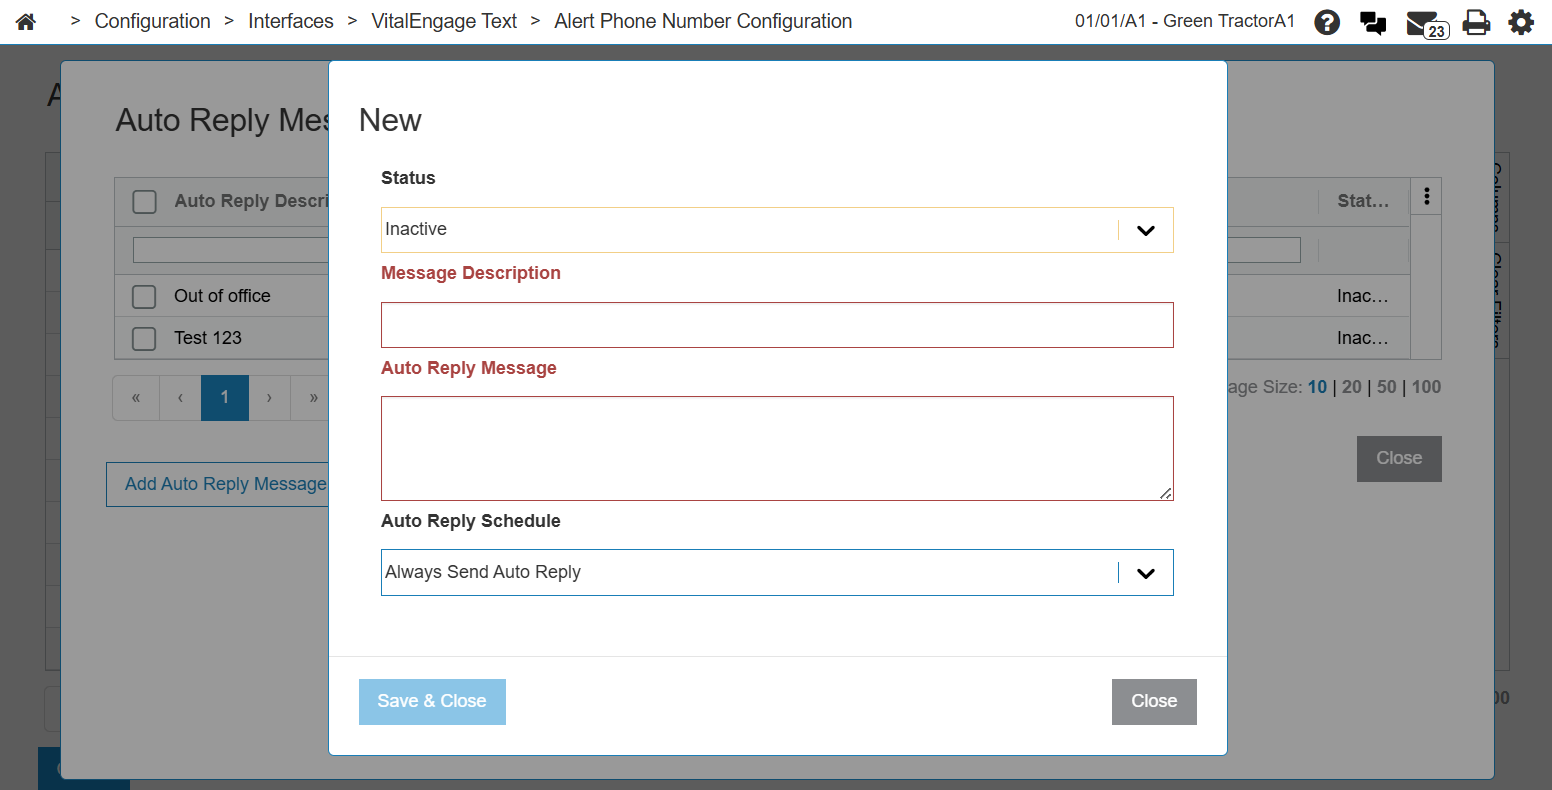
Adding a New Auto Reply Message
-
Hover the mouse over a phone number and select Auto Reply Messages.
-
Click the Add Auto Reply Message button.
-
Fill in these fields:
Field Description Status Set to either :
- Active—message comes into effect immediately after saving. Auto replies for this message are sent according to the configured schedule.
- Inactive—this message is never sent regardless of the schedule.
Message Description A brief description of the message used to identify it in the listing. Auto Reply Message The message sent to customers when the Status is Active. Auto Reply Schedule Use the drop down to select one of these options:
- Always Send Auto Reply—this message is always sent in reply to a customer. Useful for toll free numbers.
- Send Auto Reply on Schedule—opens the Schedule field.
Schedule Set the time and day(s) of the week during which the message should be sent. -
Click Save & Close to save your changes, or click Close to exit without saving.
Notification Settings
Use the Notification configuration to receive a notification when a customer sends a message within IntelliDealer using VitalEngage Text. You can chose to receive an email or have a text message sent to your cell phone. One notification is sent for each new message.
Note: This menu option is only available to User configurations, not Locations.
| Field | Description |
|---|---|
| Status |
Set to either :
|
| Notification Method |
Options are Email or SMS /Text. |
|
Email Address Mobile Number |
The contact details for the chosen notification method. |
| Notification Recipient | The name of the person to receive this configured notification. |
| Notification Type |
Since multiple users can be configured to one number, use this option to filter the notifications. Options are:
|
| Frequency |
Options are:
|
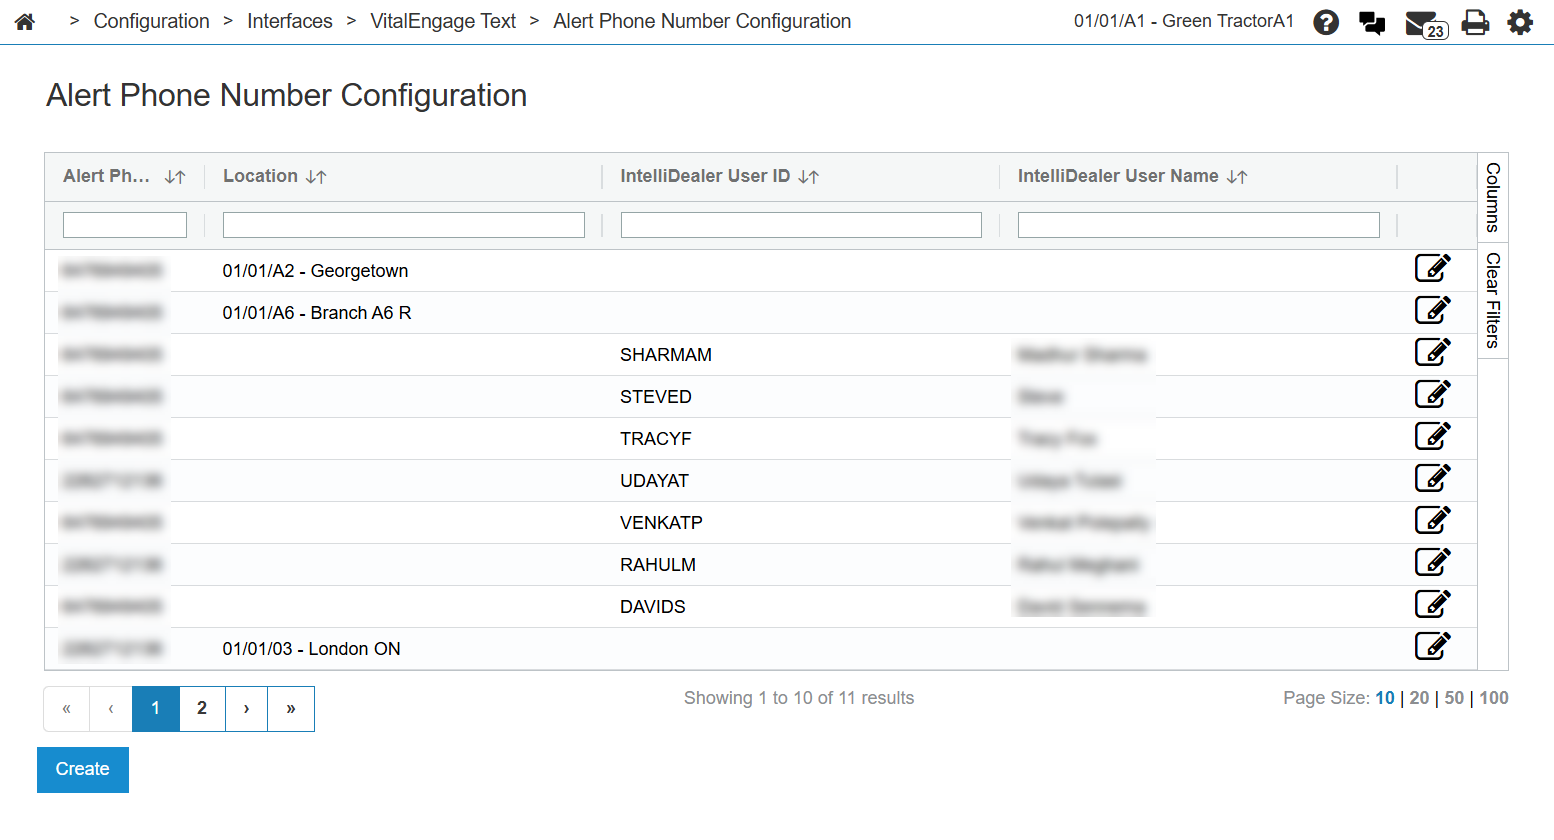
Screen Description
The search fields on the VitalEngage Text Configuration screen are:
| Search Field | Description |
|---|---|
| Alert Phone Number | The phone number to receive the alert message. |
| Location | The dealership location. Setting a location activates the location within the Alert Management System. Location is mandatory when no IntelliDealer user ID is specified. |
| IntelliDealer User ID |
The user's ID number in IntelliDealer. User ID is mandatory when no location is specified. User ID is optional when a location is specified. |
| IntelliDealer User Name | The user's name as configured in IntelliDealer |
Click Create to add a new phone number to the list. See Adding a New Alert Phone Number
Click the edit icon ![]() next to a name to open a phone number for edit. See Editing an Alert Phone Number Configuration.
next to a name to open a phone number for edit. See Editing an Alert Phone Number Configuration.
Hover the mouse over a phone number and select one of these options:
-
Auto Reply Messages— view and edit messages that are automatically sent. See Auto Reply Messages
-
Notification Settings—not available when a location is set for a number. See Notification Settings.
-
VitalEngage Text Conversation History—allows users with the 995 Users - View all VitalEngage Text Conversation History security switch enabled to view the history of all conversation for a particular number. See VitalEngage Text Conversation History.