Adding a Task/Action to Task Tracker
-
From any IntelliDealer screen, move the cursor over Quick Links and select Task Tracker from the pop-up menu.
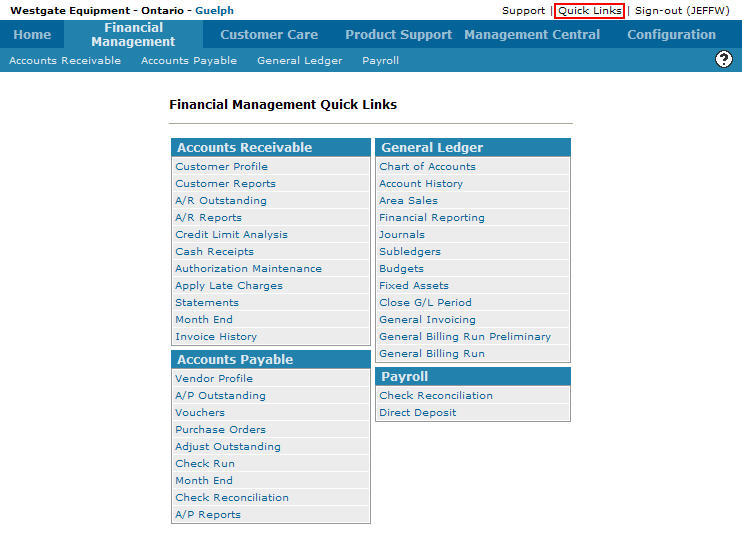
Financial Management Quick Links screen
-
The Task Tracker screen will appear.
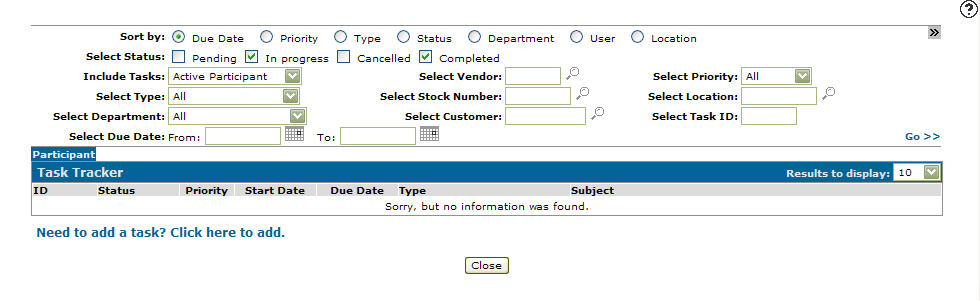
Task Tracker screen
-
On the Task Tracker screen, click on the Need to add a task? Click here to add link.
The Task/Action tab will appear.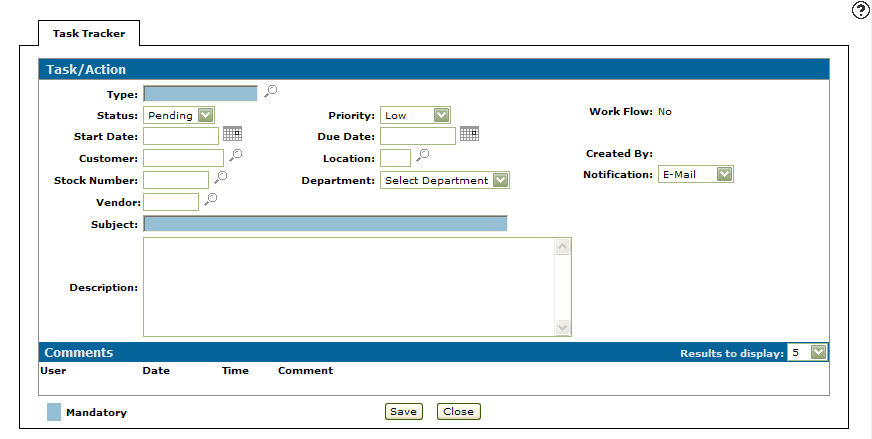
Task/Action tab
-
On the Task/Action tab, click the Search
 icon next to the Type field and select a task type from the Type Selection screen.
Note:
The Type field is a list of preset task types which may or may not consist additional custom screens. -
Select a task Status from the drop down list either pending or in progress.
-
Select a task Start Date.
-
(OPTIONAL) Enter the number of the Customer involved with the task.
-
(OPTIONAL) Enter a Stock Number.
-
Enter a Subject line outlining the task.
-
(OPTIONAL) Enter a task Description.
-
(OPTIONAL) Select a task Priority from the drop down list high, medium and low.
-
Enter a task Due Date.
-
Enter a branch Location code.
- or -
Click on the Search icon and select a location from the Location Selection screen. -
Select the Department involved from the drop down list.
-
Select the Work Flow checkbox to activate the work flow function on the Participants tab.
-
Select a Notification method from the drop down list, by which all participants are notified about this task/action.
-
Click the Save button.
-
Once the task is saved, the Task/Action tab will refresh with any Custom screen displayed as a tab.
Note:
You must first create a custom screen within IntelliDealer Administration Create Page screen for a custom screen to appear as a tab option on the Task/Action tab.Note:
The task types that appear on the drop down list can be added or configured on the Task Types screen found by going through the Configuration Quick Links screen and selecting the Other link on the Miscellaneous list and by selecting Task Types from the drop down list.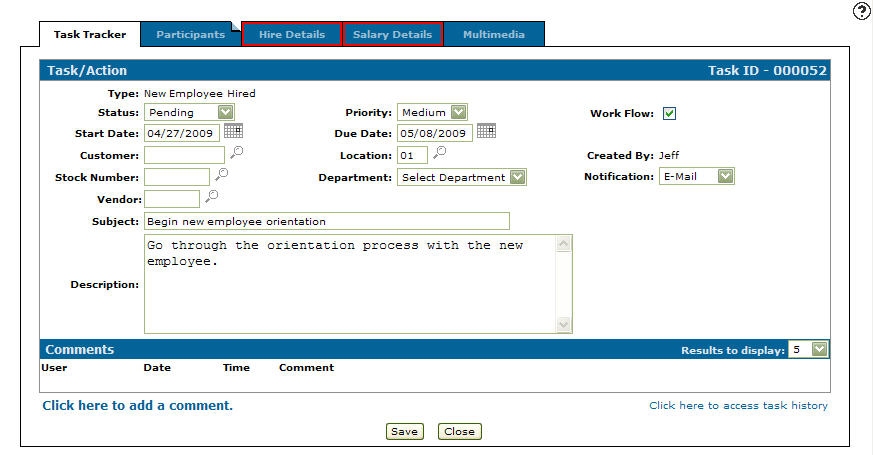
Updated Task/Action tab
-
Select the Participants tab.
The Participants tab will appear.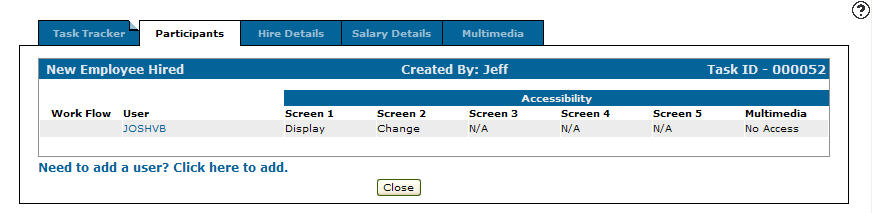
Participants tab
-
On the Participants tab, select the Need to add a user? Click here to add link.
The User Accessibility screen will appear.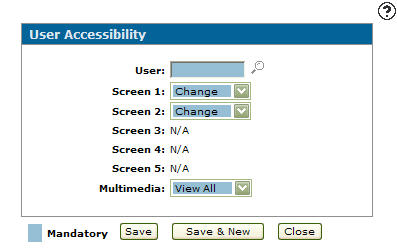
User Accessibility screen
-
On the User Accessibility screen, enter a User id.
- or -
Click on the Search icon and select a user from the User Selection screen.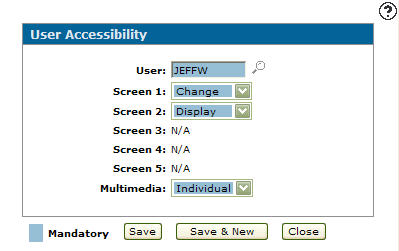
User Accessibility screen
-
On the User Accessibility screen, select the access level the user has on Screen 1 of the task.
-
Change: The participant has the ability to apply changes to the associated custom screen.
-
Display: The participant can only display the associated custom screen.
-
No Access: The participant has no access to the associated custom screen.
Note:
The Screen 2, 3, 4, and 5 fields will be accessible to set user access, depending on the number of custom screens associated with the selected task type. -
-
Select the access level the user has to Multimedia on the task's Multimedia tab.
-
View All: Allows the participant to view all added attachments.
-
Individual: Allows the participant to view only individual attachments.
-
No Access: The participant has no access to any of the attachments.
-
-
Click the Save button to save the user accessibility and return to the Participants tab.
- or -
Click the Save & New button to save the user accessibility.
The User Accessibility screen will refresh allowing you to add another user without closing the screen.Note:
At this point if you have previously created any Custom screen associated with your new task, click on the corresponding tabs at the top of the screen and fill out any appropriate information that may be required. -
On the Participants tab, click on the Multimedia tab.
The Multimedia tab will appear.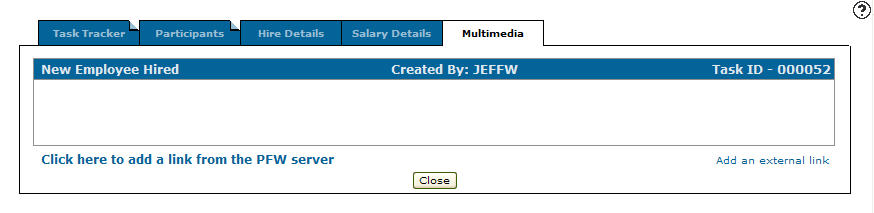
Multimedia tab
The Multimedia tab allows the user to attach any type of multimedia file to the task, for the purpose of presenting more information (e.g. equipment, parts, warranty documents, etc.).
-
Click on the Task Tracker tab.
The Task/Action tab will appear.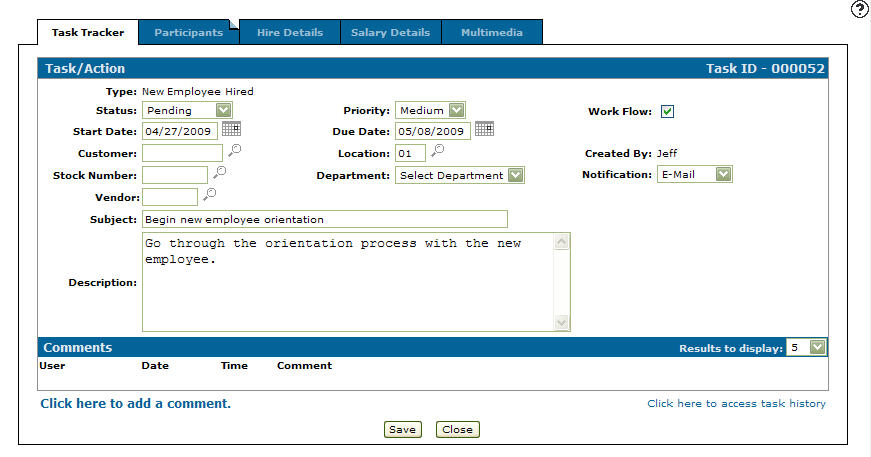
Task/Action tab
-
Click the Save button in order to create your new task.