Task/Action
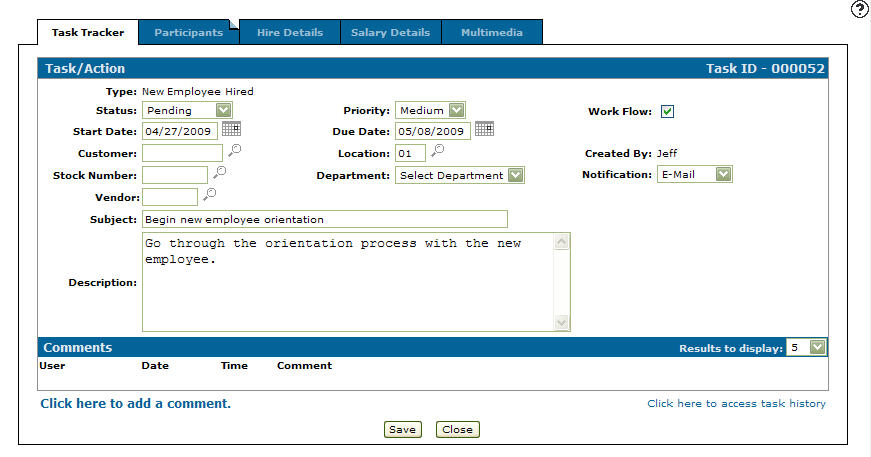
Use the Task/Action screen to add a task/action or edit a task/action.
The Task/Action screen is accessed from the Task Tracker screen by clicking the Need to add a task? Click here to add link.
Topics in this section are:
Adding a Task/Action to Task Tracker
Prerequisites: For a custom screen to appear as a tab option on the Task/Action tab, you must first create a custom screen on the IntelliDealer Administration Create Page screen.
-
Navigate to Quick Links > Task Tracker.
-
Click the Need to add a task? Click here to add link.
-
Fill in the fields referring to the table below.
-
Click Save.
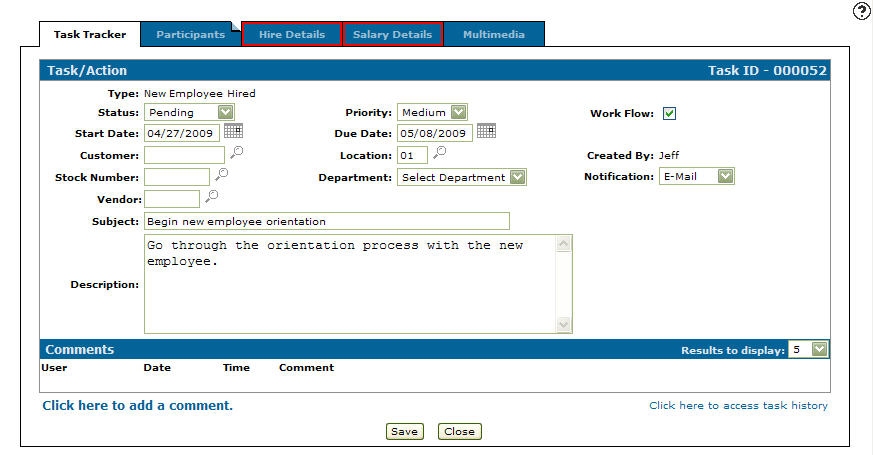
Once the task is saved, the Task/Action tab refreshes with any Custom screens displayed as a tab.
-
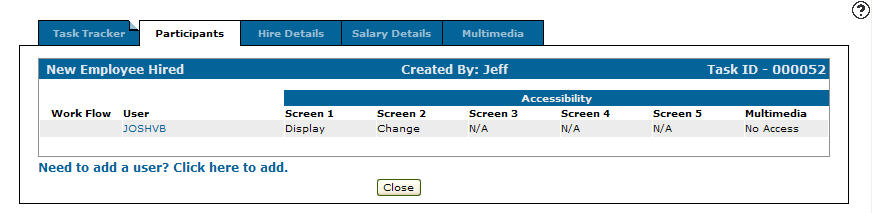
Select the Participants tab.
The Participants tab appears.
-
On the Participants tab, select the Need to add a user? Click here to add link.
The User Accessibility screen appears.
-
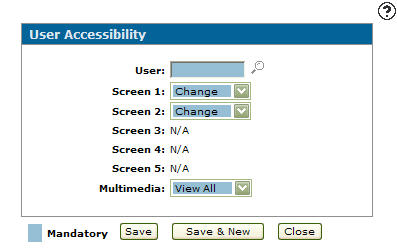
On the User Accessibility screen, enter a User id.
- or -
Click the Search
 icon and select a user from the User Selection screen.
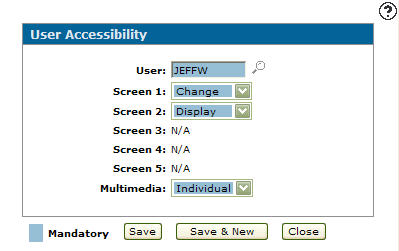
-
On the User Accessibility screen, select the access level the user has on Screen 1 of the task.
-
Change—the participant has the ability to apply changes to the associated custom screen.
-
Display—the participant can only display the associated custom screen.
-
No Access—the participant has no access to the associated custom screen.
Note: The Screen 2, 3, 4, and 5 fields are accessible to set user access, depending on the number of custom screens associated with the selected task type.
-
-
Select the access level the user has to Multimedia on the task's Multimedia tab.
-
View All—allows the participant to view all added attachments.
-
Individual—allows the participant to view only individual attachments.
-
No Access—the participant has no access to any of the attachments.
-
-
Click the Save button to save the user accessibility and return to the Participants tab.
- or -
Click the Save & New button to save the user accessibility. The User Accessibility screen refreshes allowing you to add another user without closing the screen.
Note: At this point if you have previously created any Custom screen associated with your new task, click the corresponding tabs at the top of the screen and fill out any appropriate information that may be required.
-
On the Participants tab, click the Multimedia tab.
The Multimedia tab appears.
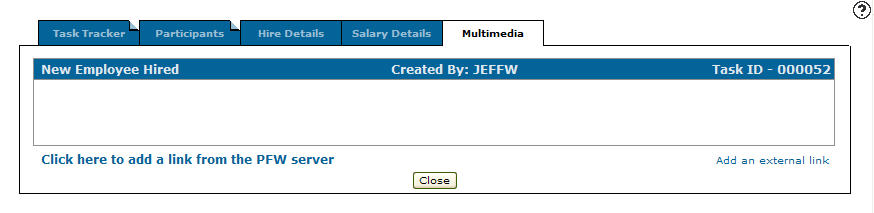
The Multimedia tab allows the user to attach any type of multimedia file to the task, for the purpose of presenting more information (e.g. equipment, parts, warranty documents, etc.).
-
Click the Task Tracker tab.
The Task/Action tab appears.
-
Click the Save button to create your new task.
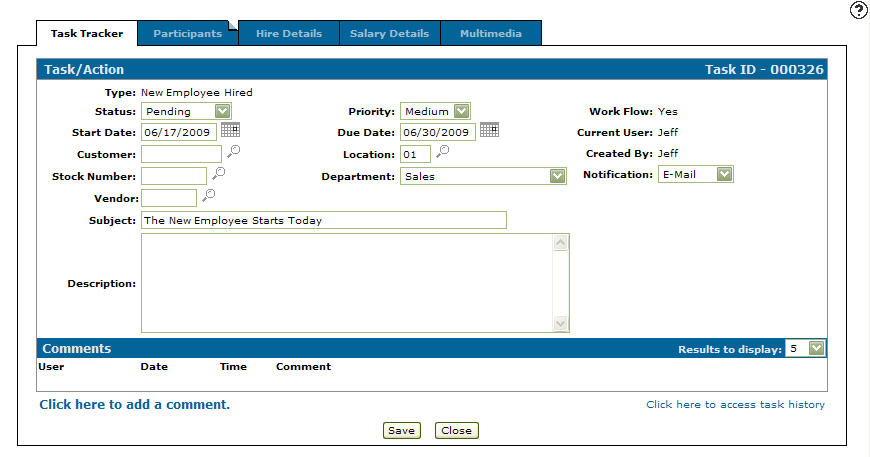
Starting the Workflow Process
-
On the Task Tracker screen, search for a task and open it by clicking its ID.
-
Click an ID.
-
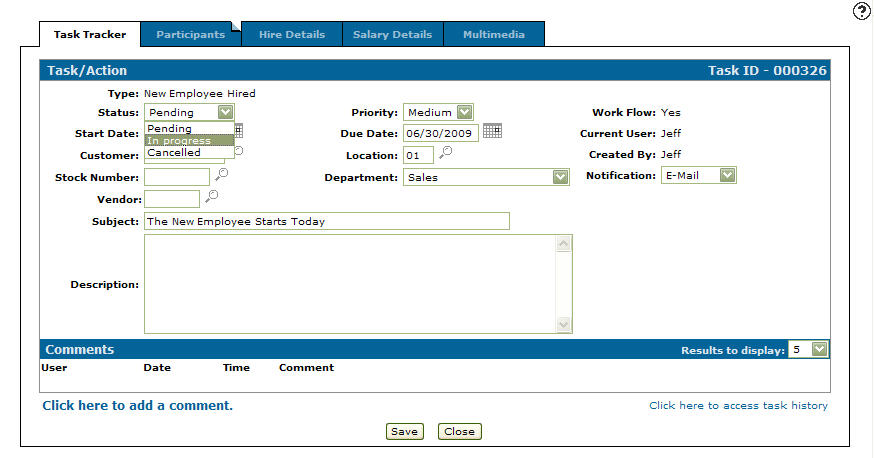
Select In progress from the Status drop down list.
-
Click Save.
The Additional Comments screen appears.
Note: The Save button is not visible if Can Only Change Prospect Customers switch is enabled.
-
Enter any additional messages regarding the task/action that you wish to send to the first participant on the work flow.
-
Click Send.
The work unit is sent to the first participant in the work flow along with any additional comments that you have entered. The participant receives an e-mail notification instructing them that the tasks/actions work unit is now in their hands and awaiting their immediate attention.
Screen Description
Fields on the Task/Action screen are:
| Field | Description |
|---|---|
| Template |
Search for a preset task template by clicking the Search You must first create a custom screen within IntelliDealer Administration Create Page screen for a custom screen to appear as a tab option on the Task/Action tab. The task templates that appear on the drop down list can be configured on the Task Templates screen found by going through the Configuration Quick Links screen and selecting the Other link on the Miscellaneous list and by selecting Task Template from the drop down list. |
| Status |
The task/action status.
|
| Start Date | The task/action start date. |
| Customer | The customer number. |
| Stock Number | The stock number of the equipment unit. |
| Vendor | The vendor number. |
| Employee | Key in or search for an employee ID. |
| Subject | A subject line briefly outlining the task/action. |
| Description | A detailed description outlining the newly created task/action. |
| Priority | The task/action priority (e.g. Low, Medium or High). |
| Due Date | The task/action due date. |
| Location | The branch location of the task/action. |
| Department | The department involved with the task/action. |
| Publish | If checked, indicates that any user, whether they are a participant in the task or not, can view the details of the task. |
| Work Flow | Indicates whether the task template selected is a work flow or not. |
| Current User | The user who is currently interacting with the selected task. |
| Created By | The user who created the task. |
| Notification |
The method by which all participants are notified about this task/action. Options include: an e-mail message or a message displayed using the IntelliDealer messaging function. |
The Comments section on the Task/Action screen allows you to add comments about the task/action.
Comments fields on the Task/Action screen are:
| Comments | |
|---|---|
| Field | Description |
| User | The user who added the comment to the task/action. |
| Date | The date the comment was added to the task/action. |
| Time | The time the comment was added to the task/action. |
| Comment | A brief comment about the task/action. |
Click a Comment to edit a task comment.
Click the Click here to add a comment link to add a task comment.
Click the Click here to access task history link to view the history on the selected task.
Buttons on the Task/Action screen are:
-
Accept—moves the selected task to the next participant as defined in the work flow setup.
-
Reject—allows a participant to reject the task or work unit, passing it back to a previous participant.
-
Send Reminder—sends the next participant in the task work flow a reminder about their current task. This button appears only for the creator of the task/action.
-
Save—saves changes made to the Task/Action screen. This button is not visible if Can Only Change Prospect Customers switch is enabled.
-
Delete—deletes a completed or cancelled task from the system. This button appears only after a task's status is changed to completed or cancelled. The amount of months a task remains in the system before being purged is set up on the Task Tracker Months field on the DIVTAB table.
-
Close—closes the Task/Action screen without saving changes and returns to the Task Tracker screen.
Security: 996 - Customer Profile
Revision: 2026.01