Creating a New Cash Receipt
Create a new cash receipt to record payments on an account.
-
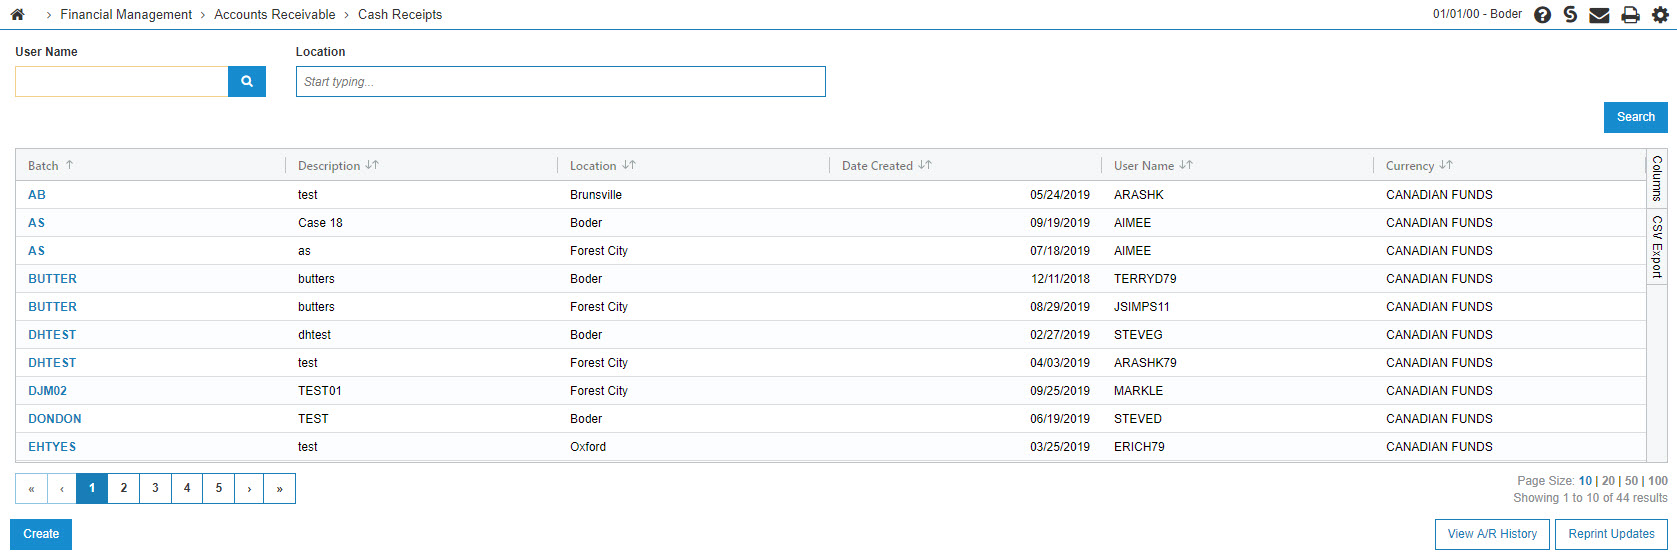
Navigate to Financial Management > Accounts Receivable > Cash Receipts.
-
Click Create.
-
Enter a Batch Number for the cash receipt.
Batch numbers may be any combination of alpha-numeric characters. VitalEdge recommends a combination of date and user initials (e.g. 1031JP) to facilitate simpler record keeping.
-
Enter a Description of the cash receipt.
-
Select the Location where the cash receipt is being entered.
-
Click the Save button to create a batch and continue.
The Cash Receipts – Invoices screen appears in a new browser window displaying a list of customers who have an outstanding accounts receivable balance with your dealership.

-
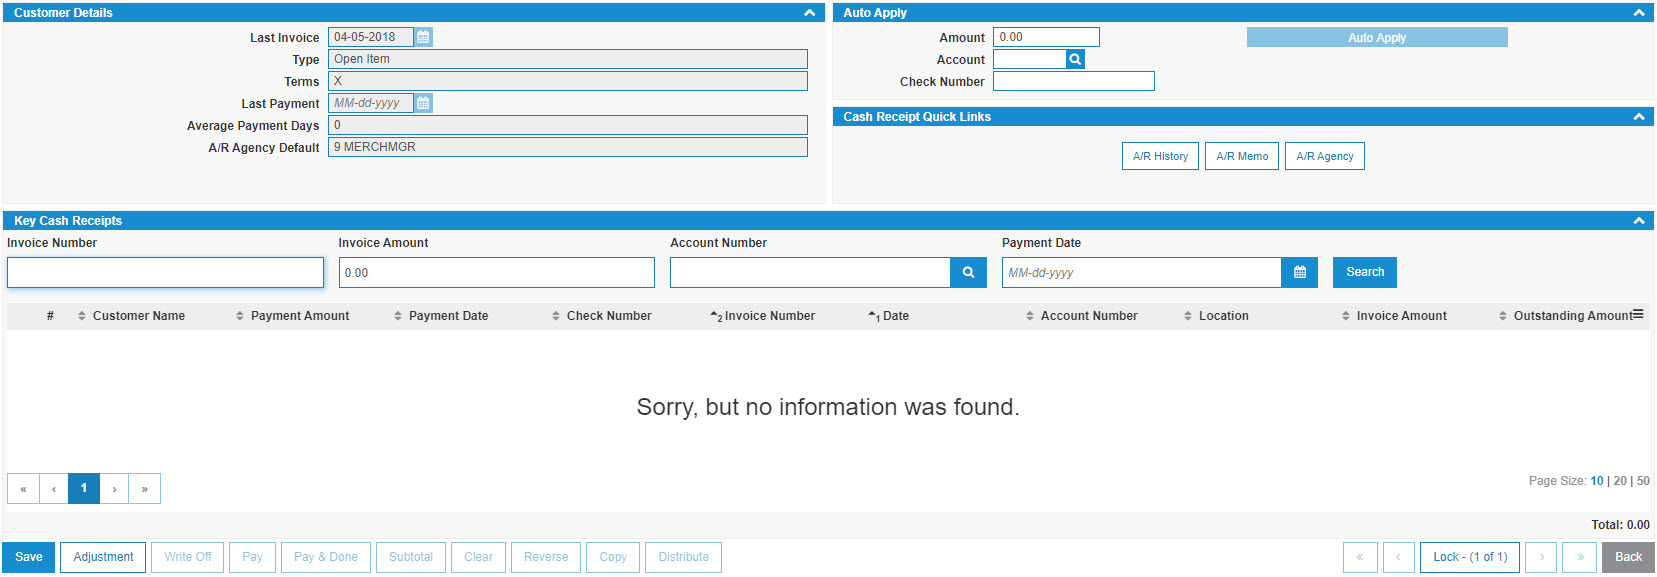
Enter the customer number in the Customer Number field.
- or -
Click the Search icon to open a Customer Search screen in a new browser window and locate the appropriate customer.
After entering or selecting a customer the Key Cash Receipts screen refreshes, adding customer information and a list of customer invoices found in the customer’s profile.
-
Locate the specific Invoice Number that the customer is attempting to pay by either paging through the list and selecting the invoice.
- or -
Use the search fields in the header and the Go >> link to locate a specific invoice. -
Select the associated checkbox to mark an invoice for payment.
More than one invoice may be marked for payment at the same time.
-
Enter a Payment Amount to indicate the amount being paid against each invoice.
-
Enter a Date that the payment is being made.
-
Enter the Check Number of the check that the customer is using to make the payment.
-
(OPTIONAL) Click the checkbox next to the invoice you want to pay and click on the Pay button.
More than one invoice may be marked for payment with the same check.
-
Once you have marked your invoice(s), you can complete your work on this receipt in many possible ways:
To: Do this: Enter the Adjustment screen and adjust any ledger accounts with a payment.
Click the Adjustment button.
Reverse an invoice based on the amounts you have keyed.
Click the Reverse button.
Copy the invoice based on the values already keyed.
Click the Copy button.
Split the selected invoice into multiple invoices.
Click the Distribute button.
Clear a previously paid (but not updated) entry.
Click the Clear button.
Pay the selected invoices based on the keyed information.
Click the Pay button.
Pay the selected invoices and exit the screen (assuming there are no errors).
Click the Pay & Done button.
Access the Subtotal screen and review the invoice amounts against payments.
Click the Subtotal button.
Exit this screen once all payments have been recorded.
Click the Done button.
-
If you have successfully added your invoice to the new batch, the Cash Receipts – Cleared Invoices section appears.
-
If you wish to add another receipt to this batch select the Click here to add to batch link.
The Cash Receipts - Outstanding Accounts Receivable screen appears in a new browser window and you may repeat steps 9-14 for each new invoice in the batch. -
Once you have added all the necessary receipts to this batch, you will be returned to the Cash Receipts - Cleared Invoices screen.