Creating a Surplus Return File
-
Navigate to Product Support > Parts > Surplus Returns.
The Surplus Returns screen will appear.
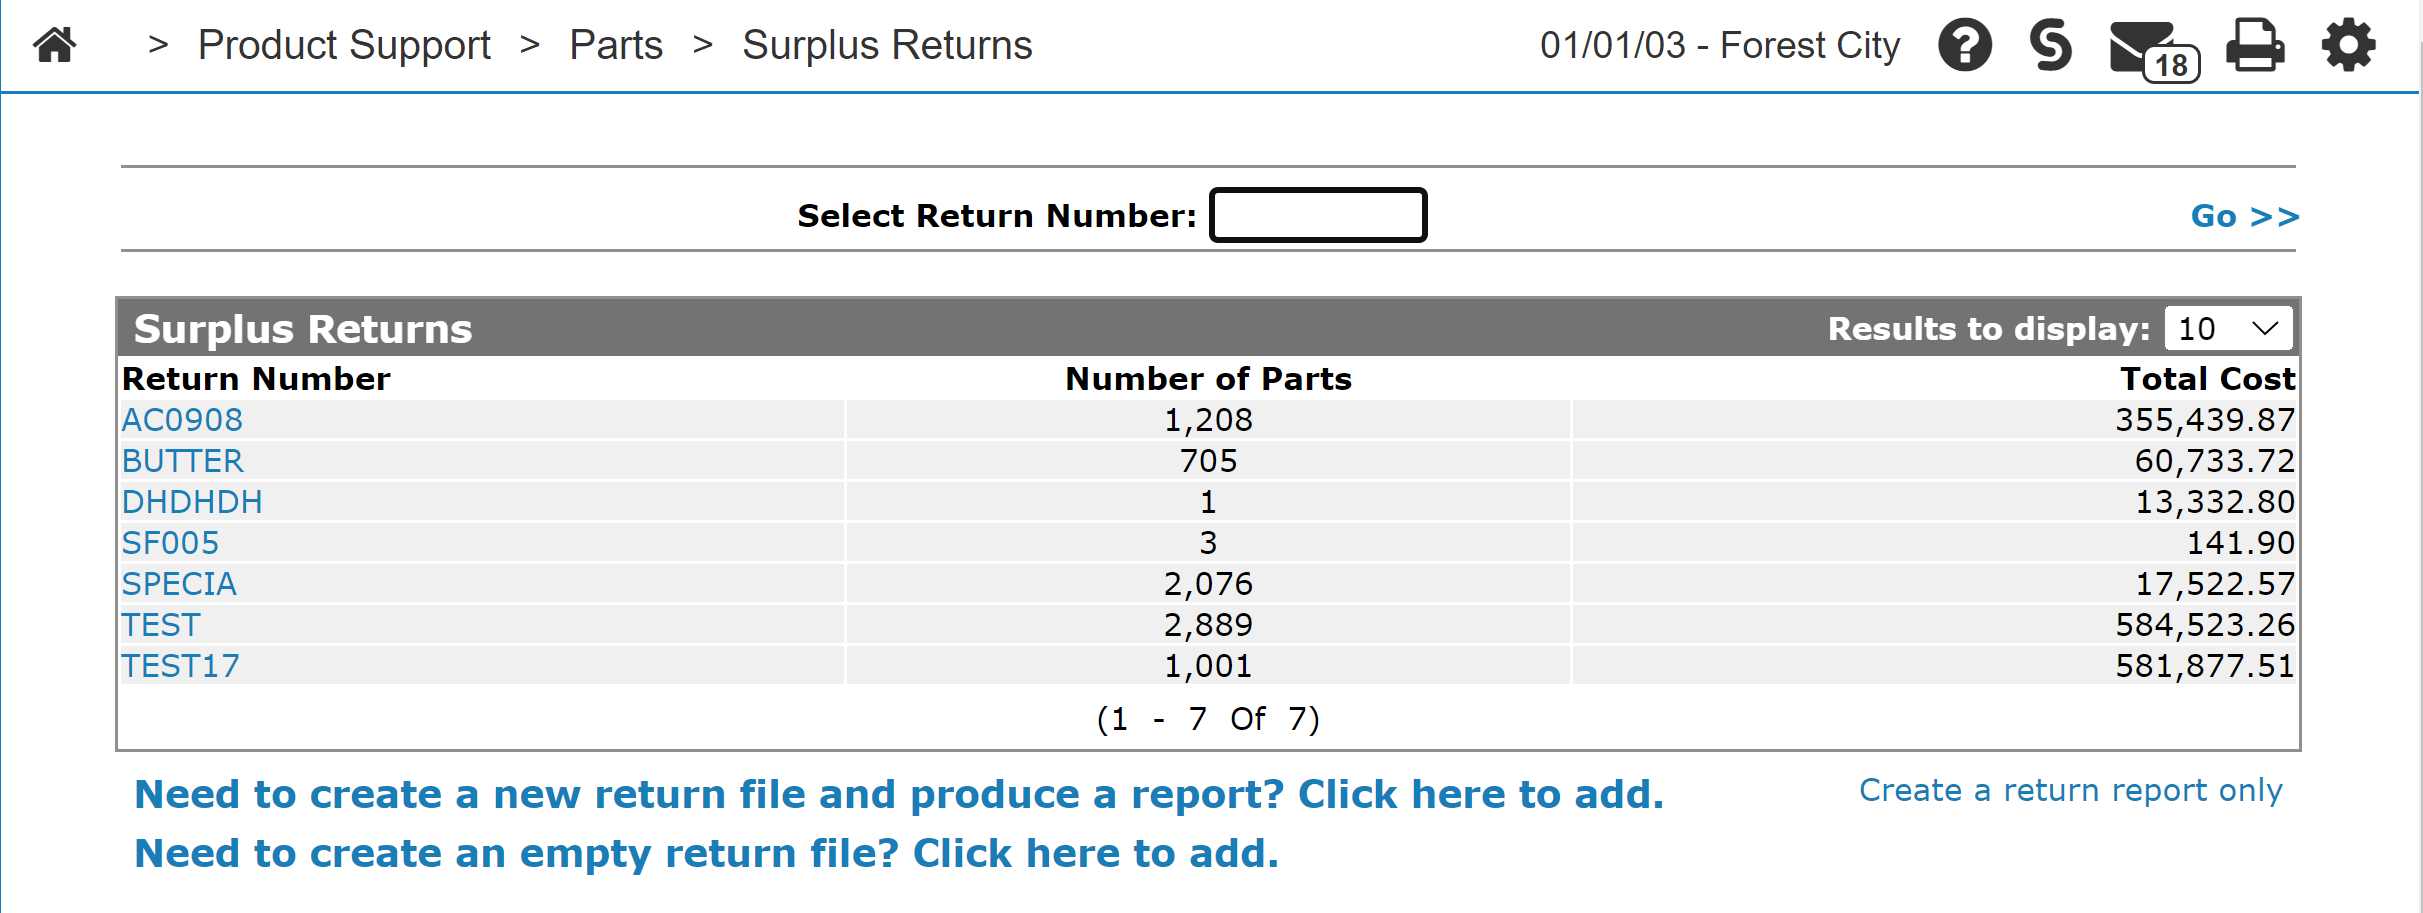
Surplus Returns screen
-
On the Surplus Returns screen, selected the Need to create a new return file and produce a report? Click here to add link.
The Selection Criteria tab will appear, allowing you to select the exact criteria for the return.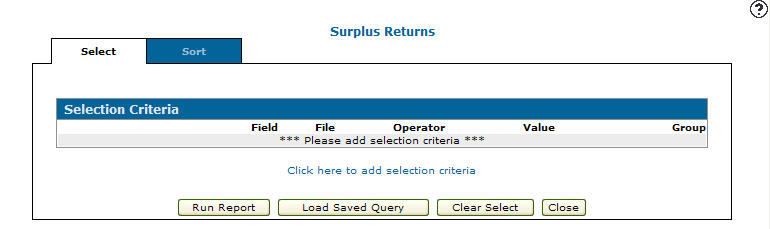
Selection Criteria tab
-
On the Selection Criteria tab, select the Click here to add selection criteria link.
The Selection Criteria screen will appear.
Selection Criteria screen
-
On the Selection Criteria screen, select a Group from the drop down list. The group code is used as a logic function between groups.
-
Enter the branch Field.
- or -
Click on the Search icon, the Select Field screen will appear.
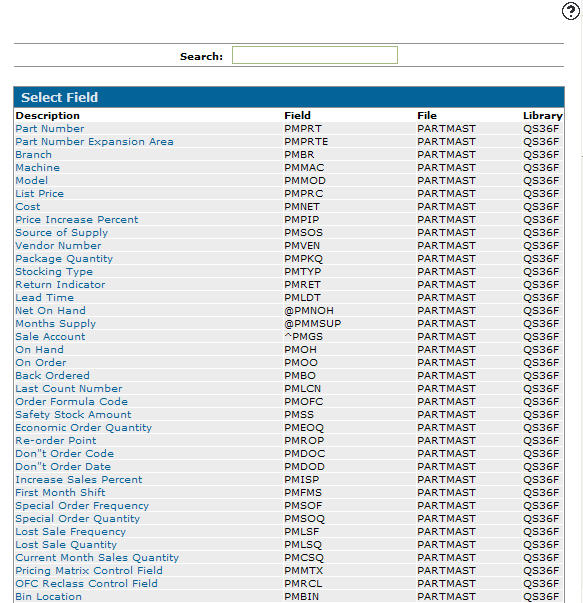
Select Field screen
-
On the Select Field screen, click on a field Description.
The Selection Criteria screen will appear with the selected field in the Field field.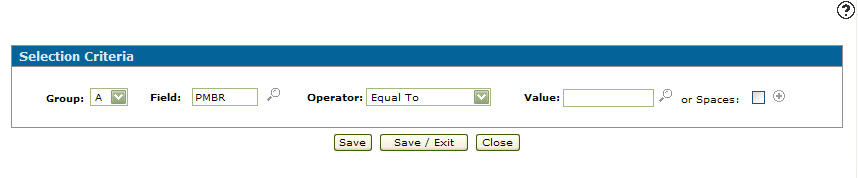
Selection Criteria screen
-
On the Selection Criteria screen, select an Operator from the drop down list.
-
Enter a Value.
- or -
Click on the Search icon and select a Value field. -
Select which value you would like to use as a valid value on the Selection Criteria screen.
The Selection Criteria screen will appear with the selected value in the Value field.
Selection Criteria screen
-
(OPTIONAL) select or Spaces by clicking on the checkbox.
-
(OPTIONAL) click on the More
 icon to add more values.
 -
Click the Save button to save your selection criteria and remain on the Selection Criteria screen.
- or -
Click the Save/Exit button to save your selection criteria and return to the Selection Criteria tab.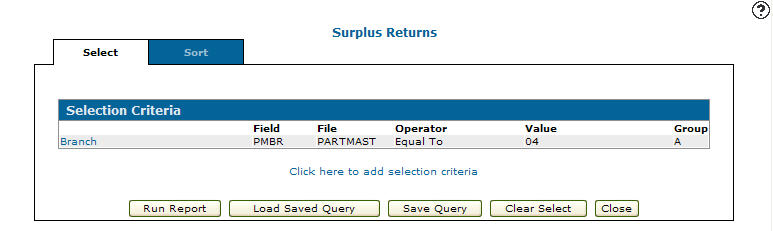
Selection Criteria tab
-
Repeat steps 3 through 13 to add a vendor Field to the selection criteria.
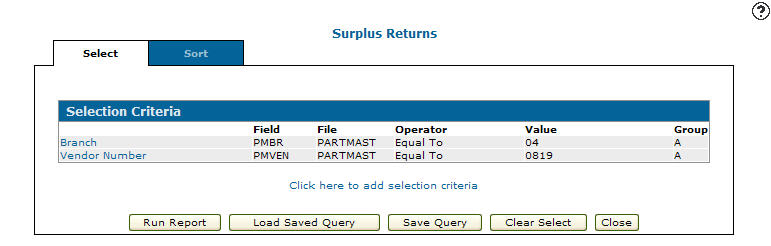
Selection Criteria tab
-
On the Selection Criteria tab, click on the Sort tab.
The Sort Order tab will appear.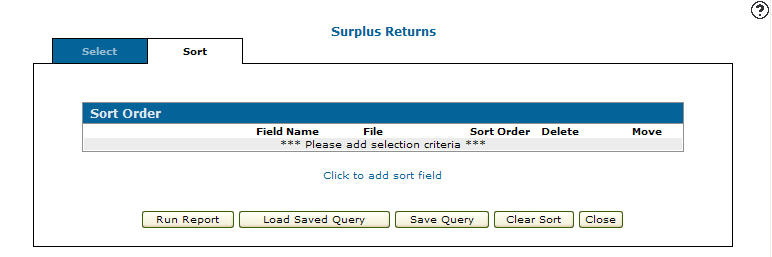
Sort Order tab
-
On the Sort Order tab, select the Click to add sort field link.
The Add Columns screen will appear.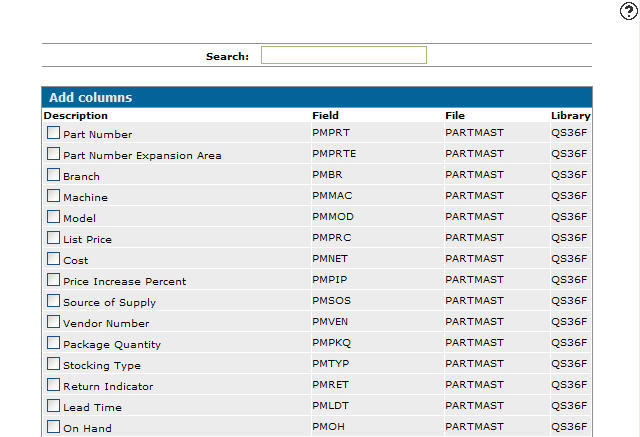
Add Columns screen
-
On the Add Columns screen, select the columns that the report will be sorted by.
The Sort Order tab will appear listing the selected sort fields.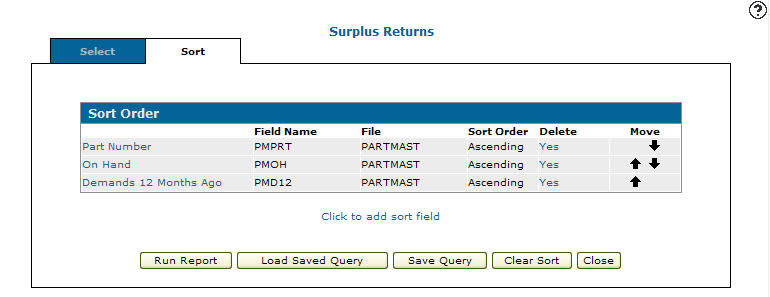
Sort Order tab
-
On the Sort Order tab, click the Run Report button.
The Report Options screen will appear.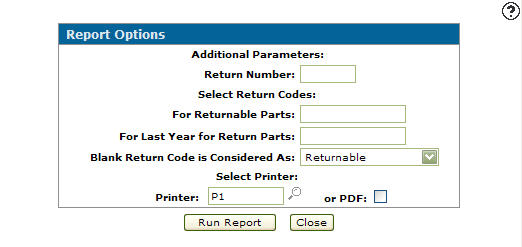
Report Options screen
-
On the Report Options screen, enter a Return Number that is up to six characters long.
-
Enter a For Returnable Parts code. This code represents which code is used when a part in marked as returnable.
-
Enter a For Last Year for Return Parts code. This code represents which code is used when a part in marked indicating that the current year is the last year the part is eligible for return.
-
Select a Blank Return Code is Considered As value. This value indicates what a blank code represents.
-
Enter the Printer that will print the surplus return report.
- or -
Click on the Search icon and select a printer from the Printer screen. -
Select the or PDF checkbox to create a PDF from the surplus return report.
-
Click the Run Report button.
The Selection Criteria tab will appear indicating that the surplus return report has been submitted.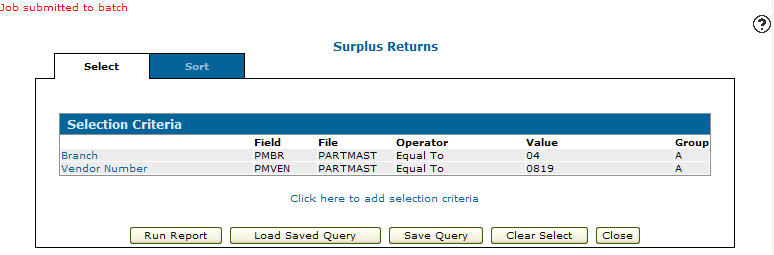
Selection Criteria tab