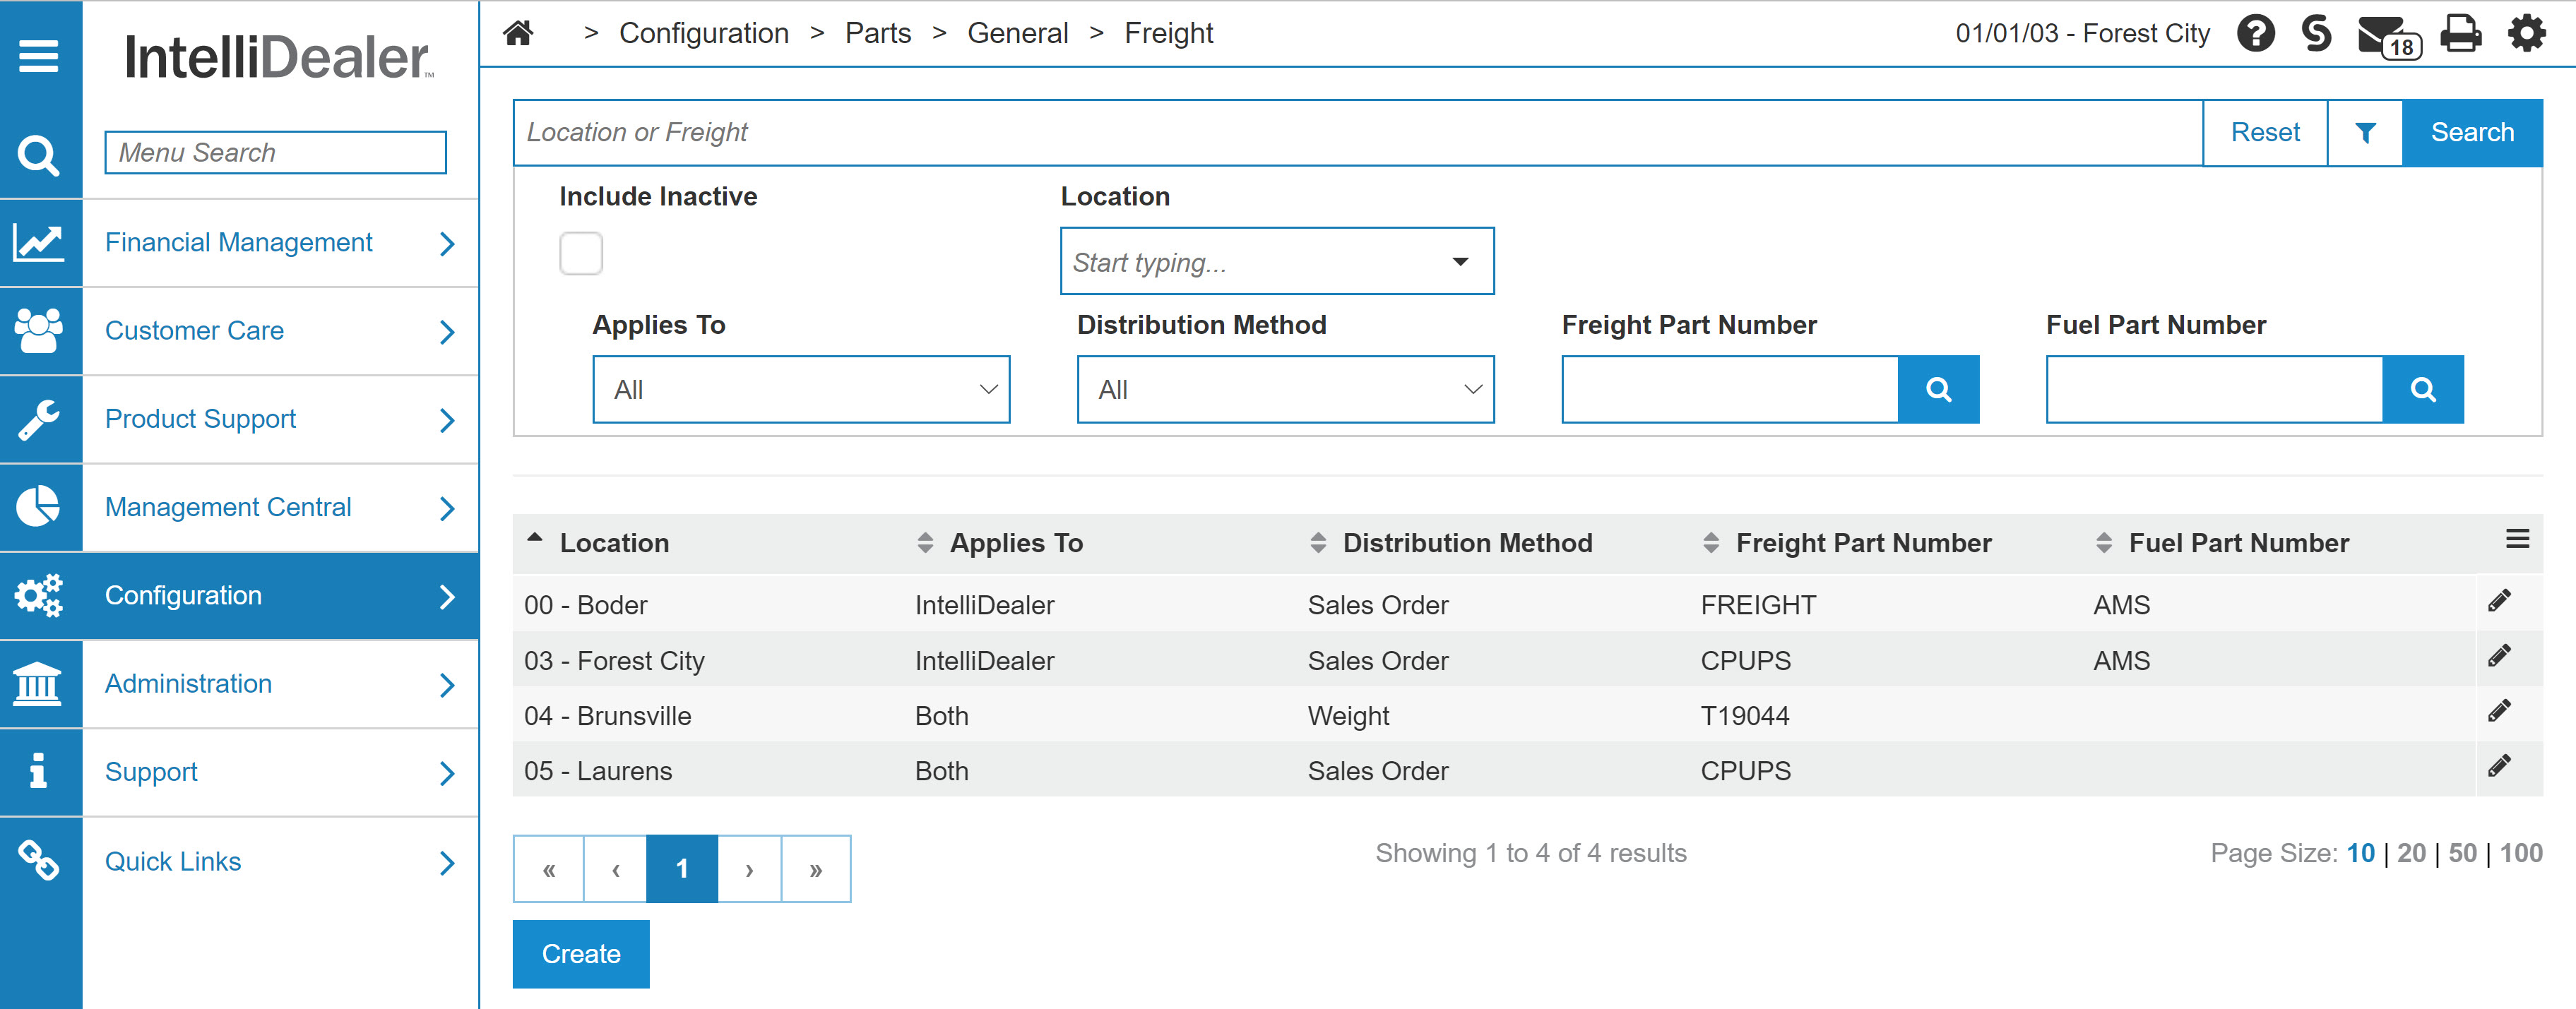
Configuration: Freight
Use the Freight screen allows you to specify which part numbers are used to bill the freight (and fuel surcharge) on the parts ticket. If there are parts for multiple customers on the same parts ticket, the default distribution method determines how costs are distributed across the ticket. Once the Freight screen and the EVIA table are configured (see Setting up FREIGHT and FUEL surcharges ), the Add Freight screen appears when updating customer-ordered parts on a parts order. The Add Freight screen allows you to add freight charges to the sales order.
To open the Freight screen ,navigate to Configuration > Parts > General > Freight.
Topic in this section
- Setting up Freight Parameters for a Branch Location
- Copying Freight Parameters From One Location to Another
- Screen Description
Setting up Freight Parameters for a Branch Location
Setting up freight parameters allows you to specify what part numbers are used to bill the freight (and fuel surcharge) on the sales order and the default distribution method.
-
Navigate to Configuration > Parts > General > Freight.
-
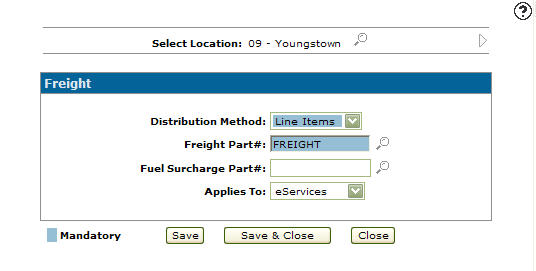
Click on a location to edit it, or click Create to add a new location. The fields to configure the location are:
- Location—select a location from the drop down.
- Applies To—select whether this part number applies to IntelliDealer, MyDealer, or All.
- Freight Part Number—the part number added to a sales order or sales requisition, representing the freight surcharge applied to the order or requisition. Click the Search
 icon to search for a part number from the Parts Search screen.
 - Distribution Method—select a distribution method from the drop down list.
- Fuel Part Number—the fuel part number added to a sales order or sales requisition, representing the fuel surcharge applied to the order or requisition. Click the Search icon to search for a part number from on the Parts Search screen.
- Active—select this checkbox to indicate that this location is active.
- When you have completed your updates, click Save.
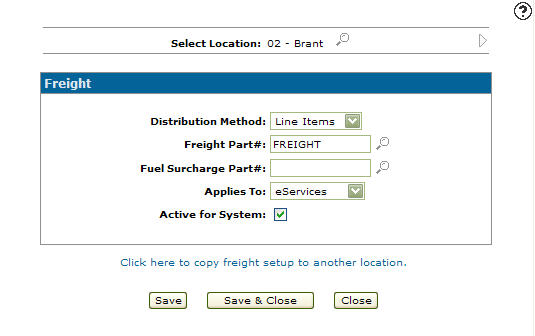
Copying Freight Parameters From One Location to Another
-
From any IntelliDealer screen, navigate to Configuration > Parts > General > Freight.
-
On the Freight screen, select the location you wish to copy by using the Previous
 and Next
 icons.
- or -
Click on the Search icon and select a location from the Location Selection screen.
-
The Freight screen will refresh indicating the selected location.
-
On the Freight screen, select the Click here to copy freight setup to another location link.
The Location Selection screen will appear.
-
The freight parameters will be copied to the location you select.
-
Once you have fill out all the desired fields click on the Save button to set up the freight parameters for the selected location.
Screen Description
The following is a description of the search field that appears on the Freight screen:
| Field | Description |
|---|---|
| Select Location | Allows you to set up freight and fuel surcharges by branch location. |
The fields on the Freight screen are:
| Field | Description |
|---|---|
| Distribution Method | Enter the default distribution method that will determine the distribution for the freight or fuel cost (e.g. Quantity, Line Items, Price, Sales Orders, or Weight). |
| Freight Part # | Enter the part number added to a parts ticket or sales requisition, representing the freight surcharge applied to the ticket or requisition (e.g. FRTIN). This part must first be added through the Parts Profile system. |
| Fuel Surcharge Part # |
Enter an optional fuel surcharge part number added to a parts ticket or sales requisition, representing the fuel surcharge applied to the order or requisition (e.g. FUEL). This part must first be added through the Parts Profile system. The EVIA table must have either a fuel surcharge percentage or amount added for each of the shipping vendors configured, in order to apply a fuel surcharge to an order or requisition. |
| Applies To | Indicates which system the values loaded in the Freight screen will apply to (e.g. IntelliDealer, MyDealer, or Both). |
| Active for System | If selected, indicates that the freight parameters are active for use within the system. |
Select the Click here to copy freight setup to another location link to copy freight parameters from one branch location to another.
The buttons completes work on the Freight screen are:
| Button | Function |
|---|---|
| Save | Saves changes made on the Freight screen. |
| Save & Close | Saves changes made on the Freight screen and returns to the Configuration Quick Links screen. |
| Close | Closes the Freight screen without saving and returns to the Configuration Quick Links screen. |