Service Agreements: Add Work Order
Use the Add Work Order screen to add a work order to the selected service agreement contract line.
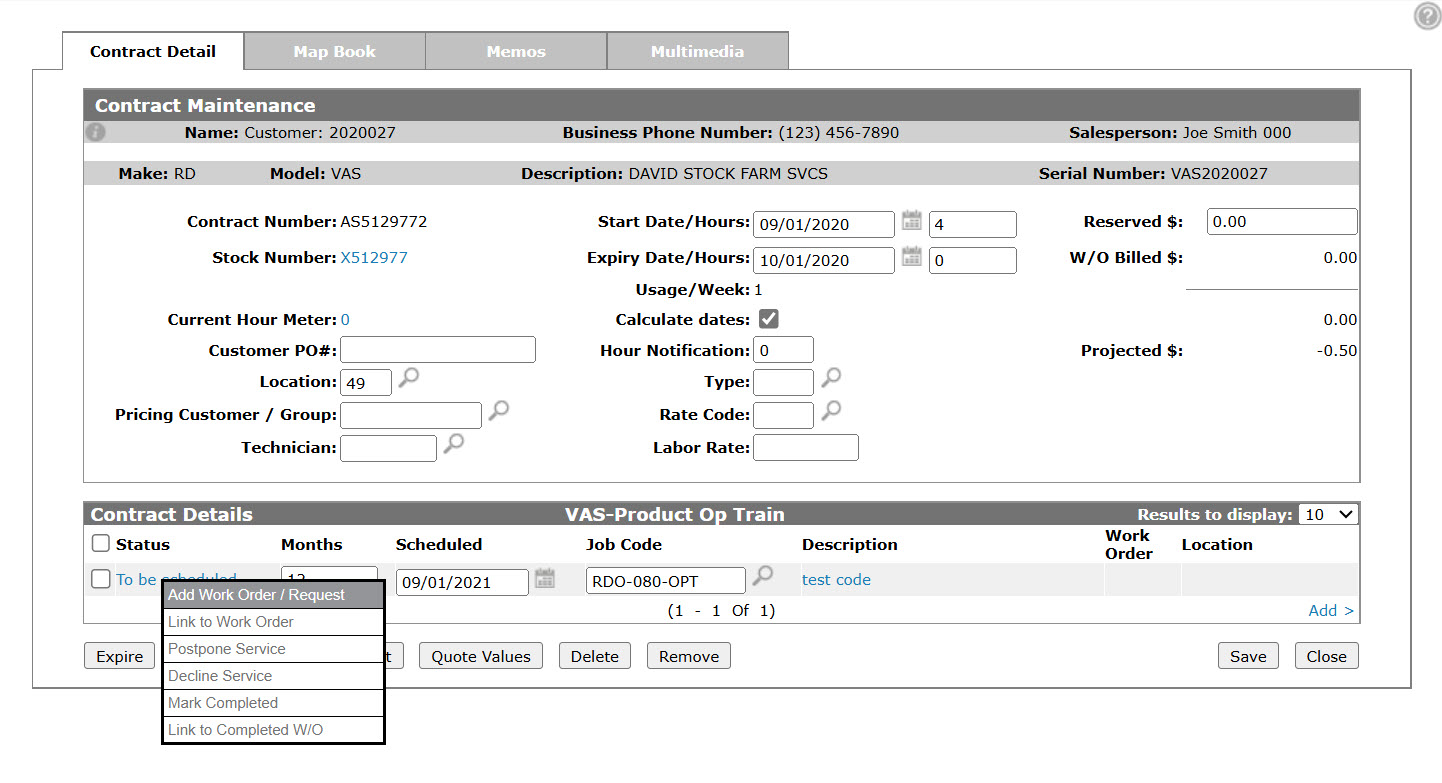
To open the Add Work Order screen, hover over the Details line on the Contract Details tab and select Add Work Order / Request from the drop down list.
Topics in this section are:
Adding a Work Order to a Service Agreement Contract
-
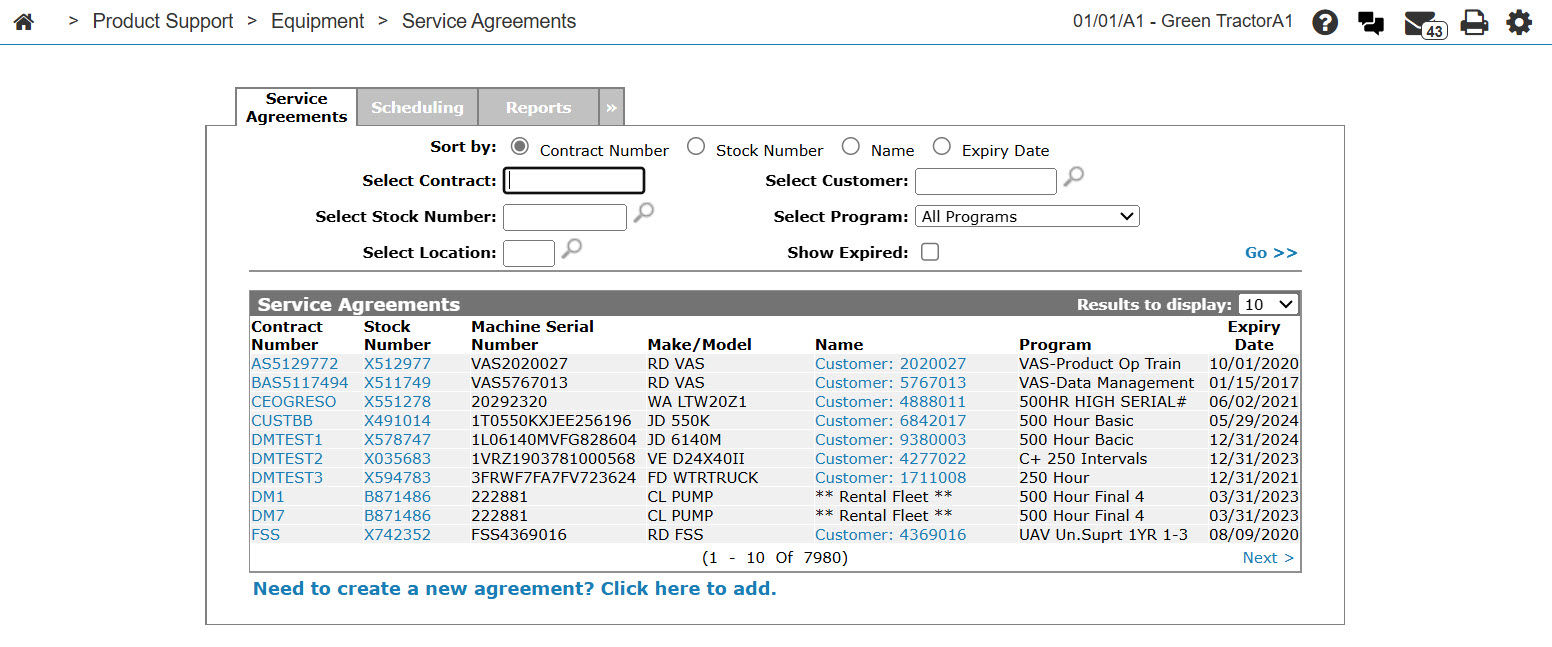
Navigate to Product Support then select one of the Equipment, Service, or Rental lists and click the Service Agreements link.
-
To search for a specific service agreement, fill out the appropriate fields and click Go >>.
The Service Agreements tab refreshes, listing the generated search results.
-
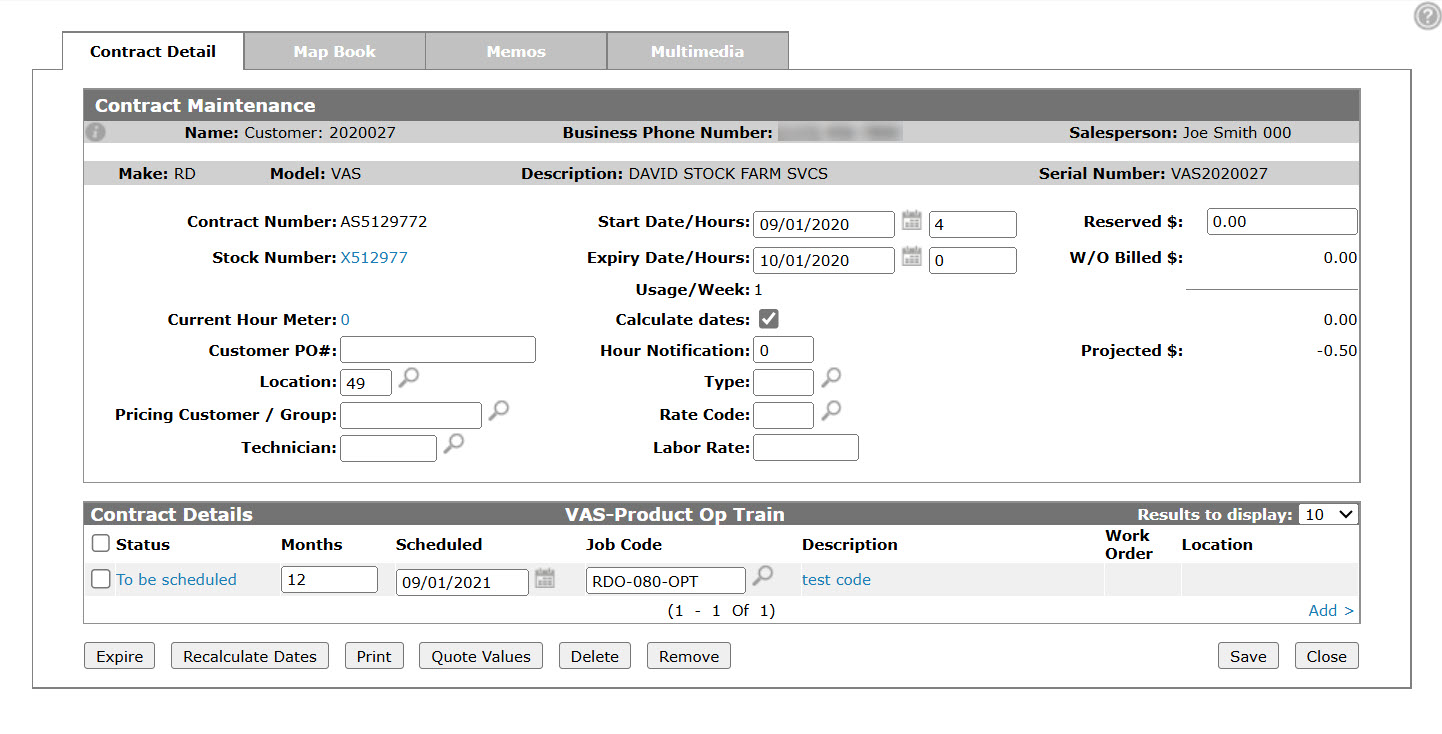
Click on a Contract Number.
-
Move your cursor over a Status and select Add Work Order/Request from the pop-up menu.
-
Another pop up asks what you want to create, a Work Order or a Job Jacket Request. Select Work Order.
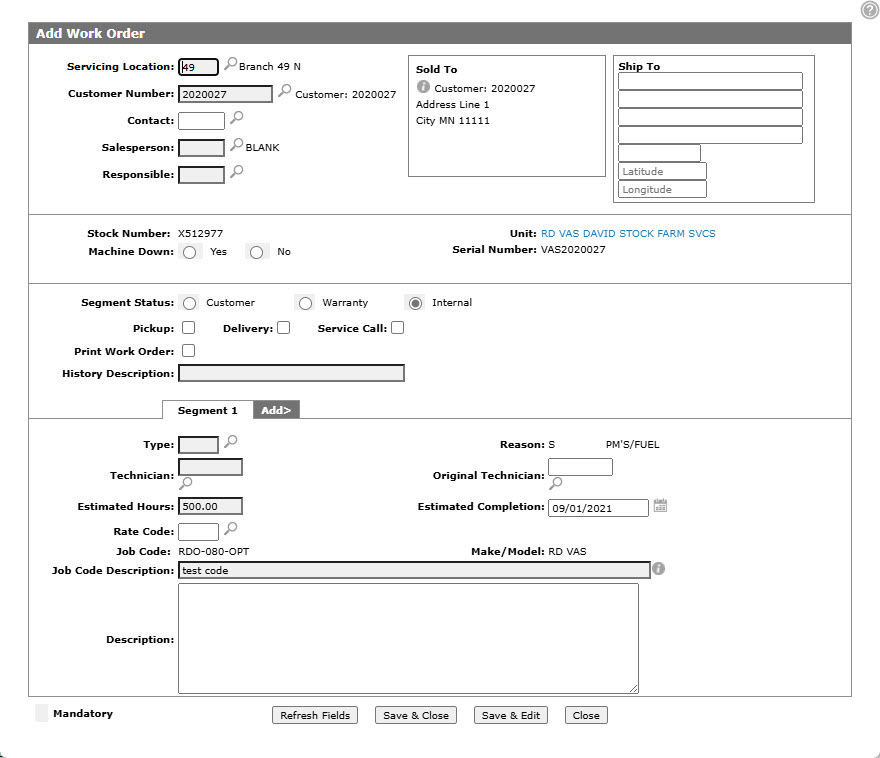
The system populates various fields with information from the selected service agreement contract. You may edit any of the fields that the system has automatically populated.
-
Fill in the fields as required, referring to the table below.
-
Click Save.
The Contract Details tab appears with a message indicating that the work order was successfully created.
Screen Description
The fields on the Add Work Order screen are:
| Field | Description |
|---|---|
| Servicing Location | The location where the work on the work order is opened. Defaults to the Location entered on the Contract Details tab. |
| Customer | The number of the customer to be assigned to the work order. |
| Contact | The contact to call for the customer. |
| Salesperson |
The salesperson assigned to the work order. Tip: To easily identify quick added work orders, use a non-standard salesperson such as "SYS". Then you can find all such work orders by searching on the salesperson code. |
| Responsible | The salesperson responsible for the quote. |
| Sold to | The customer's billing address. |
| Ship to |
The ship to address of the unit. The system checks for an associated rental contract to determine a ship to address. If this address does not exist, the sold to address is used instead. Note: Ship to address field remains blank when a work order is being created for a John Deere service request . |
| Stock Number | The stock number of the unit. |
| Machine Down | Select Yes to indicate that the machine is not in a usable state. Select No to indicate that the machine is still usable. |
| Unit | The Equipment Profile for the unit. |
| Serial Number | The unit's serial number. |
| Segment Status |
Identifies how the work order will be billed. Choose one of:
|
|
Pickup, Delivery, Service Call |
Select one of these options:
|
| Print W\O | Select to print the work order to the designated printer. |
| History Description | Enter a brief description of why the unit must be serviced. |
| Hours | The unit's current hours meter reading. |
| Segment 1 | |
| Type |
The work order Typescode. You can configure the system to validate this field by setting the Validate Work Order Types and Reasons parameter on the System Settings: Location screen. |
| Reason |
The work order repair Reason code. You can configure the system to validate this field by setting the Validate Work Order Types and Reasons parameter on the System Settings: Location screen. |
| Technician |
The technician assigned to this work order. Special technician numbers should be set up for work orders that have been created but do not have a specific technician assigned. For example:
|
| Original Technician | If this repair is a rework job, enter the original technician who performed the work. Not used for S.A.M. |
| Estimated Hours |
The estimated labor hours to complete this work order. If the used frequency of the job is greater than 0, the estimated hours field defaults to the average hours used. |
| Estimated Completion | The estimated completion date for this work order. Defaults to the number of days in the Parts & Service Quote Settings screen. |
| Rate Code | Defines the technician's rate per hour. Optional, based on user group settings. |
| Job Code |
The job code. The Job Code code field is set to S for S.A.M. |
| Make/Model | The make and model of the unit to be serviced. |
| Job Code Description | The system automatically enters the job code description. |
| Description |
If desired, add any additional comments. |
Use these buttons to complete your work on the Add Work Order screen:
| Button | Function |
|---|---|
| Save | Saves changes made to the Add Work Order screen and opens the Customer - Work Order screen (this option only works in you have previously selected the edit work order on save option). |
| Close | Closes the Add Work Order screen without saving and returns to the Contract Details tab. |