VESign Signing Details
With VESign (Electronic Document Signing) your customers electronically sign system-generated PDF documents in a web browser. Using VESign speeds up the approval process and uses less paper. IntelliDealer has integrated with OneSpan for a legally sound provision of electronic signatures, including an Electronic Evidence Summary that provides the dealership with an audit trail of the transaction. Currently VESign is available in:
-
All Rental types except where the contract is Deleted or Finished
-
All Invoice History types (Equipment, Service, Parts, Rental, and General)
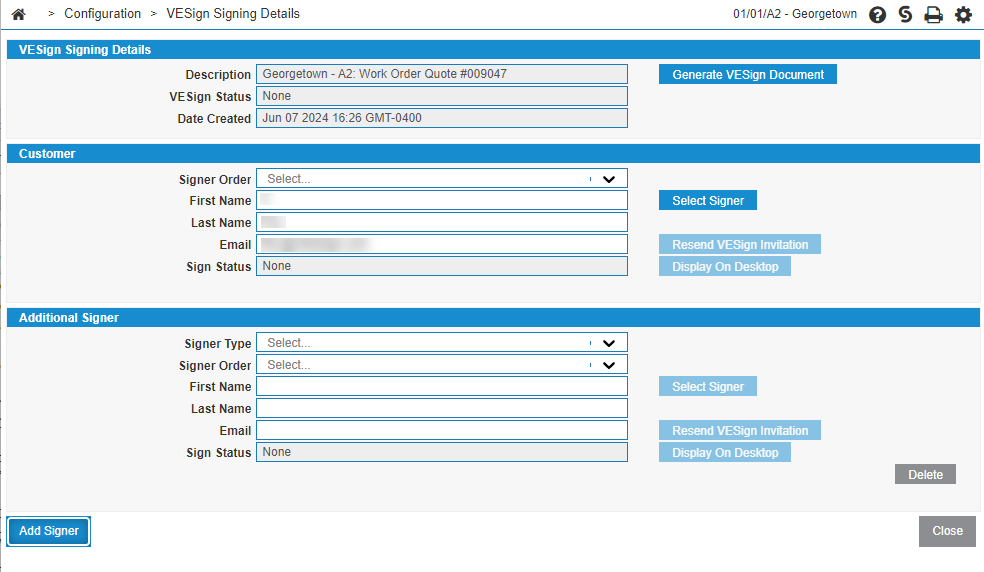
The VESign Signing Details screen shows you the details of the document signing and allows you to modify or add signers.
You can view the VESign Signing Details screen via:
-
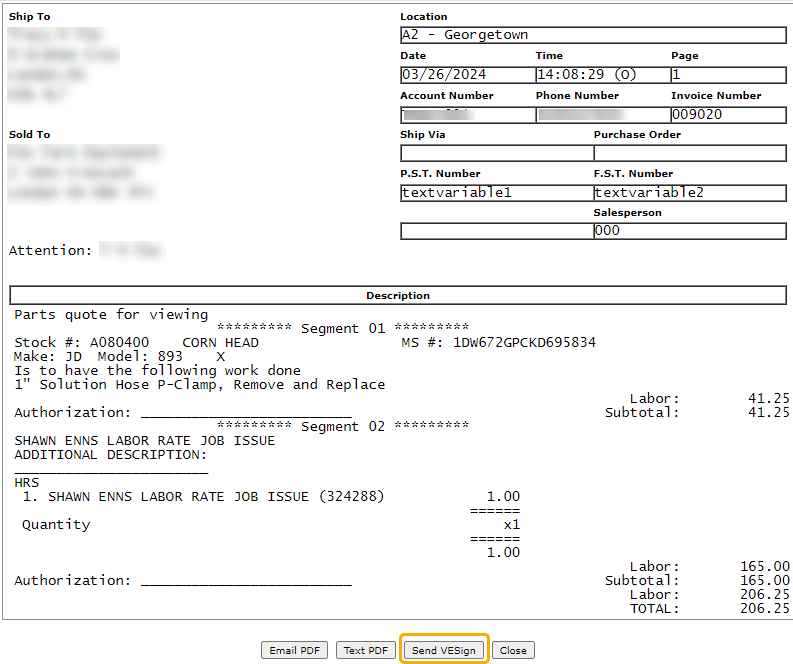
If the signing document has not been generated, on a quote open the Printing Parameters tab, click Print Preview, then click Send VESign.
-
If the signing document has been generated, on a quote click Print Preview, then click View VESign Details.
-
VESign Dashboard by hovering your cursor over a Reference Number, then selecting VESign Signing Details from the popover menu.
-
The Print window from the pop-up menu by hovering your cursor over a Rental Contract Number in the Rental Counter listing screen.
-
The Details tab of unsigned Rental Contract after selecting Send VESign.
-
The Details tab of pending VESign Rental Contract after selecting View VESign Details.
-
The Invoice Detail preview from any Invoice History screen after selecting Send VESign or View VESign Details.
-
The Parts Invoice preview screen after selecting Send VESign or View VESign Details.
-
The Printing Parameters preview from any Invoice or Equipment Quote screen after selecting Send VESign or View VESign Details.
Note: If you are using VESign, you should contact VitalEdge Support to remove the signature fields from laser overlay.
Topics in this section include:
Electronic Document Signing Process Overview
This section provides a high level overview of the signing process. The VESign button is located on different screens, depending on where you are in IntelliDealer. For details on the location of the VESign button see the help pages for: Parts Quote, Work Order Quote, Rental, Parts Invoicing or Invoice Detail for Equipment, Service, Parts, Rental, and General.
-
Once you have completed your document (for either a Parts quote, Service Work Order quote, Rental, or Invoice History for Equipment, Service, Parts, Rental, and General) click Send VESign.
The VESign Signing Details modal opens.
-
To modify the signer, click Select Signer and choose a different signer from the Customer Contact list.
-
If additional signers are required, click Add Signer.
Additional signers can be deleted if the VESign document has not been generated.
-
For each additional signer, fill in the following information:
-
Signer Type—can be one of:
-
Customer—another representative for the customer.
-
Dealer Representative—a representative for the dealer.
-
Other— any additional signer required whether customer, dealer or third-party representative.
-
-
Signer Order—the order in which the signatures must be collected including the customer. The document is not sent to the next person in the signing order until the previous person has given their signature. The default is no signing order.
-
First Name—the first name of the signer.
-
Last Name—the last name of the signer.
-
Email—the email address that the document is sent to for signature. This email address can be edited; however, changes are not saved to the customer profile.
-
-
Click Generate VESign Document.
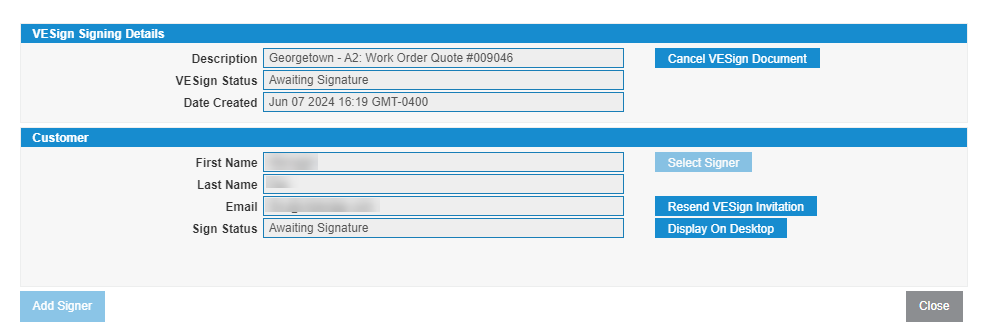
If the document generates successfully and the signing invitation email(s) have been sent, you receive a green success message. The Generate VESign Document button changes to Cancel VESign Document. The VESign Status and Sign Status fields update. The Display On Desktop and Resend VESign Invitation buttons become enabled.
-
Click Close.
The document is sent to the configured signers via email for their review and signature.
Tip: Should a customer not receive an email, remind them to check their junk mail. The signing invitation email(s) comes from signers@esignlive.com and not your dealer email address.
You can resend the signing invitation email by clicking the Resend VESign Invitation button on the VESign Signing Details modal.
A document becomes locked once a signing document is generated. If you need to change signer details or document details, select the Cancel VESign Document button and restart the process again on the same document. Once signed completely, you cannot cancel a document. If you need to alter a signed document, copy the original document and create a new document.
Screen Description
The fields in the VESign Signing Details section are:
| Field | Description |
|---|---|
| Description | A description of the document including the location, type of document and the document reference number. |
| VESign Status |
The signing status of the VESign document. Can be one of:
IntelliDealer checks for a status update every 30 minutes. |
| Date Created | The document creation date. |
The fields in the Customer section are:
| Field | Description |
|---|---|
| Signer Type |
The type of signer. Can be one of:
|
| Signer Order |
The order in which the signatures must be collected. The document is not sent to the next person in the list until the previous person has given their signature. The default is no signing order. |
| First Name |
The first name of the signer. |
| Last Name |
The last name of the signer. |
| The email address that the document is sent to for signature. | |
| Sign Status | Read-only field. The status of this signer's signature. |
Email Signing
Once the customer receives the email requesting their electronic signature, they should click the GO TO DOCUMENTS link in the body of the email. The OneSpan URL opens, asking them to read and accept the Consent and Disclosure document. Once accepted, the document opens directing them to sign where indicated by the Sign Required indicator.
If there is more than one segment on the document, the Sign Optional indicator displays. Optional is displayed to allow the customer to only sign the segments they want to agree to.
Alternatively, the customer can decline the document by clicking More Actions in the upper right corner of the document and selecting Decline to Sign from the drop down.
Once the customer completes signing, they receive a signing completed email from which they can download the completed documents.
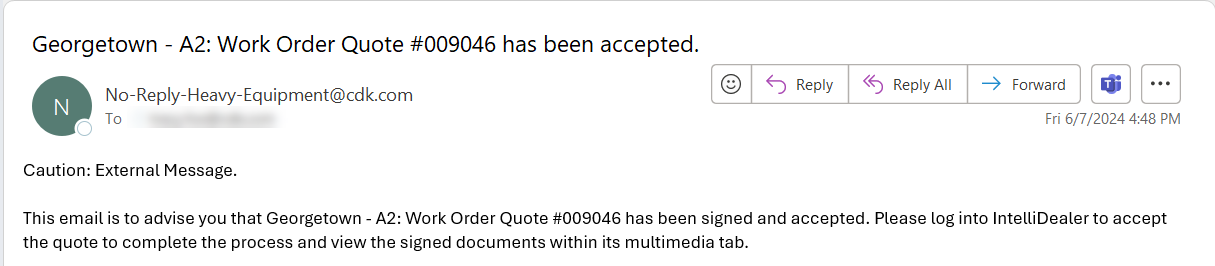
IntelliDealer notifies the user who created the signing documents for the customer of whether the document has been accepted or expired.
Desktop Signing
If the customer is ready to sign the document immediately, or your customer does not have access to email, you can give them control of your workstation so they can provide an electronic signature on the IntelliDealer interface using a mouse, touch screen, or stylus.
-
If the customer was not present during the generation of the VESign document (see Step 6 above), locate the document to be signed on the VESign Dashboard.
-
Hover your cursor over the Reference Number, then select the VESign Signing Details from the shortcut menu.
-
Verify the details and when you are satisfied, click Display on Desktop.
The in-person signing process begins by displaying a personalized welcome page containing instructions to guide you through the process of obtaining the customer's signature.
-
Optionally, you can preview the document before turning it over to the customer. Select the row that lists your location, then click Start. When you are finished reviewing, click Finish, then Done.
-
To hand over the document to the customer for signing, select the row that lists the customer's name, then click Start. You must confirm that you are handing off the document to the customer by clicking Proceed.
The confirmation of hand off is logged in the Evidence Summary for the document.
-
You can now give control of the workstation (laptop, desktop, or tablet) to the customer.
-
The customer is asked if they are "Ready to sign?" and they must click Confirm to proceed.
If the customer clicks Decline, it only pauses the signing process. It does not mean that the customer has declined the document presented to them.
-
Once the customer has read the terms of the consent document, they can select the checkbox indicating that they agree to the terms, then click Accept.
The document opens.
-
The customer should navigate to where their signature is required and click Sign.
A signing pop-up opens.
-
The customer can sign the document using a mouse or touchscreen device.
-
When the customer has completed signing, they can click Confirm.
Alternatively, the customer can decline to sign the document by clicking More Actions in the upper right corner of the document and selecting Decline to Sign from the drop down. The customer should return the workstation back to you.
-
After signing the document, the customer clicks Done and is then instructed to return the workstation back to you.
Post-requisites:
Once the customer has completed signing, they receive a signing completed email from which they can download the completed documents.
You are given the option to preview or download the document before closing the OneSpan signing window. The signed document and Evidence Summary are stored in the Multimedia tab.
IntelliDealer notifies the user who created the signing documents for the customer of whether the document has been accepted or expired.