Creating a New Equipment Quote
-
Navigate to Product Support > Equipment > Equipment Quoting.
-
Click the Need to create a quote? Click here to add link.
-
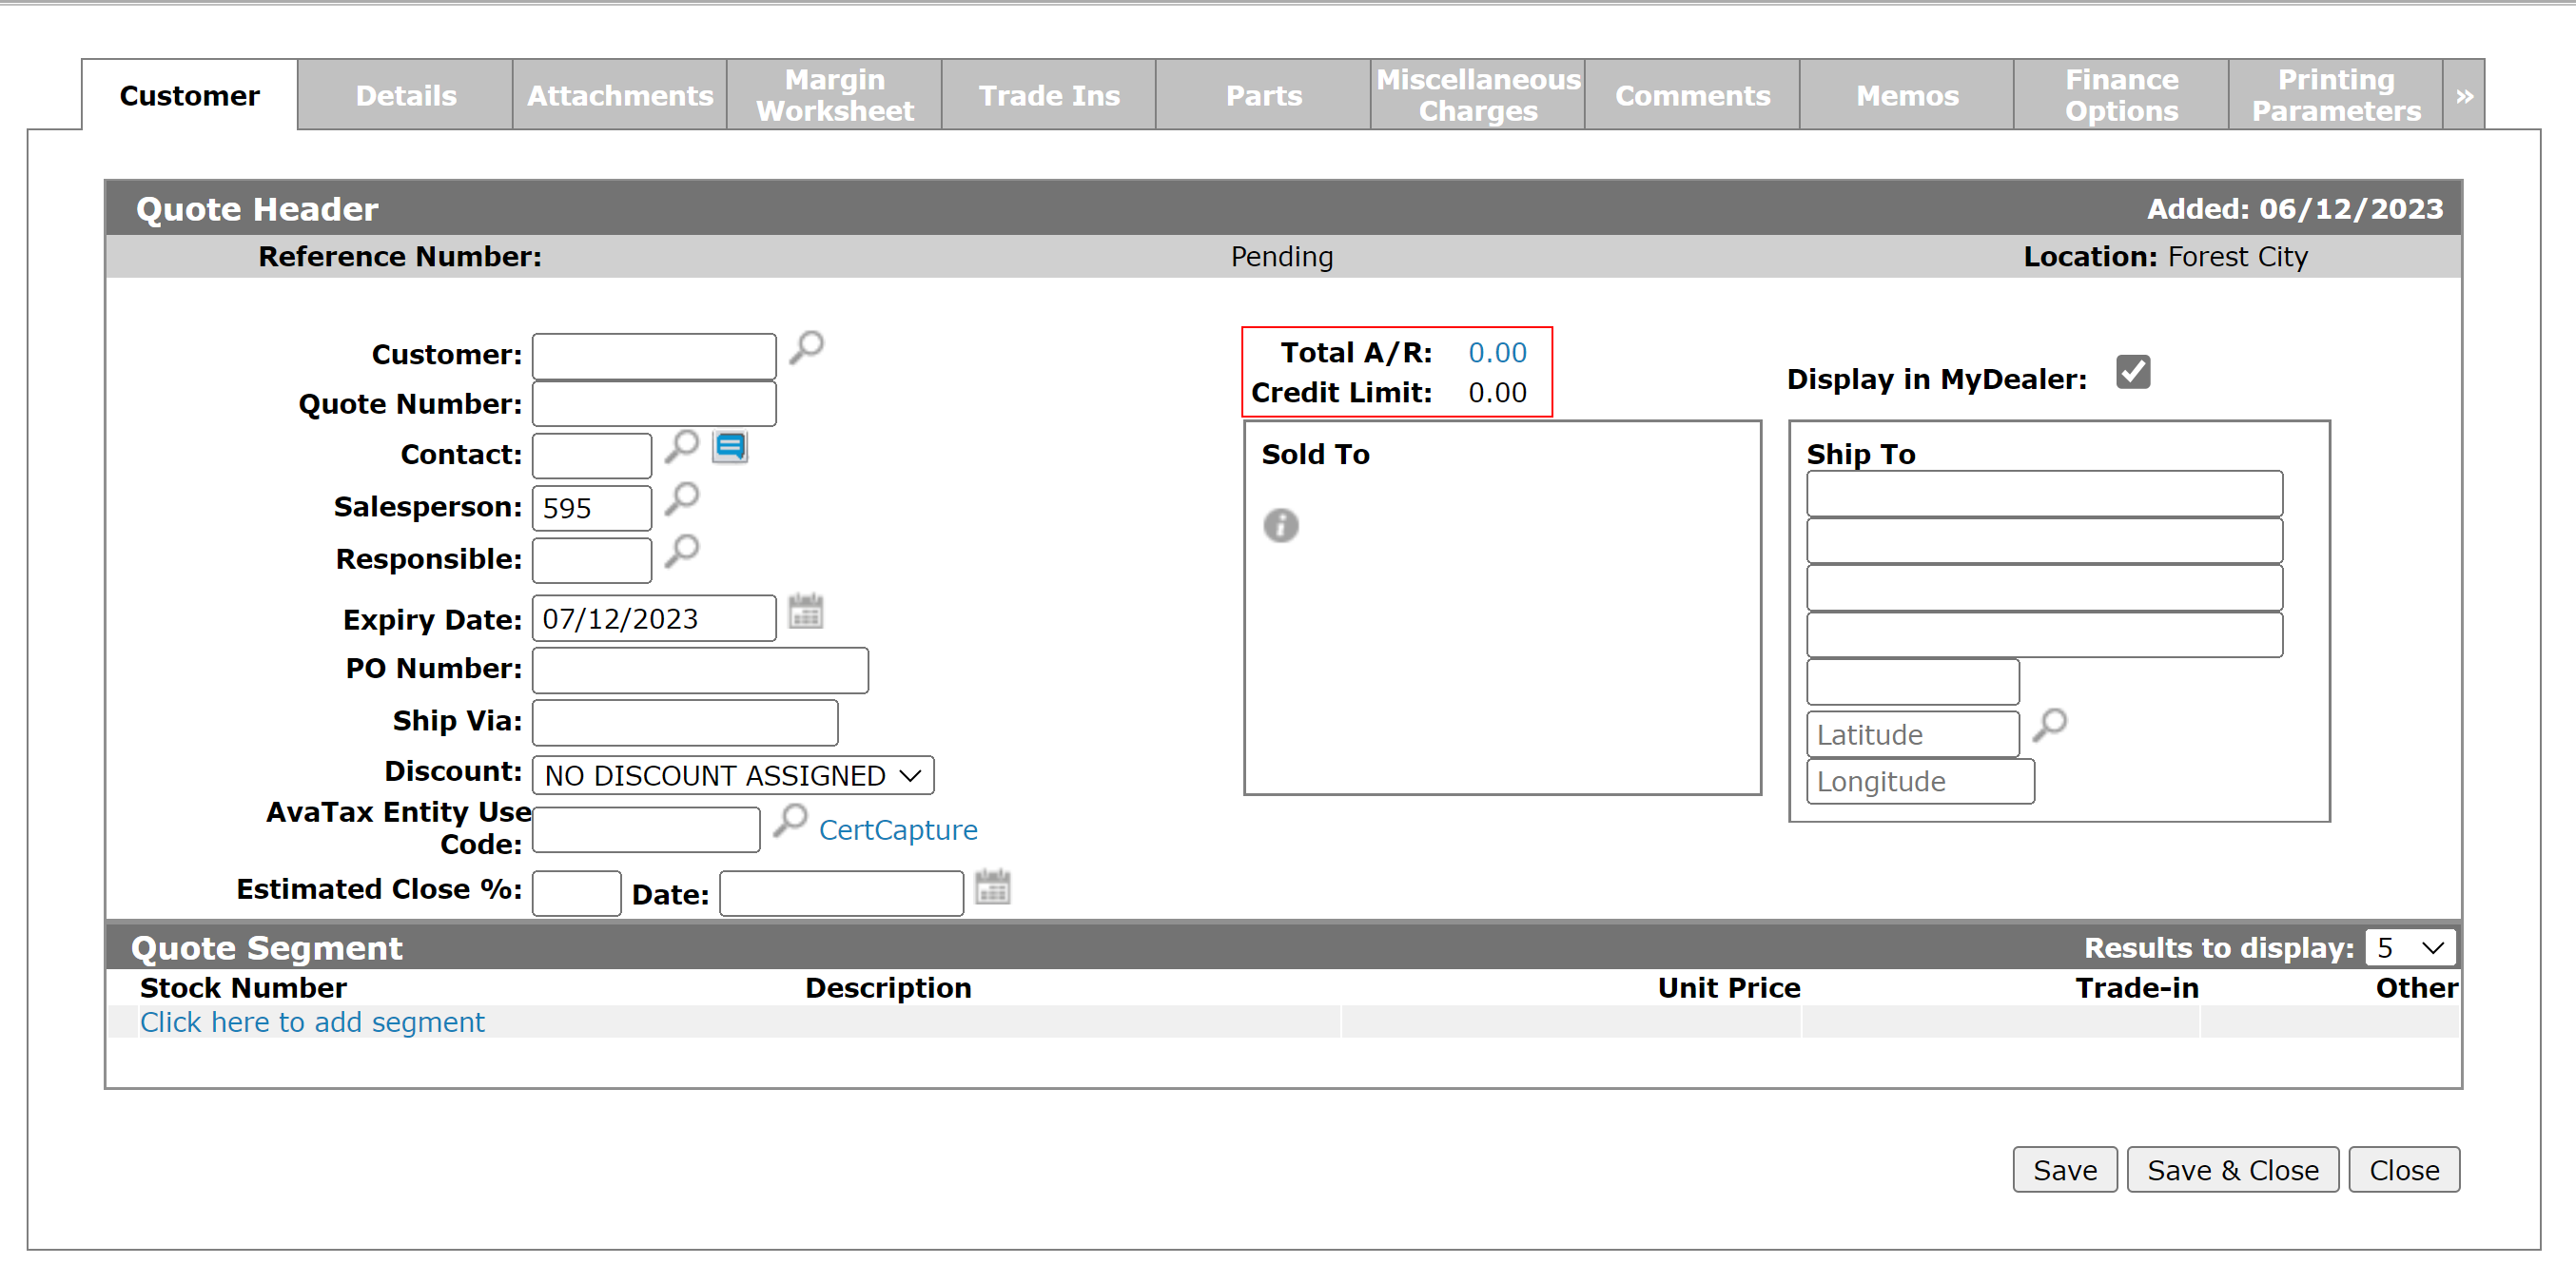
In the Customer field, enter the number of the customer you want to create the quote for, or click the Search
 icon to open the Your Customers screen in a new browser window and locate the appropriate customer.
After entering or selecting the desired customer number, the Customer - Quote Header tab refreshes with any customer information found in the customer’s profile.
-
On the Customer - Quote Header tab, enter a reference number for the quote in the Quote Number field.
-or-
Leave the Quote Number field blank and the system will automatically assign a reference number to the quote based on your system settings. -
(OPTIONAL)Enter a contact name for the customer in the Contact field.
- or -
Click the Search icon to open the Select Contact screen in a new browser window and select the appropriate contact from the list. -
Enter the salesperson ID in the Salesperson field.
- or -
Click the Search icon to open the Salesperson Selection screen in a new browser window and select the appropriate salesperson from the list.The Salesperson field may be automatically filled in, depending on your user and group settings.
-
The expiry date for the quote is automatically be added in the Expiry Date field based on earlier configurations.
If you want to manually select an expiry date for the quote, click the Search icon to open the Calendar screen in a new browser window and select the appropriate date. -
(OPTIONAL) In the PO Number field, enter the purchase order number .
The PO Number field is optional only if the customer profile does not require a PO number to be registered for all items invoiced to this customer.
-
(OPTIONAL) If the shipping location is different than the Sold To location, enter the shipment company or method in the Ship Via field.
-
(OPTIONAL) Select a Discount to apply to the quote from the drop down list.
-
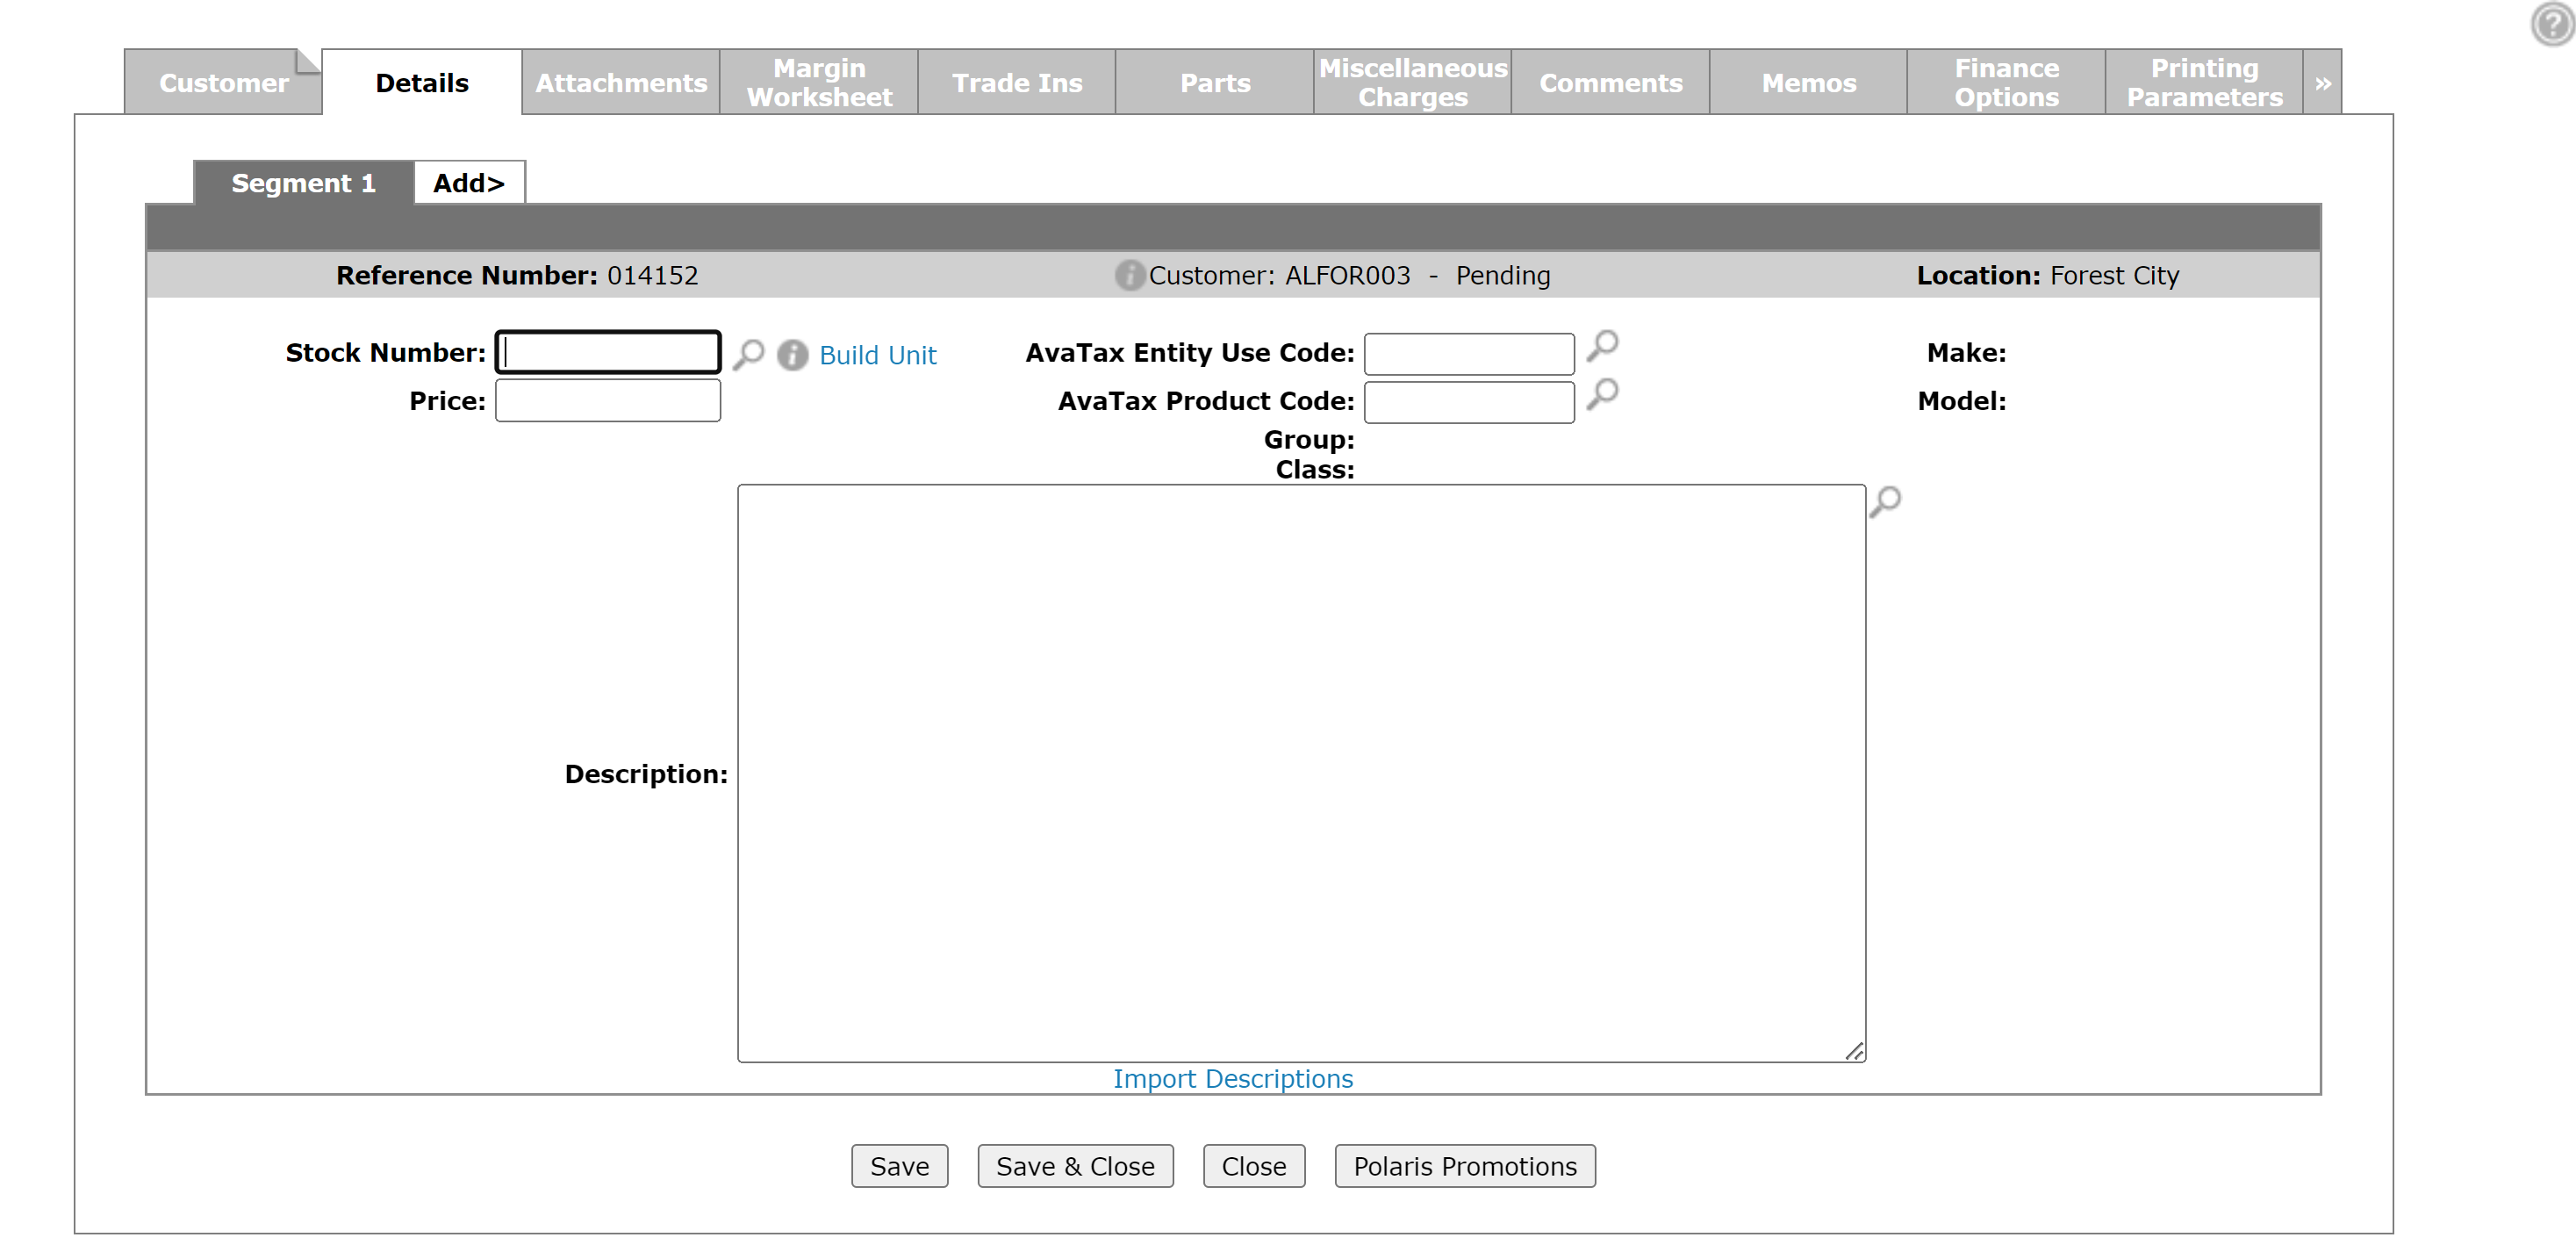
To select the unit you want to create the quote for, click the Click here to add segment link or click the Details tab.
-
Enter the stock number of the unit in the Stock Number field or click the Search
icon to open the Equipment Listing screen in a new browser window and locate the appropriate stock number. -
If the Equipment Profile for the stock includes existing attachments, then the Equipment Attachments screen opens. You must select an option for the attachment, one of:
-
Add as Quote—add it to this quote.
-
Add to Attachment Tab—add it to the Attachment tab. This option is controlled by the user's authority to access the Attachments tab.
-
Do not Quote—remove it from the quote.
-
-
Click Save.
The Equipment Quoting Details tab automatically populates the Description, Make, Model, Group and Class fields based on the information loaded to the equipment profile. -
Enter the quoted selling price of the equipment in the Price field.
-
On the Equipment Quoting Details tab, enter a description of the base and options of the unit in the Description field.
- or -
Click the Import Descriptions link to import the base and option descriptions of the unit into the Description field.
The Import Descriptions screen appears in a new browser window where you may select the descriptions you want to import. -
To save the segment information, click Save. Or to add another unit to the quote, click the Add> tab.
-
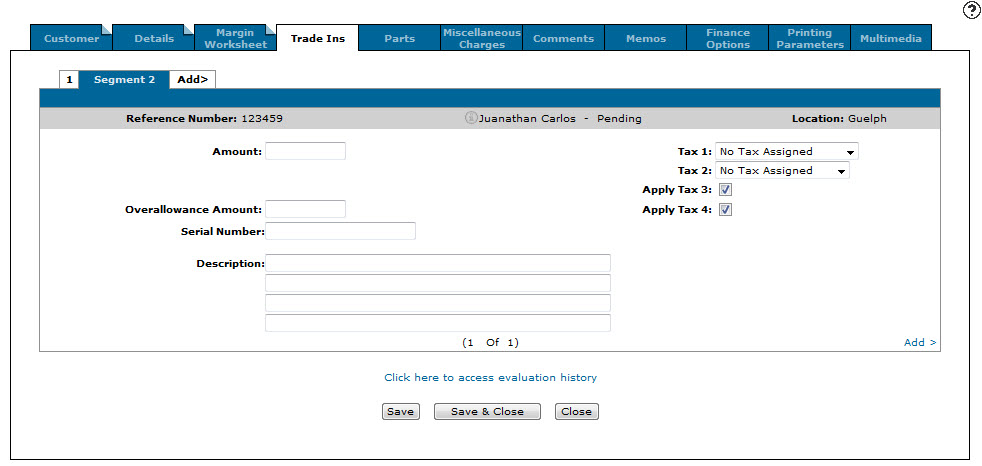
(OPTIONAL) If the customer plans to trade in a unit as part of the transaction you are creating the quote for, click the Trade Ins tab.
-
(OPTIONAL) On the Trade-Ins tab, select the Segment that the trade-in unit applies to and fill-in these fields, referring to Equipment Quoting:
-
Amount
-
Overallowance Amount
-
Serial Number
-
Description
-
Tax 1 or Tax 2
-
Apply Tax 3 or Apply Tax 4 to the trade-in unit
-
-
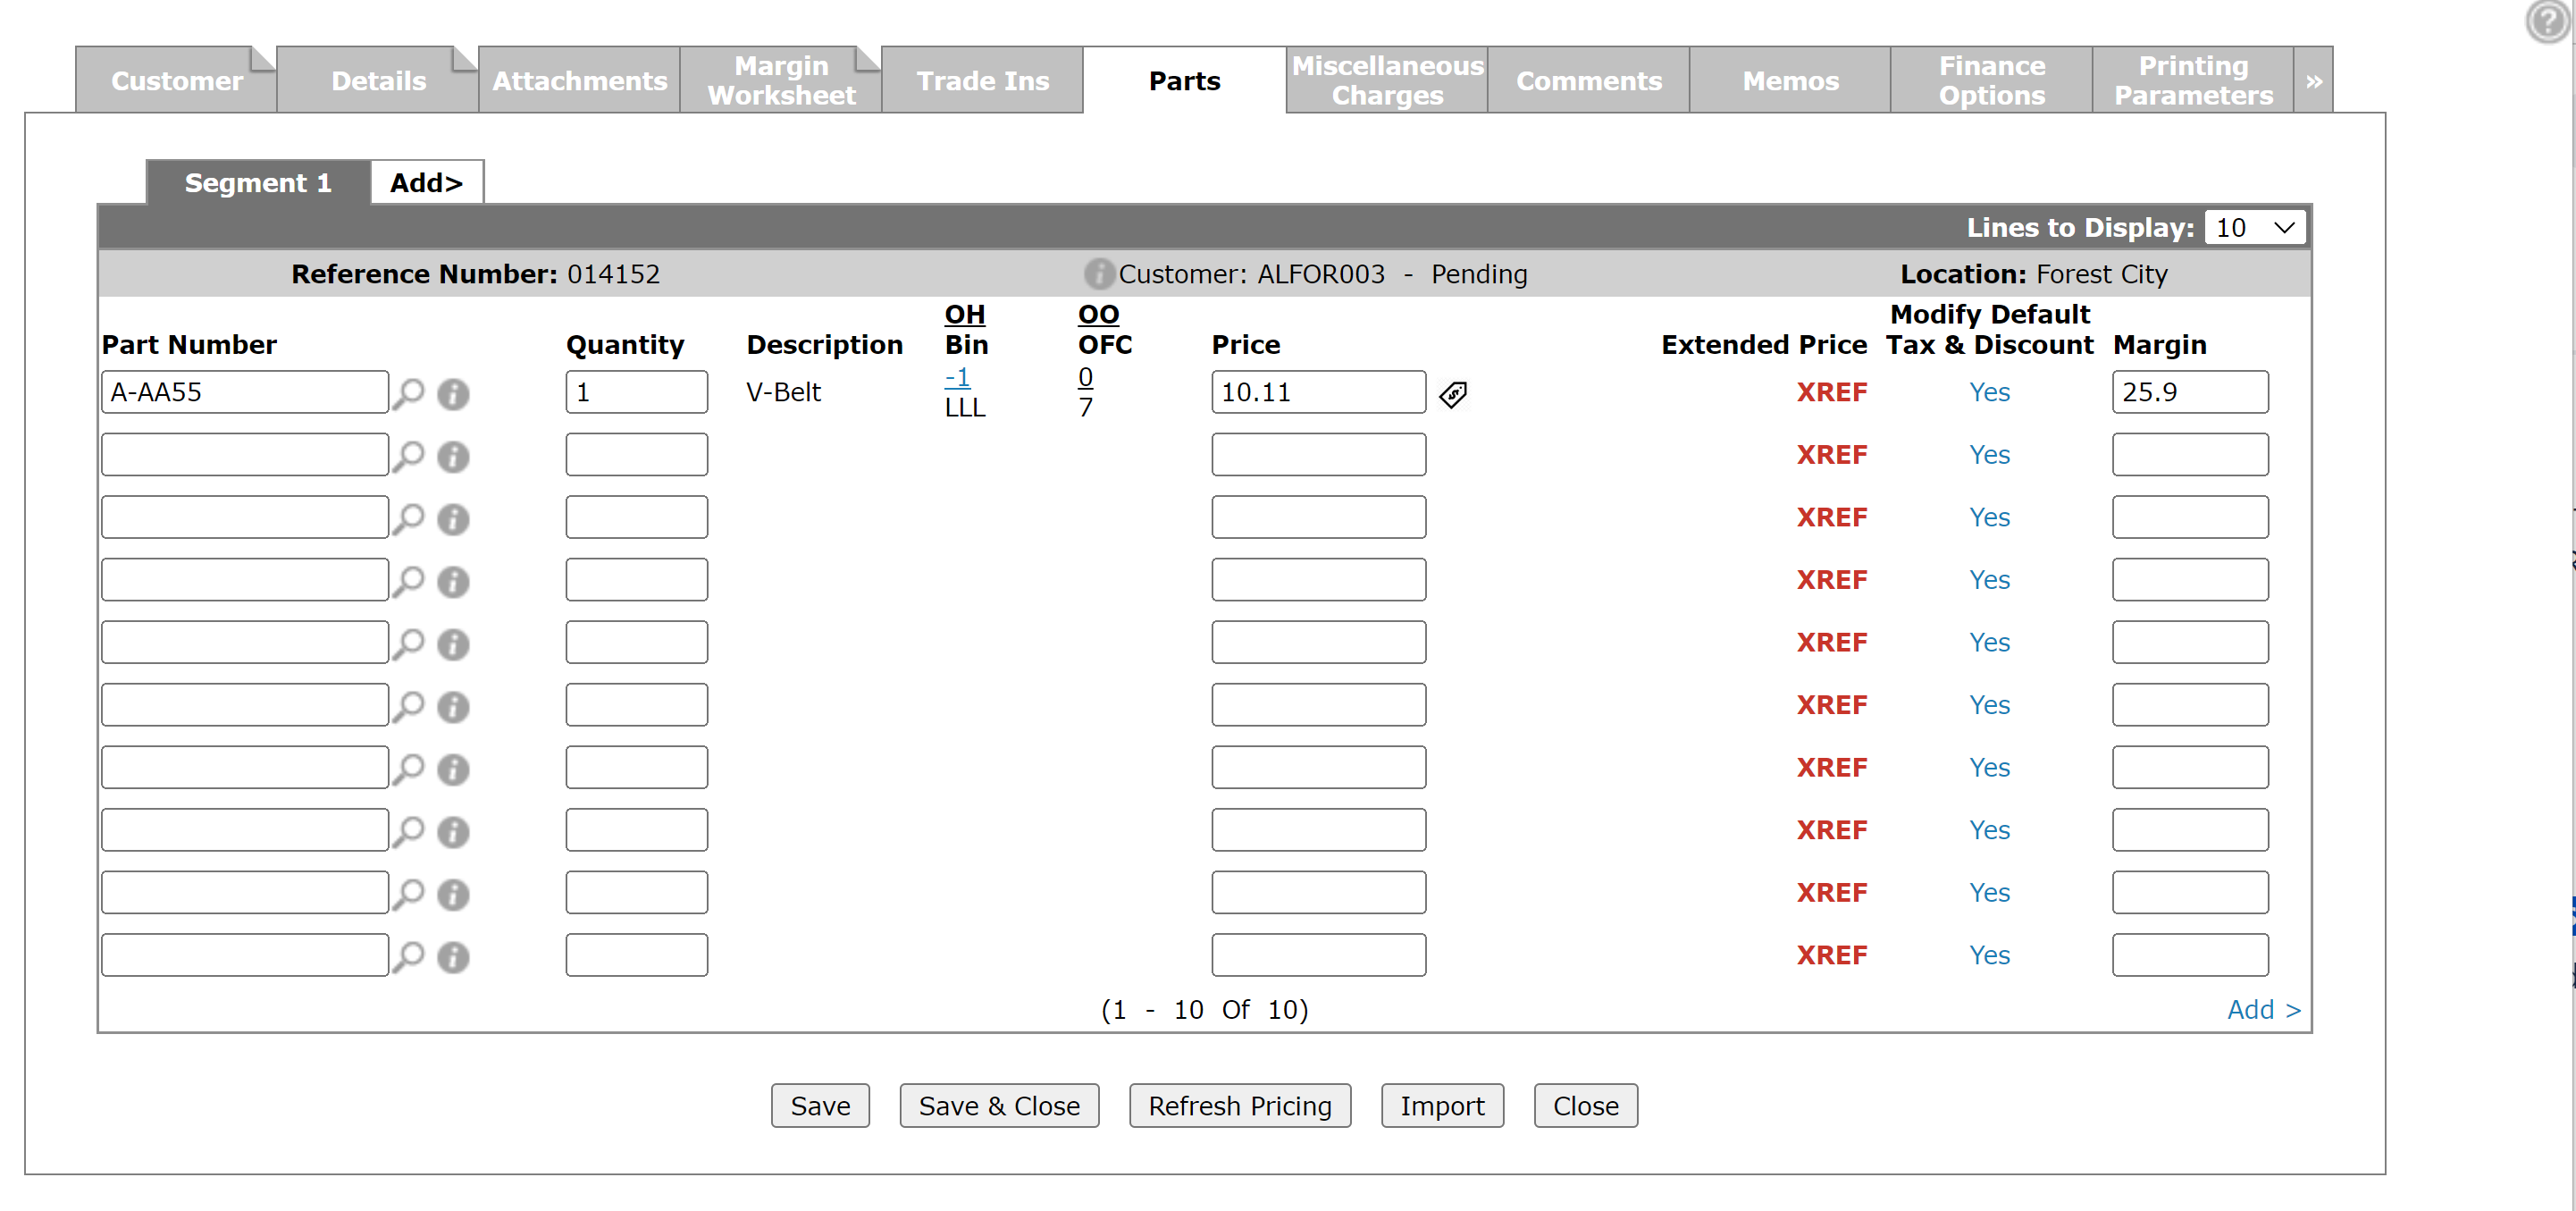
(OPTIONAL) To add parts to the quote, click the Parts tab.
-
(OPTIONAL) Enter or select the Part Number you want to add to the quote, and the Quantity and Price of the part. Or click the Import button to import an existing parts list from the Import screen.
-
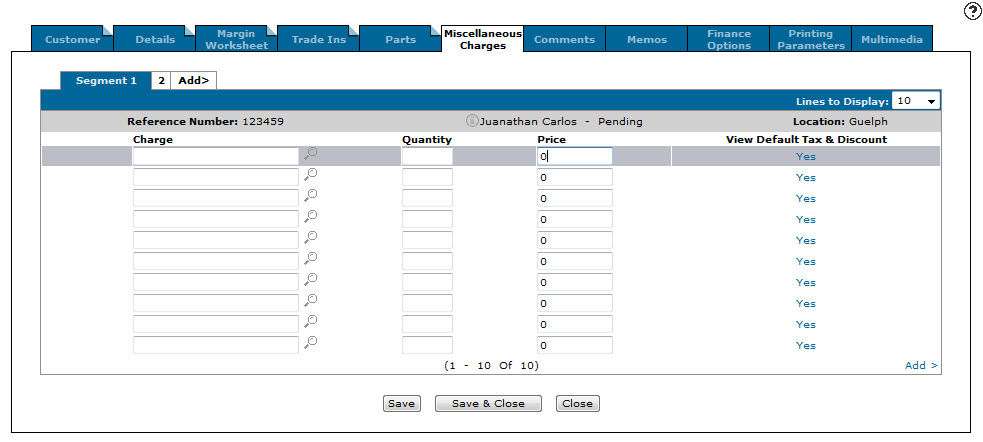
(OPTIONAL) To add miscellaneous charges to the quote, click the Miscellaneous Charges tab.
-
(OPTIONAL) Enter or select the Charge you want to add to the quote, the Quantity and the Price for the charge.
-
(OPTIONAL) To add comments or memos to the quote, click the Comments or Memos tabs and enter a comment or memo in the space provided.
Comments always print on the quote, while memos are for internal use only.
-
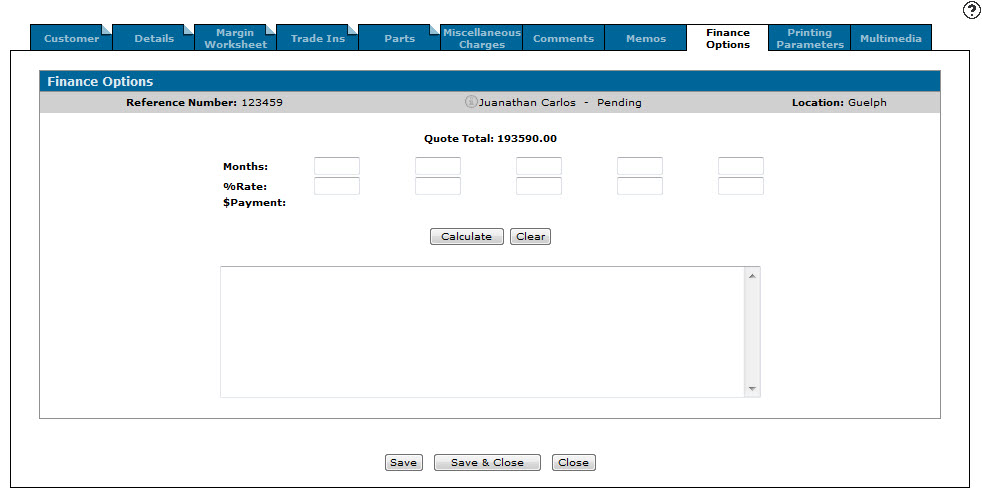
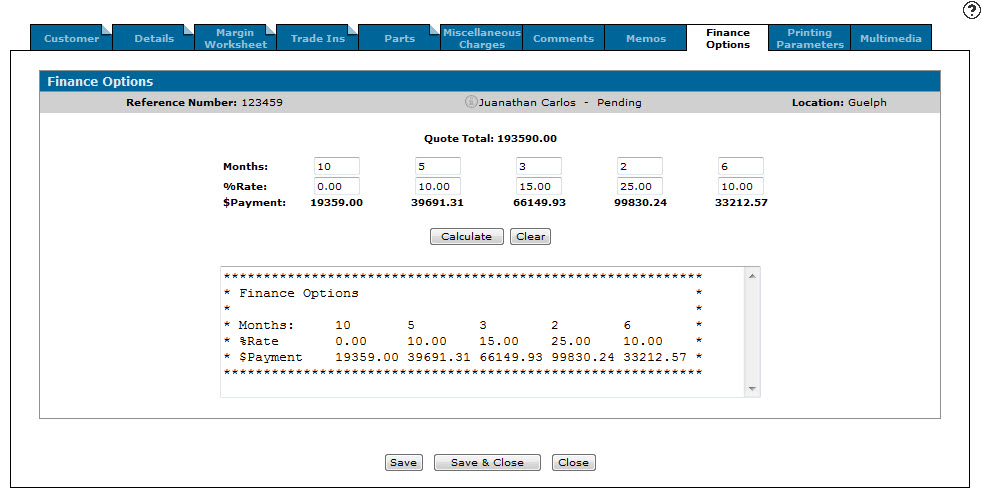
(OPTIONAL) To calculate up to five payment plans for the quote, click the Finance Options tab.
-
(OPTIONAL) On the Finance Options tab, for each payment plan enter:
-
Months—the number of months you want the quote to be paid in
-
%Rate—the interest rate to charge
Then click Calculate. The Finance Options tab refreshes, displaying the total dollar amount for each monthly payment in the $Payment field.
-
-
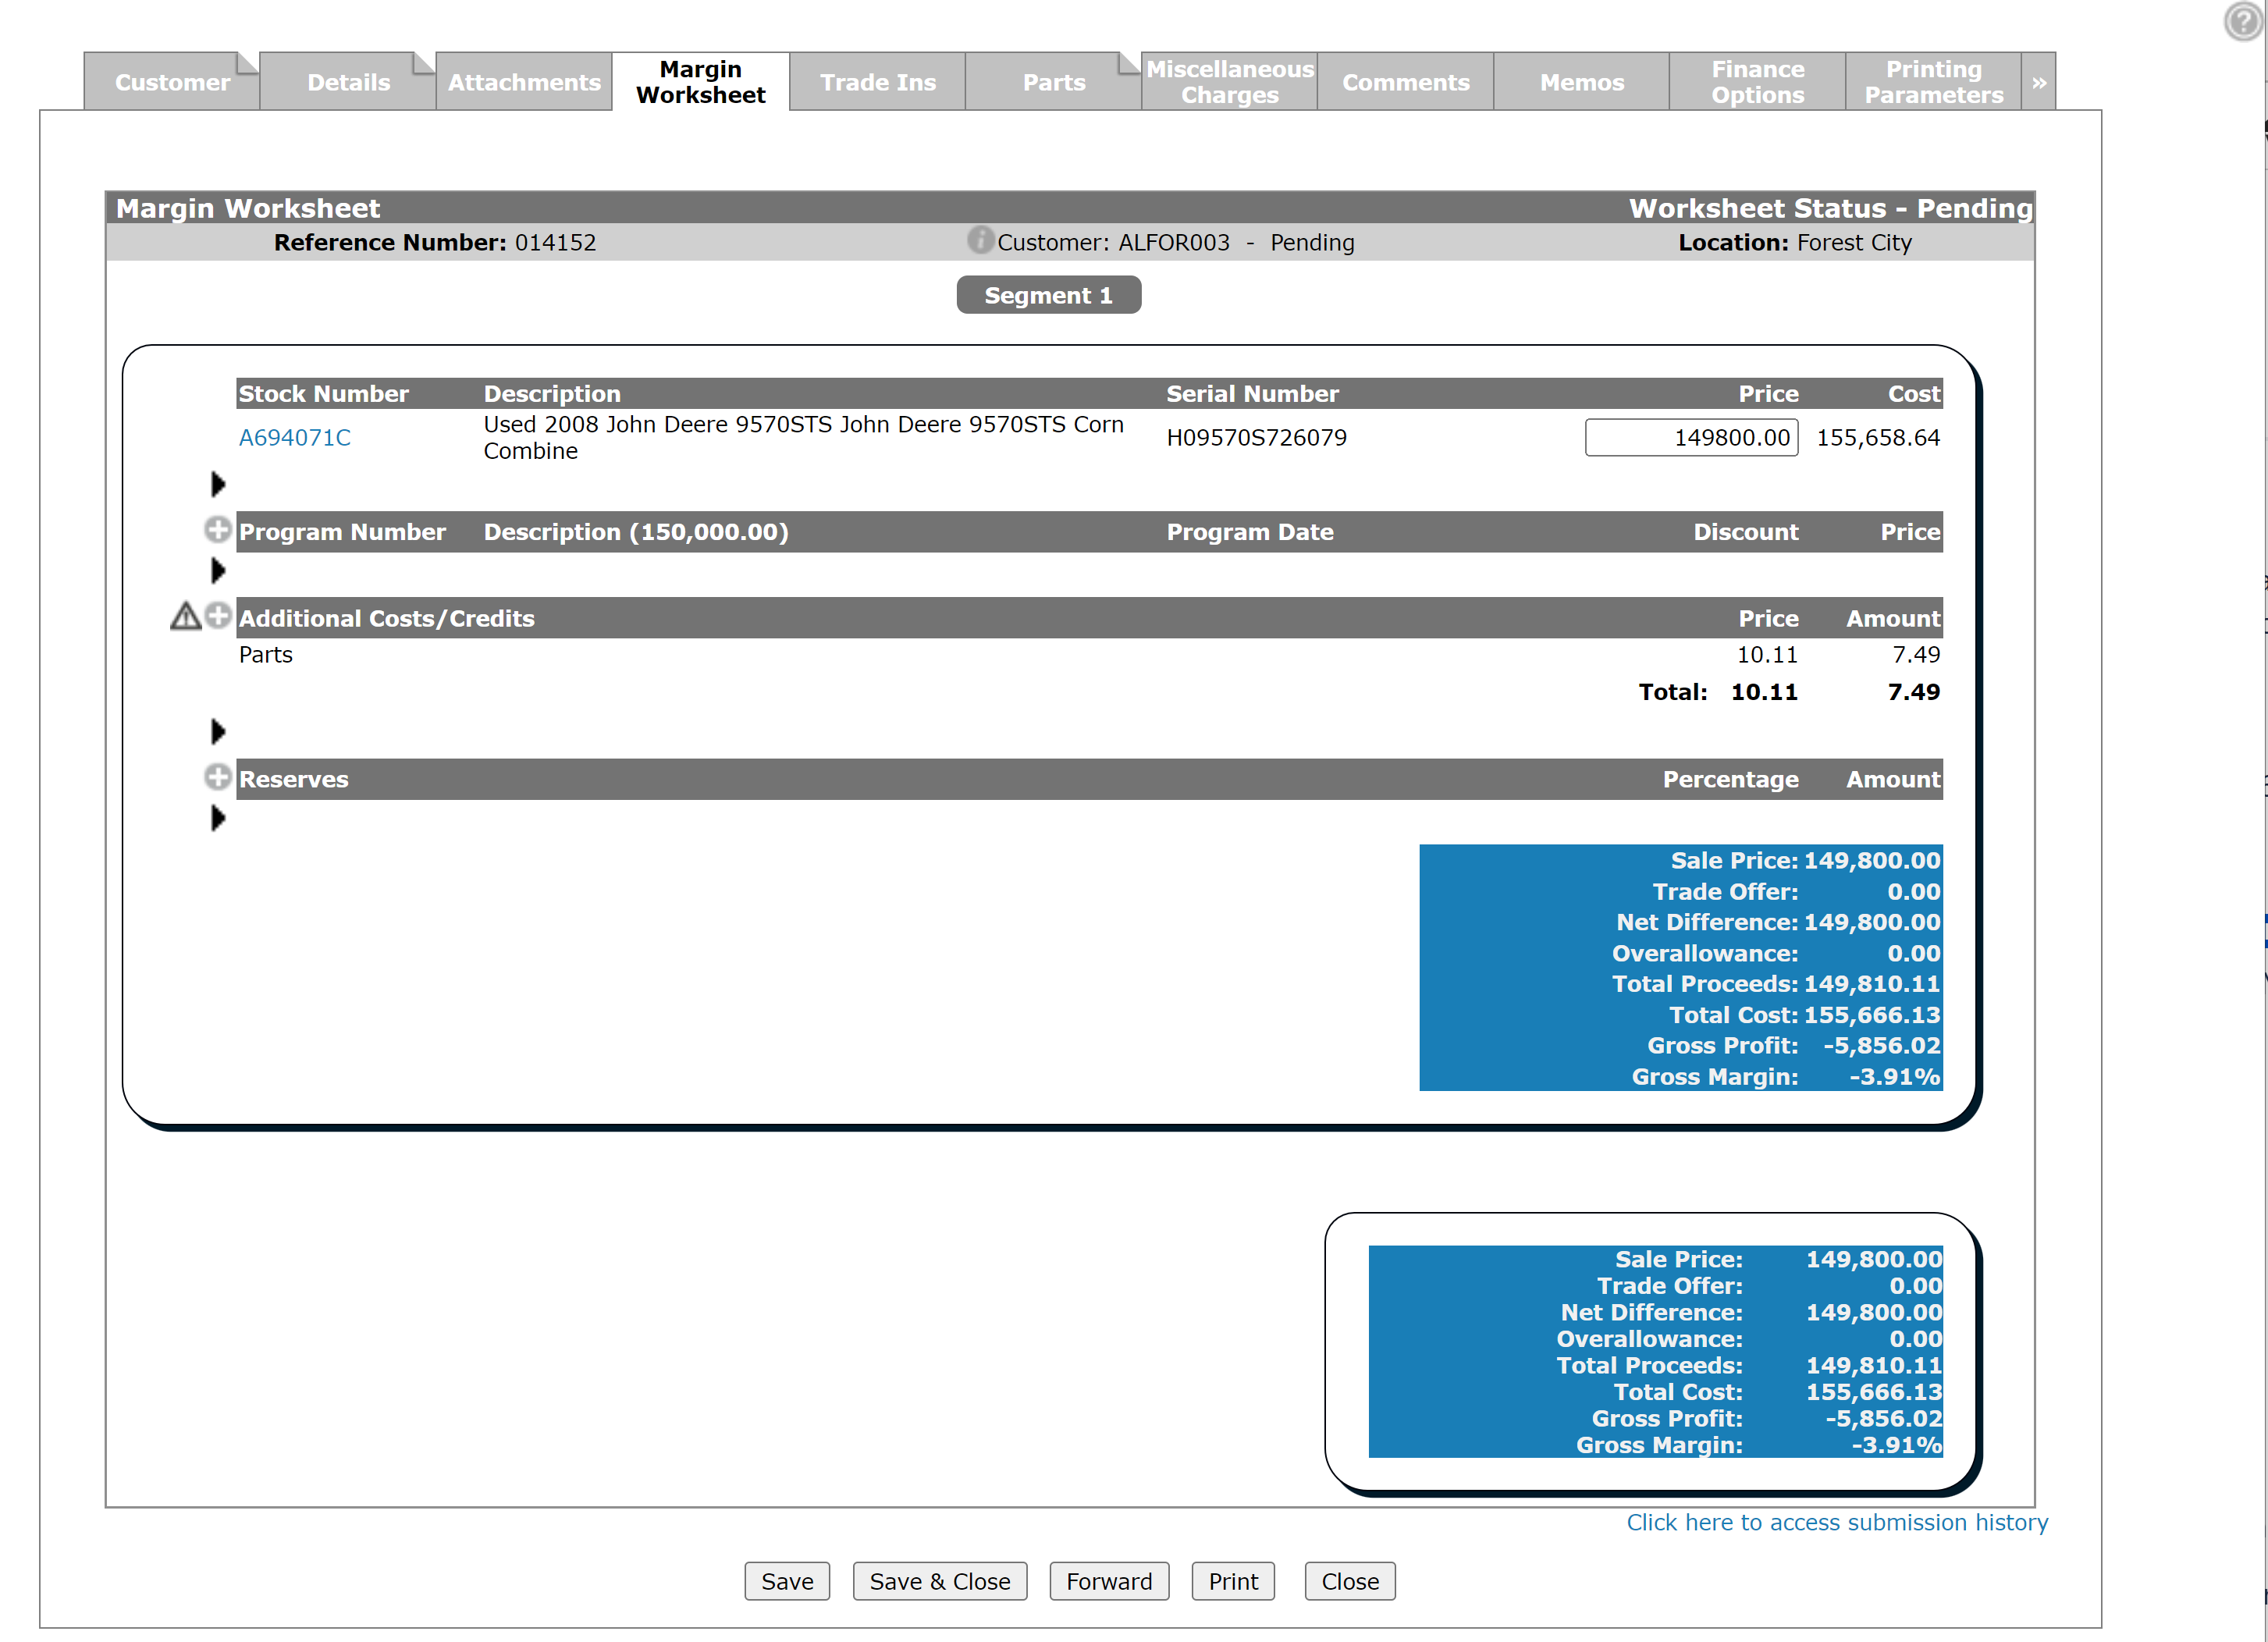
Click the Margin Worksheet tab.
-
Review the quote information then click Forward to send the worksheet to a manager for approval.
The Comments window appears.
If you are a Level 1, 2, or 3 Manager with the appropriate margin user levels for the margins on the selected worksheet, the Accept button appears instead of the Forward button. If you approve of the margins on the worksheet, click the Accept button to complete the quote.
If you do not approve of the margins you can edit the quote using the margin worksheet.
-
On the Comments window, enter any information that the manager may need to know about the margin worksheet and click Save to complete the quote.
The system returns to the Equipment Quoting screen.

Security Switch: 801 - Product Support - Equipment Quoting
Revision: 2024.08