Creating a Custom Financial Report
If none of the available reports meet the needs of your organization, you can create a custom report. This procedure walks through the process and provides sample data to use while creating the report.
-
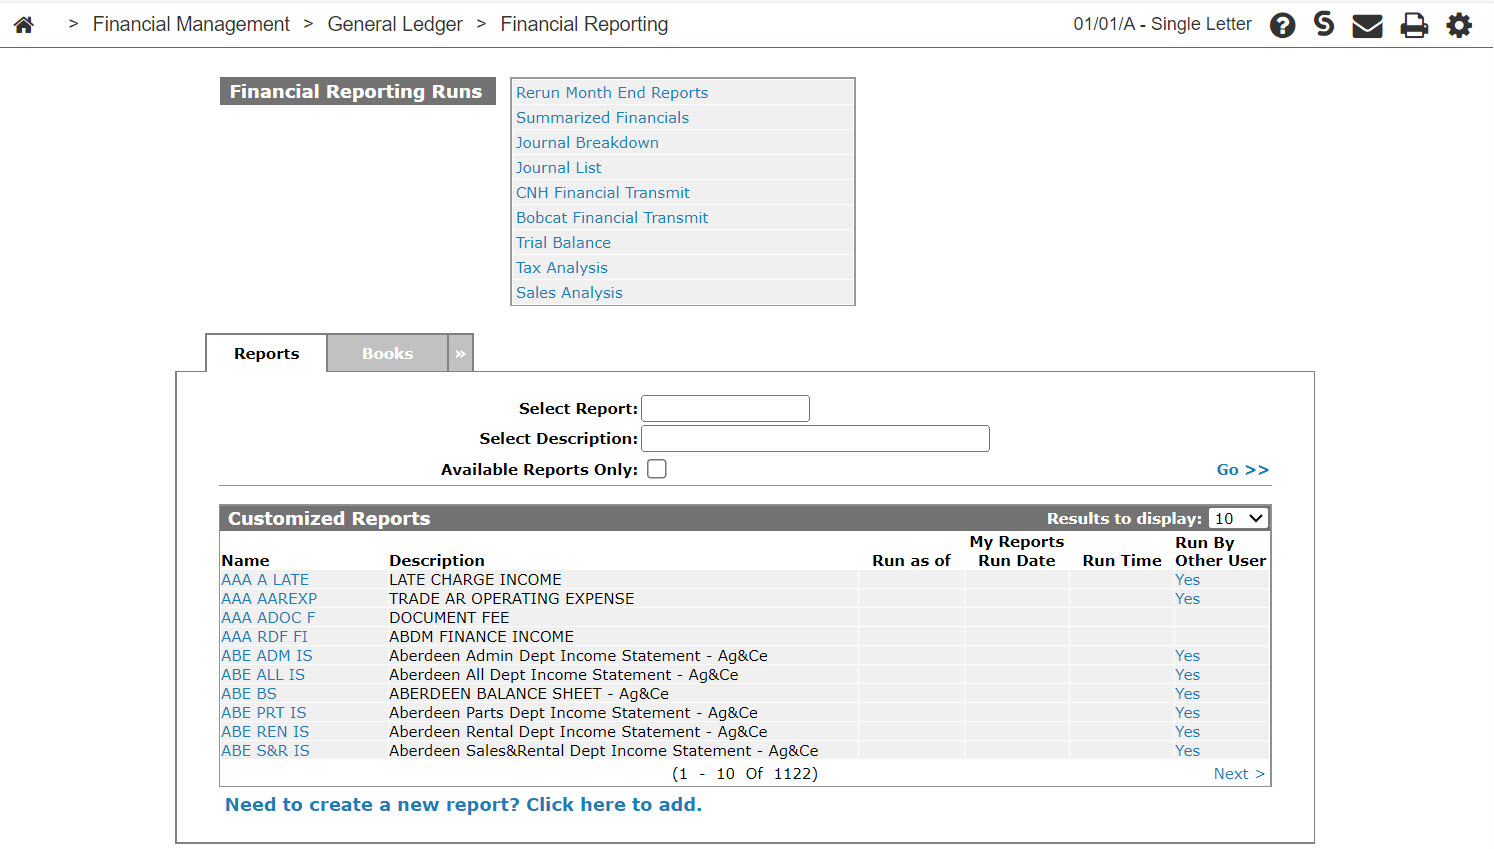
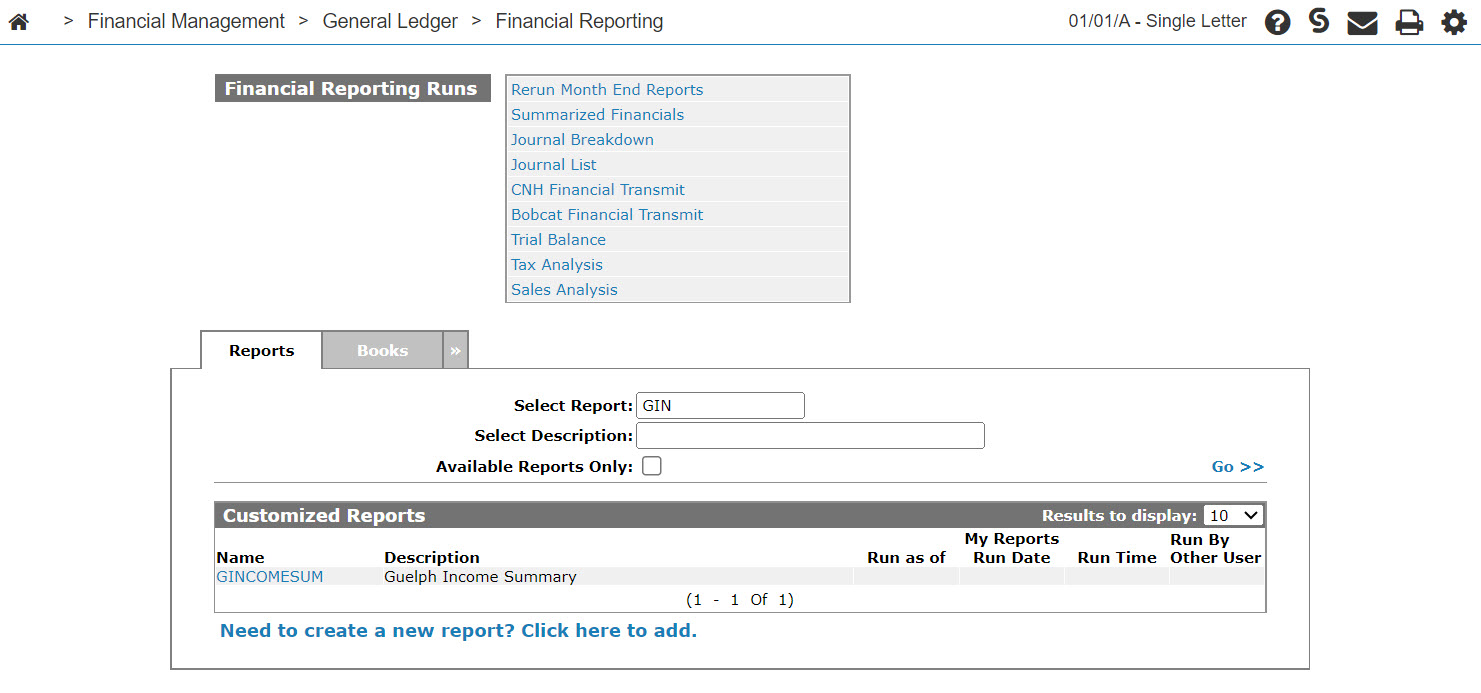
From anywhere within IntelliDealer, navigate to Financial Management > General Ledger > Financial Reporting.
-
Click the Need to create a new report? Click here to add link.
-
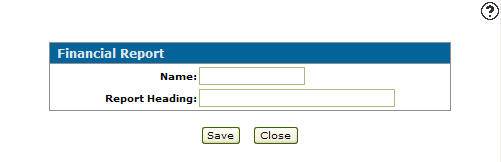
Enter a Name and Report Heading (a description) in the fields provided.
Tip: Reports are listed all in one folder. To make them easier to find, use a naming convention that sorts reports by location. For example:
01PartPL
01ServPL
01RentPL -
Click Save.
-
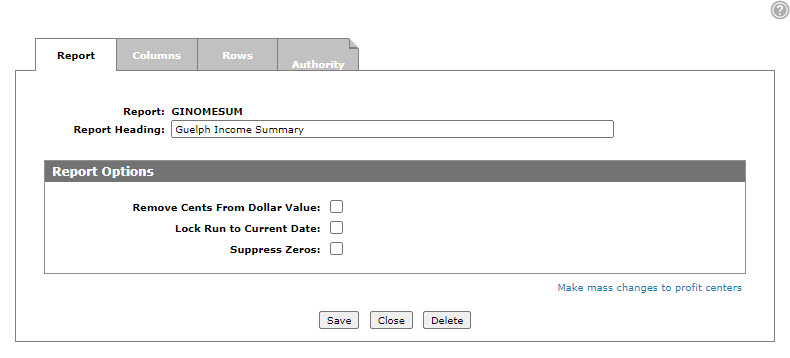
Set these report options, if desired:
Report Options Field Description Remove cents from dollar value Remove cents from the dollar values that are displayed. Lock run to current date Locks the report so it can only be run for the current date, instead of prompting the user for the report end date. Suppress zeros Determines whether the report should show cells with zero values (0.00). If selected zero value cells are shown as blank. -
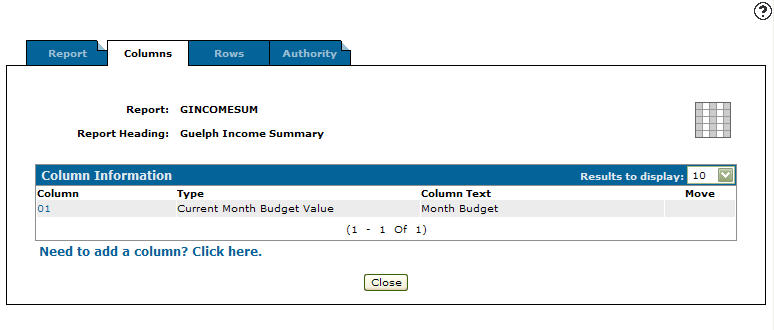
Click the Columns tab.
The Column Information tab appears.
-
Click the Need to add a column? Click here link.
-
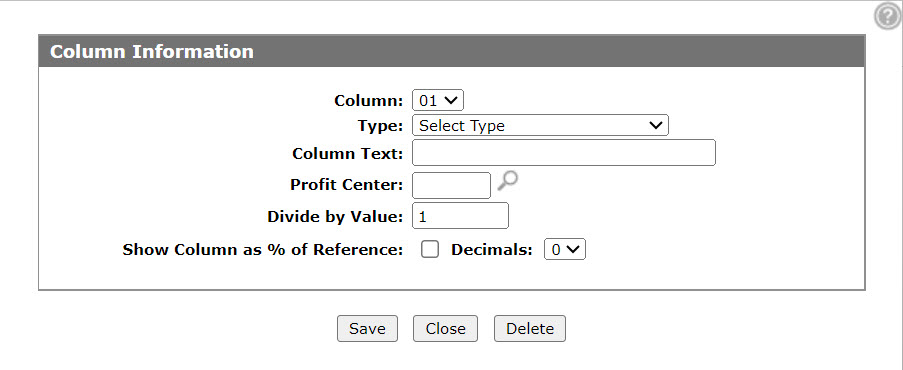
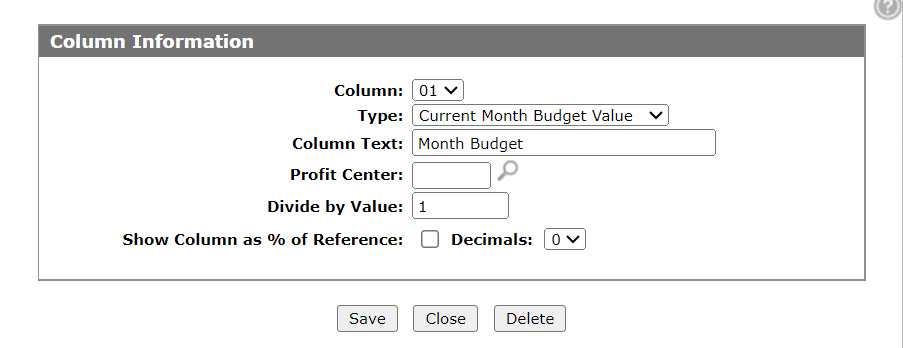
Refer to Column Information to fill in this tab.
Column 1 is for the Current Month's Budget Value. Configure it as:
-
Type - Current Month Budget Value
-
Column Text - "Month Budget"
-
-
Click Save.
-
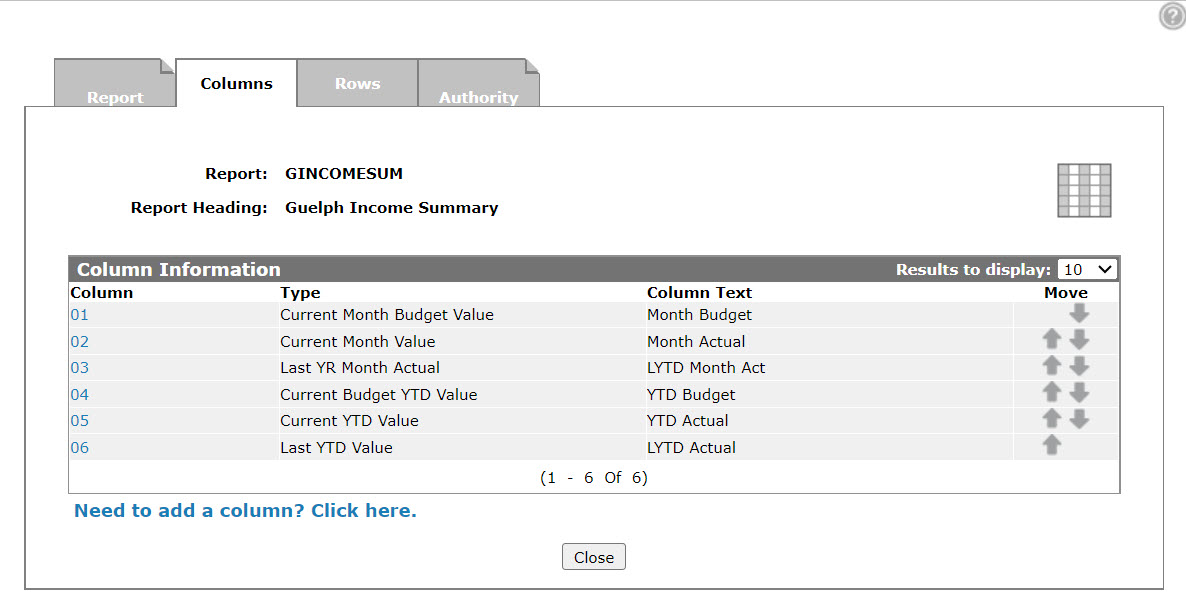
In this example, add these further columns by clicking the Need to add a column? Click here. link, filling in the information, then click Save. If you make a mistake, click the column number to open it for edit.
Column 2 is for the Current Month Value. Configure it as:
-
Type - Current Month Value
-
Column Text - "Month Actual"
-
Select the Show Column as % of Reference field so that this column shows a percentage value to the right based on the row % of reference number values calculated.
Tip: For this parameter to work correctly, the Show Account Details for Row parameter must be disabled on the Row Information screen. Otherwise, the column will always display %100.
-
Select 2 from the Decimal drop down list so two decimal places show in the percentage value.
Column 3 is for the Last Year Month Actual. Configure it as:
-
Type - Last YR Month Actual
-
Column Text - "LYTD Month Act"
Column 4 is for the Current Budget Year To Date Value. Configure it as:
-
Type - Current Budget YTD Value
-
Column Text - "YTD Budget"
Column 5 is for the Current Year To Date Value. Configure it as:
-
Type - Current YTD Value
-
Column Text - "YTD Actual"
Column 6 is for the Last Year to Date Value. Configure it as:
-
Type - Last YTD Value
-
Column Text - "LYTD Actual"
-
-
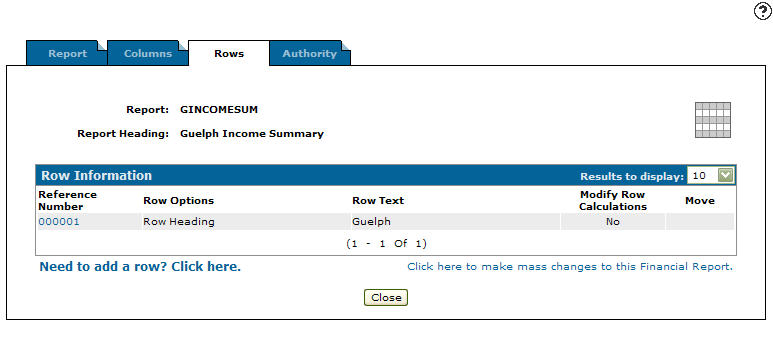
Click the Rows tab.
The Rows tab appears. The Rows tab allows you to set up accumulated general ledger accounts and special print lines for your report.
-
Click the Need to add a row? Click here link.
-
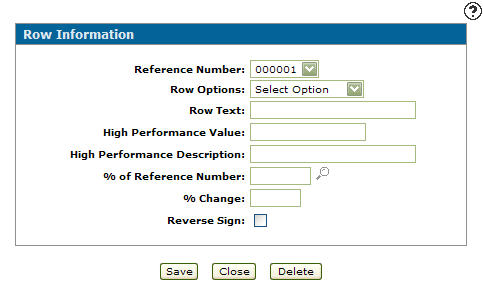
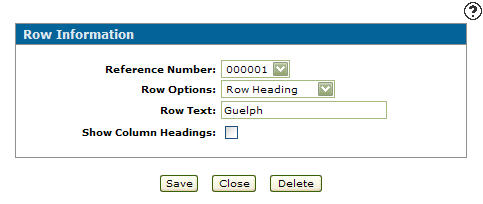
Refer to Row Information to fill in the screen.
The first row is numbered 000001 and can be configured as:
-
Row Option - Row Heading
-
Row Text - "Guelph"
-
-
Click Save.
-
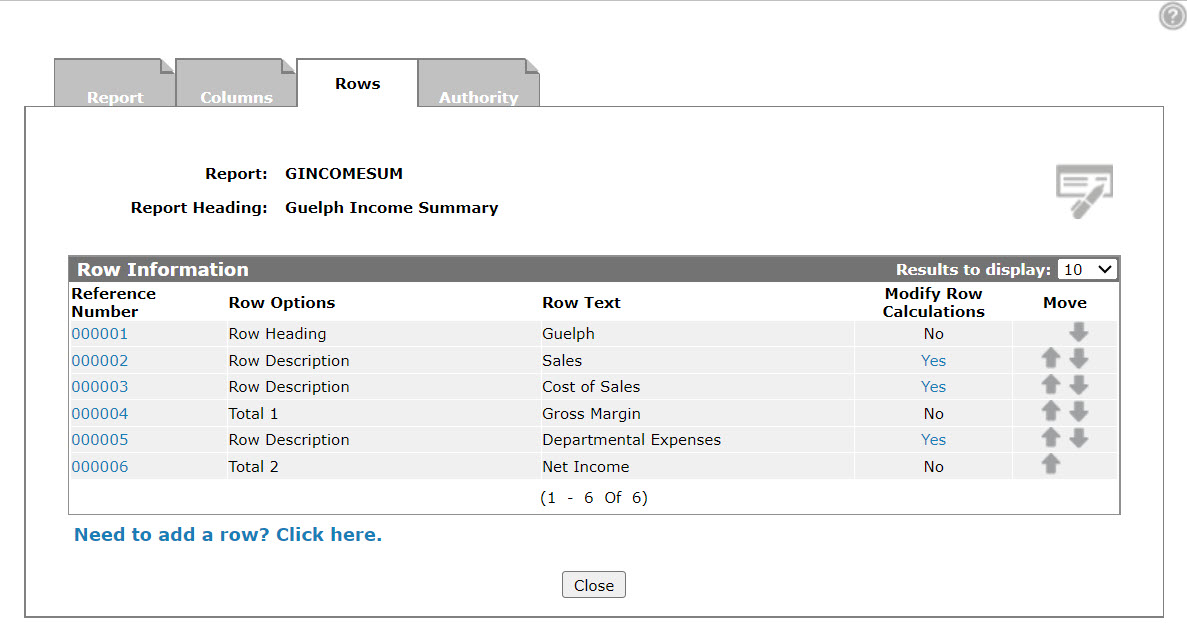
In this example, add these further rows by clicking the Need to add a row? Click here. link, filling in the information, then click Save. If you make a mistake, click the row number to open it for edit.
Row 000002 is for Sales data. Configure it as:
-
Row Options - Row Description
-
Row Text - "Sales"
-
% of Reference Number - after all rows are entered, open this row for edit and enter 000006. This calculates the dollar value as a percentage of this row to the referenced row number.
-
Select the Reverse Sign checkbox, to reverse the values in the row.
-
(Optional) Select the Show Account Details for Row option if you want the selected row to be expandable if the report is added to the Home screen as an Interactive Financial Report. See Row Information - Reference Number/Row Information.
Row 000003 is for Cost of Sales data. Configure it as:
-
Row Options - Row Description
-
Row Text - "Cost of Sales"
-
(Optional) Select the Show Account Details for Row.
Row 000004 is for the Gross Margin total. Configure it as:
-
Row Options - Total 1
-
Row Text - "Gross Margin"
-
High Performance Value - 10.00
-
High Performance Description - "Total"
-
Select the Reverse Sign checkbox.
Row 00005 is for Departmental Expenses data. Configure it as:
-
Row Options - Row Description
-
Row Text - "Departmental Expenses"
-
(Optional) Select the Show Account Details for Row.
Row 000006 is for the Net Income total. Configure it as:
-
Row Options - Total 2
-
Row Text - "Net Income"
-
Click the Reverse Sign checkbox, to include a reverse sign.
-
-
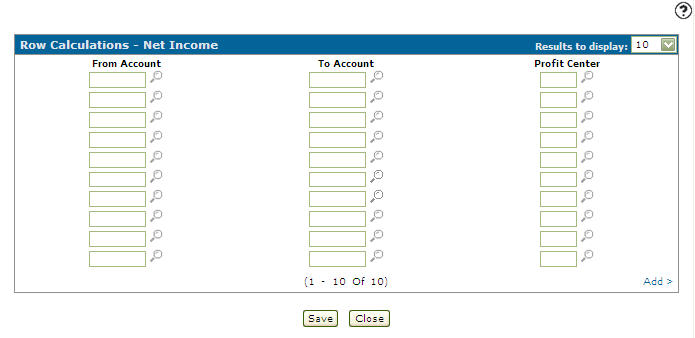
For each row that can be modified, add the appropriate general ledger account number as row descriptions by clicking the Yes link under the Modify Row Calculations field.
Refer to Row Calculations when filling in these fields.
-
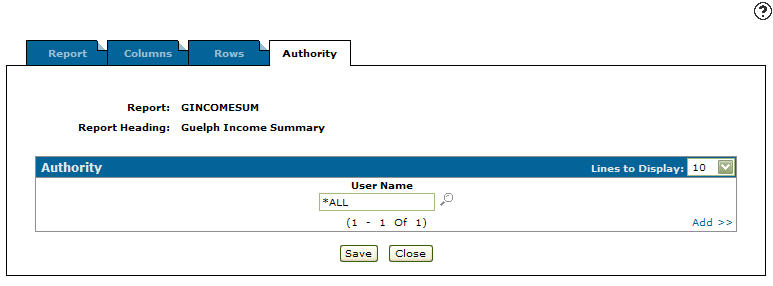
Click the Authority tab to define who is authorized to run, view, print and download a report.
-
Click Add >> to select the authorized users.
Delete the *ALL entry from the first User Name field, unless you want all users to be authorized to run, view, print, or download the report. You can then search for specific users.
-
Once you have entered all authorized users, click Save.
-
Click Close.
-
On the Financial Reporting Runs screen, move the cursor over a name and select Run from the pop-up menu.
The screen refreshes and a message appears indicating that the report has been submitted.
Security: 602 -Financial Management - General Ledger
Revision: 2024.08