Employee Profile
Use the Employee Profile tab to add new employee profiles to the system and maintain existing employee profiles.
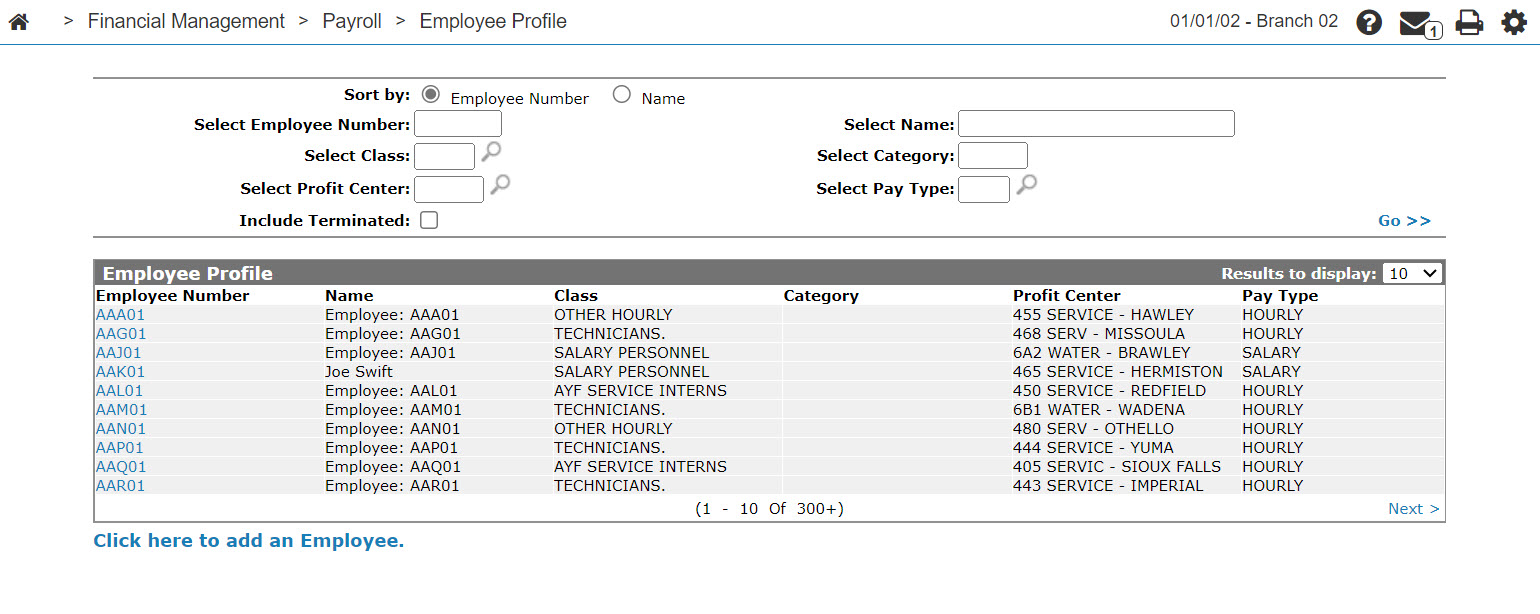
To open the Employee Profile tab, click the Click here to add an employee link or an Employee Number on the Employee Profile screen.
Note: Employee payroll functionality has been deprecated since December 2013 for US dealers and December 2016 for Canadian dealers.
Topics in this section are:
Adding an Employee
-
Navigate to Financial Management > Payroll > Employee Profile.
-
Click the Click here to add an employee link.
-
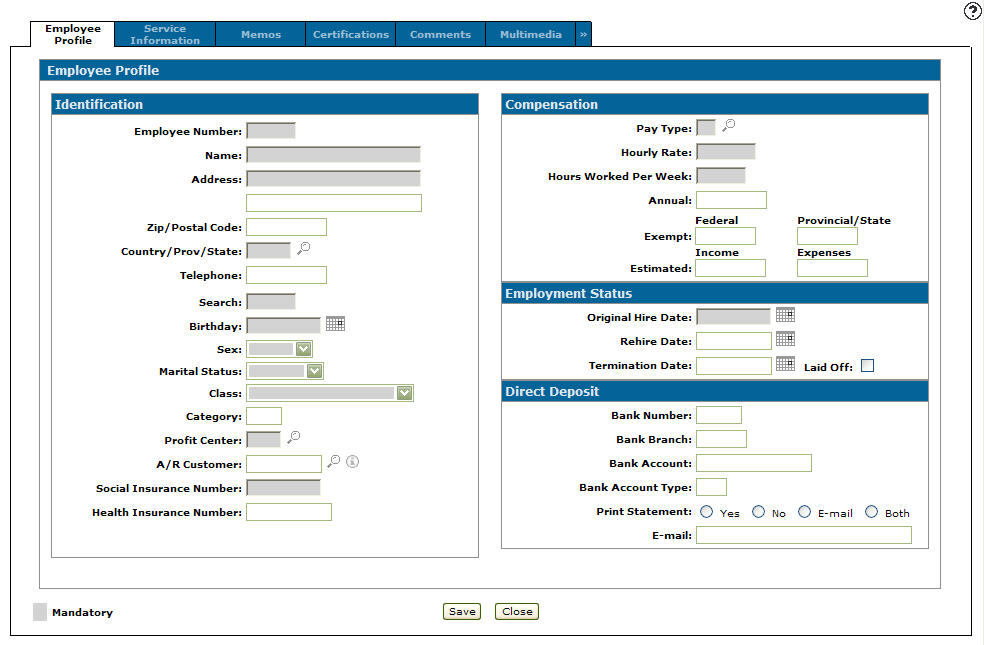
Fill in the employee's information referring to the table below.
- Complete the profile by adding additional information about the employee in these tabs:
Service Information—to set an employee's technician rates and weekly shift hours.
Memos—to add any additional information to an employee profile.
Certifications—to manage dealership employee certifications.
Comments—to track history adjustments applied to an employee's profile.
Multimedia—to provide links to any type of multimedia file (assuming the appropriate software is present) and to present more information (e.g. equipment, parts, warranty documents, etc.). Click on the picture to process the multimedia file. Clicking on the title/description lets you edit the Multimedia Links.
-
Click Save to create the employee profile entry, or click Close to exit without saving any of the information.
Screen Description
The Employee Profile screen has these sections:
Identification
The fields in the Identification section of the Employee Profile tab are:
| Identification | |
|---|---|
| Field | Description |
| Employee Number |
A five-character alphanumeric number that represents the employee within the system. The employee number is used as the technician number in the Work Order system. |
| Name | The name of the employee. |
| Address | The employee's home address. |
| Zip/Postal Code | The employee's zip/postal code. |
| Country/Prov/State | The country/prov/state where the employee currently resides. |
| Telephone | The employee's home phone number. |
| Search |
This is a five character value that is used as a cross reference to access the employee account. If the value is less than five characters in length, the remainder of the search key is left blank. The Search value is normally the first five letters of the employee's last name. |
| Birthday | The employee's date of birth. |
| Class |
The employee class code which determines the G/L expense account to which the employee's wages are debited. Note that:
|
| Category |
A user defined, three-character employee category. Set the Category field to N/A for non-real technician (eg. CUST, WARR, INTER, etc.) Employees with a Category of N/A will not appear on the Technician Service Scheduling screen. |
| Profit Center | The pre-defined Profit Center for the employee. |
| A/R Customer | The assigned accounts receivables user for the employee. |
| Social/Health Insurance Number | The employee's respective personal information. |
| Payroll ID |
The employee's identification number in the Payroll Plus software. Click the search |
The available Profit Center Departments are:
| 0 | Balance Sheet |
| 1 | Administration |
| 2 | Equipment Sales |
| 3 | Parts |
| 4 | Service |
| 5 | Rental |
| 6-9 | User defined departments |
Employment Status
The fields in the Employment Status section of the Employee Profile tab are:
| Employment Status | |
|---|---|
| Field | Description |
| Original Hire Date |
The date that the employee was originally hired. If an employee is laid off and returns to work, the Original Hire Date field should not be changed. Enter the date that the employee returned to work in the Rehire Date field. |
| Rehire Date |
The date that the employee is rehired in the event of a break in employment. If the employee is temporarily laid off, the date the employee is rehired is entered in this field. |
| Termination Date | The employee's termination date. |
| Laid Off | Select the checkbox if the employee has been temporarily laid off. |
Use these buttons to complete your work on the Employee Profile tab:
| Button | Function |
|---|---|
| Save | Save changes made to the Employee Profile tab. |
| Close | Closes the Employee Profile tab without saving and returns to the Employee Profile screen. |