Creating a New Rental Contract
-
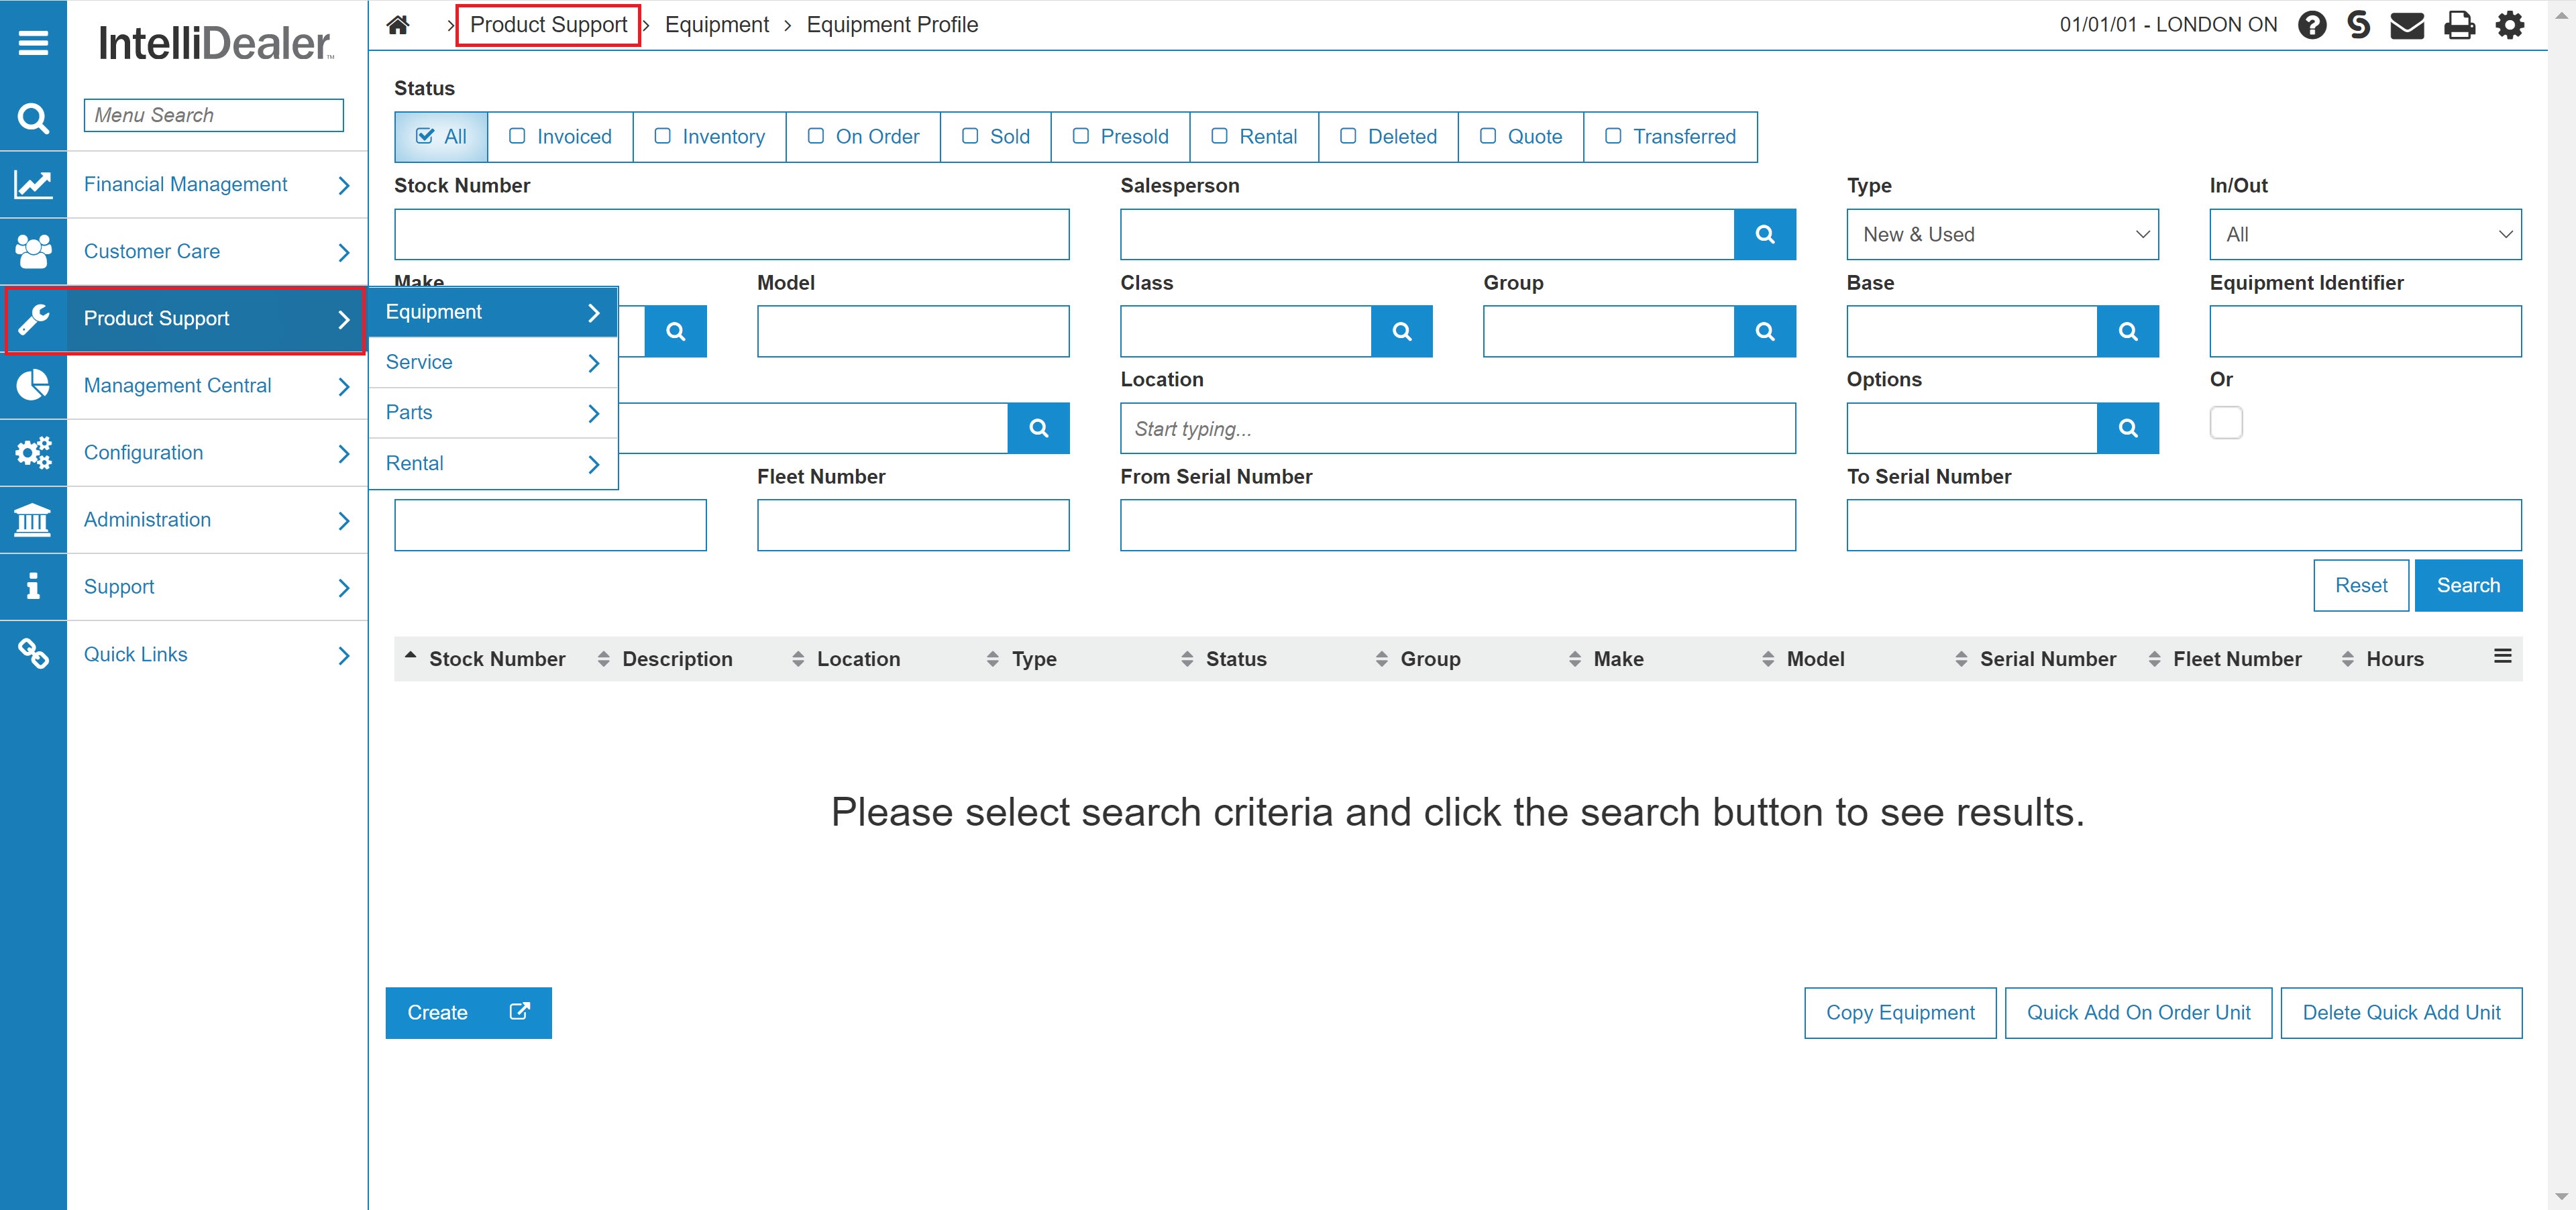
From any IntelliDealer screen, click the Product Support tab. The Product Support Quick Links screen appears.
-
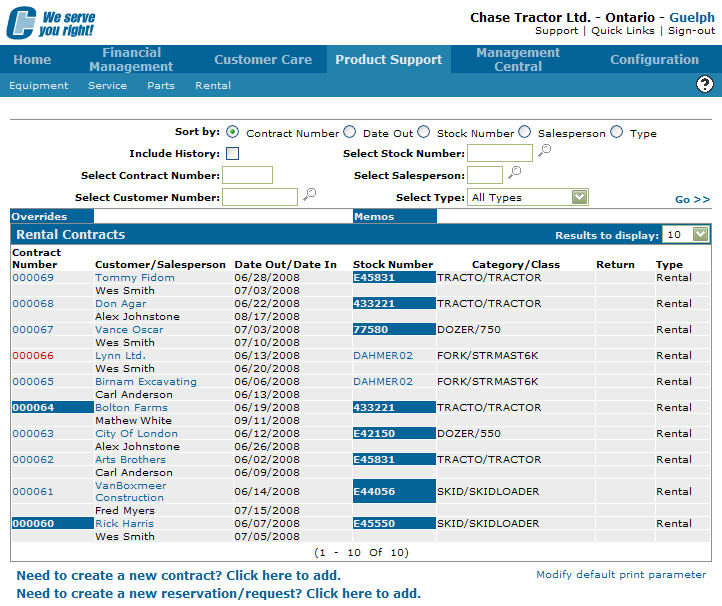
From the Rental list, click the Rental Counter link. The Rental Counter screen appears.
-
On the Rental Counter screen, click the Need to create a new contract? Click here to add link. The Customer tab opens in a new browser window.
-
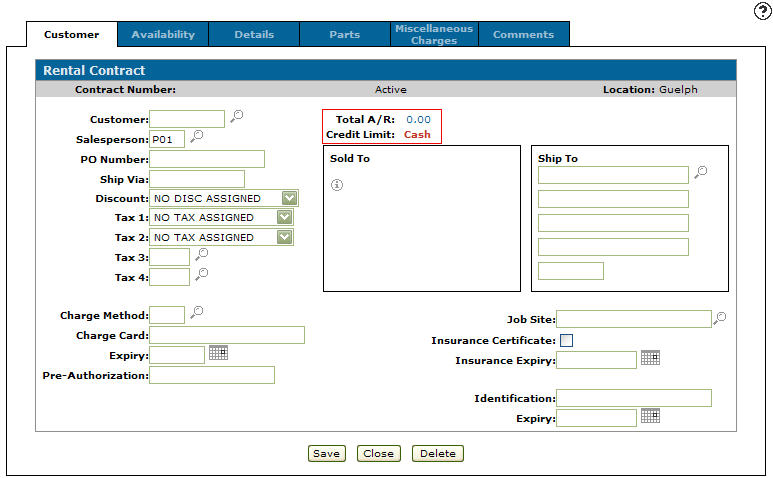
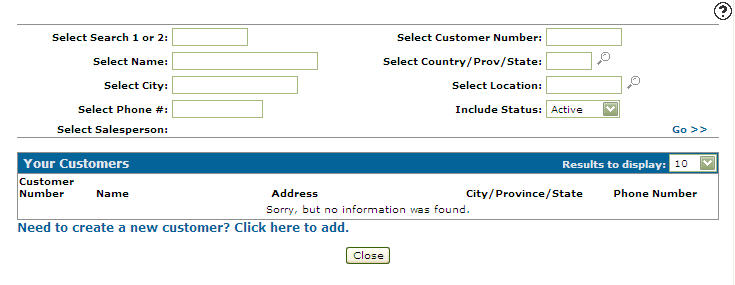
On the Customer tab, type the customer number in the Customer field, or click the Search
 icon to open the Your Customers screen in a new browser window and locate the appropriate customer.
 -
The Customer tab refreshes and adds any customer information found in the customer's profile.
-
On the Customer tab, enter the salesperson id in the Salesperson field, or click the Search
 icon to open the Salesperson Selection screen in a new browser window and select the appropriate salesperson from the list.
Note: The Salesperson field may have been filled in automatically, depending on your User and Group settings.
-
(OPTIONAL) On the Customer tab, enter the purchase order number in the PO Number field.
Note: The PO Number field is optional only if the Customer Profile does not require a PO Number be registered for all items invoiced to this customer.
-
(OPTIONAL) On the Customer tab, enter the shipment company or method in the Ship Via field.
-
(OPTIONAL) Select a Discount from the list.
-
(OPTIONAL) Select or search for Tax 1-4.
-
On the Customer tab, enter or select the Charge Method for the contract.
-
(OPTIONAL) If a credit card was selected as the Charge Method for the contract, enter the Charge Card number.
-
(OPTIONAL) If a credit card was selected as the Charge Method for the contract, enter the Expiry date for the card.
-
(OPTIONAL) If a third-party agency is associated to the selected Charge Method, enter the appropriate Pre-Authorization number.
-
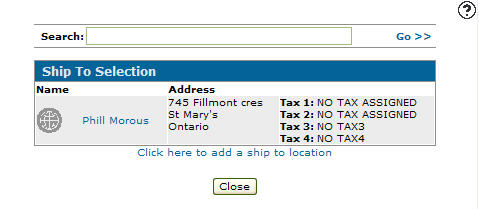
(OPTIONAL complete only if the shipping location is different than the Sold to location) Enter a Ship to address, or click the Search
 icon to open the Ship to Selection screen in a new browser window and select the appropriate shipping location from the list associated with this customer profile.
 -
(OPTIONAL) Enter a Job Site address, or click the Search
 icon to open the Job Site Selection screen in a new browser window and select the appropriate job site location from the list associated with this customer profile.
 -
Select the Insurance Certificate checkbox to indicate that an insurance certificate has been provided.
-
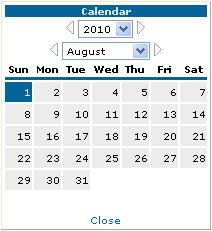
Enter the date that the insurance certificate expires in the Insurance Expiry field, or click the Calendar icon and select a date from the Calendar screen.
-
Enter the driver's license, or other Identification number.
-
Enter the date that the identification certificate expires in the Identification field, or click the Calendar icon and select a date from the Calendar screen.
-
Click the Save button to record your customer information.
-
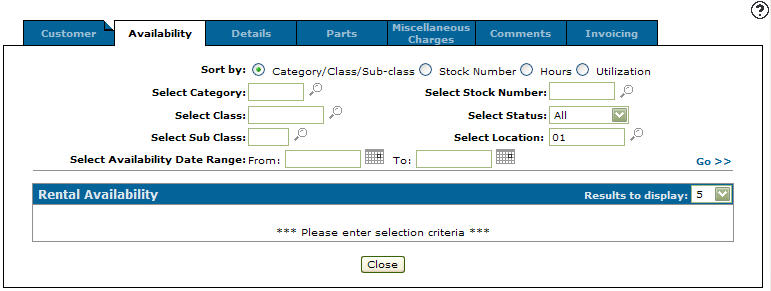
Click the Availability tab to continue entering contract information. The Availability tab appears.
-
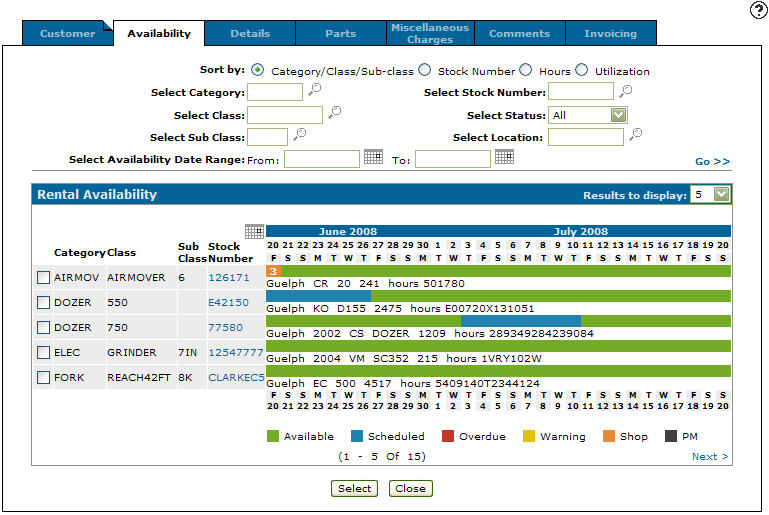
Identify the equipment you wish to check availability for by typing or searching for any combination of the Category, Class, Sub Class, Stock Number, Status or Location and the clicking the Go>> link to submit your search. The Availability tab is updated with matching rental equipment and parts, showing their availability for rental.
Note: If you do not see the piece of equipment you are searching for, verify that the piece of rental equipment has been properly set up with a Category, Class, and Sub-Class in your system.
-
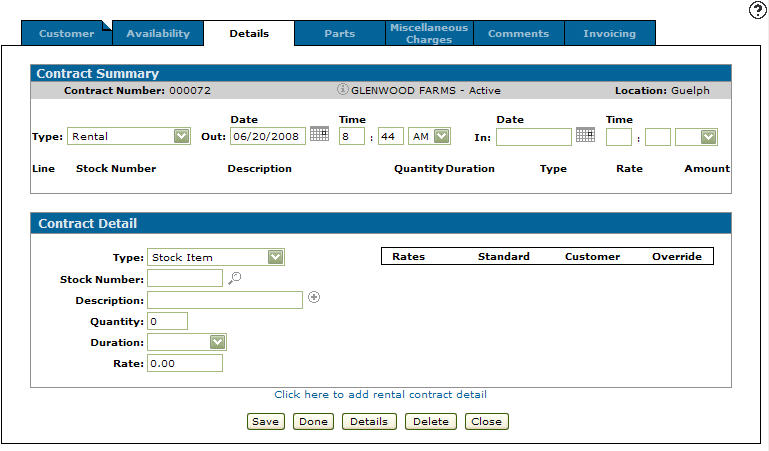
Begin the rental of a piece of equipment by selecting the corresponding checkbox and clicking the Select button. The Details tab appears displaying a summary of the rental contract in the Contract Summary section and the details of the selected rental equipment in the Contract Details section.
-
Enter the Quantity (number of) and Duration (unit of measure) to describe the length of the intended rental.
-
Click Save to record your changes.
-
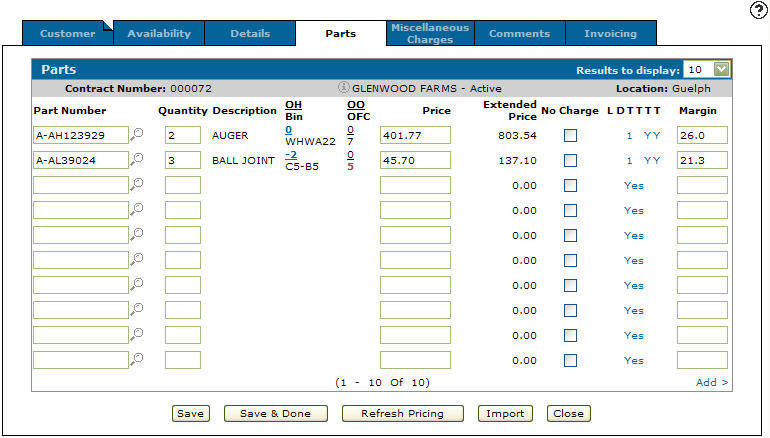
Click the Parts tab to continue entering contract information. The Parts tab opens.
-
Enter the part number in the Part Number field, or click the Search
 icon to open the Parts Search screen in a new browser window and locate the correct part.
Note: Non-serialized parts may also be added to your rental contract in this way, however non-serialized parts need to be manually entered into your system using the Parts Master before you attempt to add them to any Rental Contract.
-
Click the Save button to save the part number and update the information fields with inventory and pricing information about the added part.
-
In the Parts screen you should:
-
Review and if necessary type a Quantity (or ordered quantity) value.
-
Review or type the Description: the name of the part.
-
Review the OH /Bin value: the on hand quantity and the bin number for the part.
Note: If the part information from the parts master was loaded with a '?' in the last position of the Description field, you are required to enter a description.
-
Review the OO /OFC value: the number of parts that are on order and the order formula code for the part.
Note: You may click the OH Number to view parts availability details for the selected part.
Note: You may click the OO Number to view the on order details for the selected part such as the status and the due date of the order.
-
Review or type the Price value: the Unit price.
Note: The default value is the selling price currently loaded on the part master. If the part selling price is different from MSRP (manufacturer suggested retail price), the price value appears in reverse color. For example, if a customer parts discount applies or if you manually enter a price different from MSRP. To see the MSRP, hover over the price and a pop up window appears.
-
Select the No Charge checkbox to indicate that the part should be allocated to this contract, but not charged to the customer's invoice.
-
If desired, click the Yes link in the LDTTTT column to change the default tax and discount values for this part.
-
Review the Margin value (the current margin for the part being sold). You may override this margin if you have the necessary security access.
Note: For more detailed information about each column and entry on the Parts screen, click the Help
 icon and review the IntelliDealer Online Help.
 -
-
Add an additional part to this invoice by repeating steps 8–11 in the next empty row.
-
Click the Save button to keep your changes and continue.
-
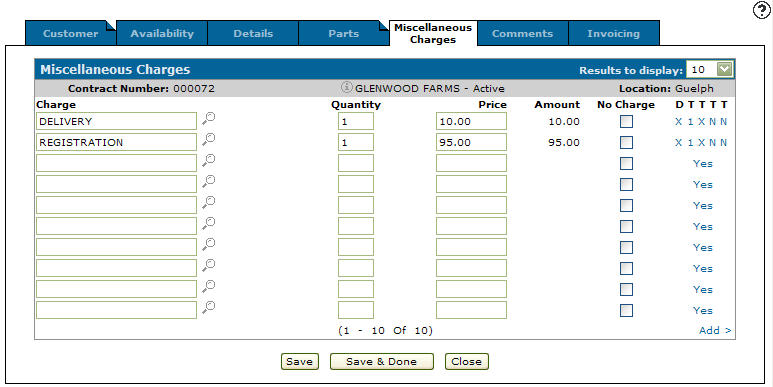
Click the Miscellaneous Charges tab to continue entering contract information. The Miscellaneous Charges tab opens.
-
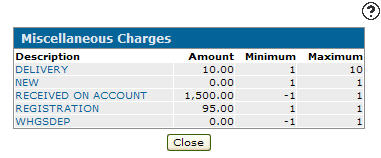
Enter the charge description in the Charge field, or click the Search
 icon to open the Miscellaneous Charges search screen in a new browser window and locate the correct charge.
 -
Click the Save button to save the charge and update the information fields with inventory and pricing information about the added part.
-
In the Miscellaneous Charges screen you should:
-
Review and if necessary type a Quantity value.
-
Review and if necessary type a Price.
-
Select the No Charge checkbox to indicate that the part should be allocated to this contract, but not charged to the customer's invoice.
-
If desired, click the Yes link in the DTTTT column to change the default tax and discount values for this part.
Note: For more detailed information about each column and entry on the Miscellaneous Charges screen, click the Help
 icon and review the IntelliDealer Online Help.
 -
-
Add an additional part to this invoice by repeating steps 8–11 in the next empty row.
-
Click Save to keep your changes and continue.
-
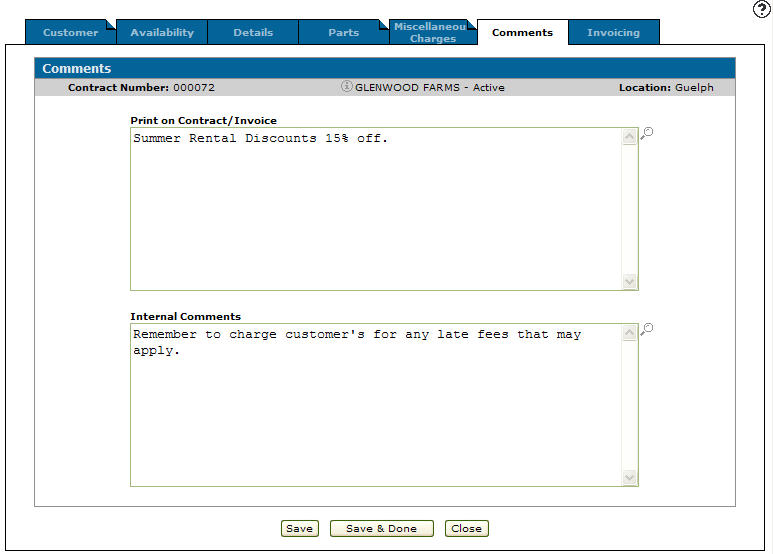
Click the Comments tab to continue entering contract information. The Comments tab opens.
-
Enter any comments, concerns, directives that need to be added to the rental contract in either the Print on Contract/Invoice area, or the Internal Comments area.
Note: All comments in the Internal Comments area are NOT printed on the invoice, but rather stored electronically in IntelliDealer with this contract for internal dealership use.
-
Click the Save button to keep your changes and continue.
-
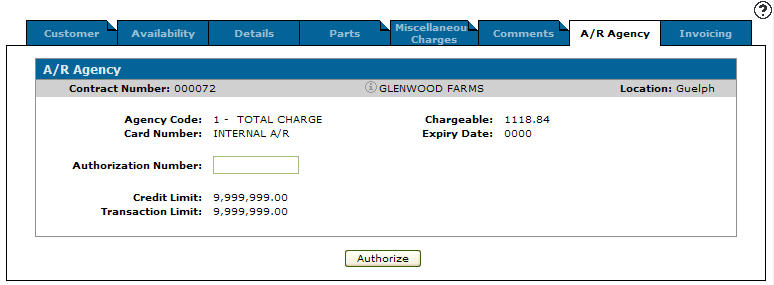
Click the A/R Agency tab to continue entering contract information. The A/R Agency tab opens.
Note: The A/R Agency tab appears on the rental contract after the contract has been created.
-
The A/R Agency tab acquires account information from the customer's profile and displays that information in the appropriate fields. To allow these A/R accounts to be charged upon the completion of this contract an Authorization Number must be entered in the appropriate field.
-
Click the Authorize or Pre-Authorize button to continue.
Note: When dealing with a Farm Plan account; click the Authorize button and the Authorization Number is populated automatically. If it has not been approved, then Farm Plan needs to be called for a verbal authorization number. Once you have received this number, type it into the Authorization Number field and click the Pre Authorize button to continue.
-
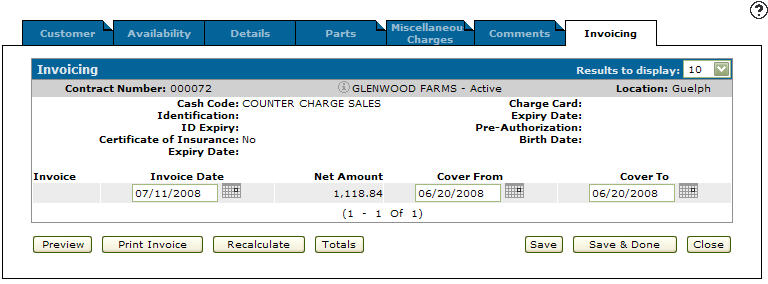
Click the Invoicing tab to continue entering contract information. The Invoicing tab opens.
Once the rental transaction has been defined as a contract, the system assumes (by default) that one invoice is initially produced containing all charges that have been specified on the rental transaction.
If the rental equipment has not been returned by the end of the contract period, the system automatically produces another invoice by increasing the quantity of the duration.
In the case where invoices are to be issued at specific intervals in the rental period (for example, in a Rent-to-Purchase transaction), the user can specify in advance the number of days, months, or years to pass between invoices, as well as the number of invoices to be produced.
-
On the Invoicing tab you should:
-
Review and if necessary type an Invoice Date.
-
Review and if necessary type a Cover From date.
-
Review and if necessary type a Cover to date.
For more detailed information about each column and entry on the Invoicing screen, click the Help icon
 and review the IntelliDealer Online Help.
-
-
Once have finished with invoicing the rental contract you can complete your work on the invoice in many possible ways:
To: Do This: Preview the printable version of the invoice in another browser window. Click the Preview button. Print the invoice and exit. Click the Print Invoice button. Recalculate the number of invoices, the dates that the invoices are produced, and the charges that appear on each invoice. Click the Recalculate button. Display the line items, tax, sub-totals, and totals for the invoicing of this contract. Click the Totals button. Save any changes made without exiting the Invoicing screen. Click the Save button. Save any changes made and exit the Invoicing screen. Click the Save & Done button. Close the invoice without saving changes. Click the Close button. Once you have completed working on the Rental Contract you need to confirm delivery information and if necessary, create a Traffic Ticket to indicate proper delivery and receipt of the rental equipment and parts.
Revision: 2026.01
