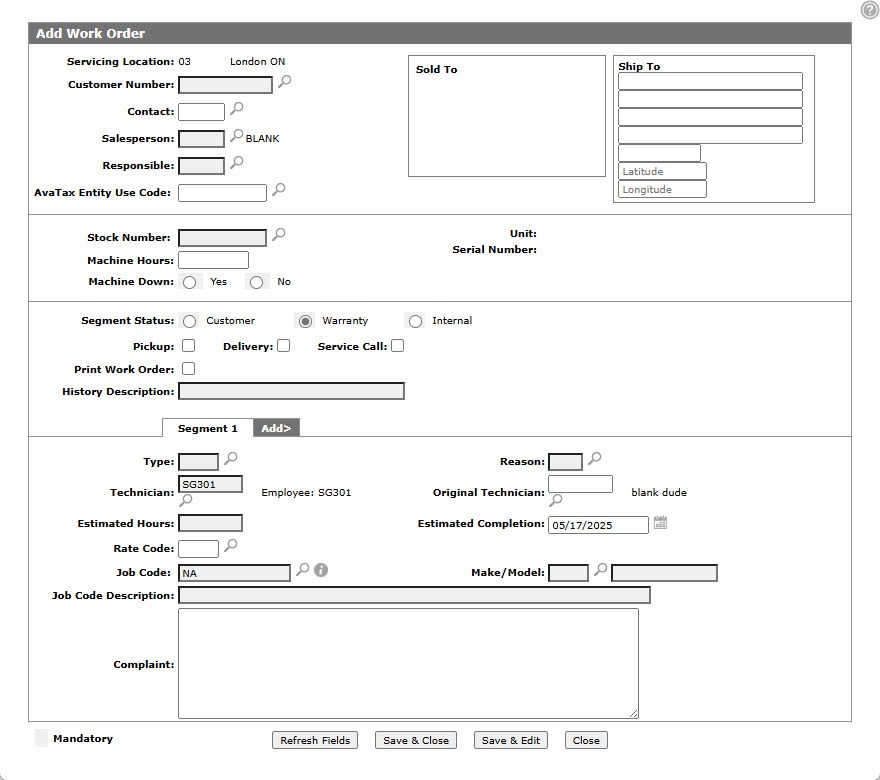
Add Work Order
The Add Work Order screen is used to quickly add a work order.
Depending on the security settings at your dealership, the Add Work Order screen can be accessed from several areas of IntelliDealer including the Open Work Orders screen, the Service Request screen, the Contract Details tab, the Scheduling tab, the Accept Quote screen.
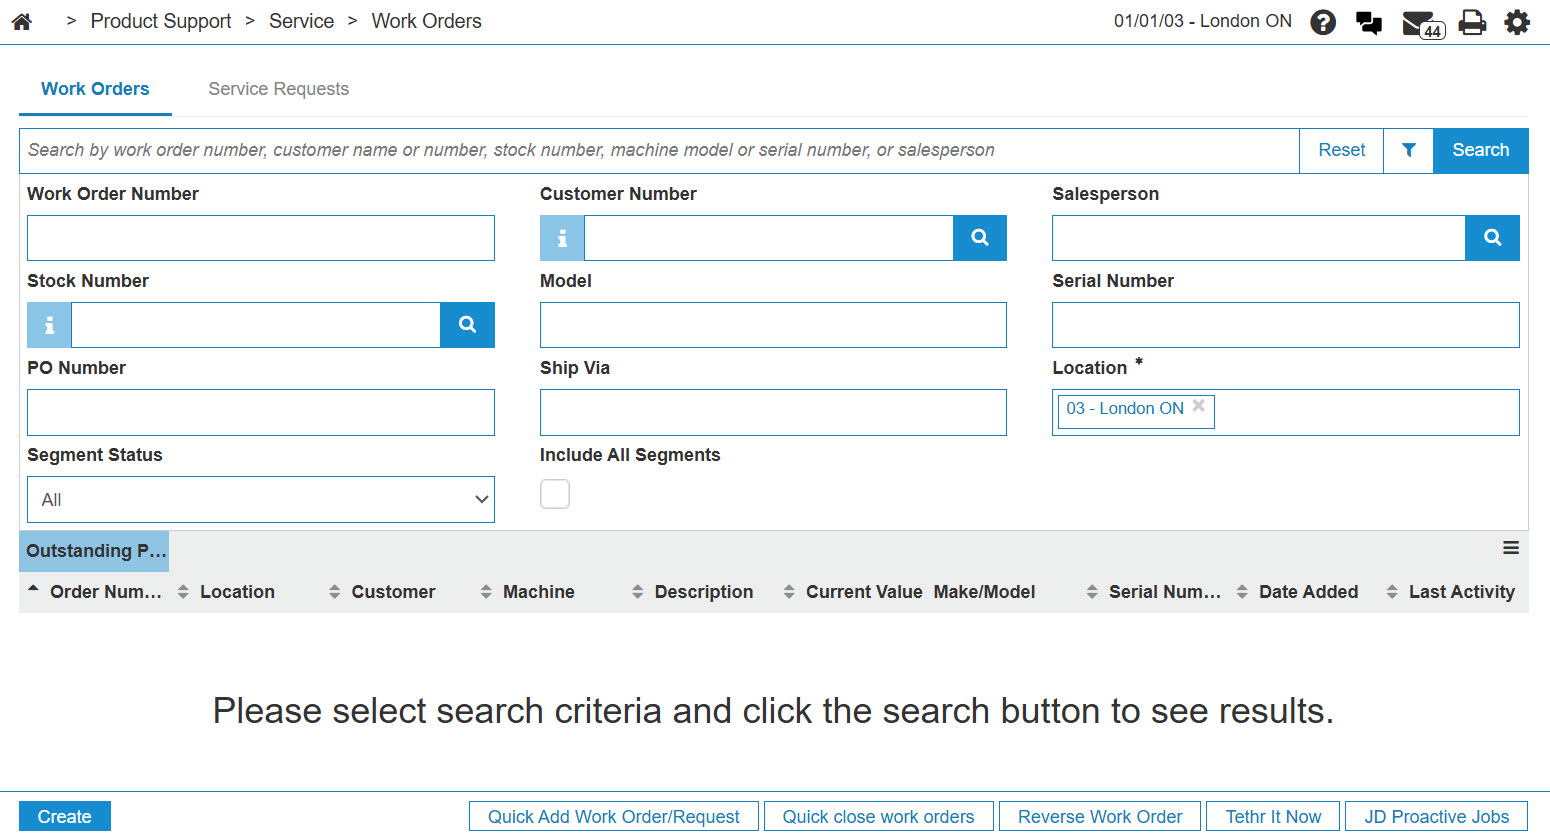
Quick Adding a Work Order From the Open Work Orders Screen
Depending on where you access the Add Work Order screen from, some of the following steps will not apply.
-
Navigate to Product Support > Service > Work Orders.
-
Click the Quick Add Work Order/ Request link.
-
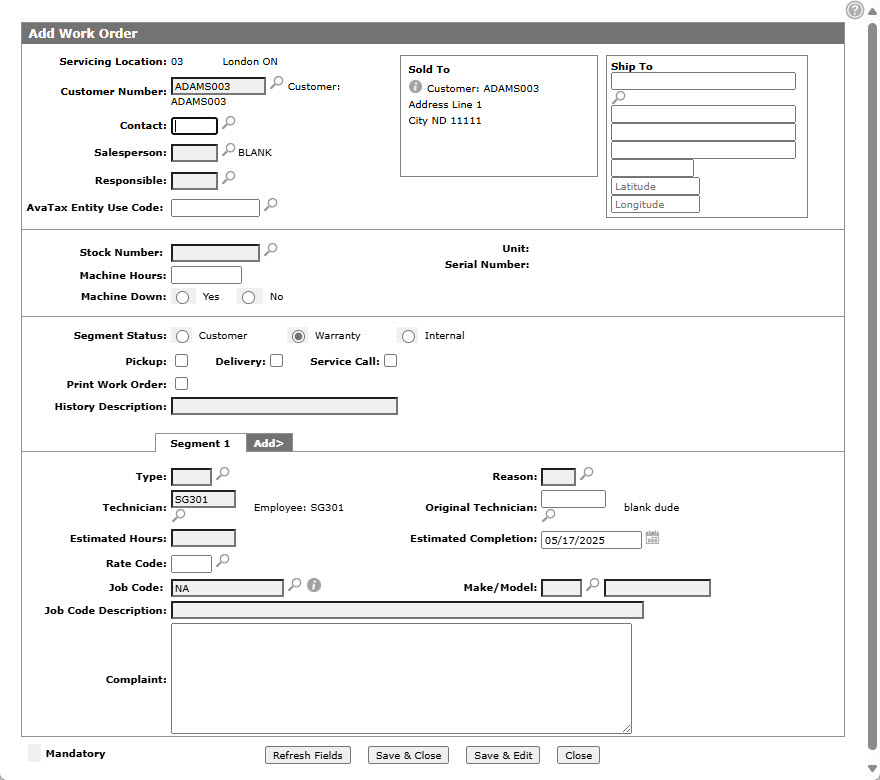
Enter a customer number in the Customer field or click the Search
 icon to search for and select a customer.
The Add Work Order screen refreshes and includes any customer information found in the customer’s profile.
-
If the customer's shipping location is different than their Sold To location, enter the shipping address in the Ship To field.
-
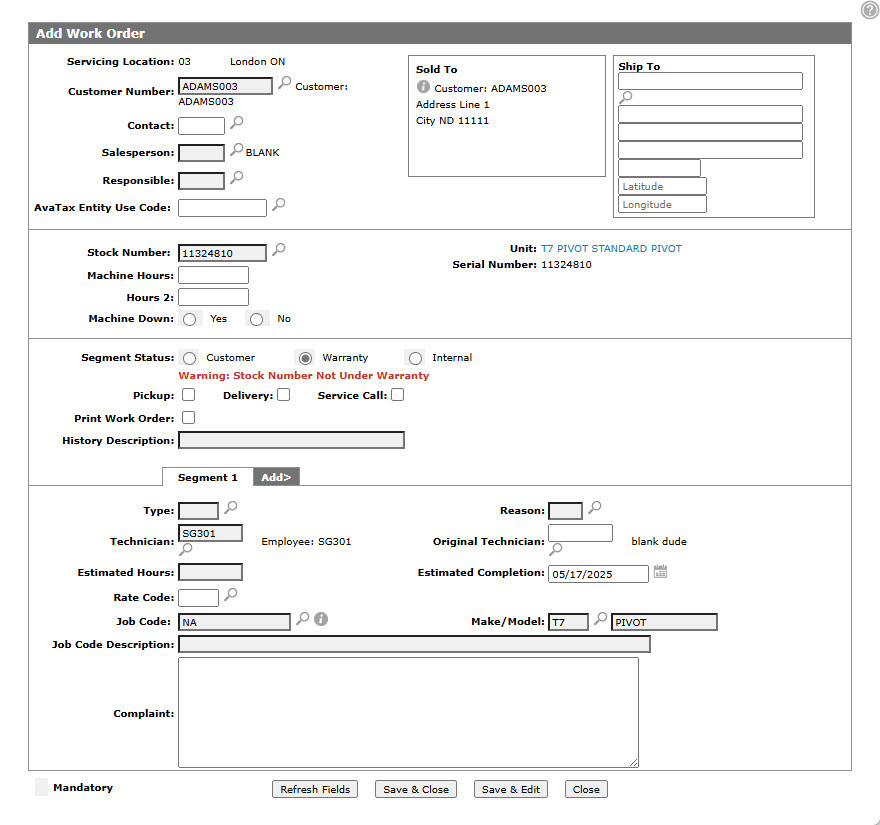
Enter the stock number for the machine being serviced in the Stock Number field or click the Search
icon to search for and select the appropriate piece of equipment.Tip: A stock number is mandatory, however you can use a ? when creating the work order. When using a ? in place of the stock number, you must manually enter values in the Description, Model, and Serial Number fields. You must also change the ? to a stock number before billing.
After selecting the appropriate stock number, the Unit and Serial Number fields are auto-populated.
-
Fill in the rest of the fields, referring to the table below.
If more than one segment is required to complete the work order, click the Add> tab to automatically add a new segment. Up to 50 segments can be added to a single work order.
-
Once you are satisfied that all segments are added, click Save.
Screen Description
Depending on where you access the Add Work Order screen from, some fields are auto-populated with the corresponding information.
If the customer you select for the work order has default Service Work Order information configured on their profile (as specified on the Rental & Service tab), the G/L account and status of any segments created using this screen are defaulted to the values specified on the Rental & Service tab.
The fields on the Add Work Order screen are:
| Field | Description |
|---|---|
| Servicing Location |
Enter or select the location where the machine will be serviced. The system defaults to the location assigned to the user unless all these conditions are true:
|
| Customer Number | The customer number associated with the work order. |
| Contact | The customer contact associated to the invoice. Any print outs related to the invoice include this name. |
| Salesperson | The salesperson associated with the work order. |
| Responsible |
The salesperson responsible for the order. This field is for informational purposes only, however it is included on print-outs related to the order. This field is mandatory if the Responsible Salesperson Required For Work Orders checkbox is selected on the System Settings: Location screen. |
| Sold To | The address of the customer associated with the work order. |
| Ship To | The shipping address of the customer associated with the work order, if different from the address in the Sold To field. |
| Stock Number |
The stock number of the machine being serviced. If you are licensed for feature number 6218, a PreCise link appears next to this field. Click the link to locate the selected unit using the PreCise Mobile Resource Management tool. |
| Unit | The name and make/ model of the machine being serviced. |
| Machine Hours/ Hours 2 |
The number of hours that the machine has been used up to the current date. This field only appears if you are creating the work order for a unit that has at least one hour meter, as specified by the Group Code assigned to the unit. You can only enter a value that is lower than the current number of hours recorded for the selected unit if the Update Equipment Hours if Less Than Original checkbox is selected on the System Settings: Division screen. |
| Serial Number | The machine's serial number. |
| Machine Down |
Indicates whether the machine is completely non-functional. This field is mandatory if the Mandatory Machine Down Prompt on Work Orders checkbox is selected on the System Settings: Location screen. |
| Repair Status |
The type of work to be performed; either Active, Customer, Warranty, or Internal. |
| Pickup | Select Pickup to create an inbound traffic ticket for this machine. |
| Delivery | Select Delivery to create an outbound traffic ticket for this machine. |
| Service Call | Select Service Call to automatically decline the creation of traffic tickets and indicate that a technician will be traveling to the machine. |
| Print Work Order | Select this option if you want to print a copy of the work order. |
| Printer | The printer to use if printing the work order. |
| History Description |
A summary description of the major repairs being done on the work order. This field contains the job jacket number if the work order was created from a Job Jacket. The history description is shared across all segments of the work order. |
| Type |
The work order type. The Type Code dictates the Rate Codes that can be applied to the work order. For more information, see the Rates topic. If the work order is being created as part of a service agreement then this field defaults to the Type configured on the service agreement. Valid Type codes are set up on the Types screen. |
| Reason |
The reason the service is being performed. Valid Reason codes are set up on the Reasons screen. |
| Technician | The technician who has been assigned to the work order. |
| Original Technician | The original technician assigned to the work order. Use this field only if the Reason for the work order is Rework. |
| Estimated Hours |
The approximate number of hours the service will take to complete. This field is mandatory depending on the setting of the Work Order Estimated Completion field on the System Settings: Location screen. |
| Estimated Completion |
The approximate date when the service will be complete. This field is mandatory depending on the setting of the Work Order Estimated Completion field on the System Settings: Location screen. |
| Rate Code |
The rate code used to calculate labor pricing on the work order segment. Only rate codes that have been assigned to the selected Type Code can be added to the work order. Valid Rate codes are set up on the Rates configuration screen. |
| Job Code |
The job code assigned to the segment. This field defaults to NA. |
| Make/ Model |
The equipment make and model number of the unit that will be serviced. If a valid Job Code is selected, these fields are automatically populated. |
| Job Description | A short description of the work being performed in this work order segment. |
| Description |
A detailed description of the work being performed in this work order segment, including any and all tasks expected to be performed by the technician. This field appears as a Complaint if the Add Work Order screen is accessed from the Open Work Orders screen. |
Click the Add tab to add additional segments to the work order. You can add up to 50 segments to a work order.
Use these buttons to complete your work on the Add Work Order screen:
| Button | Function |
|---|---|
| Save |
Saves the changes made to the work order. You must add all segments before you click Save. |
| Save & Edit | Saves the work order and opens it in the Customer - Work Order Header tab. |
| Close | Closes the work order and returns to the previous screen. |