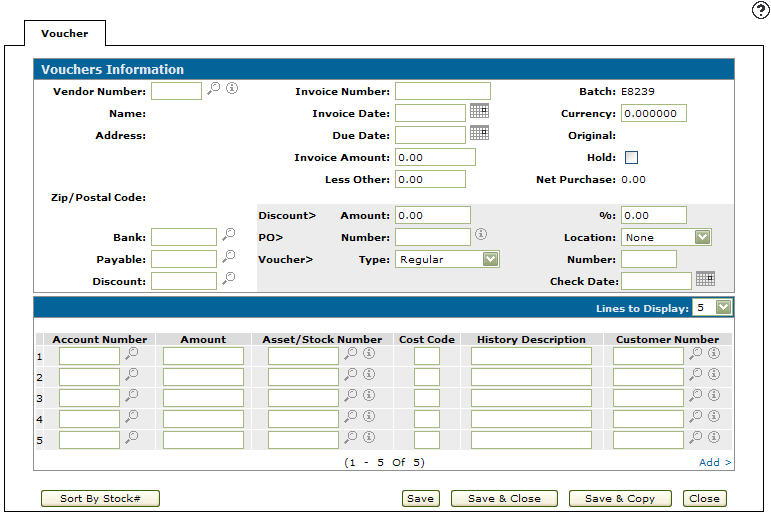
The Vouchers Information screen allows you to:
-
enter vouchers that affect the accounts receivable subledger
-
track the payments on a voucher
-
update a voucher for a particular vendor
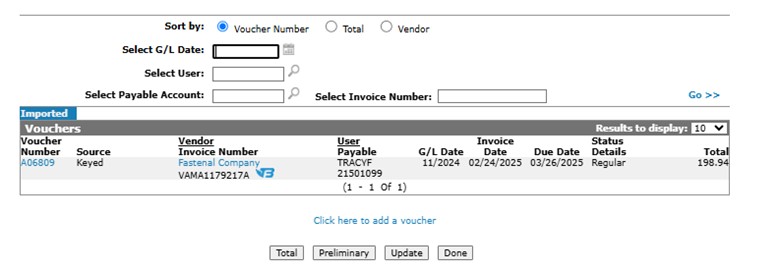
To open the Vouchers Information tab, click a Voucher number on any of these screens: Adjust Outstanding, Vouchers, or Vendor History.
Note: If "MULTIPLE" is displayed, this indicates that multiple purchase orders were selected and are being entered on this single voucher.
Topics in this section are:
Creating an Accounts Receivable Voucher
When you are affecting a GL account that is identified as an A/R account in the special accounts configuration, a customer number must be input on the voucher screen to keep the AR subledger in balance. In simple terms, the dealer owes money to an account that could be an internal or external customer. Possible scenarios include:
-
The customer is both a vendor and a customer of the dealer, where the voucher offsets outstanding balances.
-
A warranty is tracked to a customer account where a pending credit is coming from the vendor that needs to be applied to an outstanding receivable.
-
The voucher is used to impact both receivables and payables.
-
You need to apply payment to a customer account but the A/R period is closed, so you use this procedure to adjust the GL date.
-
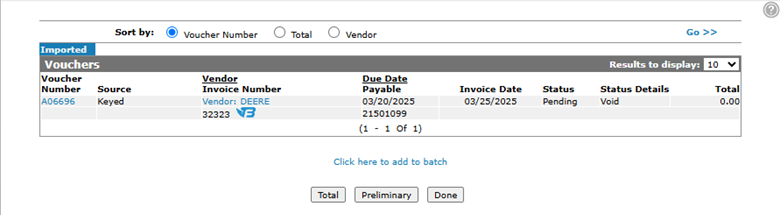
Navigate to Financial Management > Accounts Payable > Vouchers tab.
-
Move the cursor over a Batch number and select Edit from the pop-up menu.
The Vouchers screen appears.
-
On the Vouchers screen, click the Click here to add to batch link.
-
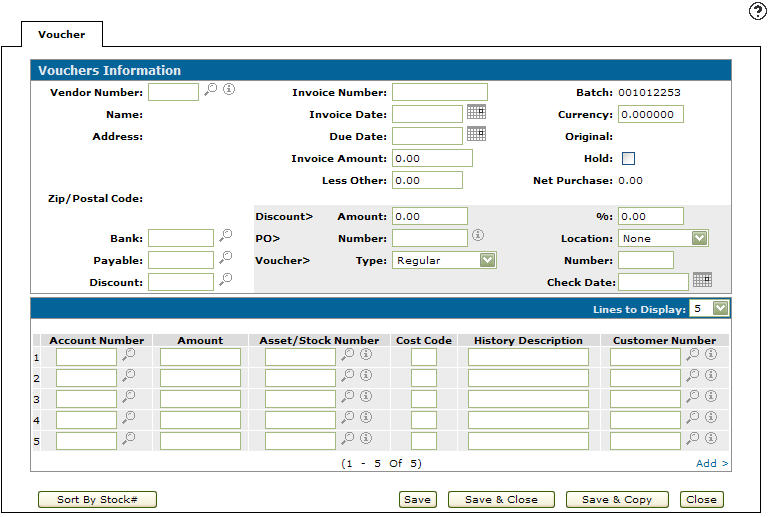
Enter a Vendor Number
- or -
Click on the Search icon to search for and select a Vendor Number.
The Vouchers Information tab appears with the selected vendor number in the Vendor Number field. The system automatically generates the Name, Address, Zip/Postal Code, Bank, Payable and Discount fields.
-
Enter an Account Number.
- or -
Click on the Search icon to search for and select an Account Number
The Vouchers Information tab appears with the selected account number in the Account Number field.
-
Enter an Amount to apply to the A/R account.
-
Enter a Customer Number.
- or -
Click on the Search icon to search for and select a Customer Number.The Vouchers Information tab appears with the selected customer number in the Customer Number field.
- Click the Save button.
Creating a New Accounts Payable Voucher/Vendor Warranty Credit
-
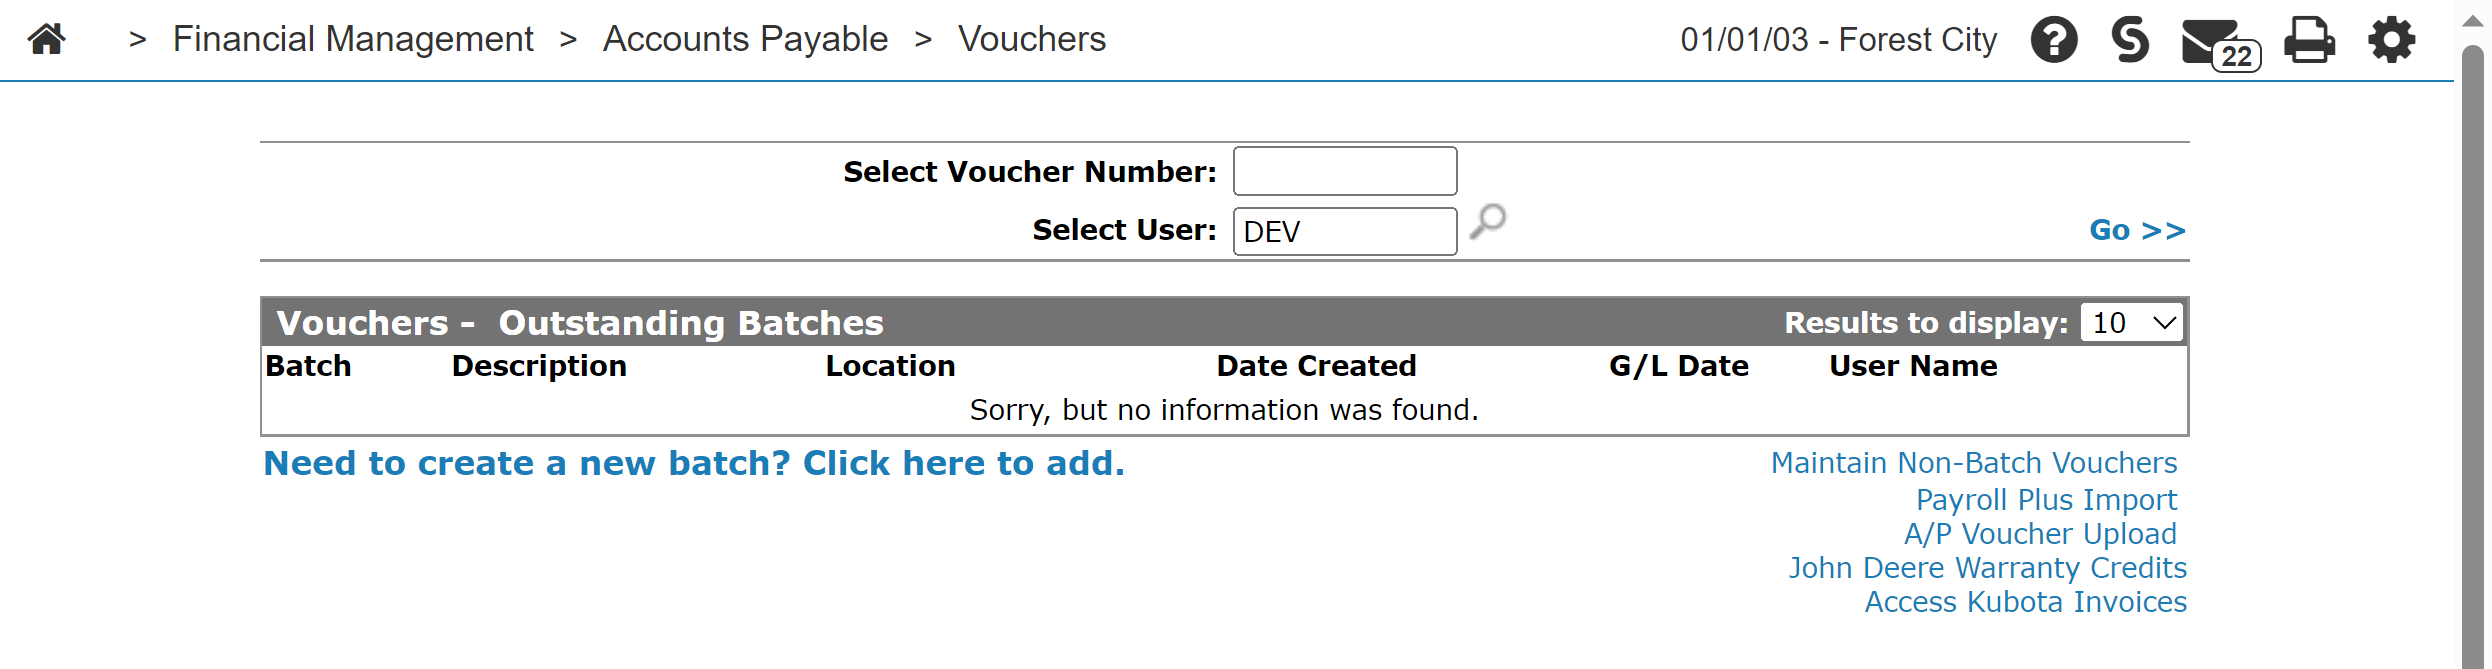
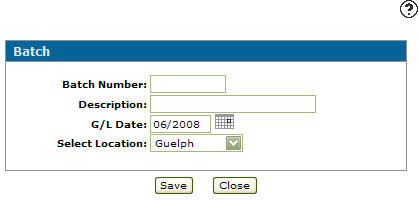
Navigate to Financial Management > Accounts Payable > Vouchers.
-
Click the Need to create a new batch? Click here to add link.
-
Fill in the fields as described in the table below.
-
Click Save to create the batch and continue.
-
Enter the vendor number in the Vendor Number field or click the Search
icon to search for a Vendor using the Vendor Selection screen.After entering or selecting a vendor, the Vouchers Information tab refreshes and adds any vendor information found in the vendor’s profile.
-
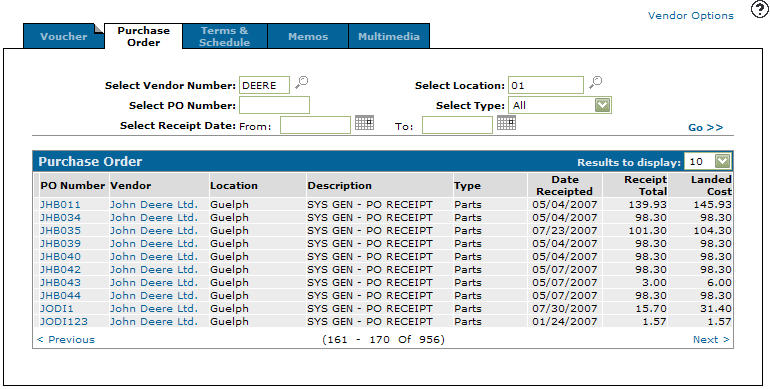
If you are using either the purchase order interface or the parts accrual system, the Purchase Order tab automatically displays any outstanding purchase orders associated with this vendor.
From the Purchase Order tab you may add any of these purchase orders to your batch by selecting the associated checkbox and then choosing to add them as either a Full Receipt or a Partial Receipt by clicking on the appropriate button. After this you are returned to the Voucher tab which has been refreshed to include information from the selected POs.
-
Enter the required information in the Information and Distribution sections, using the Vouchers Information help page as a reference.
-
Add any additional payable line items to this voucher by repeating the previous in the next empty row.
-
When you have completed adding payable line items, perform one of these actions:
To: Do This Print a quick check based on this voucher. Click the Quick Check button. Sort distribution entries in this voucher by stock number. Click the Sort by Stock # button. Save the information you have entered and remain on this screen. Click the Save button. Save the information in this batch and return to the Voucher Information tab. Click the Save & Close button. Save the information in this voucher, close it, and create a new voucher in this batch by copying the same vendor information. Click the Save & Copy button. Close the voucher without saving changes and returns to the Vouchers Information tab. Click the Close button. -
Once you have added all the necessary vouchers to this batch, you are returned to the Vouchers screen. Click Done to close the batch.
The Vouchers – Outstanding Batches screen appears with the new batch listed.
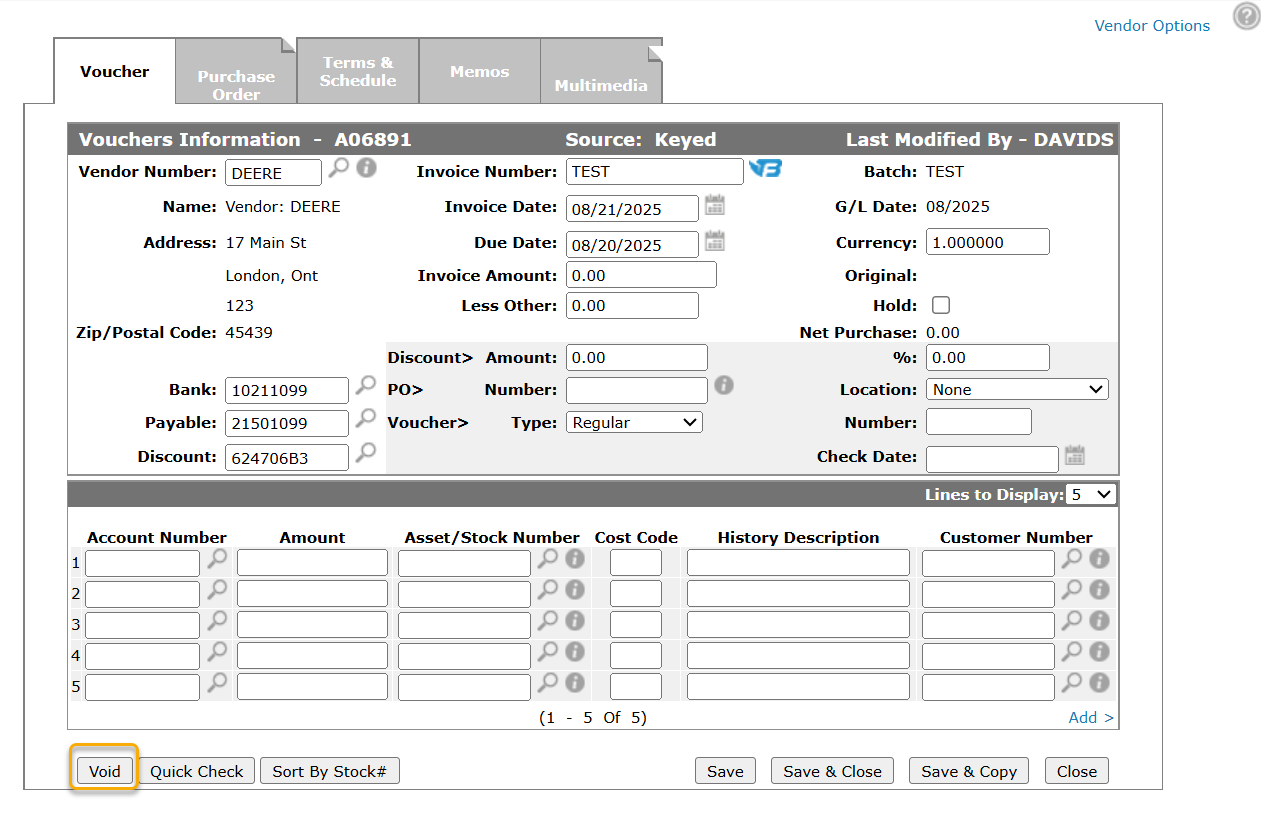
Voiding a Voucher
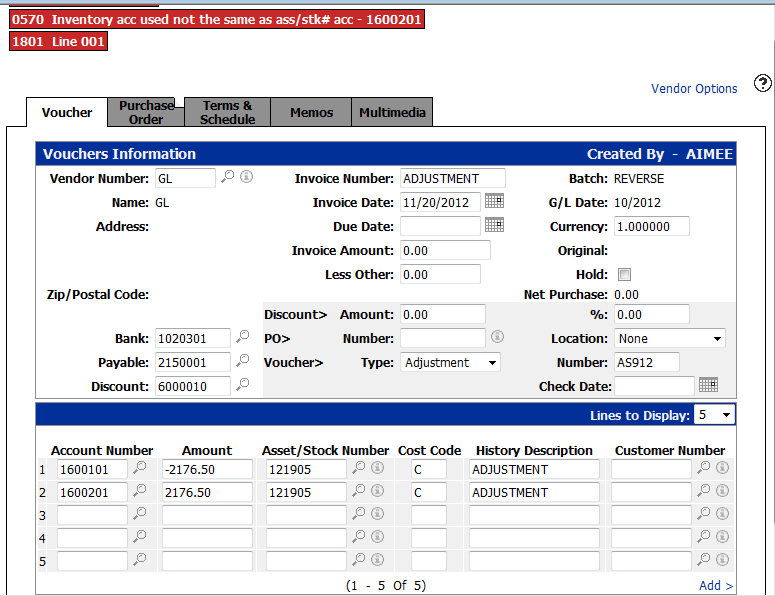
You can use the Void function on the Vouchers Information tab to void all distribution lines on a selected voucher. For example, you may wish to void a voucher if you were trying to move money to an inventory account, but the inventory account on the unit was changed to a new account number.
To fix, you have to change the account number on the unit to the old account number. In a voucher you then take the money from the old inventory account and put it into a clearing account. Update batch. Change the inventory account on the unit to the new inventory account. In another voucher take the money from the clearing account and put it in the new inventory account. Doing it this way allows you to use the stock number on the voucher and it will appear on the unit history. If the dealer does not need to see the history they can do one voucher and use a ? instead of the stock number, and they don't have to change the account on the profile.
Note: You cannot void a voucher that is on hold, or put a voided voucher on hold.
-
Navigate to Financial Management > Accounts Payable > Vouchers, open a voucher for edit and ensure the Vouchers Information tab is selected.
-
Click the Void button.
A Confirmation screen appears. -
Click Continue.
The system voids all distribution lines from off of the selected voucher.
Screen Description
The fields on the Vouchers Information screen are:
| Field | Description |
|---|---|
| Vendor Number |
The vendor number the voucher is being created for. The vendor number can be up to six alphanumeric characters in length. The name, address and zip/postal code fields are automatically updated after selecting a vendor number. |
| Name | The name of the vendor. |
| Address | The address of the vendor. |
| Zip/Postal code | The vendor's zip/postal code, from their mailing address. |
| Invoice Number |
The voucher's invoice number. Click the FileBound Note: The FileBound icon only appears if your dealership is licensed for feature number 6211 and the Display FileBound Invoice Details switch is activated (995 - User Security). |
| Invoice Date | The date of the supplier's invoice. |
| Due Date |
The date a check is to be printed for the voucher. The due date does not apply for rapid remittance (voucher type "manual check") and adjustment (voucher type "adjustment") vouchers. This field is calculated if a payment schedule is loaded for this vendor. If payment terms are loaded for this vendor, discounts are calculated on the due date. You cannot enter a due date that is earlier than the G/L date for the batch. The system may populate the Due Date field after tabbing out of the Invoice Date field, depending on the payment terms on the vendor. If there is nothing loaded on the vendor, the system uses the default payment days loaded in the DIVTAB table. |
| Invoice Amount | The total amount credited to the invoice, net purchase amount plus any other charges (e.g. taxes and freight). |
| Less Other | Any other charges (e.g. taxes and freight charges). |
| Batch |
The name of the batch the voucher is in. |
| G/L Date |
The date the voucher will be posted to the general ledger. |
| Currency | The currency exchange rate for the vender selected. |
| Original | Displays the original due date, if the voucher is placed on hold. |
| Hold |
Place a voucher on hold by clicking the hold checkbox. The due date changes to 99/99/9999, and a check will not be issued. To take a voucher off hold, simply uncheck the box. The original due date value changes back to the due date field. Note: You cannot void a voucher that is on hold, or put a voided voucher on hold. |
| Net Purchase | The total amount credited to the invoice - less other charges (e.g. taxes and freight charges). |
| Bank |
The Bank G/L account that is relieved when a check is cut. |
| Payables | The payables account to be posted to for this vendor. |
| Discount | The discount account to be posted to for this vendor. |
| Discount Amount |
The discount amount applied to the invoice. Calculated from the net purchase amount, entered in either dollar amount or percentage. When creating a new voucher, if discount information exists in the Default Payment Terms screen, the first payment terms discount percentage in the list is displayed in the Discount Percentage field. If another discount amount is required, clear the Discount Percentage field and continue. If Payment Terms exist for this voucher, special terms discount information found in the payment terms Information screen overrides any discount entered in the A/P Voucher Detail screen. |
| Discount Percentage |
The discount percentage applied to the invoice. Calculated from the net purchase amount. If a percentage is entered the system automatically calculates the Discount Amount field value. |
| PO Number |
The purchase order number, used in conjunction with Location. Note that:
When a PO is linked to a voucher, and it matches the total and the location, this field is bold and read-only. |
| Location |
Corresponding location number of the PO. When a PO is linked to a voucher, and it matches the total and the location, this field is bold and read-only. |
| Voucher Type |
The type of voucher you wish to load or create. The available voucher types are:
|
| Number |
Enter the corresponding check number. The check number is only used for manual and/or adjustment vouchers. |
| Check Date |
Select the date the check is issued. The Check Date is only used for manual and/or adjustment vouchers. |
 icon to view the selected invoice from within FileBound.
The fields in the Distribution section of the Vouchers Information screen are:
| Distribution | |
|---|---|
| Field | Description |
| Account Number |
Voucher payment amounts are distributed to the G/L account number entered. If you leave the account number field blank, enter a corresponding stock number on the line and then click Save, the system will default the Account Number field to the Expense Account set up on the Equipment Defaults screen. If no expense account is found and the unit is Non Depreciable with a status of Invoiced, the system uses the Expense Account loaded in the Fixed Asset system. If the system does not find an account in the Fixed Asset system and the unit does not have an Inventory Account set up, the system defaults the account to the Asset Account set up in the CASHTAB table under Cash Code 8. |
| Amount | Enter the dollar amount to be allocated to the corresponding G/L account. |
| Asset/Stock Number | The equipment stock number which is assigned in the Equipment Profile or Fixed Assets options. Asset/stock number can only be used if the corresponding G/L account being used is coded as equipment inventory or asset, notes payable or history account. |
| Cost Code |
Determines how the cost of the unit is updated and recorded. A Cost Code is only applicable when there is a stock number or asset shown on screen. The default valid codes are:
Custom cost codes may also be available and valid if history sub-types are configured on History Sub-Types screen. |
| History Description | A brief description related to the entry being made. Appears on the Equipment Profile and Fixed Asset options. |
| Customer Number |
If an A/R G/L account is used in the account number field, a customer number is required. The system default to an A/R customer number set up on the vendor profile. You can enter the customer number manually. |
Use these buttons to complete your work on the Voucher Information screen:
| Button | Function |
|---|---|
| Distribute |
Allows you to overwrite or append the current distribution of the net purchase amount (invoice amount, minus other charges), using the default distribution accounts configured on the Distribution tab of the vendor profile. The Distribute button only appears when accessing the Vouchers Information screen through the Vouchers screen and if the associated vendor has distribution accounts configured on their profile. |
| Void |
Clears distribution lines and invoice amounts off of the selected voucher, marking the voucher as void. Note: You cannot void a voucher that is on hold or put a voided voucher on hold. The Void button only appears when accessing the Vouchers Information screen through the Vouchers screen. |
| Quick Check |
Opens the A/P Voucher Quick Check Printing screen which allows you to print a check for the corresponding voucher. The Quick Check button only appears when accessing the Vouchers Information screen through the Vouchers screen. |
| Sort by Stock # |
Sorts the distribution lines by stock number. The Sort by Stock # button only appears when accessing the Vouchers Information screen through the Vouchers screen. |
| Save | Saves the information entered without closing the Voucher Information screen. |
| Reverse |
Reverses the selected voucher placing it back on the selected batch. See Reversing a Voucher. The Reverse button only appears when accessing the Vouchers Information screen through the Adjust Outstanding screen. |
| Save & Close | Saves the information entered and closes the Voucher Information screen returning you to the previous screen. |
| Save & Copy |
Saves changes made to the Voucher screen and makes a copy of the selected voucher. To prevent two vouchers from posting original cost to the same stock number, a voucher with a cost code value of O can not be copied via the Save & Copy button. The Save & Copy button only appears when accessing the Vouchers Information screen through the Vouchers screen. |
| Close |
Closes the Voucher Information screen without saving and returns to the previous screen. When accessing the Vouchers Information screen from the Vendor History screen, only the Close button appears, preventing you from performing other options on the screen. |
Data Source: OUTSTD, YTDIST
Security: 601 - Accounts Payable
Learning Resources: Processing a Bank Deposit via Accounts Payable
Revision: 2025.09