Creating a Data Miner Query
Creating a query using the Data Miner application allows you to build your own data access views including specific columns, selection criteria and the sort order to easily organize the data you wish to extract. Queries are based on the files, columns, and rows you specify, allowing you to extract the customer, finance, equipment, parts, and marketing information needed to make management level decisions. Once created, you can save the query for future use, or modify it as you require. You can also upload the query to the Data Miner Repository to make it available for users at other dealerships. For details, please see the Uploading a Query to the Data Miner Repository help topic.
-
From anywhere within IntelliDealer, hover over the Management Central link and select Utilities> Data Miner from the drop down list.
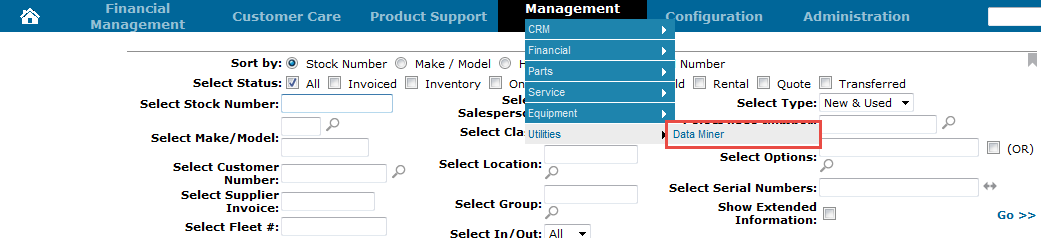
Management Central Quick Links screen
-
The Data Miner screen will appear.
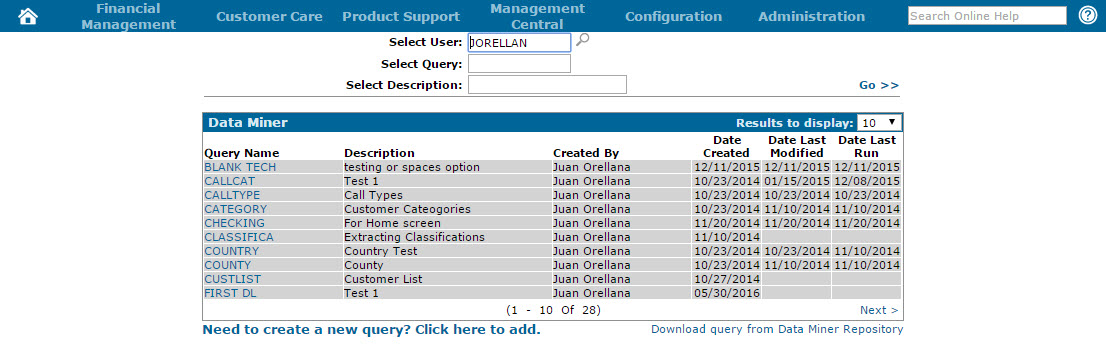
Data Miner screen
-
On the Data Miner screen, click the Need to create a new query? Click here to add link.
The Add Query screen will appear.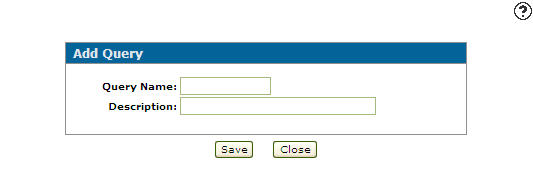
Add Query screen
-
On the Add Query screen, enter a new Query Name and a brief Description of the query.
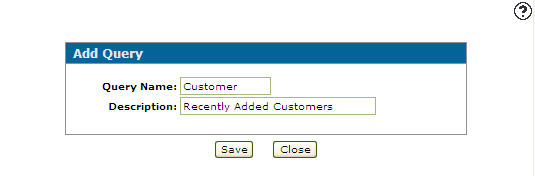
Add Query screen
-
Click the Save button.
The Query tab will appear.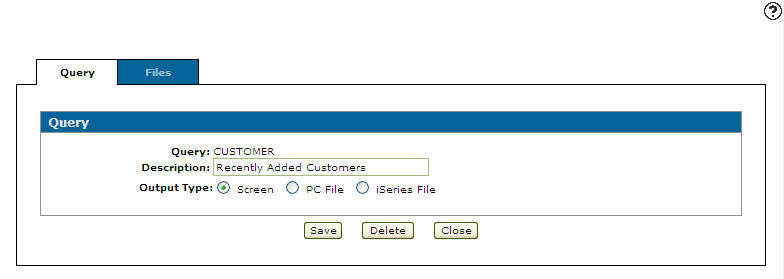
Query tab
-
On the Query tab, you can edit the query's Description.
-
Select the Output Type you wish to use to generate the query.
-
Screen: Displays the query output on screen
-
PC File: Sent to a designated PC file as a comma separated, Microsoft Excel, Lotus 123 worksheet, or tab delimited file
-
iSeries File: Sent to an iSeries File
-
-
Click the Files tab.
The Add File screen will appear.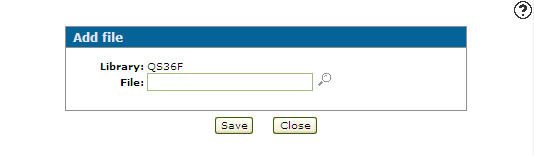
Add File screen
-
On the Add File screen, enter the data file from which the data will be extracted in the File field.
- or -
Click the Search icon and select a data file from the Files screen.
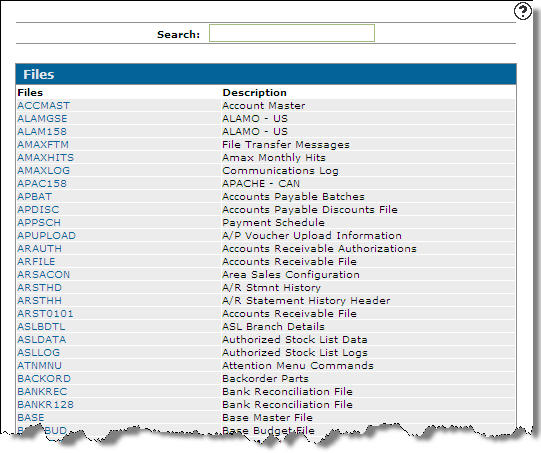
Files screen
-
The Add Files screen will refresh with the selected data file in the File field.
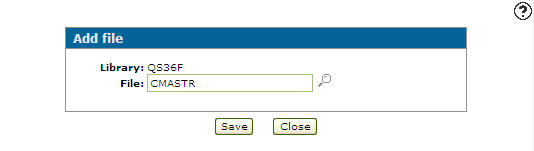
Add File screen
-
Click the Save button.
The Files tab will appear and the following tabs will now be unlocked (Virtual Fields, Columns, Rows, Sort, and Authority).
Files screen
-
(OPTIONAL) Click the Virtual Fields tab.
The Virtual Fields tab will appear, allowing you to add virtual fields to the query.
Virtual Fields tab
-
Click the Columns tab.
The Select Field screen will appear.
Select Field screen
-
On the Select Field screen, select the checkbox next to the columns you wish to include in the query.
Click the Save button. -
The Columns tab will appear, displaying the selected columns to be used for the query.
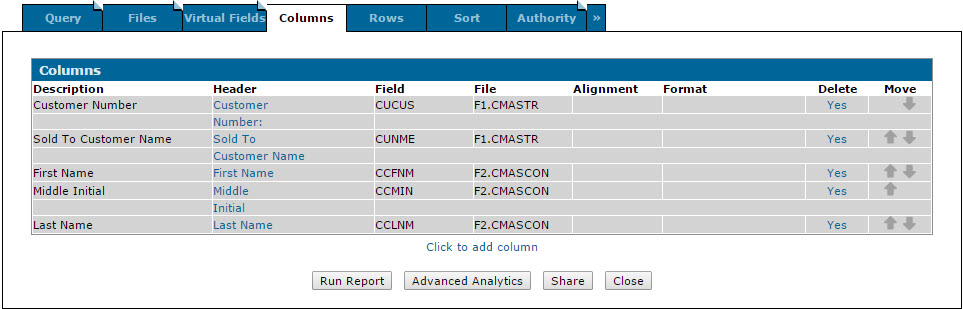
Columns tab
-
(OPTIONAL) On the Columns tab, click a column header to configure the Column Alignment and Format.
The Column Headings screen will appear.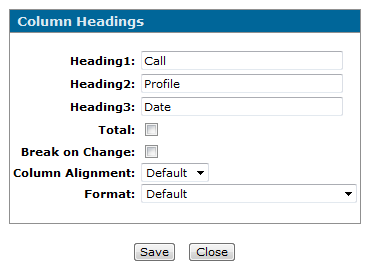
Column Headings screen
-
(OPTIONAL) On the Column Headings screen, select the desired Column Alignment and Format from the fields provided, then click Save.
The Columns tab will appear displaying the selected options.Note: Certain Format options may not be displayed depending on the type of data being presented in the column. For more information, see the Column Headings topic.
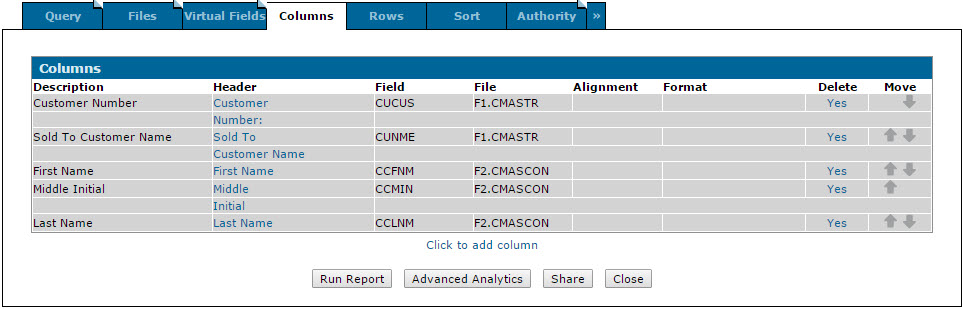
Columns tab
-
Click the Rows tab.
The Selection Criteria tab will appear.
Selection Criteria tab
-
On the Selection Criteria tab, click the Click here to add selection criteria link.
The Selection Criteria screen will appear.
Selection Criteria screen
-
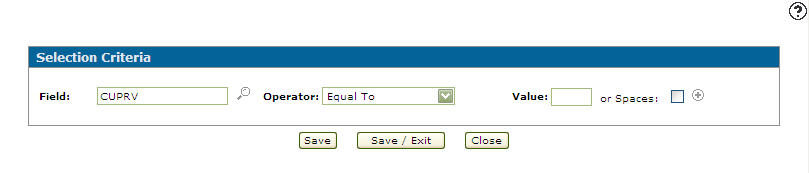
On the Selection Criteria screen, click the Search
icon next to the Field field.
The Fields screen will appear.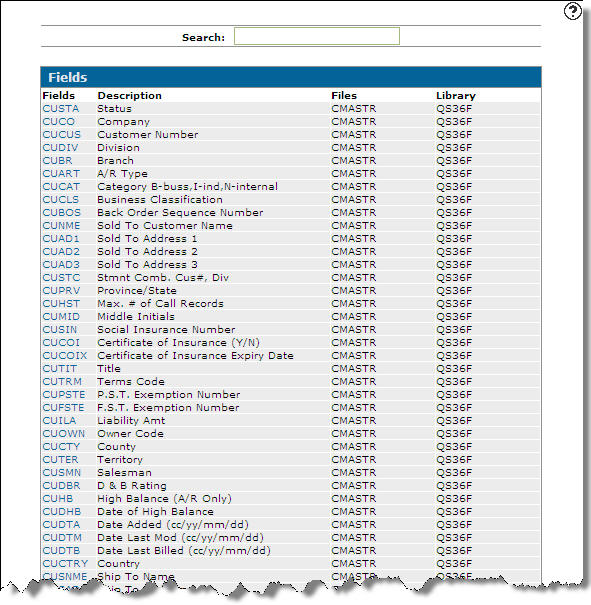
Fields screen -
On the Fields screen, to search for a field, start by entering a field name or description. The system will filter the results dynamically as you enter each character.
Click the desired Field name. -
The Selection Criteria screen will appear displaying the selected field.
Selection Criteria screen
-
On the Selection Criteria screen, select an Operator from the drop down list that will apply to the value entered in the Value field.
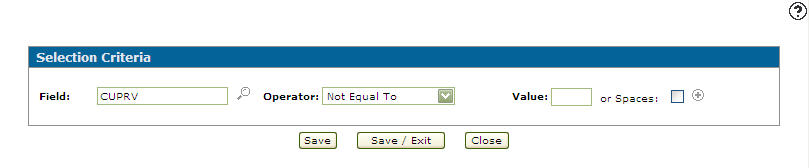
Selection Criteria screen
-
Enter a Value.
-
Click on the Save and Close button.
The Selection Criteria tab will appear displaying the selected rows.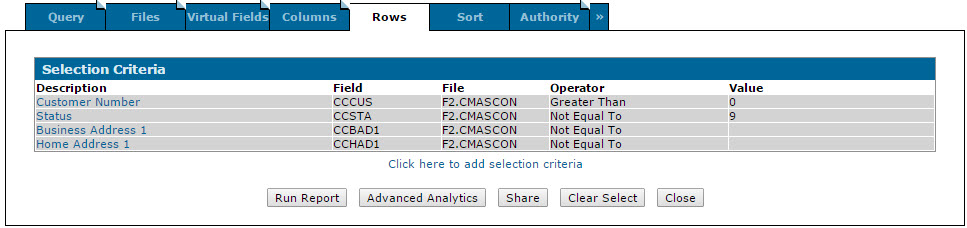
Selection Criteria tab
-
Click the Sort tab.
The Select Field screen will appear.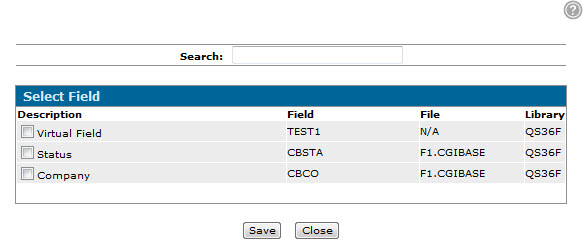
Select Field screen
-
Select the fields to sort the query information by, by selecting the checkbox next to the desired field.
Click the Save button.
The Sort Order tab will appear listing the selected sort fields.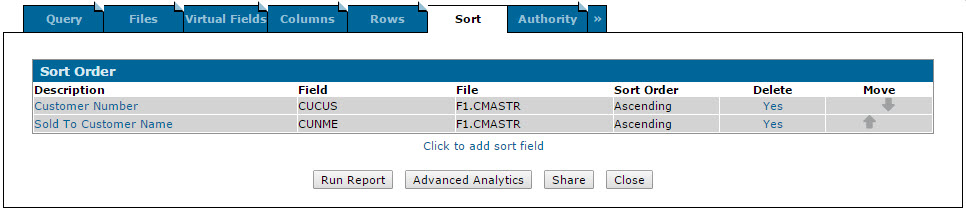
Sort Order tab
-
Click the Authority tab.
The Authority tab will appear.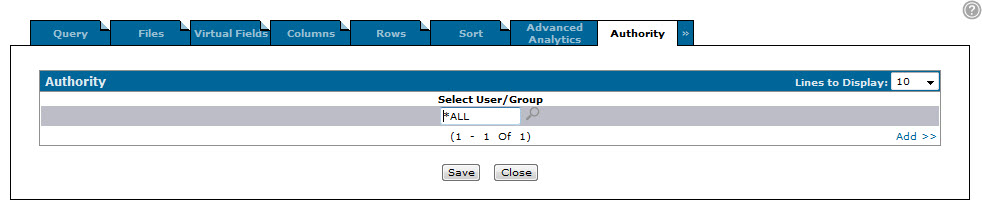
Authority tab
-
On the Authority tab, select the users that are authorized to run the query.
Note: *ALL in Select User/Group field indicates that all users and user groups are authorized to run the associated report.
-
Click the Add >> link to add additional users or user groups to the authorization list.
-
Click the Save button to save your user authorization list.
-
Click the Columns tab.
The Columns tab will appear.
Columns tab
-
On the Columns tab, click the Run Report button to run the report.
Note: The Run Report button can also be found on the Sort tab and the Rows tab.
-
If you selected Screen for the Output Type on the Query tab, a screen will appear displaying the generated report.

Generated Report
(OPTIONAL) If you want to upload the query to the Data Miner Repository, click the Share button on either the Virtual Fields, Columns, Rows or Sort tabs of the query.