The Purchase Orders (PO) screen allows you to display purchase orders by status, edit preexisting purchase orders, and add new purchase orders.
Purchase Orders relate to units (Equipment Profile) and other items. When ordering parts, see Parts Ordering.
To open the Purchase Orders screen, navigate to Financial Management > Accounts Payable > Purchase Orders.
-or-
navigate to Product Support > Equipment > Purchase Orders.
Topics in this section are:
Creating a New Purchase Order
-
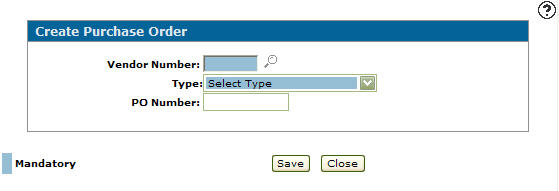
Navigate to Financial Management > Accounts Payable > Purchase Orders, then click the Click here to add a Purchase Order link.
The Create Purchase Order screen appears.
-
Fill in the fields. Note that:
-
Click the Search
 icon to open the Vendor Selection screen.
 -
When selecting a Type, refer to Type.
-
If the PO Number is left blank the system assigns a PO Number.
-
-
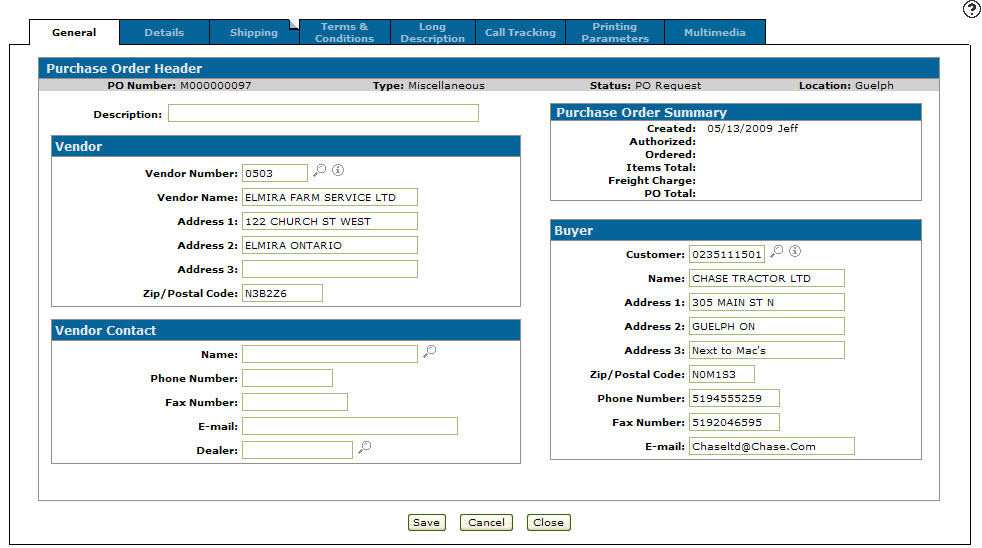
Click Save.
The Purchase Order General tab appears.
-
On each tab you can fill in additional information:
-
Purchase Order General—add additional information regarding a new purchase order or edit information on a preexisting purchase order.
-
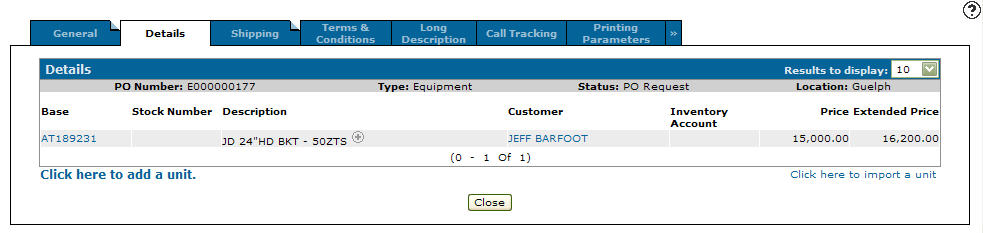
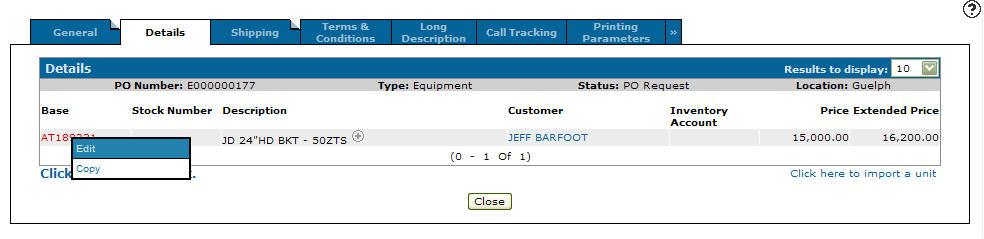
Details—add items for order onto the purchase order.
The Details tab allows you to import units onto a purchase order.
For Miscellaneous type POs, you can distribute an item among several G/L accounts by selecting the add link from the Distribute field.
-
Shipping—add shipping and delivery information and apply shipping charges to the purchase order.
-
Terms & Conditions—add additional terms and conditions to a purchase order.
-
Long Description—as the creator of the purchase order, add additional descriptions or comments. The description or comment can be used for internal purposes only or can be printed on the purchase order.
-
Call Tracking— track correspondence with a vendor regarding a purchase order.
-
Printing Parameters— adjust printing parameters on the purchase order before printing and preview the purchase order before printing.
-
Multimedia—add multimedia files such as photos to the purchase order.
-
-
When you are done, click one of:
-
Save—save the PO in progress.
-
Cancel—cancels the PO and provides an opportunity to leave a comment as to why.
-
Close—close the PO window.
-
Adding or Editing Base and Options from Within a Purchase Order
-
Navigate to Financial Management > Accounts Payable > Purchase Orders.
-
Search for the desired PO then open it edit by moving the cursor over a PO Number and selecting Edit from the pop-up menu.
-
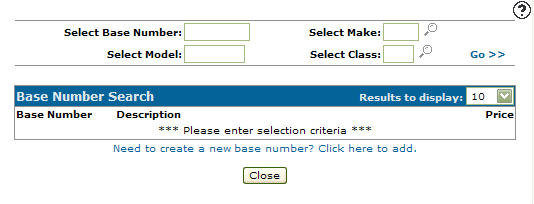
Click the Details tab, then click the Click here to add a unit link.
The Base Number Search screen appears.
-
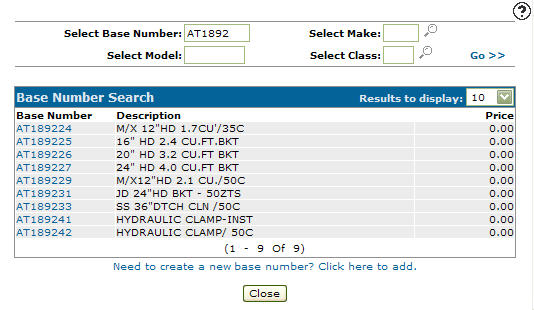
Fill out the appropriate fields and click the Go >> link.
The Base Number Search screen refreshes listing the generated search results. -
Select a Base Number.
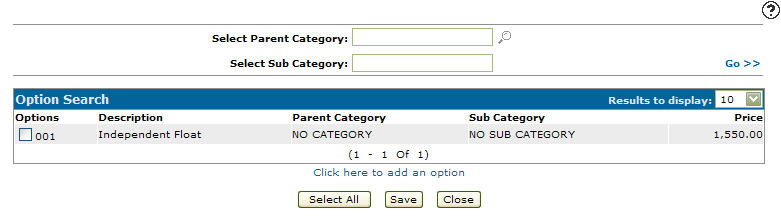
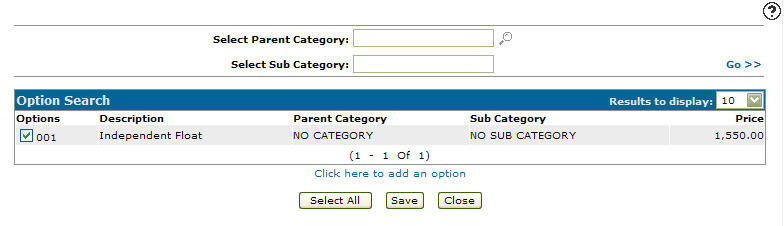
The Options Search screen appears.
-
Select an option by clicking a checkbox.
- or -
Click Select All to select all listed options. -
Click Save.
The Receive/Cancel Unit screen appears listing the selected Base and Option codes.
-
Enter a Price, and search for or enter a Customer.
-
Click Save.
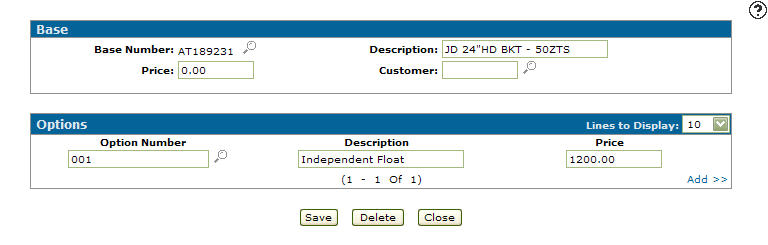
The Details screen appears listing the added unit.
-
To edit a unit, move the cursor over the Base number and select Edit from the pop-up menu.
The Base & Options screen appears allowing you to edit any of the available fields.
Putting a Purchase Order on Order
To put a Purchase Order on order, you must have the appropriate security authorization for its status:
-
PO Requested—you must have created the PO and be authorized to authorize or reject a purchase order.
-
Waiting for Authorization—you must be allowed to authorize, reject, or order a purchase order but only if you did not create the purchase order.
-
Authorized—you must have created the purchase order.
-
Navigate to Financial Management > Accounts Payable > Purchase Orders.
-
Search for the desired PO then open it for edit by moving the cursor over a PO Number and selecting Edit from the pop-up menu.
-
To place the PO, click Order.
The Order Comments screen appears.
-
Enter any comments related to the order of the selected purchase order.
-
Click Save.
The purchase order is placed on order and its status changes to On Order.
-
The Equipment Add/Edit screen appears. If desired, add an Equipment Profile for the unit (if one does not exist) by clicking the Add link or edit the unit on order.
Adding a unit sets its status in the Equipment Profile to On Order, unless there is a Customer Number on the Purchase Order, in which case the status is set to Pre-Sold.
-
Click the Close button to return to the Purchase Order General tab.
Screen Description
The sorting options on the Purchase Orders screen are:
| Sort by | |
|---|---|
| Field | Description |
| PO Number | Sort the search results by PO number. |
| Type | Sort the search results by PO type. |
| Status | Sort the search results by PO status. |
The PO Statuses to search by are:
| Status | |
|---|---|
| Field | Description |
| All | Search through all status options. |
| PO Request |
The PO has been created and saved, but has not been submitted for Authorization. |
| Waiting for Authorization |
The PO is waiting for the approval of the supervisor (the PO system user with the proper authority). |
| Authorized |
A supervisor has approved the PO, but it has not been submitted to the vendor. |
| On Order |
The PO has been authorized and sent to the vendor. On Order POs do not have any items received or canceled. |
| Canceled |
The PO has been canceled. Only the individual who is creating the purchase order can cancel it before it is placed On Order. |
| Back Order |
Some of the items on the PO have been received or canceled. |
| Completed |
All items on the PO have been accounted for; either they have been received or have been canceled. |
| Rejected |
The PO was Waiting for Authorization but was then rejected by the supervisor. This purchase order cannot be reactivated. |
The search fields on the PO Orders screen are:
| Field | Description |
|---|---|
| Select PO Number | A unique PO number. |
| Select Vendor | A vendor number. Click the Search |
| Select Type |
Select a PO type from the drop down list. |
| Select Location | A location. Click the Search |
| Select Description | The description of the PO. |
| Select Created By | The ID of the user who created the PO. Click the Search |
| Select Modified By | The ID of the user who last changed the PO. Click the Search |
| Select Takeover By | The ID of the user who completed the PO takeover. Click the Search |
The fields on the PO Orders screen are:
To save or reset search defaults, move the cursor over the Bookmark ![]() and select either Save Defaults or Reset Defaults from the drop down list.
and select either Save Defaults or Reset Defaults from the drop down list.
Move the cursor over a PO Number and select one of:
-
View—to view a completed or canceled purchase order.
-
Edit—to edit a purchase order.
-
Copy—to copy a purchase order.
Move the cursor over an Equipment Replenishment PO Number and select Create PO From Replenishment from the pop-up menu to create a PO from replenishment.
Click on a Vendor to open the Vendor Profile screen.
Select the Click here to add a purchase order link to add an Equipment, Fixed Asset, or Miscellaneous purchase order. See Creating a New Purchase Order.
Click on the Purchase Order Report link to run a Purchase Order by Type or Equipment Replenishment report.
Click on the Modify default print parameters link to modify default print parameters on the Printing Parameters screen.
Data Source: POHDR
Security: 603 - PO System
Learning Resources: Creating a Miscellaneous Purchase Order; Creating an Equipment Purcahse Order
Revision: 2024.07