UPS WorldShip Interface
The UPS WorldShip desktop application, released by UPS, allows users to ship packages and print labels. The IntelliDealer integration allows you to import the freight charge and tracking number from the UPS WorldShip program to a Sales Order (specifically, a Parts Invoice) or Parts Requisition. The freight charge is posted using a freight part number and the tracking number is recorded in the Comments section of the Sales Order or Parts Requisition. You can also export customer information from IntelliDealer into the address book in UPS WorldShip.
The UPS WorldShip version 2.0 integration supports freight markups, multiple shipments per order, voided shipment handling, and has improved handling when using UPS WorldShip to ship packages that are not associated with a specific Sales Order in IntelliDealer.
Topics in this section include:
Prerequisites
This setup guide assumes that you have installed the UPS WorldShip desktop client on your system and that it is properly configured. You should be able to set up this application yourself, or contact UPS for technical support if you are having issues.
Open Database Connectivity (ODBC)
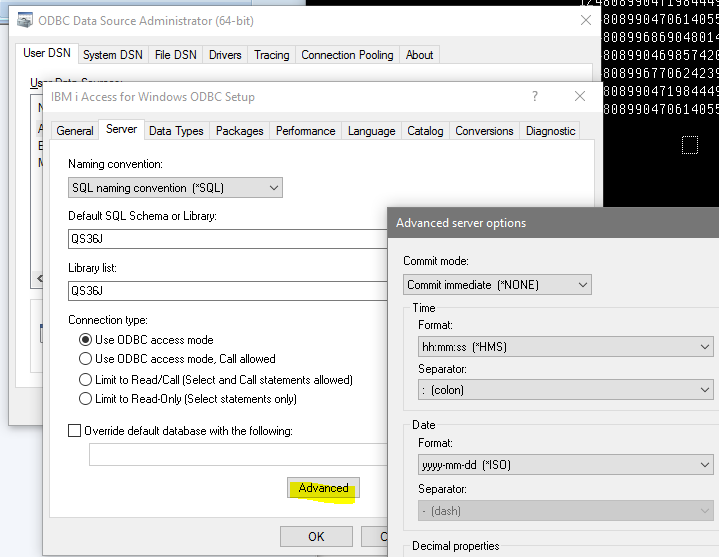
Users must have an ODBC connection set up to their database for each PC using the UPS WorldShip interface.
Set the commit mode on the ODBC connection to *NONE.
UPS WorldShip Setup
This section guides you in setting up the UPS WorldShip application to import and export data from IntelliDealer.
Tip: In the procedures below, use care when entering field names. They must match exactly for the interface to work correctly. If you are experiencing issues, review these instructions carefully and follow them exactly.
The procedures include:
Sales Order (and Part Requisition) Import Setup
To set up a Keyed Import for importing customer shipment information from a Sales Order number you need to create an Import Map:
-
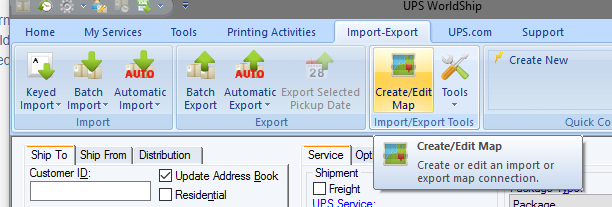
In the UPS WorldShip application, navigate to the Import-Export menu and click Create/Edit Map.
-
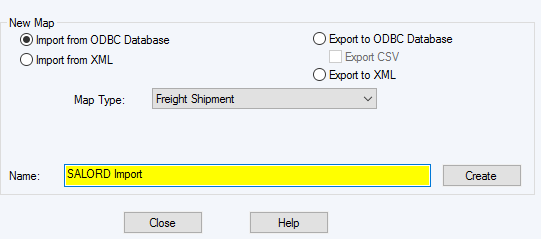
On the resulting pop-up, set these parameters, then click Create:
-
Choose Import from ODBC Database
-
Set Map Type to Freight Shipment
-
Choose a meaningful name like "Sales Order Import" or "SALORD Import"
-
-
Choose your ODBC connection to the VitalEdge database, enter a valid login ID and password, and click OK.
-
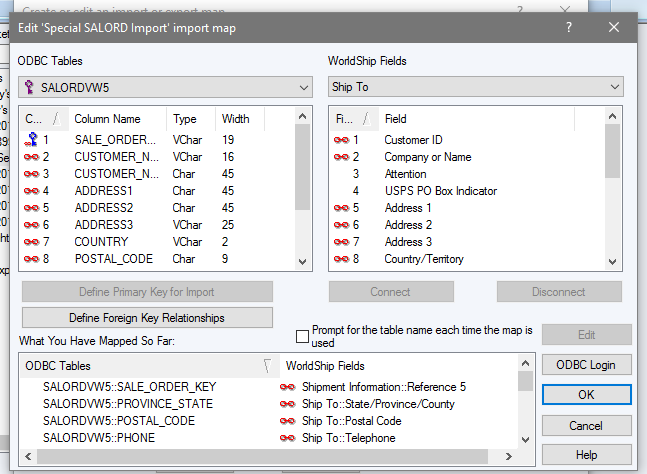
On the next window, you will complete the field mapping between the UPS Worldship fields and the fields in the IntelliDealer file SALORDVW5. The SALORDVW5 file is a special view of SALORD and CMASTR that finds the appropriate ship-to or sold-to information from a Sales Order.
-
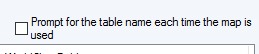
Uncheck "Prompt for the table name each time the map is used".
-
Set the table on the left to SALORDVW5.
-
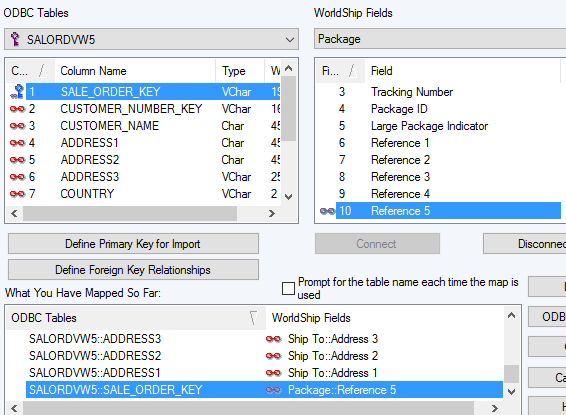
Click SALE_ORDER_KEY on the left and Package: Reference 5 on the right, then click Define Primary Key for Import.
This maps a reference field in UPS WorldShip to the Sales Order key (a number) in IntelliDealer.
-
Continue linking fields according to the chart below. Click on the fields in the left and right sides of the window then click Connect. If the fields were successfully connected you will see a link icon appear beside them and they will show up in the "What You Have Mapped So Far" box. Most fields have been named in SALORDVW5 to match exactly with the name of the field in UPS WorldShip.
SALORDVW5 UPS WorldShip SALE_ORDER_KEY
This link still needs to be established, even though it was designated as the primary key in the last configuration steps.
Primary Key for Import Package: Reference 5 CUSTOMER_NUMBER_KEY Ship To: Customer ID CUSTOMER_NAME Ship To: Company or Name ADDRESS1 Address 1 ADDRESS2 Address 2 ADDRESS3 Address 3 COUNTRY Country/Territory POSTAL_CODE Postal Code CITY City or Town PROVINCE_STATE Province/State/Country PHONE Telephone FAX Fax Number -
Once you have linked all the fields, click OK. You should see your new import map showing up in the list
-
Close the window.

(Optional) Alternate Sales Order Import Setup for Single-Location Dealerships
An alternate setup for the Sales Order import is available for single-location dealerships only.
Warning: While it is possible to set up the interface to function this way for a non-single-location dealership, it is not recommended as order numbers can repeat across dealership resulting in data errors. For example, the interface will not be able to properly determine whether the dealer wants the sales order from division 01 or 02 if they just enter SOORD as the import key.
-
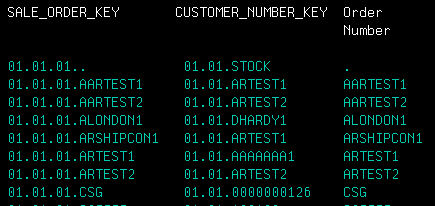
Instead of using SALE_ORDER_KEY as the primary key for the import (step 8), you can use the field ORDER_NUMBER instead, which is just the SOORD value.
-
When importing using the keyed import, enter the sales order number and NOT the 01.01.01 prefix.
Shipment Information Export
To set up the Export map to send shipment information back to IntelliDealer:
-
In the UPS WorldShip application, navigate to the Import-Export menu and click Create/Edit Map.
-
Set the table on the left to SALORDVW5.
-
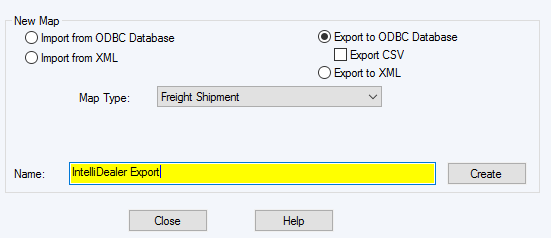
On the pop-up set-up these parameters, then click Create:
-
choose Export to ODBC Database
-
Set Map Type to Freight Shipment
-
Choose a meaningful name like "IntelliDealer Export"
-
-
Choose your ODBC connection to the VitalEdge database, enter a valid login ID and password, and click OK.
-
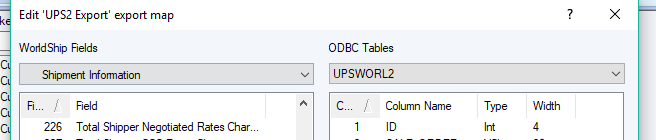
For the export map, you will be mapping fields to the ODBC Table UPSWORL2:
-
Uncheck "Prompt for the table name each time the map is used".
-
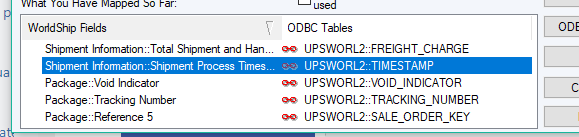
Map the fields according to this chart. You may use a different field for the freight charge if desired, but the default configuration is provided below (the field order does not matter).
UPS WorldShip Field UPSWORL2 Field Shipment Information: Total Shipment and Handling Published Charges FREIGHT_CHARGE Shipment Information: Shipment Process Timestamp TIMESTAMP Package: Void Indicator VOID_INDICATOR Package: Tracking Number TRACKING_NUMBER Package: Reference 5 SALE_ORDER_KEY -
Once you have linked all the fields, click OK. You should see your new export map showing up in the list
-
Close the window.
Support for Multi-Package Shipments
You can optionally enable multi-package shipments to be handled through the UPS WorldShip integration by mapping some extra fields. Multi-package shipments are posted as a single freight charge, but with multiple tracking numbers shown in the comments section.
To enable, map these two additional highlighted fields to your UPS2 Export map:
| UPS WorldShip Field | UPSWORL2 Field |
|---|---|
| Package: Package ID | PACKAGE_ID |
| Package: Reference 5 | SALE_ORDER_KEY |
| Package: Tracking Number | TRACKING_NUMBER |
| Package: Void Indicator | VOID_INDICATOR |
| Shipment Information: Shipment ID | SHIPMENT_ID |
| Shipment Information: Shipment Process Timestamp | TIMESTAMP |
| Shipment Information: Total Shipment and Handling Published Charges | FREIGHT_CHARGE |
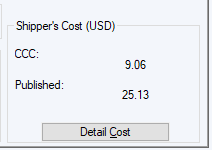
Support for Cost Center Calculator (CCC) Pricing
Some customers use the CCC feature in UPS WorldShip to automatically apply discounts and surcharges to the prices in UPS WorldShip. A customer using CCC can be identified by the different look of the Shipper's Cost pricing section.
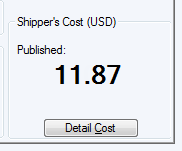
No additional setup is required if the customer is not using CCC.
To ensure the appropriate amount is exported to IntelliDealer, we recommend using this export map instead of the one above. It is identical, save for the FREIGHT_CHARGE mapping which has been highlighted to show the field change.
| UPS WorldShip Field | UPSWORL2 Field |
|---|---|
| Shipment Information: Shipment Process Time stamp | TIMESTAMP |
| Shipment Information: Total Shipment and Handling CCC Rates Charge | FREIGHT_CHARGE |
| Package: Tracking Number | TRACKING_NUMBER |
| Package: Void Indicator | VOID_INDICATOR |
| Package: Reference 5 | SALE_ORDER_KEY |
| Shipment Information: Shipment ID | SHIPMENT_ID |
| Package: Package ID | PACKAGE_ID |
Warning: There are many similar looking fields to this one, so you must make 100% sure the text on the selected field is exactly the text displayed above. Pay special attention to the use of "Shipment" and not "Shipper".
Exporting from UPS WorldShip to IntelliDealer
To send shipment information from UPS WorldShip back to IntelliDealer, you must set up automatic export. You can choose any of the export options in the WorldShip application, but the export must be performed before the shipment information will be available to import back into the Sales Order in IntelliDealer.
For example, to set up an automatic export during End of Day, in the UPS WorldShip application, select the export you created above from the list, or choose it from the More... option.
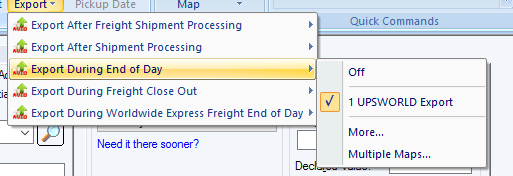
End of Day is shown only as an example. You may choose whichever export criteria works for your business process.
IntelliDealer Setup
This section describes the setup required within IntelliDealer, and includes these topics:
Location Configuration
-
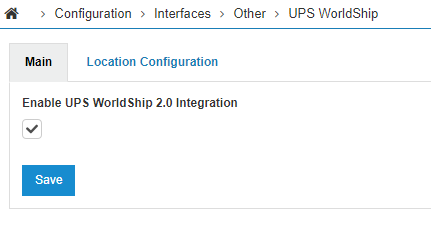
Navigate to Configuration > Interfaces > Other > UPS WorldShip.
-
To enable the 2.0 integration of the UPS WorldShip interface (recommended), check the Enable UPS WorldShip 2.0 Integration checkbox and click Save.
-
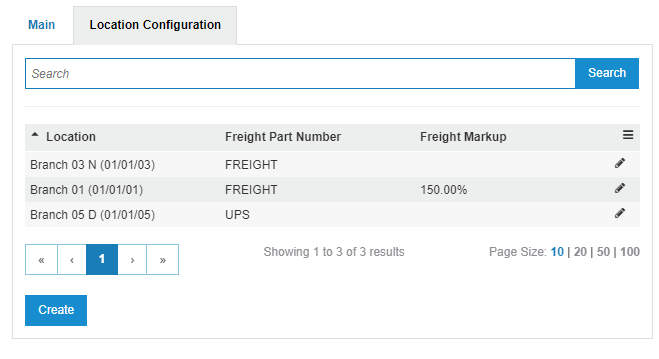
Click the Location Configuration tab.
On this screen, you can configure a special part number for freight for each location in which the interface is used. If no special part is configured for freight for a particular location, the shipping information cannot be imported into a Sales Order/ Parts Requisition in IntelliDealer.
The 2.0 version of UPS WorldShip supports an optional freight markup. This can be used for a markup only - discounts are not supported.
-
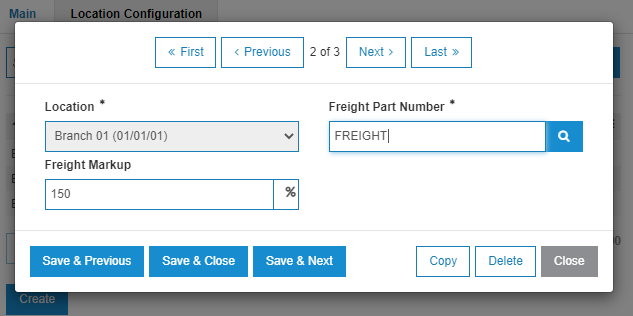
Click Create to add a new entry for a location and fill in all relevant fields on the pop-up.
UPS WorldShip Migration from 1.0 to 2.0
To migrate from version 1.0 to version 2.0 of UPS WorldShip, the Export Map created for the 1.0 version must be modified. Upon completing the migration, freight charges can be imported as normal by clicking the Import UPS WorldShip button on a sales order.
-
For the export map, you will now be mapping fields to the ODBC Table UPSWORL2 instead of the old UPSWORLD file.
-
Map fields according to this chart. You may use a different field for the freight charge if desired, but the default configuration is provided below (the field order does not matter).
UPS WorldShip Field UPSWORL2 Field Package: Package ID PACKAGE_ID Package: Reference 5 SALE_ORDER_KEY Package: Tracking Number TRACKING_NUMBER Package: Void Indicator VOID_INDICATOR Shipment Information: Shipment ID SHIPMENT_ID Shipment Information: Shipment Process Timestamp TIMESTAMP Shipment Information: Total Shipment and Handling Published Charges FREIGHT_CHARGE


Usage Walkthroughs
These sections describe some typical usage scenarios:
Importing an IntelliDealer Sales Order into UPS WorldShip
-
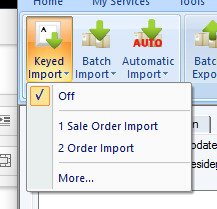
In the UPS WorldShip application, click Keyed Import on the main screen. You may need to click More... to make your import show up if it is the first time you are importing.
-
Into the resulting window with a yellow box, enter the import key in this format:
COMPANY.DIVISION.BRANCH.SALES_ORDER_NUMBER
For example, to import a Sales Order with the Sales Order number "SALORD" in company 01, division 01, branch 01, enter:
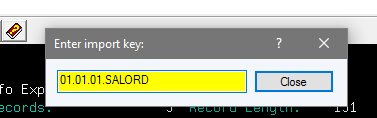
Note: If the company, division or branch number were only one character, you will need to leave a space between that number and the period. For example, if the branch number was 'T', using the above example, the number entered above would be: 01.01.T .SALORD or the second. Notice the space after the "T".
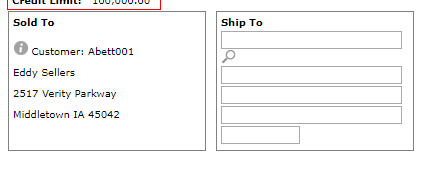
Press enter, and you should see the ship-to information has been imported:
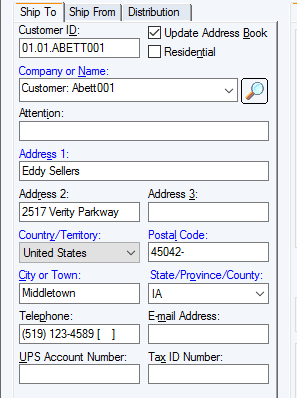
If the Ship To field is populated on the Sales Order, the system will import that address information. Otherwise, it will use the Sold To information:
Importing UPS WorldShip information into IntelliDealer
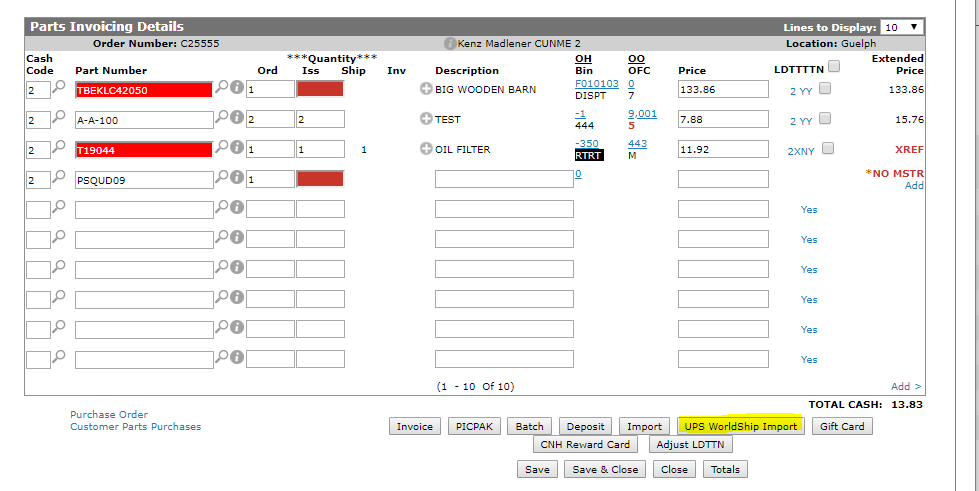
If the UPS WorldShip feature has been licensed, a UPS WorldShip Import button appears on a Parts Invoice/Sale Order.
To import data:
-
Clicking the UPS WorldShip Import button to attempt to import information that has already been exported from the UPS WorldShip application.
If data has not been exported from the UPS WorldShip application or the interface has not been configured correctly, an error message is shown:
If the import worked successfully, the screen should refresh and you will see a new line for the imported shipping information, using the special part set up on the configuration screen.
-
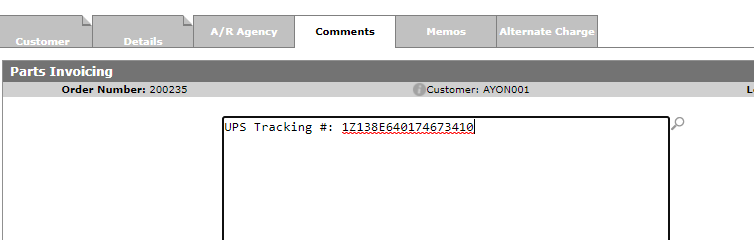
Click the Comments tab.
If multiple shipments have been generated for a single sales order before attempting the import, the freight charges are combined and multiple tracking numbers are shown on the Comments tab.


Feature: 6406 - UPS WorldShip Integration
Revision: 2024.08