Configuration: Shopify
The IntelliDealer Shopify integration can perform a nightly update of parts inventory levels in the Shopify environment with data from the IntelliDealer parts system. IntelliDealer maintains a mapping between Shopify items and IntelliDealer parts through the SKU field in Shopify. The Shopify Integration does not have any direct user interaction after the configuration screen has been set up, aside from the ability to monitor the inventory update logs.
Topics in this section include:
See also: Shopify: Orders and Shopify: Logs.
For legacy configuration instructions see Legacy Configuration (To Be Sunset).
Note: Shopify is deprecating certain REST API endpoints. The GraphQL-based order import method is recommended for future compatibility.
How to Access the Shopify Configuration
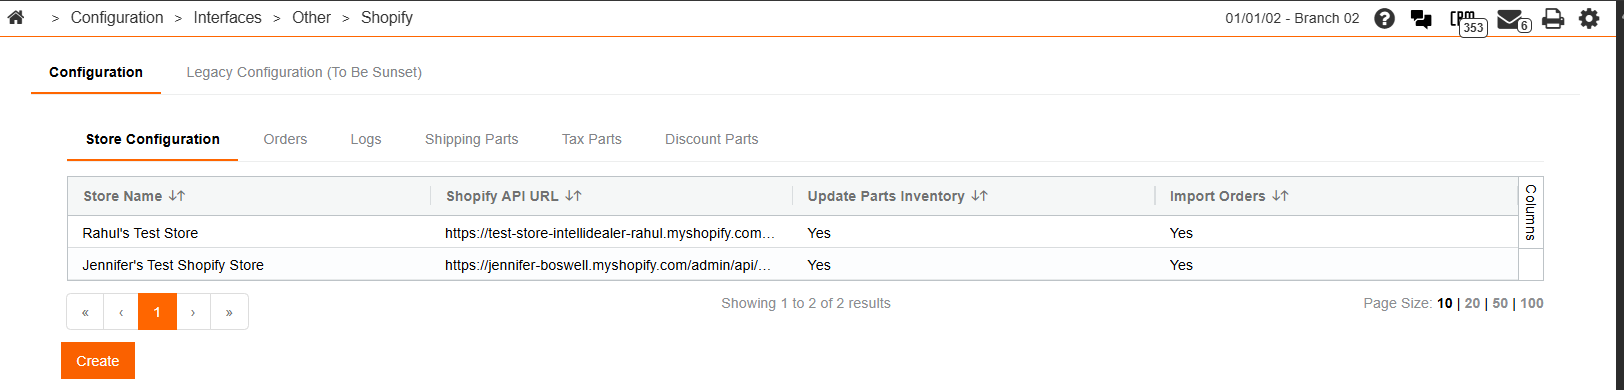
From anywhere within IntelliDealer, navigate to Configuration > Interfaces > Other > Shopify.
The screen displays a list of all configured Shopify stores. If no Shopify stores have been configured, the list is empty.

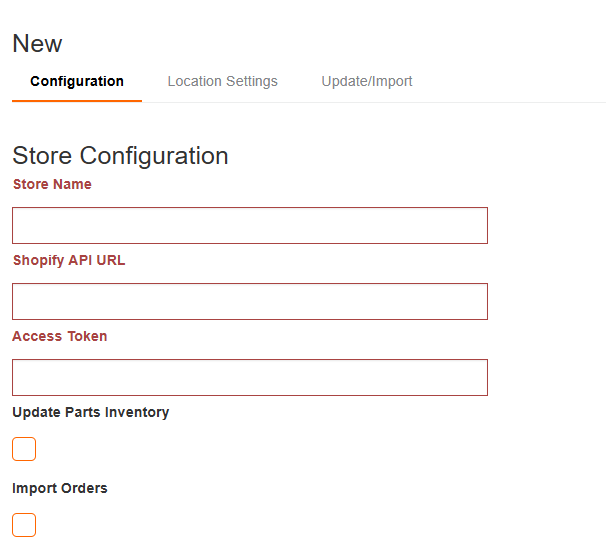
How to Create a new Shopify Store
-
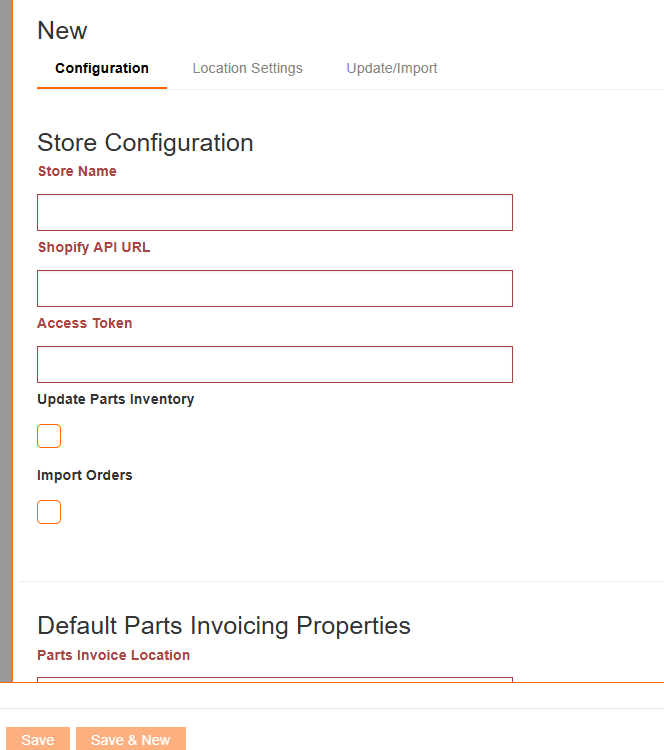
Click Create.
-
Set these fields for the new store:
-
Store Name—a unique identifier for the store.
-
Shopify API URL—the URL of your Shopify environment, followed by /admin/api/2022-04/. The date may change depending on the version you are using. For example:
myshopifyurl.com/shop/admin/api/2022-04/ -
Shopify Access Token—provided by Shopify. See the Shopify website for details.
-
Update Inventory Nightly—select this checkbox if you want IntelliDealer to automatically update inventory levels in Shopify.
-
Import Orders—if selected, IntelliDealer automatically creates parts invoices from Shopify orders.
Order Import Method
-
Use Legacy Order Import (REST)—uses Shopify’s REST API to retrieve orders. This method is being deprecated by Shopify.
-
Use GraphQL Order Import—uses Shopify’s GraphQL API to retrieve orders. This is the recommended method going forward.
-
Note: Only one order import method can be selected at a time.
-
-
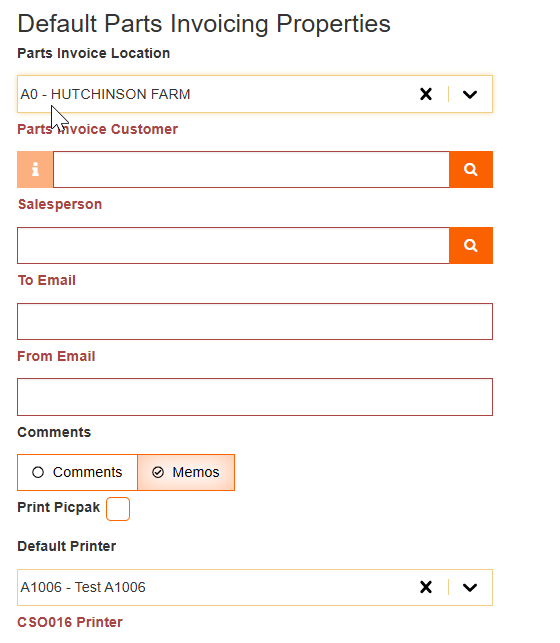
Scroll down to the Default Parts Invoicing Properties section.
-
Set these fields for the new store:
-
Parts Invoice Location—the default location for creating Parts Invoices, used when there is no direct mapping on the Location Settings configuration tab.
-
Parts Invoice Customer—the customer to be used for the created parts Invoice.
-
Salesperson—the salesperson to be used on the parts invoice.
-
To and From Email—used for parts invoice creation emails, these fields specify who the email is sent to, and who the email is addressed from.
-
Comments/Memos—specifies where to store any relevant order notes.
-
-
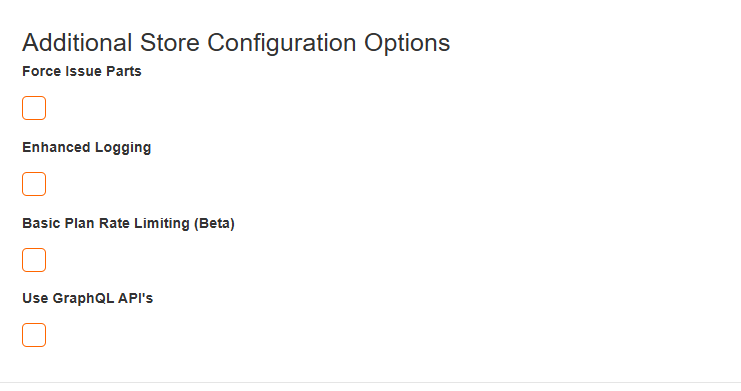
Scroll down to the Additional Store Configuration Options section.
-
Set these fields for the new store:
-
Force Issue Parts—if selected, forces the interface to issue all parts on the created parts invoice, regardless of stock levels at the creation location.
-
Enhanced Logging—if selected, IntelliDealer logs more detailed information about how inventory levels are calculated. Useful for troubleshooting.
-
-
Click one of the save buttons to save your changes.
You must save changes to the Configuration tab before you can access the other tabs.
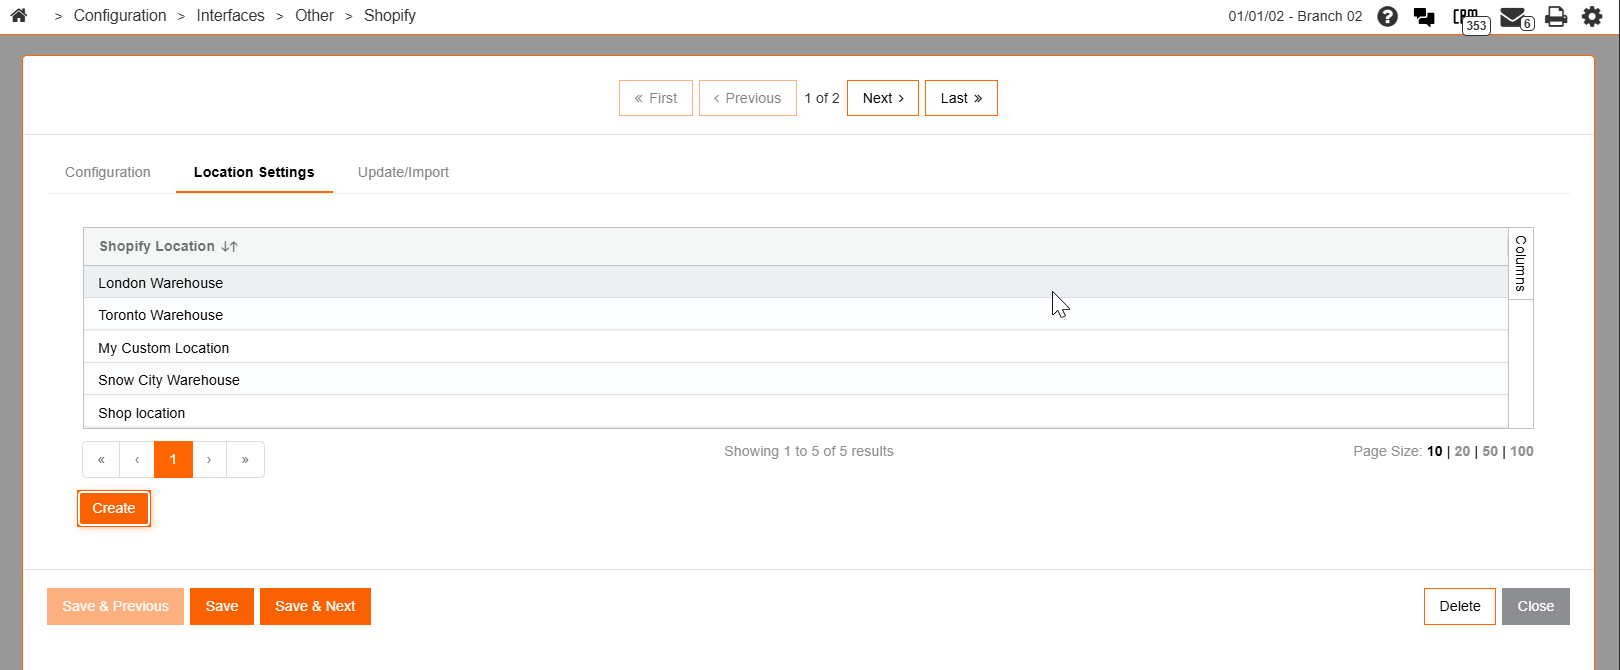
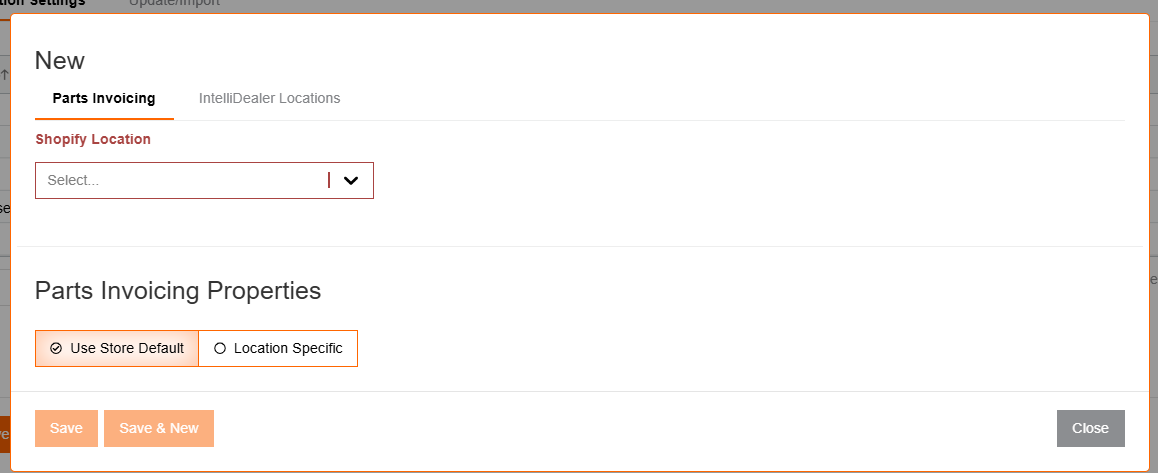
How to Modify Location Configuration
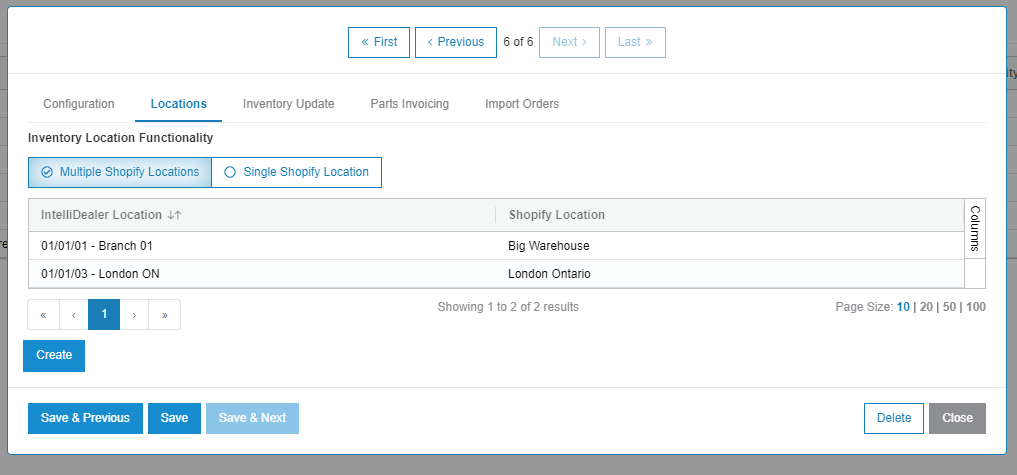
On the Locations tab, you can configure different settings for each Shopify store. The locations are retrieved from the Shopify store you set up in How to Create a new Shopify Store.
-
On the Location Settings tab, click Create.
-
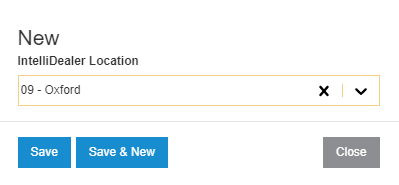
Use the dropdown menu to select the Shopify location you wish to configure.
If you do not see any locations populated but you do have locations in your Shopify store, you may have an issue with your API Key or URL. Ensure the settings on the Configuration tab are correct before proceeding.
-
Under Parts Invoicing Properties, configure the settings to be used for orders creation for the specified location. These settings override the properties configured at the store level.
To use the default properties, select Use Store Default.
-
Click one of the save buttons.

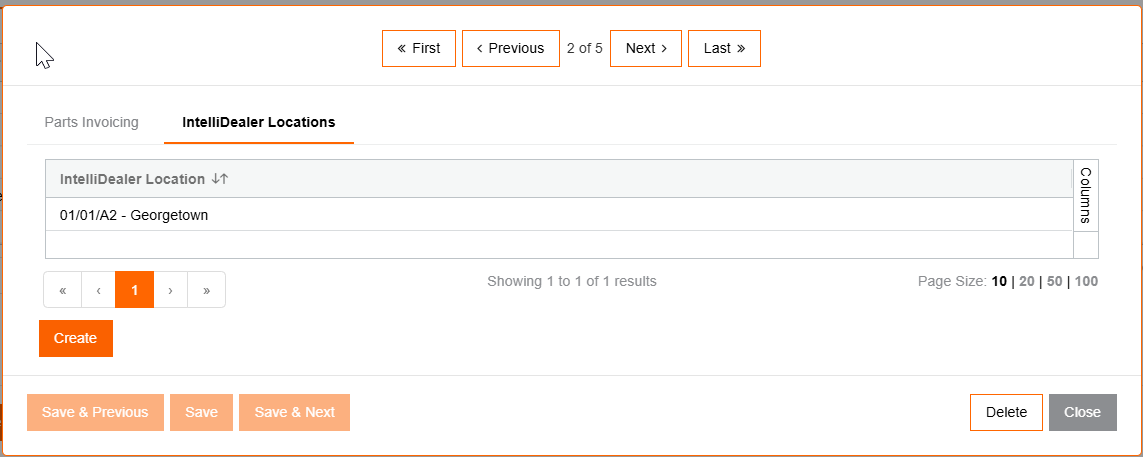
How to Map your Locations to a Shopify Store
To determine how inventory is updated in Shopify, you must map the appropriate IntelliDealer locations to Shopify locations. Use the IntelliDealer Locations tab to select Locations to map to Shopify locations. When configured on this screen, inventory levels from these locations are combined to set the total inventory level in the Shopify location.
For example, if London ON has 4 of a given part and Branch ZI has 10, the total inventory updated for this part in this Shopify location is 14.
Special Part Numbers Configuration
To allow for tax, discount, and freight handling when importing Shopify orders, the main configuration screen offers configuration tabs for Shipping Parts, Tax Parts, and Discount Parts. The special parts numbers configured for tax, discount, and shipping are used for the total tax, discount, and shipping costs on a Shopify order. See Special Part Numbers.
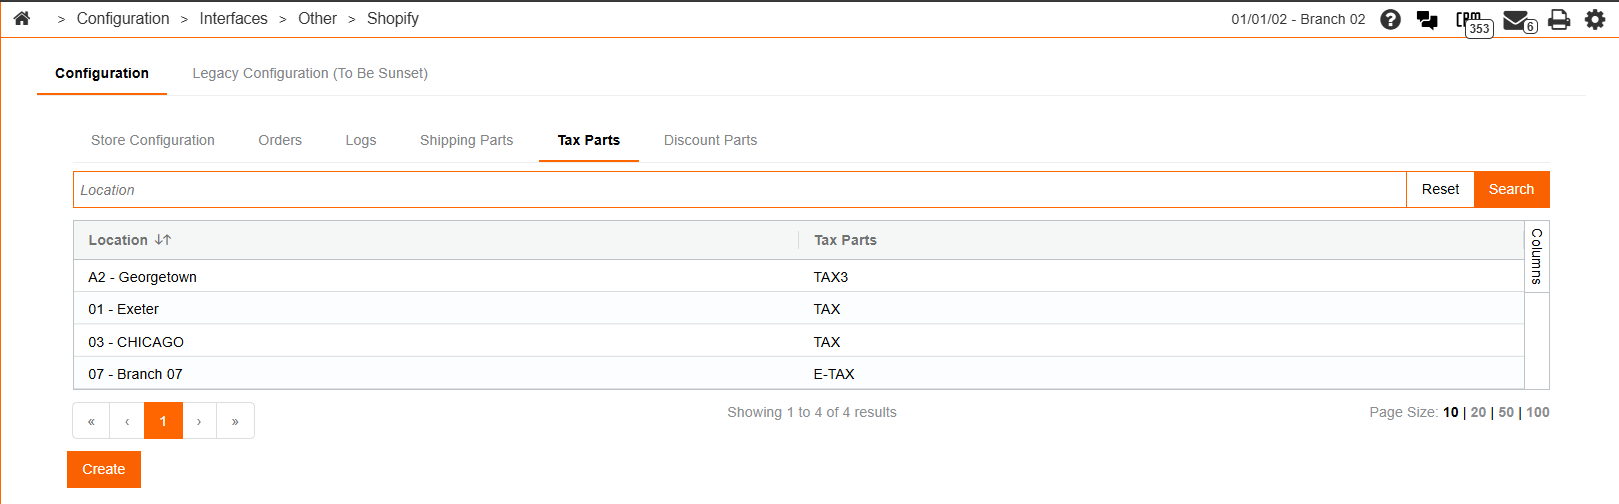
All tabs for configuring special parts numbers function in the same way.
-
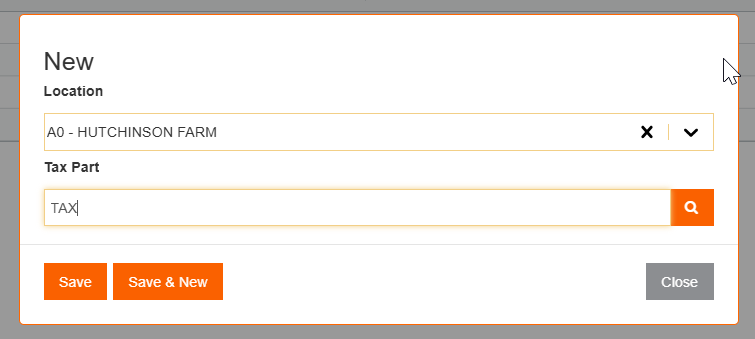
Click Create. A New pop up opens.
-
Select the location you are configuring this part for, then enter or search for and select the part number.
-
Click one of the save buttons.
The IntelliDealer Shopify integration can perform a nightly update of parts inventory levels in the Shopify environment, with data from the IntelliDealer parts system. The Shopify Integration does not have any direct user interaction after the configuration screen has been set up, aside from the ability to monitor the inventory update logs. See Shopify - Logs.
Topics in this section include:
See also: Shopify: Invoices.
How to Access the Shopify Configuration
From anywhere within IntelliDealer, navigate to Configuration > Interfaces > Other > Shopify.
The screen displays a list of all configured Shopify stores. If no Shopify stores have been configured, the list is empty.
How to Create a new Shopify Store
-
Click Create.
The configuration window opens.
-
Set these fields for the new store:
-
Store Name—a unique identifier for the store.
-
Shopify API URL—the URL of your Shopify environment, followed by /admin/api/2022-04/. The date may change depending on the version you are using. For example:
myshopifyurl.com/shop/admin/api/2022-04/ -
Shopify Access Token—provided by Shopify. See the Shopify website for details.
-
PDF Nightly Report User ID—the ID of the user who will receive a nightly PDF report of issues that occurred during the inventory update.
-
Update Inventory Nightly—select this checkbox if you want IntelliDealer to automatically update inventory levels in Shopify.
-
Import Orders—if selected, IntelliDealer automatically creates parts invoices from Shopify orders.
-
-
Click one of the save buttons to save your changes.
You must save changes to the Configuration tab before you can access the other tabs.
How to Map your Locations to a Shopify Store
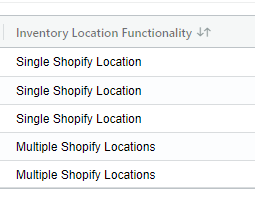
On the Locations tab, you must map each of your locations (branches) to a Shopify store. You can have one or more Shopify stores, and you can map one or more IntelliDealer locations to each Shopify store. If multiple IntelliDealer locations are configured for a single Shopify store, the inventory from each location is combined to create a total inventory number.
Once the locations are configured, you can switch a location between the configuration options by changing the toggle switch and clicking Save.
The currently active inventory functionality is shown on the main Shopify configuration listing screen in this column:
Configuring a Single Shopify Store
Use this option for a faster set up when you have only one Shopify store, and want to configure all IntelliDealer locations to that store.
-
Select the Single Shopify Location option.
-
To add the new location, click Create.
-
From the drop down, select the location to configure.
-
Click Save, or Save & New to configure an additional location.
Configuring Multiple Shopify Stores
Use this option when you have multiple Shopify stores that each need to be configured separately.
Note: A valid Shopify configuration must have already been saved to use this option.
-
Select the Multiple Shopify Locations option.
If your URL and Access Token are properly configured, a modal opens with an IntelliDealer Location select and a Shopify Location select.
-
Select the appropriate locations to match and click Save or Save & New to configure an additional location.
Invoices
You can configure the Shopify integration to automatically create Shopify orders in IntelliDealer as Parts Invoices. The created Shopify orders are listed with other eCommerce Orders at Product Support > Parts > eCommerce Orders.
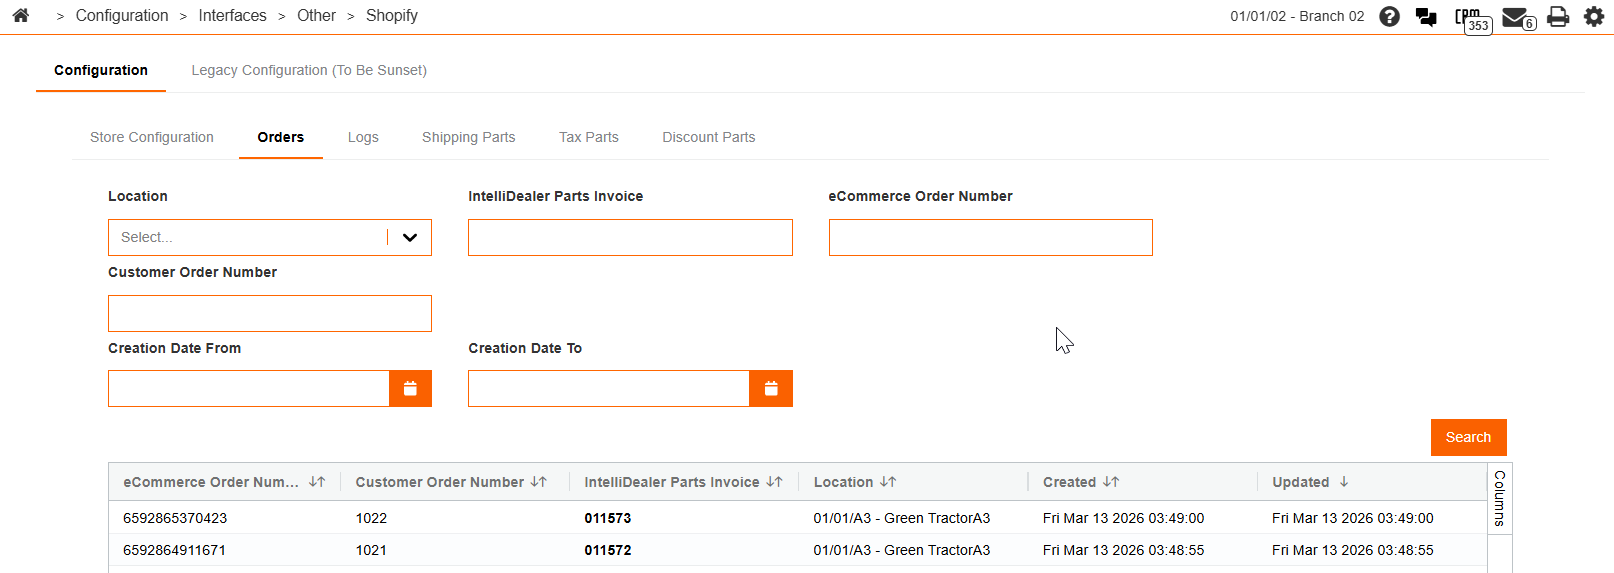
Topics in this section include:
Inventory Update Tab
Use the Inventory Update tab to manually update parts inventory.

Click the Update Inventory button to submit a batch job to update the Shopify inventory for the current store.
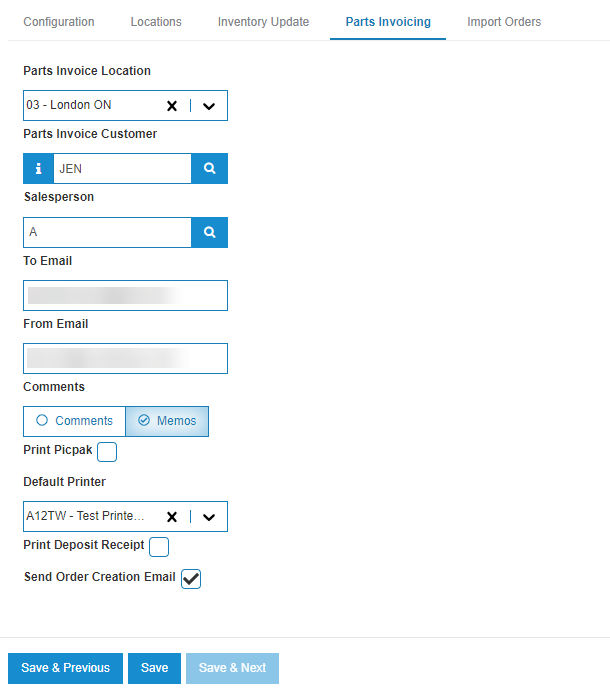
Parts Invoicing Tab
The Parts Invoicing tab controls the settings used when creating parts invoices in IntelliDealer from Shopify orders.
-
Parts Invoice Location—the default location for creating Parts Invoices, unless a direct location mapping exists on the location configuration tab.
-
Parts Invoice Customer—is the customer that will be used for the created parts invoice.
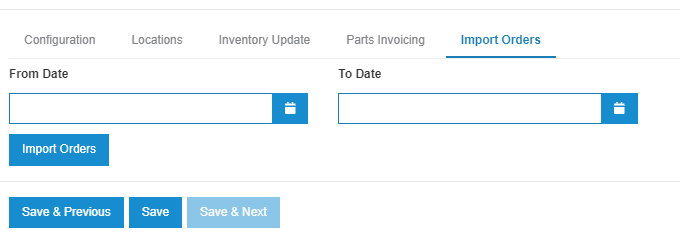
Import Orders Tab
The Import Orders tab allows orders to be manually imported for a given date range.
The order import method (Legacy REST or GraphQL) is determined by the settings configured on the Configuration tab.
Shipping Parts, Tax Parts, and Discount Parts Tabs
To allow for tax, discount, and freight handling when importing Shopify orders, the main configuration screen offers configuration screens for Shipping Parts, Tax Parts, and Discount Parts.
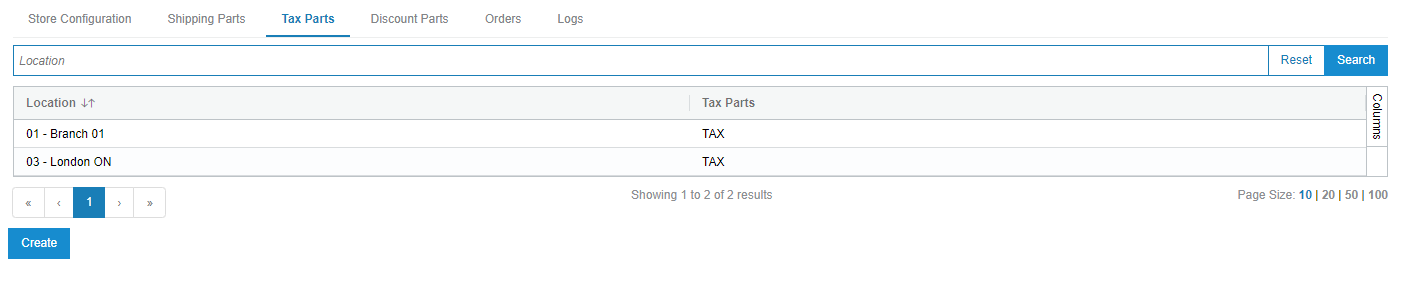
All screens function the same way. Click Create to launch a popup window
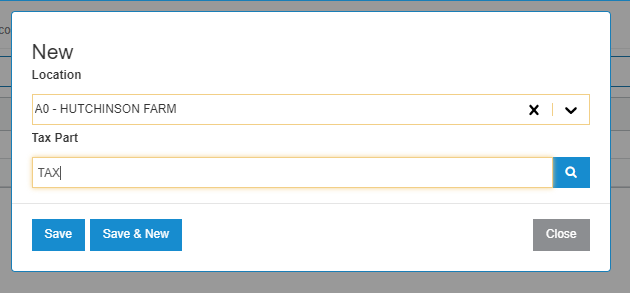
Select the IntelliDealer location for which you are configuring a part, then select the part number. Click Save
Tax, discount, and shipping parts are used for the total tax, discount, and shipping costs on a Shopify order.