
AGCO eOrdering Configuration
This interface retrieves new and updated equipment units from AGCO's SFTP server as a nightly task. In IntelliDealer, a stock unit is created and modified as updates are available.
Configure this interface by navigating to Configuration > Interfaces > AGCO > eOrdering/Open Orders and fill in all mandatory fields in the pop-up window:
 AGCO eOrdering configuration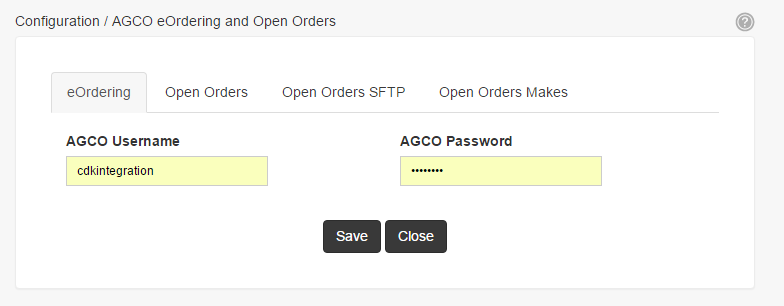
The AGCO Username and AGCO Password are the top-level username and password used to log into the AGCO BigMachines website.
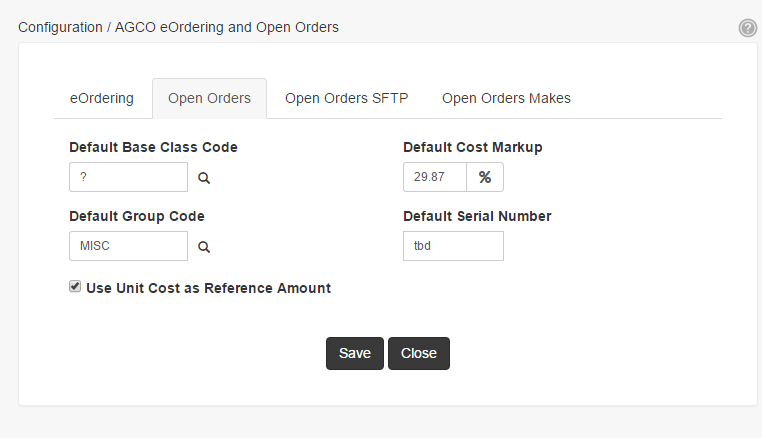
Open the Orders tab:
-
For the Default Base Class Code field, you may wish to set up a new base class code to identify new equipment bases created through this interface.
- To do so, navigate to Configuration > Equipment > Profile > Classes.
- On the popup window, select Need to create a new class? Click here to add.
- Fill in the Code and Description boxes. You may choose any available one or two letter code.
- Click Save. You may now select your new Class from the AGCO eOrdering Configuration window.
-
The Default Group Code is the default group code that is assigned to units as they are created as part of the nightly task.
Optional: you may also wish to set up a custom Group Code for this interface. This can be done similar to the Base Code setup above. Navigate to Configuration > Equipment > Profile > Group Codes and choose Need to add a group code? Click here to add.
Now click the Open Orders SFTP tab:
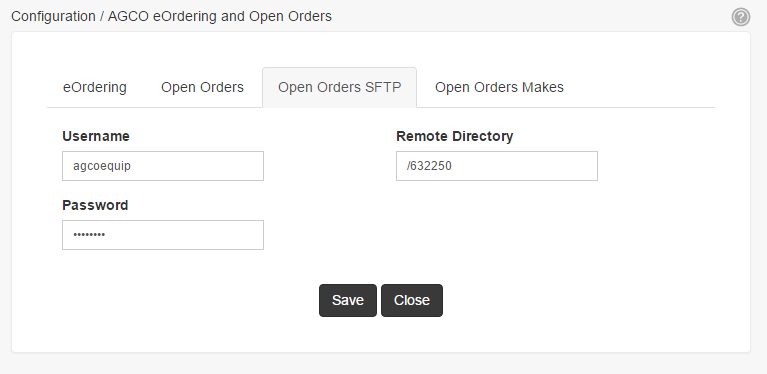
You need to enter your username and password for the AGCO ftp site. The remote directory should be set to your top-level dealer code for AGCO and should be provided by AGCO during the setup of this interface.
Lastly, click the Open Orders Makes tab:
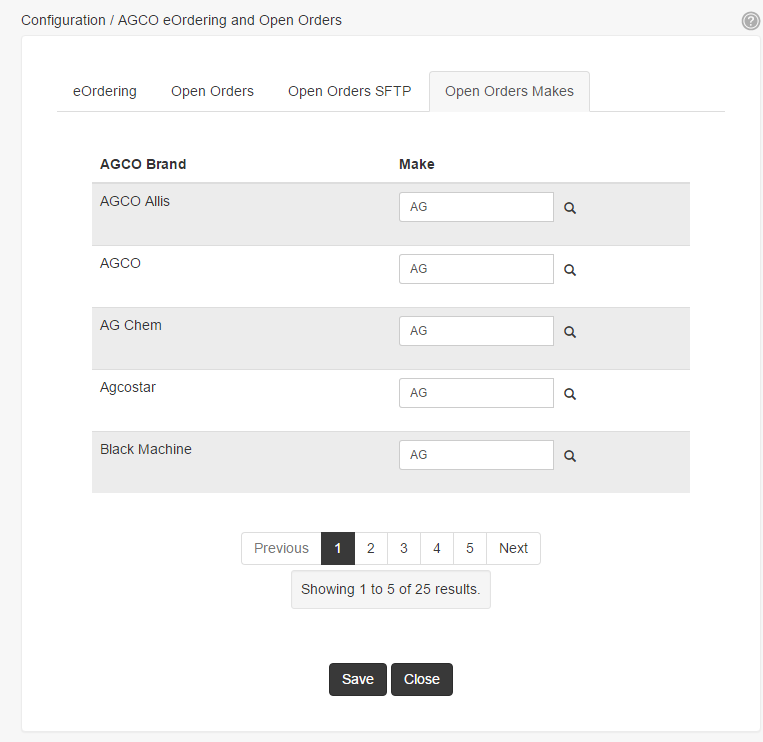
This tab is unique to the AGCO interface. Since AGCO offers many different brands of equipment, they all need to be mapped to a Make in IntelliDealer.
A list of the brands available through the eOrdering interface is pre-loaded on the configuration screen. Each AGCO brand needs to be mapped to an IntelliDealer make to ensure units are created with the proper make.
Dealer Codes
You also need to set up your AGCO eOrdering manufacturer code and dealer codes. Navigate to Financial Management > Accounts Payable > Vendor Profile:
-
On the screen that appears, search for your AGCO vendor code and select it.
-
On the next screen, select Update/View Profile.
-
On the popup window, on the Profile tab, ensure that you have selected the correct Manufacturer Code for AGCO.
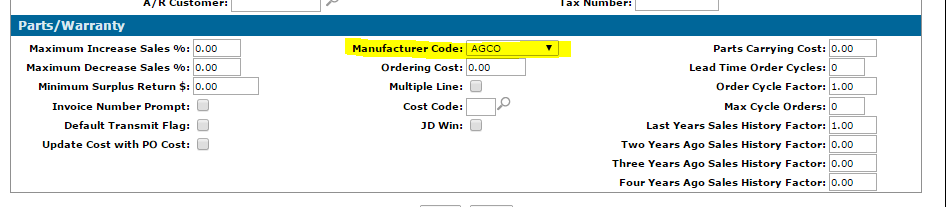
-
Next, select the Dealer tab.
-
Click Is there a dealer missing from the list? Click here to add.
-
Fill in the appropriate information. The Description, SIC code, and Start Digit fields do not matter for this interface.
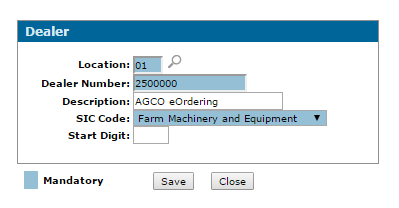
-
Click Save.
Equipment Defaults
You must also set up Equipment Defaults so the interface knows which inventory account should be associated with created units.
-
Navigate to Configuration > Equipment > Profile > Equipment Defaults.
-
On the screen that pops up, click Need to add a new equipment default? Click here to add.
-
On this new popup, a few fields must be configured for each location:
- Type must be set to New.
- You must select the same Make codes used on the AGCO eOrdering configuration screen or choose All.
- Status must be set to On Order.
- Group Code must be set to All.
The AGCO eOrdering interface should now be configured for use.