Creating and Assigning a Manufacturer Code to a Vendor
Note: Many of the steps outlined in this procedure must be completed from the green screen application. If you do not have access to the green screen application, contact your system administrator or VitalEdge support for more information.
-
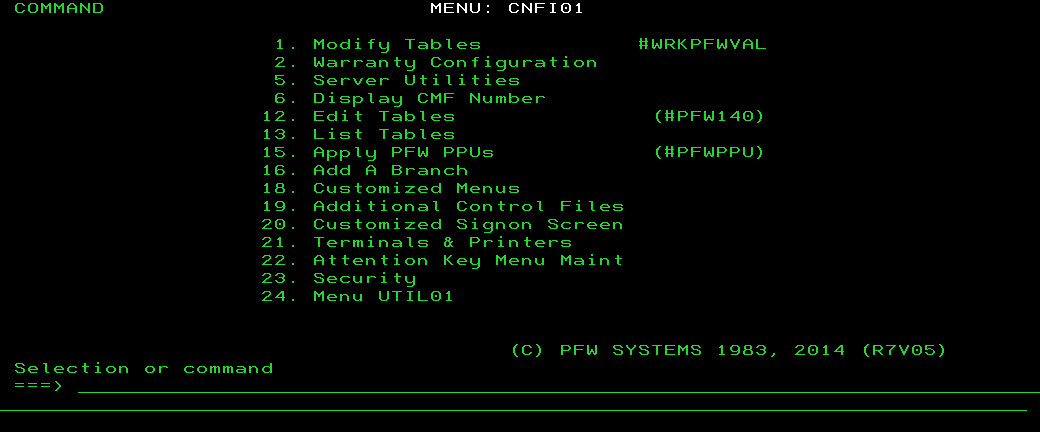
From the Main Menu of the green screen application, type CNFIGPFW on the command line and press Enter.
-
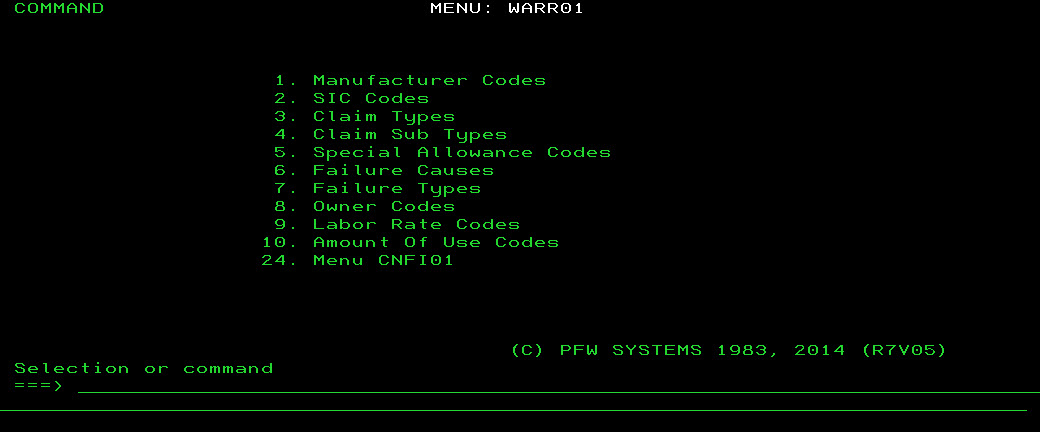
To select the Warranty Configuration option, type 2 on the command line and press Enter.
-
To select the Manufacturer Codes option, type 1 on the command line and press Enter .
-
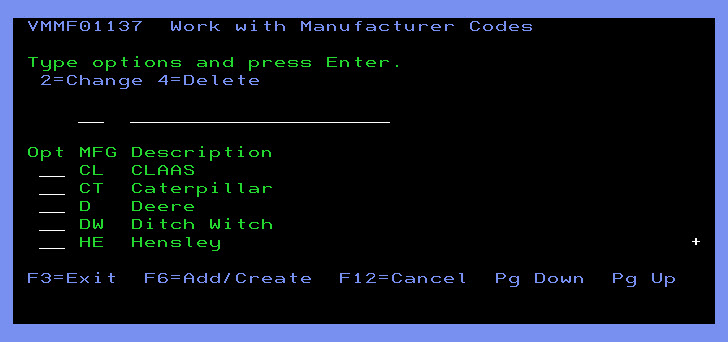
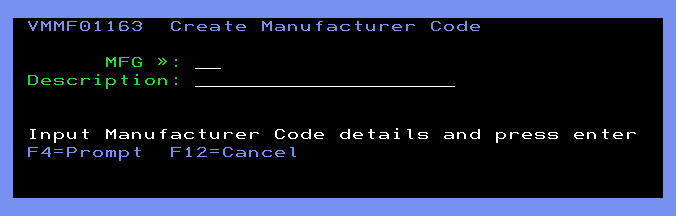
Press F6.
-
Type the desired manufacturer code in the MFG field and a Description for the code in the field provided, then press Enter to save it to the system.
For example, to add a Kobelco manufacturer code type KB in the MFG and Kobelco in the Description field.
The code will be listed on the Work with Manufacturer Codes screen. -
Exit the green screen application and open IntelliDealer.
-
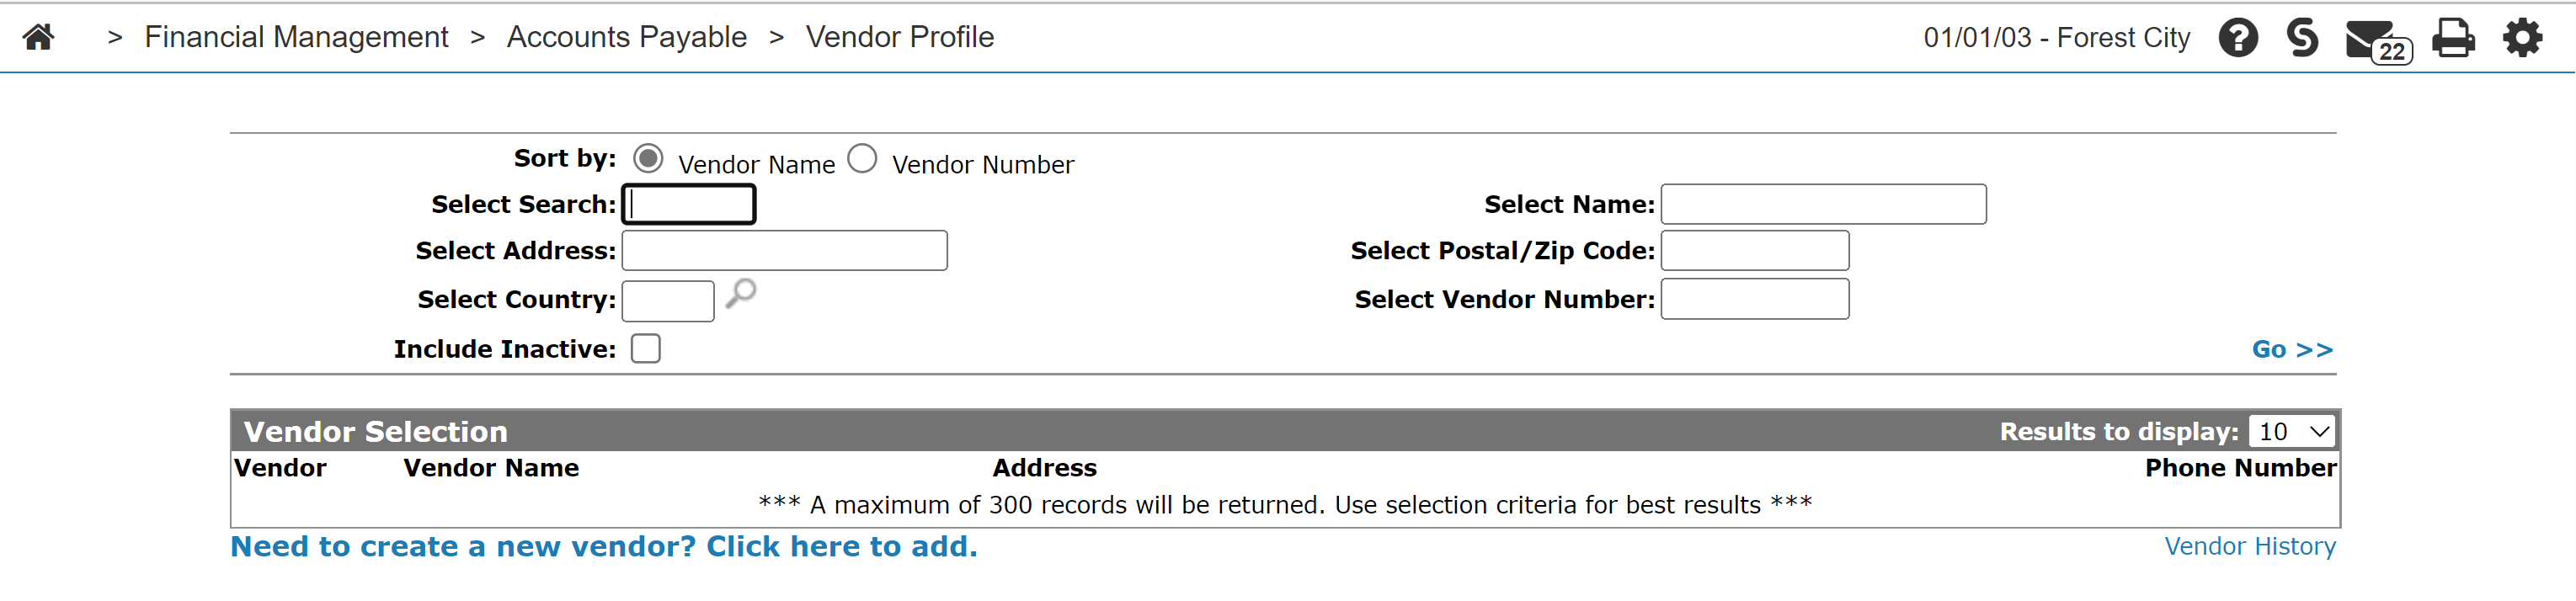
From anywhere within IntelliDealer, navigate to Financial Management > Accounts Payable> Vendor Profile.
-
Fill out the appropriate search fields and click the Go >> link.
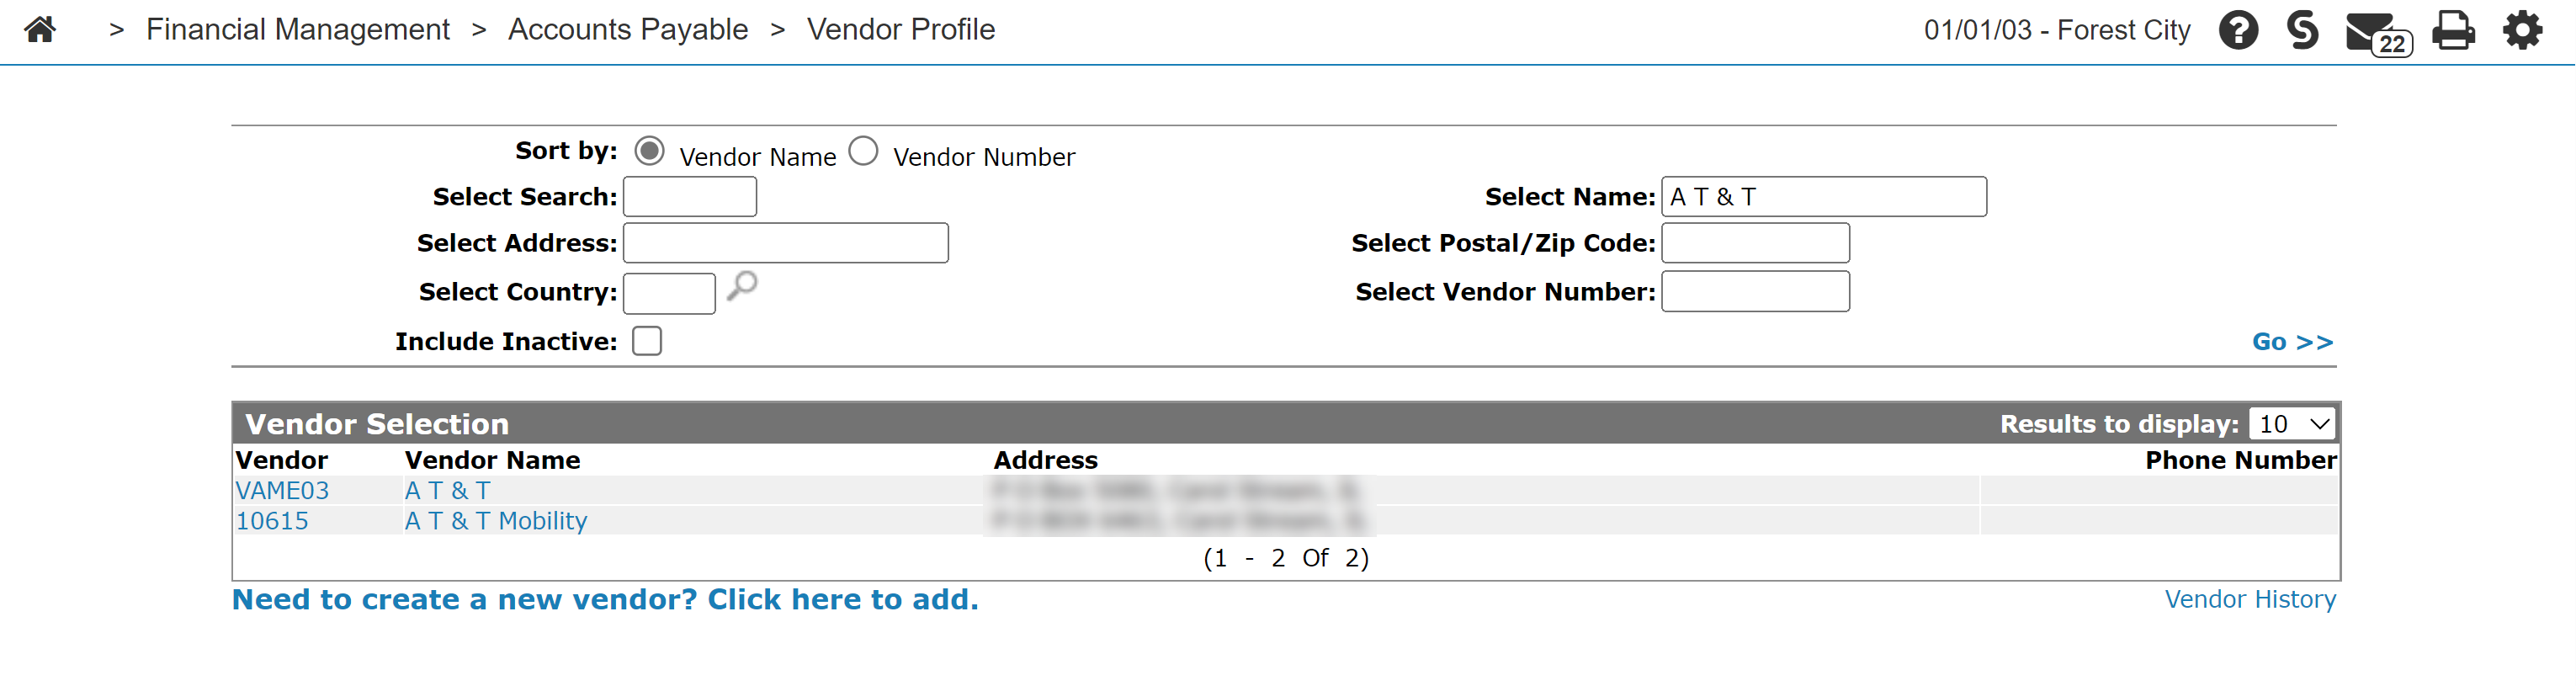
The Vendor Selection screen refreshes listing the generated search results.
-
Click the desired Vendor number.
The Vendor Profile screen appears. -
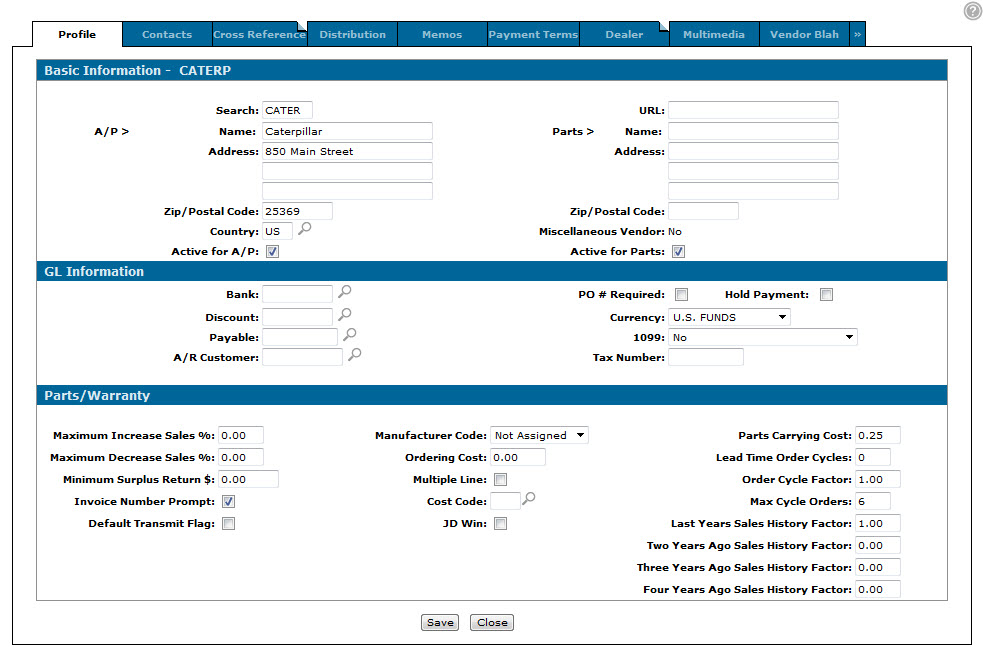
On the Vendor Profile screen, click the Update/View Profile link.
The Vendor Profile tab appears.
-
On the Vendor Profile tab, select the newly created Manufacturer Code in the field provided and click Save.
The vendor is now associated to the selected manufacturer.