Kubota: eCommerce
The WorldPay integration with Kubota eCommerce interface is beta.
The Kubota eCommerce interface connects IntelliDealer to Kubota eCommerce .
The interface contains these components:
-
Part Availability
-
Tax Look up
-
Parts Invoice creation
Setup Requirements
The below must all be installed for Kubota to allow dealers to begin processing transactions via K-Com. They each can be completely set up individually without any relying on the others, but Kubota requires all to be completed prior to allowing a dealer onto K-Com.
Each of these features must be enabled:
-
6273 - Kubota eCommerce. See How to setup Kubota eCommerce.
-
6238 - Avalara Tax. See Avalara Implementation Guide.
-
A payment interface, one of:
-
6157 - Payment Card Interface. The dealer must be on-boarded with Versapay and have contracted for Payment Card Interface via their VitalEdge sales rep. They must have an eCommerce ID from Versapay, which the dealer is responsible for providing to Kubota. In order to get an eCommerce ID from Versapay, they must also have a normal merchant account with Versapay - please ensure dealers are requesting both when they sign up.
-
6272 - Worldpay Interface. The dealer must have an Authorize.net account. As a client, when creating an Authorize.net account make sure that eCheck is part of the product purchased. Applicable fees from Authorize.net will apply. See Worldpay Setup.
-
How to setup Kubota eCommerce
Note: The Kubota Wholegoods interface and related functionality is pending vendor certification.
-
Navigate to Configuration > Interfaces > Kubota > eCommerce and click the Wholegoods tab. This tab is pending vendor certification.
-
Fill in these fields:
-
Price to Send—make a selection from the drop down list of the type of price to send to Kubota.
-
Salesperson—which salesperson code the invoices should be created for.
-
Shipping Charge—make a selection from the drop down list of the type of freight charges you want on invoices. You can configure the options available here on the Shipping Charges tab.
-
-
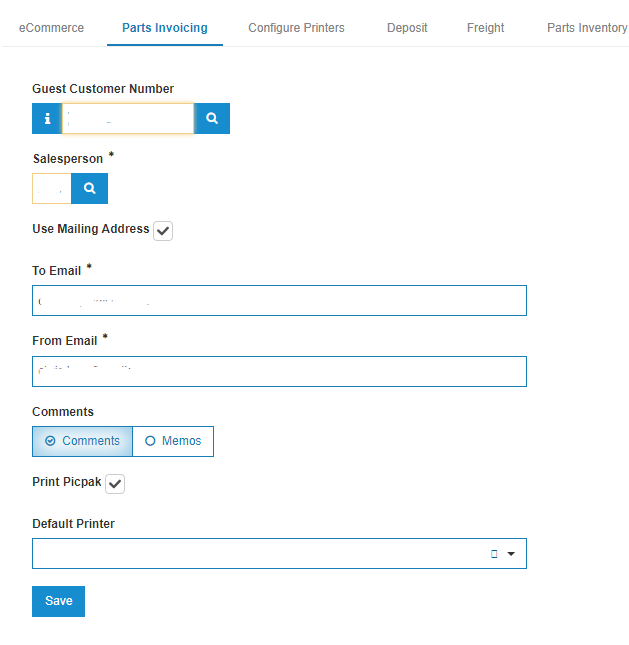
Navigate to Configuration > Interfaces > Kubota > eCommerce and click the Parts Invoicing tab.
-
Fill in these fields:
-
Guest Customer Number—should Kubota eCommerce NOT provide a DBSCustId, what customer would you like the invoices created for.
Note: The customer this is associated with CANNOT be an INTERNAL customer. Internal customers do NOT get charged tax. The customer must be marked as INDIVIDUAL or BUSINESS.
-
Salesperson—which salesperson number would you like the invoices created for.
-
To Email and From Email—if IntelliDealer has trouble creating a parts invoice, it sends an email to the addressee configured in the To Email and the source is the user configured in the From Email.
-
Comments or Memos—select to have comments passed from Kubota to be added to either the memos tab or the comments in a parts invoice.
-
Print Picpak—select this checkbox if you want a picpak to be automatically generated when an invoice is created.
-
Default Printer—which printer should generate the picpak.
-
CSO016 Printer—the printer to use for the CSO016 report, which is generated when there is an exception.
-
-
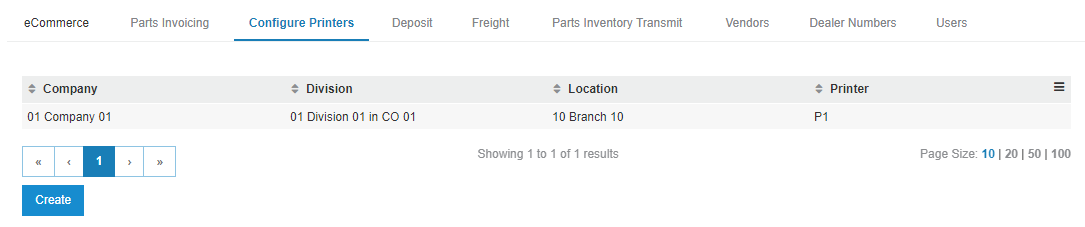
To configure a printer for each location, click the Configure Printers tab. You can click on the row to edit, or click Create to add a new location record.
-
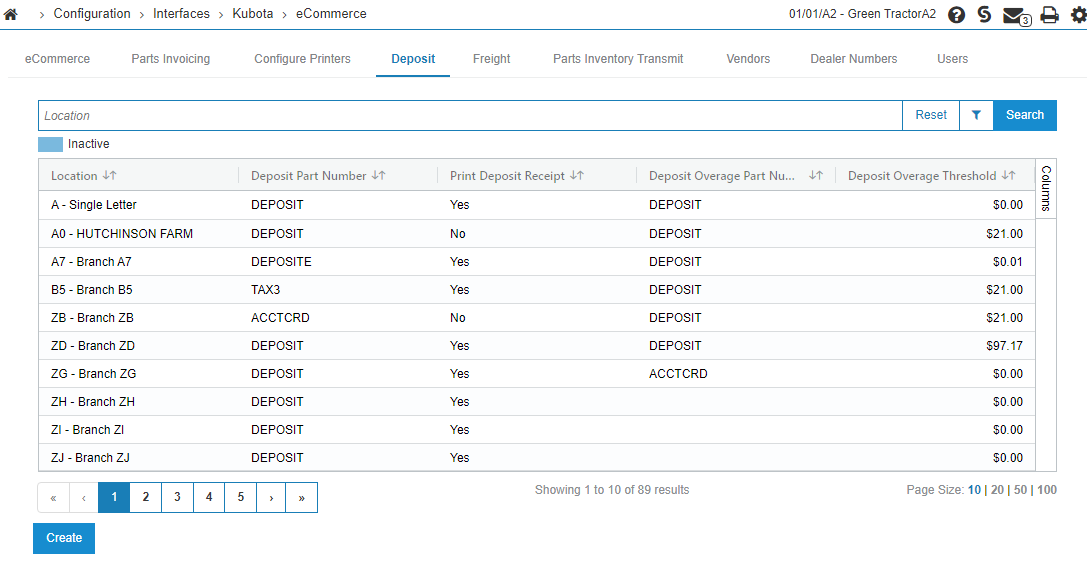
Click the Deposit tab. The Deposit tab displays deposit part numbers. Set up a deposit part number for each location that uses Kubota eCommerce. See Deposit.
-
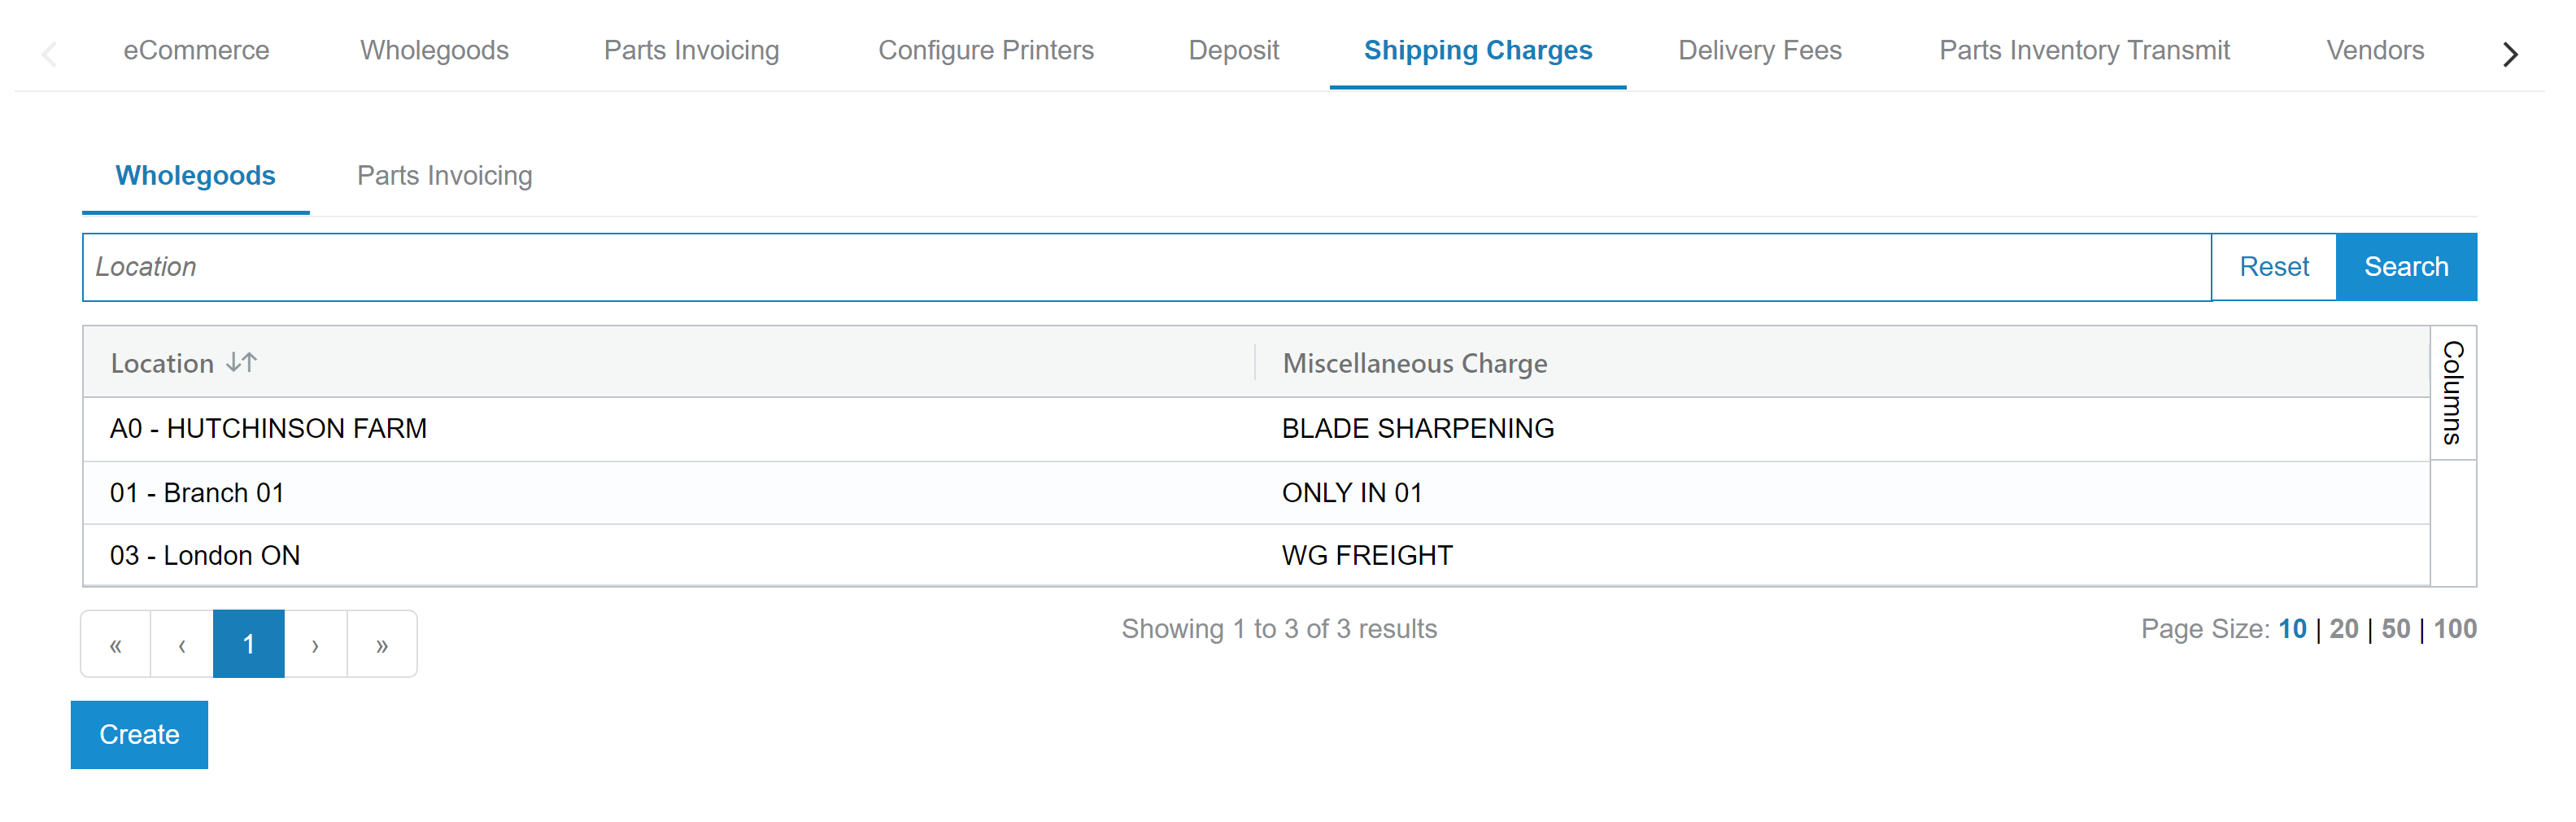
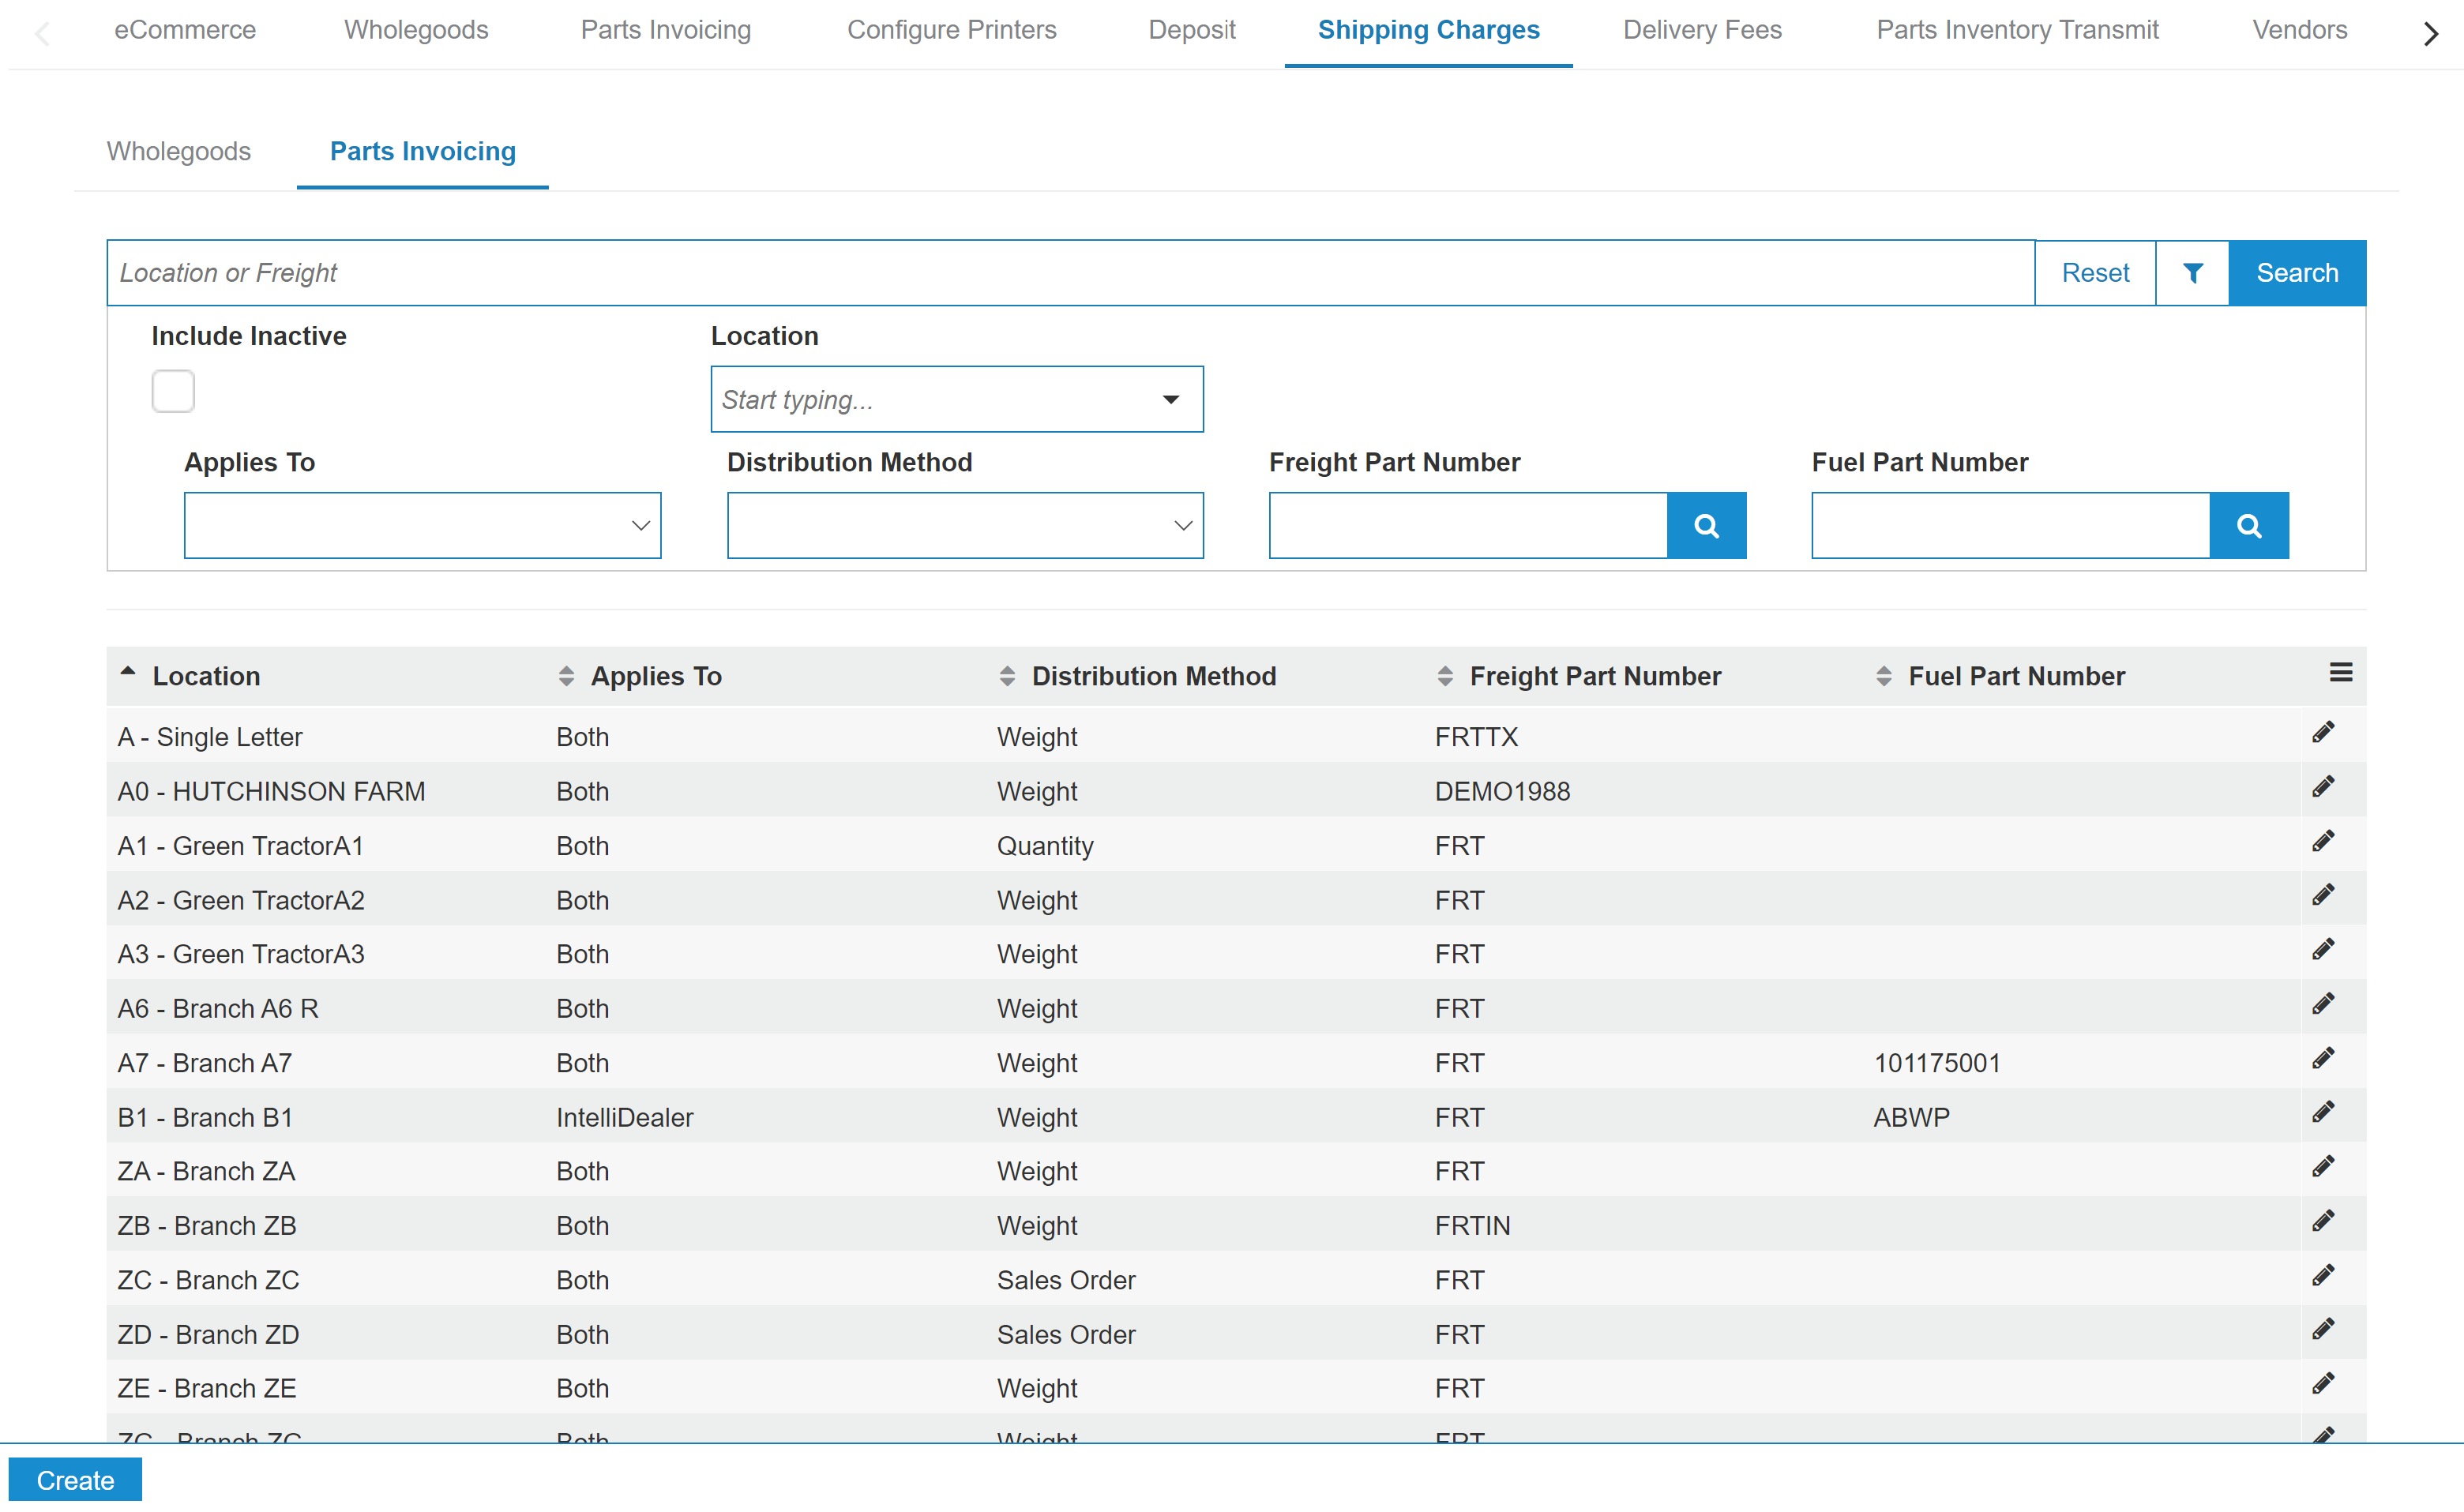
Click the Shipping Charges tab.
It opens to the Wholegoods tab. This tab is pending vendor certification.
The configuration on this tab is based on the selection made on the Wholegoods tab. It will be one of:
-
Freight—you must have a freight part number for each location that will be doing Kubota K-com. Please see the manual about setting up freight parts.
-
Custom Freight—select a different Freight Part for each location, and not necessarily the same parts as the other generic freight configuration screen.
-
Miscellaneous Charges—you must have a miscellaneous charge for each location that will be doing Kubota K-com. Please see the manual about setting up miscellaneous charges.
-
-
Click the Parts Invoicing tab, which is used to configure freight. You must have a freight part number for each location that will be doing Kubota K-Com. Please see the manual about setting up freight parts. See Setting up Freight Parameters for a Branch Location.
-
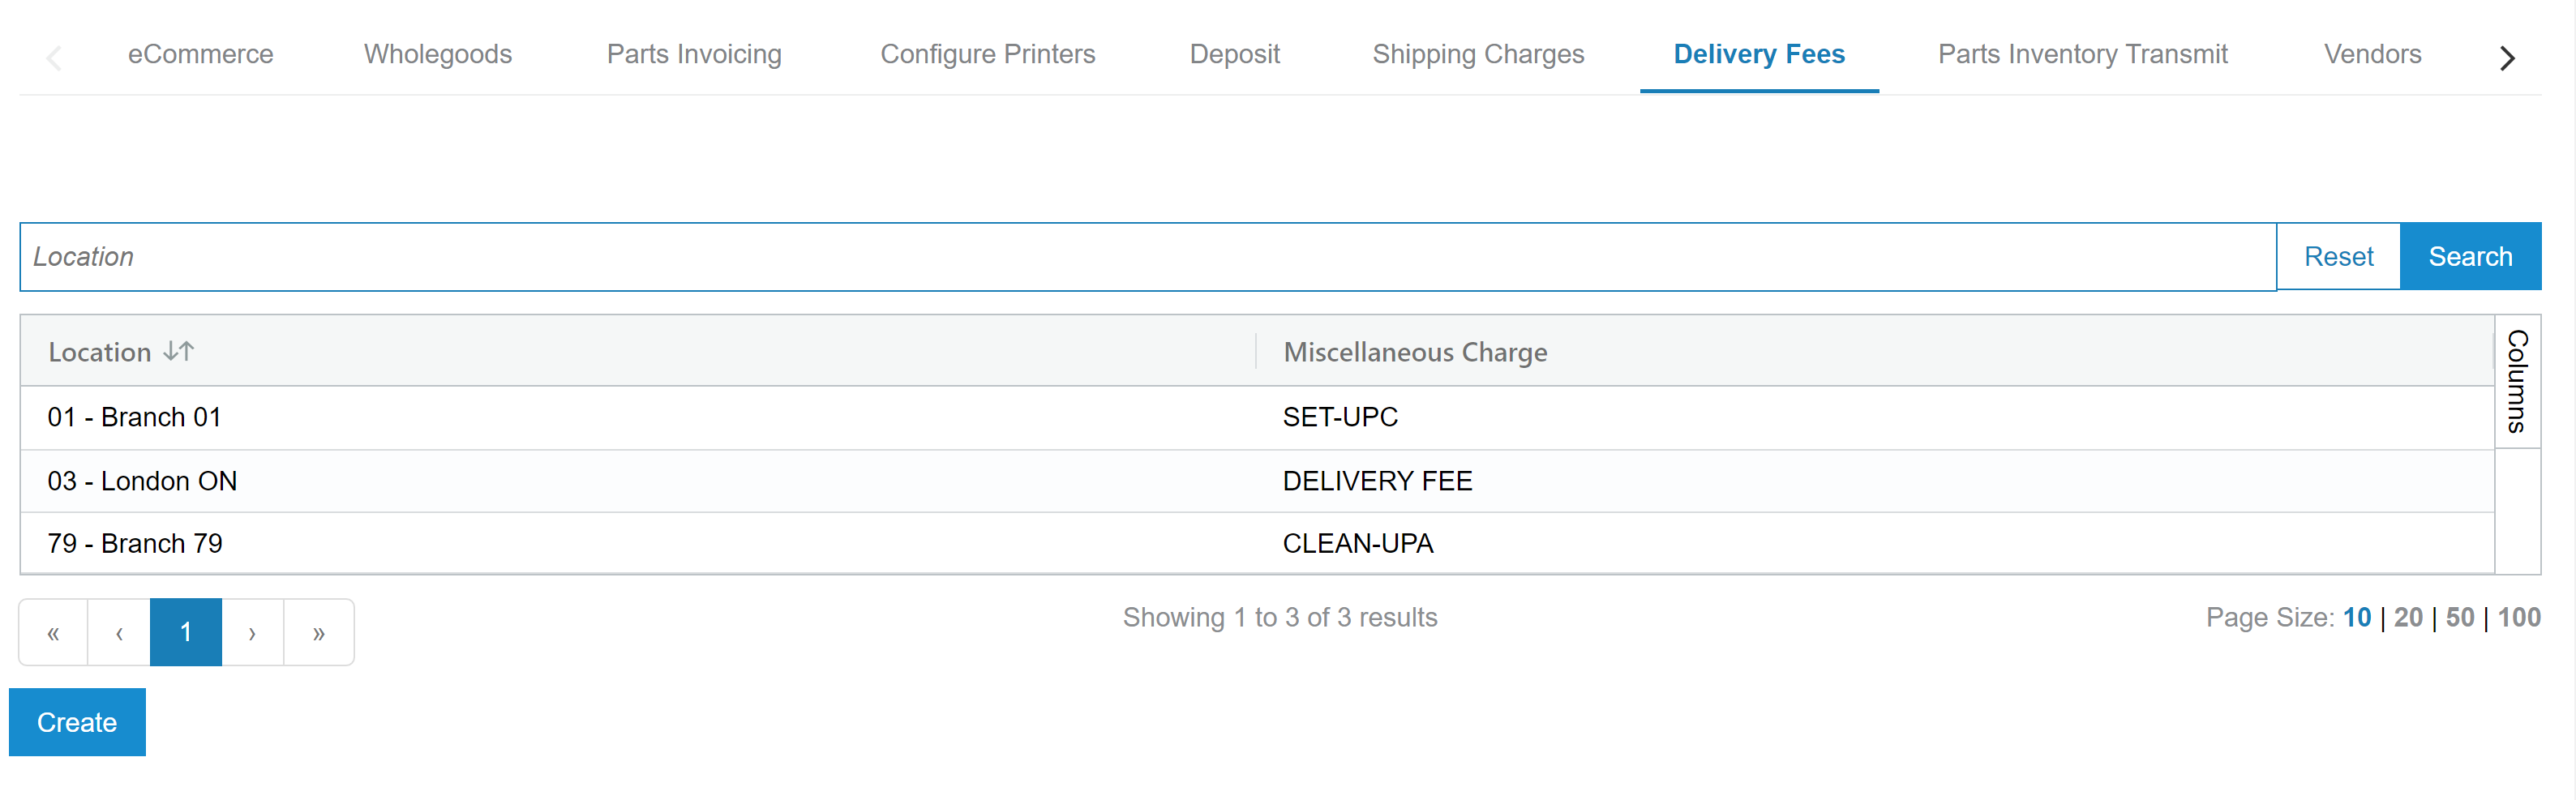
To configure delivery fees to Kubota Wholegoods, click the Delivery Fees tab. This tab is pending vendor certification.
You can create or update delivery fees. See also Miscellaneous Charges / Credit.
-
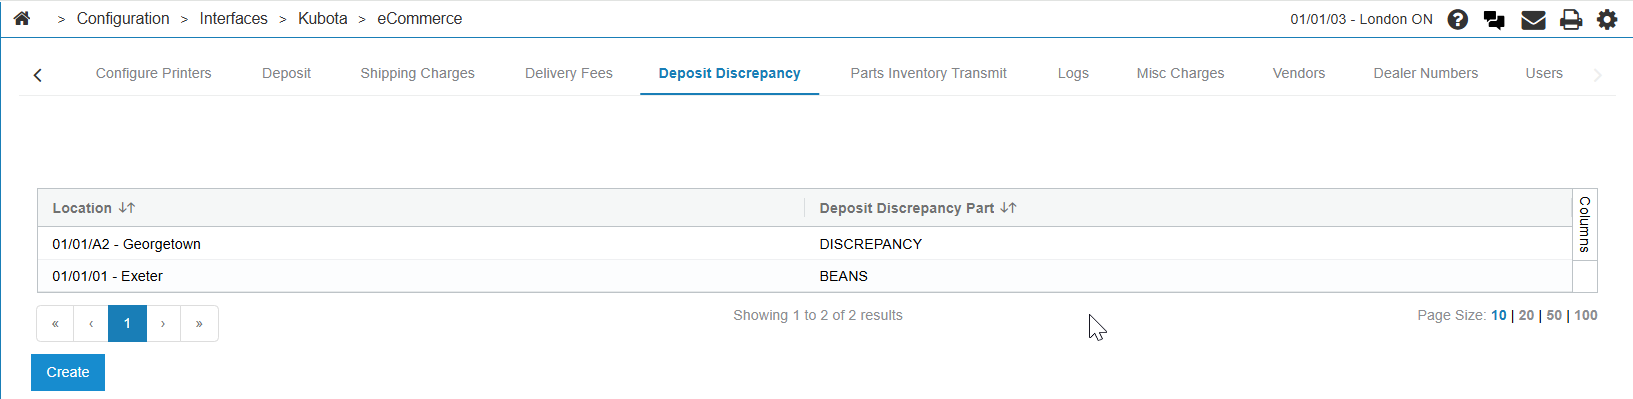
To configure discrepancies with part deposits, click the Deposit Discrepancy tab. This is used to resolve payment mismatches between what the dealer received and what Kubota is expecting for an eCommerce order.
The Create button opens a window where a deposit discrepancy part can be searched by location.
-
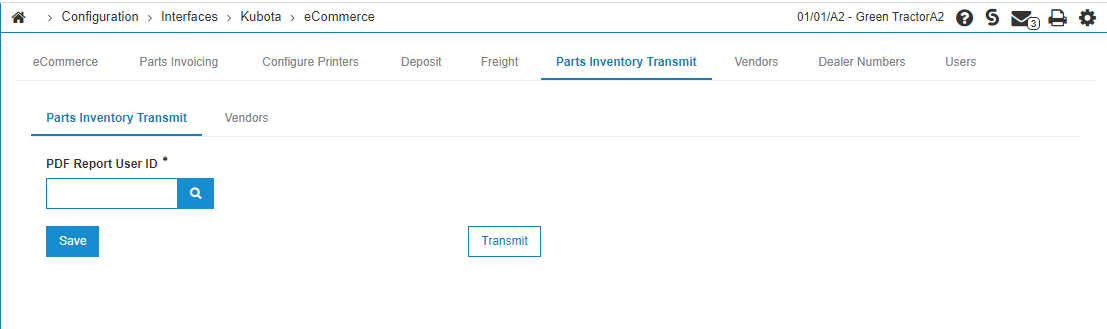
To configure who will receive the Parts Inventory Transmit reports, click the Parts Inventory Transmit tab.
IntelliDealer runs a nightly job to transmit the dealer's inventory for Kubota eCommerce. If you wish to force it, you can manually push the transmit by clicking the Transmit button.
-
To review a log of transmission events between Kubota and IntelliDealer you can use the Logs tab.
You can search for a specific Order Number, Parts Invoice, or Event Type. You can also search from a user defined date range. The logs captured here are records of the data carried between transmissions. You can use these logs to determine troubleshooting solutions if there was an error in the data transfer process.
-
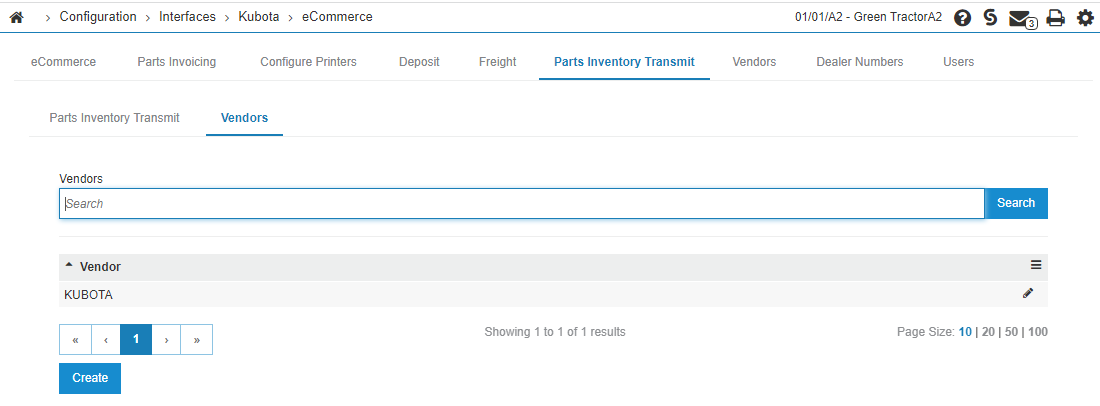
To set the vendors that are transmitted to Kubota eCommerce, on the Parts Inventory Transmit tab, click Vendors. You can click on the row to edit, or click Create to add a new vendor.
-
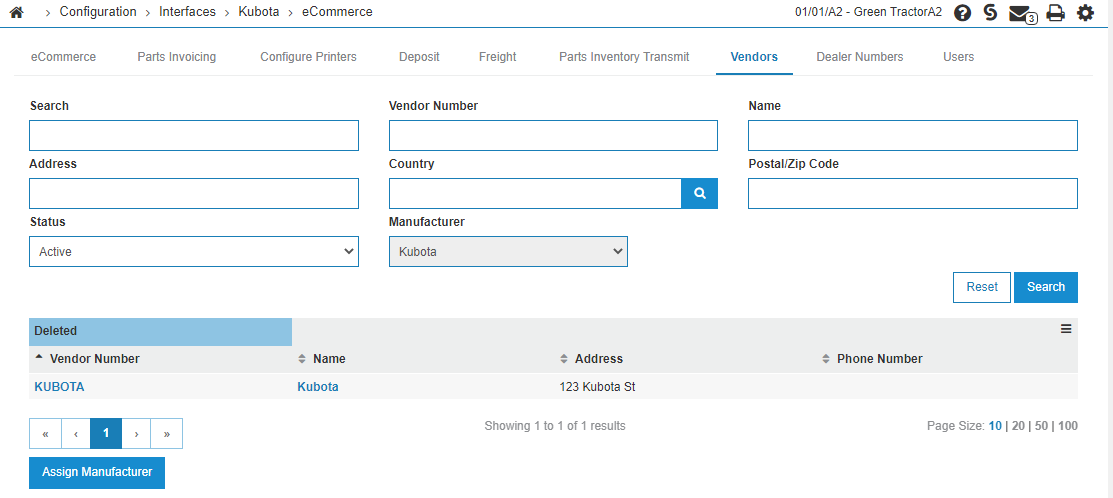
To assign which vendors are Kubota and set the manufacturer code in the vendor to Kubota, click the Vendors tab.
-
Click the Assign Manufacturer button, then search for the Kubota vendor. Hover over the vendor number and click Select.
-
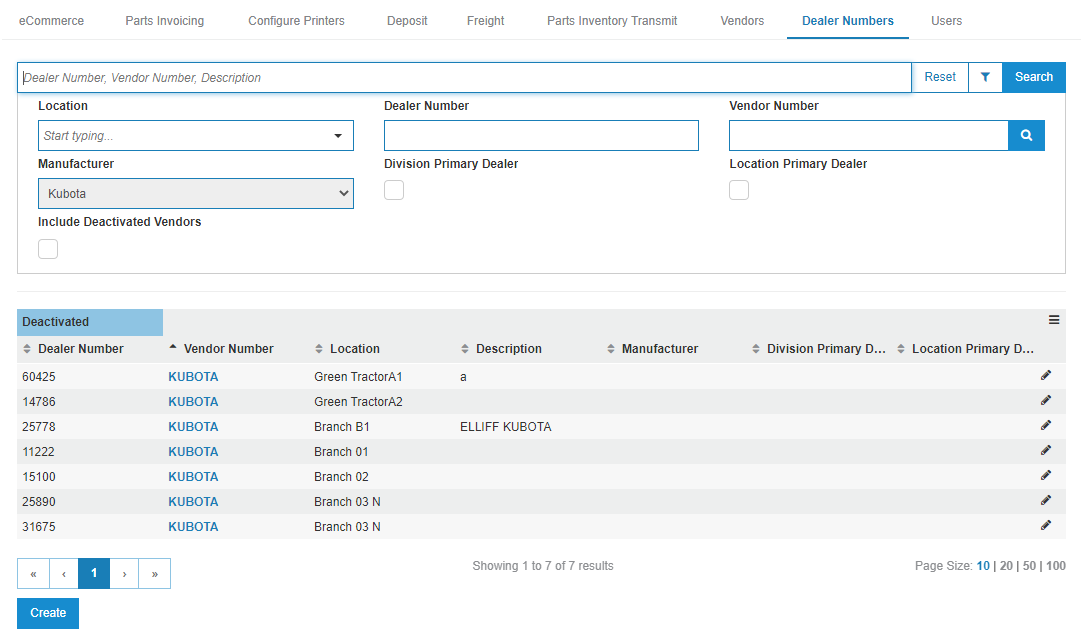
To create or manage the dealer numbers assigned to the location, click the Dealer Numbers tab.
-
To create and manage the dealer numbers assigned to each location for the vendors, click the Users tab.
IntelliDealer requires the Kubota interface to authenticate against a third-party user ID. The user tab allows you to manage all the user IDs for Kubota interfaces. IntelliDealer auto-generates a user name based on your library. For example, PFWF5000, QS36F.
You must have this information:
-
the user ID
-
the password associated with the user ID.
-
which manufacturer/OEM is allowed to use this user ID.
-
-
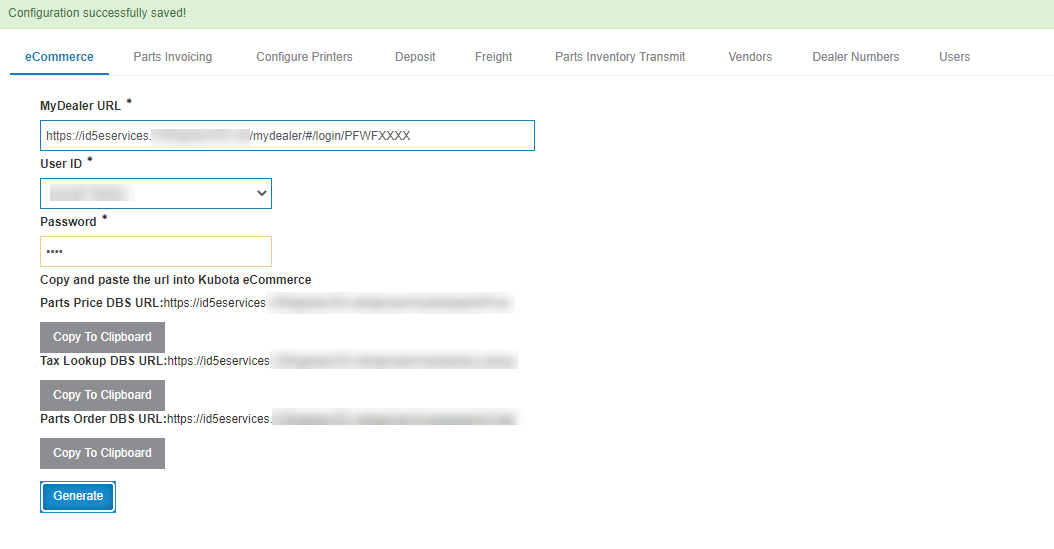
Note down the User Name and ID you just configured, then click the eCommerce tab.
-
Enter the User ID and password, then click Generate.
-
Send the generated URLs to Kubota along with the associated User ID and Password.


Security: 999 Configuration
Features: 6273 - Kubota eCommerce, 6238 - Avalara Tax, and either 6157 - Payment Card Interface or 6272 - Worldpay Interface (beta)
Revision: 2026.03