Add Highlighting / Change Highlighting - Parts Highlighting
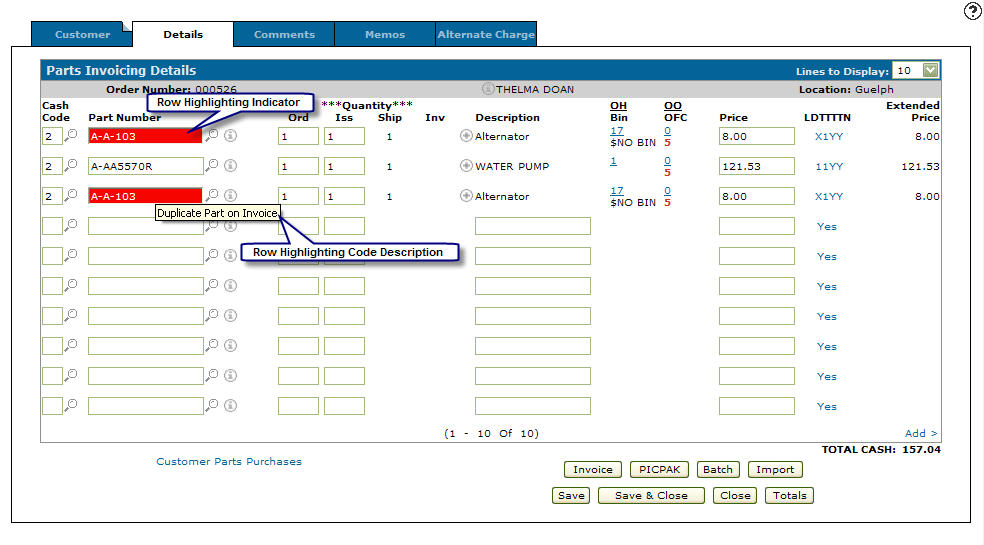
Use Parts Highlighting or Parts Requisitions Highlighting to apply row highlighting to part numbers based on the criteria selected. Once configured, the highlighting appears on your Executive Summary or on the Parts Invoicing Details tab, giving your team a quick visual cue of potential issues. This allows users to instantly spot a negative stock (and resolve the discrepancy) or identify parts with missing data (like no bin assigned), without running separate reports.
You can specify the conditions to be highlighted and what colors to use. For example, you can highlight parts with negative on-hand quantities, those with no bin location, or parts that have had zero sales in the past twelve months. These conditions are highlighted by the colors you specify.
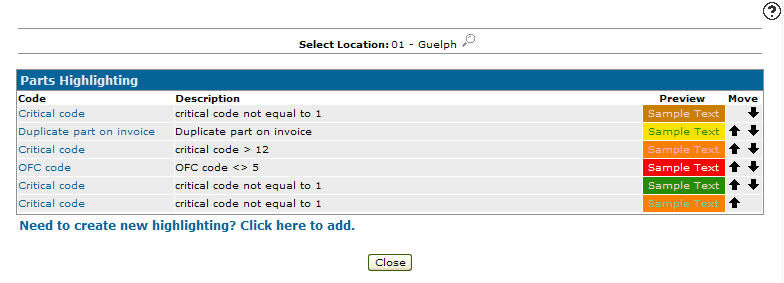
To open the Add Highlighting/Change Highlighting - Parts Highlighting screen, navigate to Configuration > Parts > General > Parts Highlighting and click a code to edit. Or click Need to create new highlighting? Click here to add.
Topics in this section are:
Setting Up Parts Highlighting Criteria
-
Navigate to Configuration > Parts > General > Parts Highlighting.
-
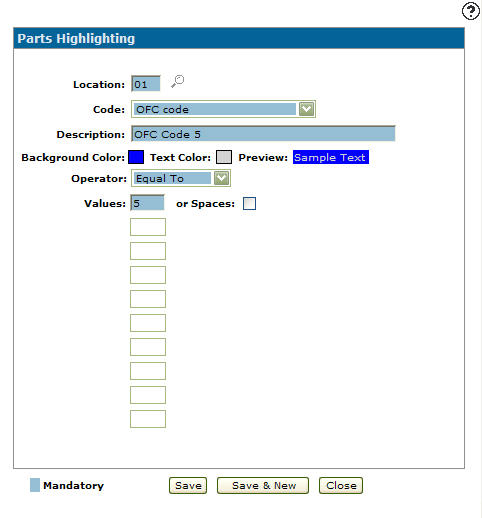
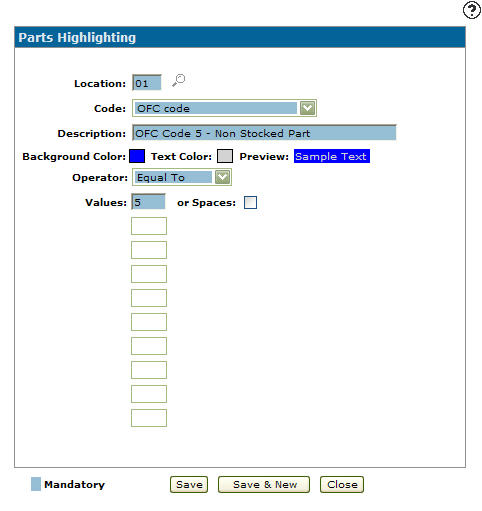
Click the Need to create new highlighting? Click here to add link.
-
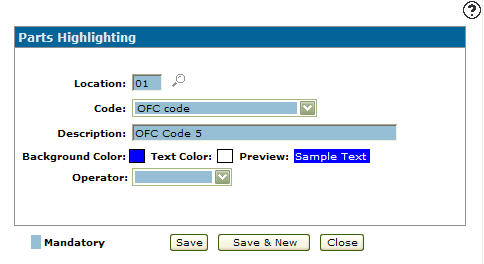
Enter a Location - or - click the Search
 icon to select a location from the Location Selection screen.
 - Select a Code from the drop down list.
-
Enter a Description of the code.
The description entered appears when a user cursors over the part number.
-
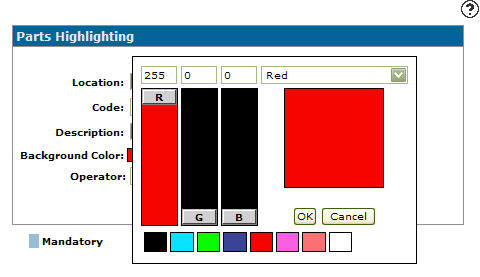
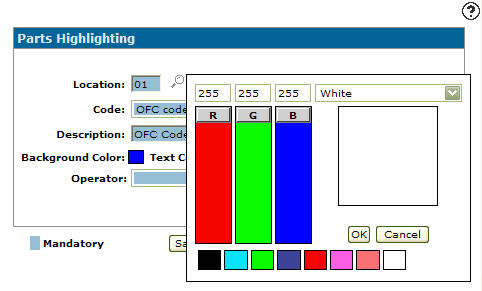
Click on the Background Color box.
- Indicate the specific color you wish to use for the background color appearing behind the part number on the screen. You can:
Enter an RGB Value
Select a Color from the drop down list
Manipulate the RGB Color Slider
Select a Color box
-
Click the OK button once you have set the desired background color.
-
Click on the Text Color box.
- Indicate the specific color you wish to use for the text color. You can:
Enter an RGB Value
Select a Color from the drop down list
Manipulate the RGB Color Slider
Select a Color box
-
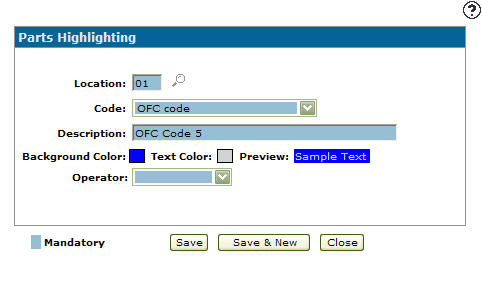
Click OK once you have set the desired text color.
-
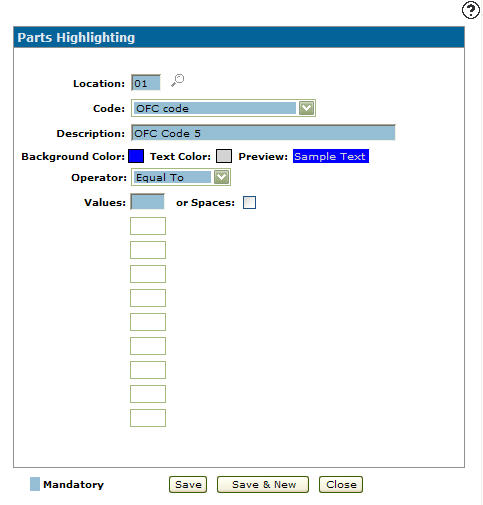
Select an Operator code.
The Operator field does not appear for all Code selections.
Once an Operator code is selected from the drop down list a Values field appears.
The Values field not appears for all Operator selections.
-
Enter a value in the Values field which the operator selected will act on - or - select the or Spaces checkbox to include blank values for the field.
-
On the Parts Highlighting screen, click the Save button to save the new highlight criteria and return to the Parts Highlighting screen.
- or -
Click the Save & New button to save the new highlight criteria.The Parts Highlighting screen refreshes allowing you to add another highlight criteria without closing the screen.
Copying or Editing Parts Highlighting Criteria
-
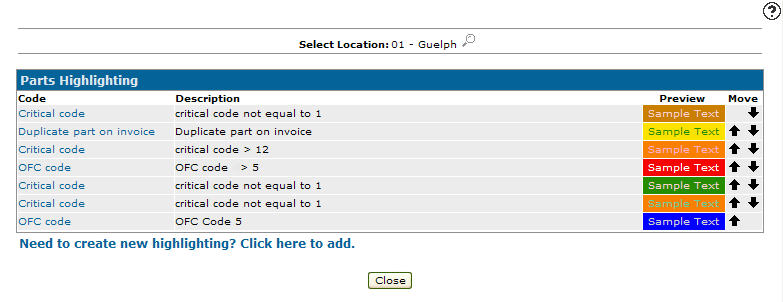
Navigate to Configuration > Parts > General > Parts Highlighting.
-
If you desire another location besides your default location, click the Search
 icon to select a location from the Location Selection screen.
 -
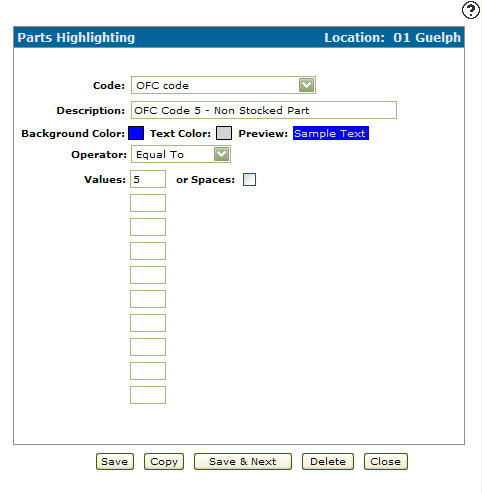
Click the Code you wish to edit or copy.
-
To edit the rule, make your changes then click Save.
-
To create a copy of the rule, click Copy.
The Parts Highlighting screen refreshes, allowing you to add additional information to the copied highlight criteria before creating the new copy.
-
Once you have filled out all the desired fields click Save to create the new highlight criteria.
Screen Description
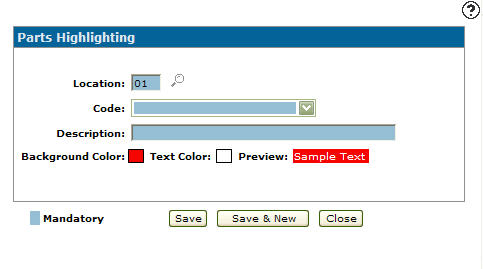
The fields on the Add Highlighting/Change Highlighting - Parts Highlighting screen are:
| Field | Description |
|---|---|
| Location |
The location where the parts highlighting rule will apply. This field appears only by accessing the Add Highlighting - Parts Highlighting screen by clicking the Need to create new highlighting? Click here to add link. |
| Code | Indicates under what circumstance the system will apply row highlighting to a part that falling under this circumstance within the parts system (e.g. Do Not Order code). |
| Description | A brief description outlining the function of the code that will appear when a user cursors over the part number. |
| Background Color | The background color that appears behind the part number on the screen, when the criteria is met. |
| Text Color | The color of the text that appears on the screen, when the criteria is met. |
| Preview | Displays a preview of what the background and text color selected will look like on screen. |
| Operator |
Indicates the selection operator code (e.g. equal to, greater than, less than or not equal to). Which applies to the value entered. The Operator field will not appear for all Code selections. |
| Values | The value or value range which the operator selected will act on (e.g. greater than 5). |
The Parts Row Highlighting codes can be set up for:
| Code | Description |
|---|---|
| ASL Code |
Deprecated. Parts with a certain ASL code can be flagged. This option is only available if a dealer is licensed for Komatsu’s Authorized Stocking List interface. If a dealer is not licensed for this, they will instead see IC Code.IC Code relates to the Inventory Class information that John Deere dealers receive from Deere via DTF (PRIC in the PARTPRC file) |
| No Sale Last XX Months | Parts with no sales within the last XX (specified) number of full months (plus the current month). |
| Non-Returnable | Parts with a Return code equal to N (non-returnable), on the Parts Profile tab. |
| Return Code | Parts with a certain Return code can be flagged. |
| Type | Parts with a certain Type code can be flagged. |
| OFC Code | Parts with a certain OFC code can be flagged. |
| Duplicate Part on Invoice | Parts entered more than once of the same invoice. |
| On Stock Order | Parts on an existing stock order. |
| Available in Another Location | Parts that are available (in stock) in another location . |
| Do Not Order Code | Parts with a Do Not Order Code equal to D, on the Ordering Information tab. |
| Reman Part Number | Parts that are a remanufactured part, cataloged in the system and linked to the core part number (new/base part) available in the system. |
If the desired quantity of the part cannot be fulfilled, an "available in another location” message appears on the screen, otherwise this check will be skipped.
Use these buttons to complete your work on the Add Highlighting/Change Highlighting - Parts Highlighting screen:
| Button | Function |
|---|---|
| Save | Saves changes made to the Parts Highlighting screen. |
| Copy |
Copies the selected highlight criteria. This button appears only by accessing the Change Highlighting - Parts Highlighting screen by clicking on a Code. |
| Save & New |
Saves a newly added highlight criteria and refreshes the Add Highlighting - Parts Highlighting screen, allowing you to add another highlight criteria without closing the screen. This button appears only by accessing the Add Highlighting - Parts Highlighting screen by clicking the Need to create new highlighting? Click here to add link. |
| Save & Next |
Allows you to save any edits/changes made to the selected highlight criteria and scroll through to the next highlight criteria in the list to apply any edits/changes. This button appears only by accessing the Change Highlighting - Part Highlighting screen by clicking on a Code. |
| Delete |
Deletes the selected highlight criteria. This button appears only by accessing the Change Highlighting - Part Highlighting screen by clicking on a Code. |
| Close | Closes the Parts Highlighting screen without saving and returns to the Parts Highlighting screen. |