Inventory Count
Use the Inventory Count screen to track parts in the inventory system. You can search for, view/edit, update, and perform an inventory count.
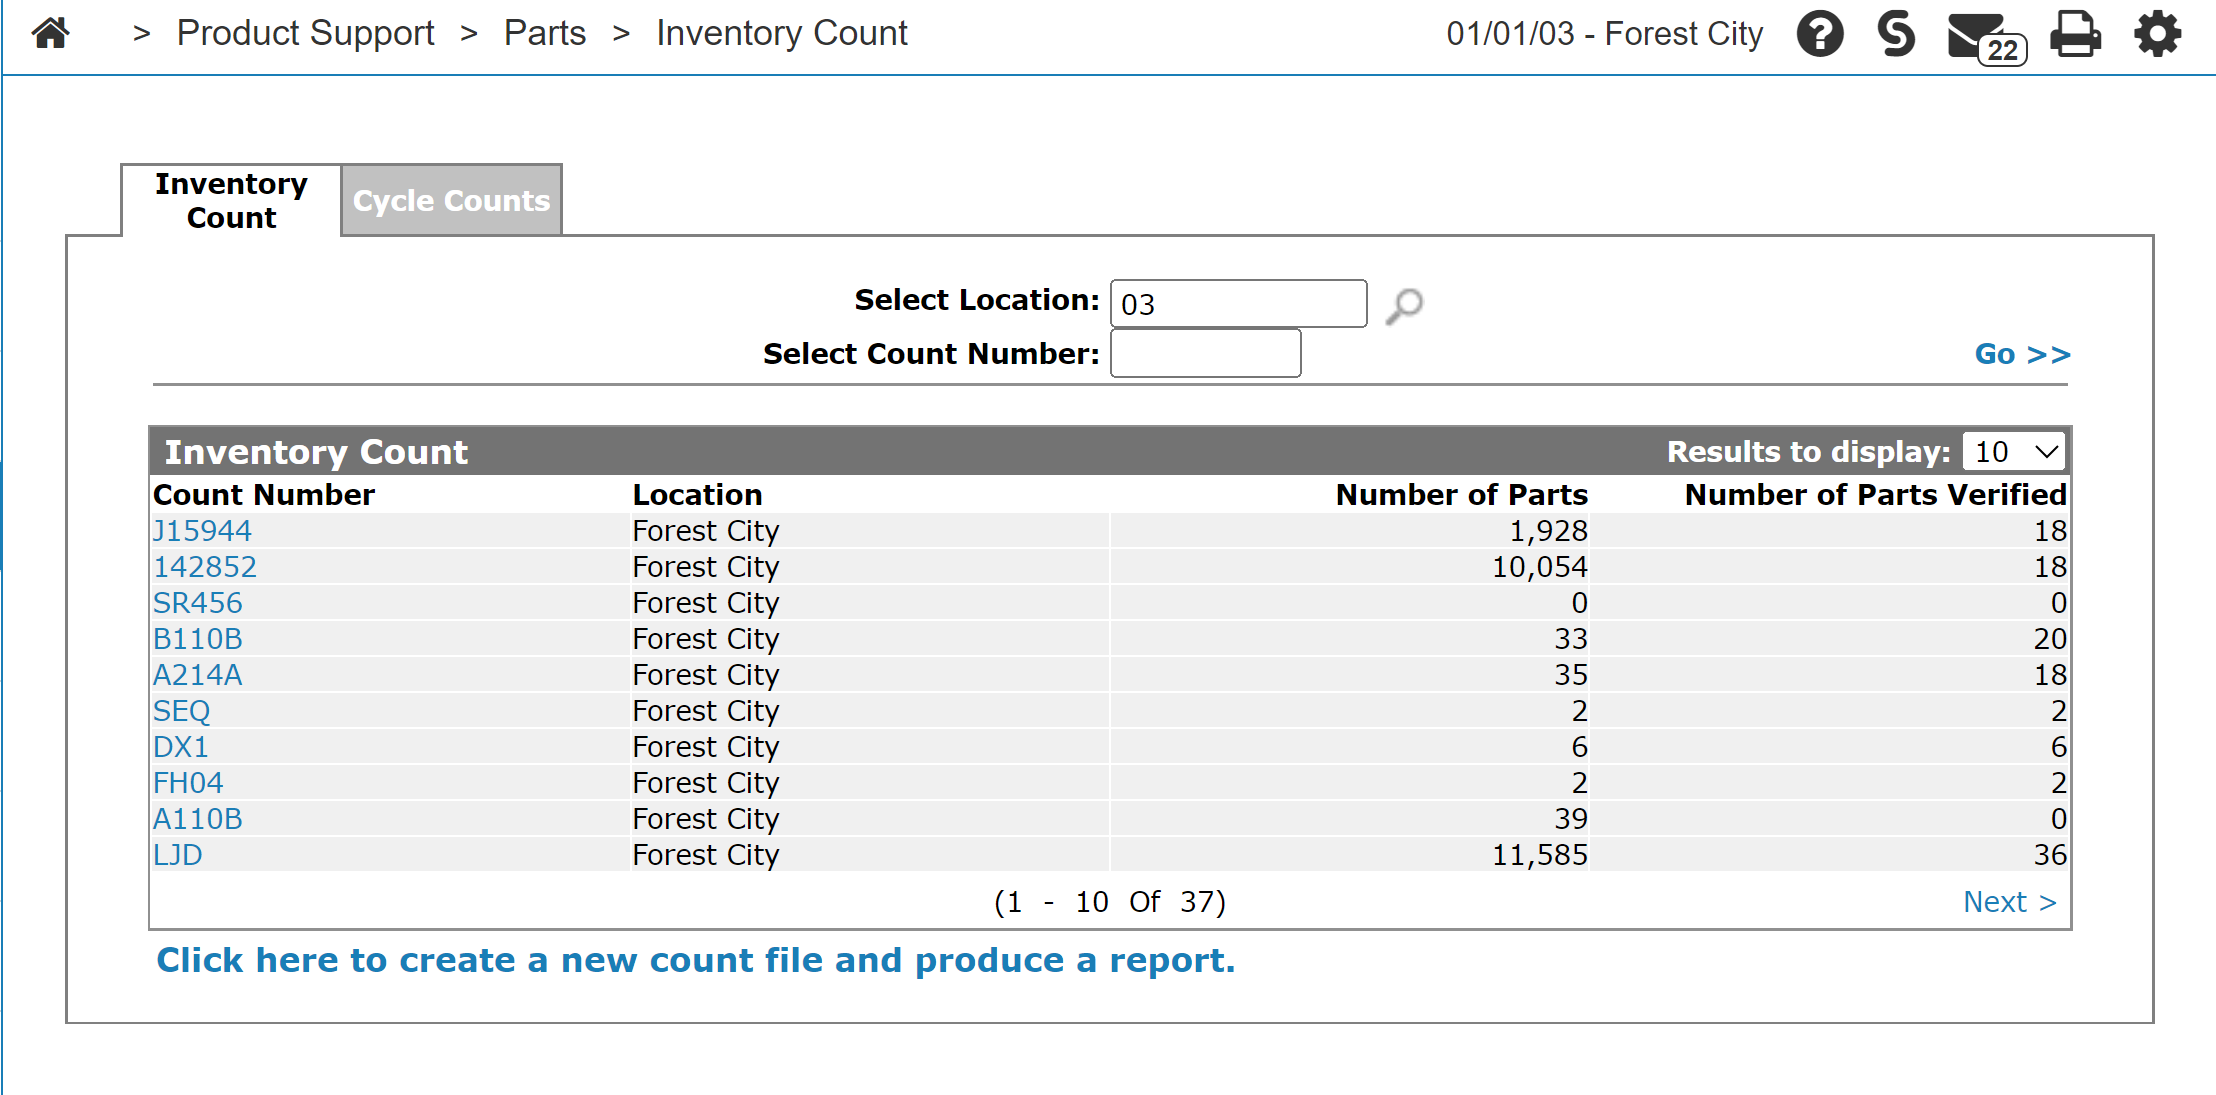
To open the Inventory Count tab, navigate to Product Support > Parts > Inventory Count.
Topics in this section are:
See also: Parts Inventory Control
Performing an Inventory Count
-
Navigate to Product Support > Parts > Inventory Count.
-
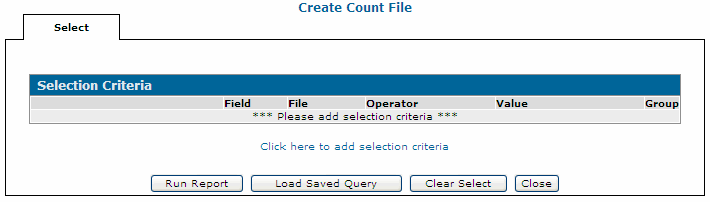
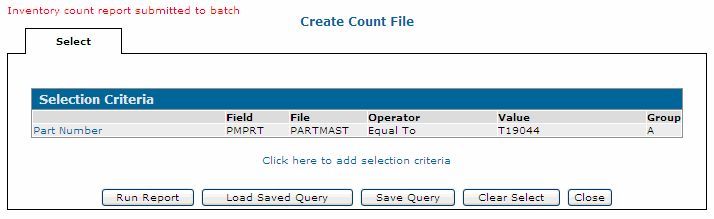
To create a new count file, select the Click here to create a new count file and produce a report link.
-
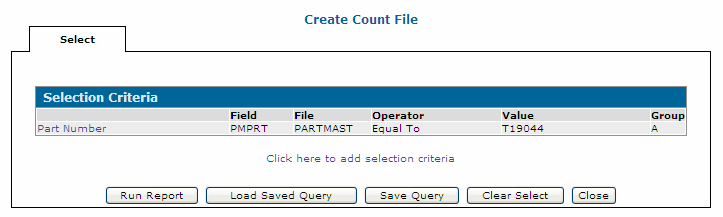
To add selection criteria to your count file, click the Click here to add selection criteria link.
The Selection Criteria screen appears.
-
Complete the fields on this screen to set your selection criteria for locating parts to add to your count file. Click Save to record the selection criteria.
If you want to do an inventory count for all the parts in the location you do not need to specify any selection criteria.
-
Click Save/Exit to return to the Selection Criteria - Create Count File tab.
-
To save this selection criteria for future use click Save Query.
-
To generate an inventory count report click Run Report.
You can run a report at any time since no files are updated when running a report.
Note: If you click Run Report without filling out any of the fields on the Selection screen, then all reports are run with all report criteria.
-
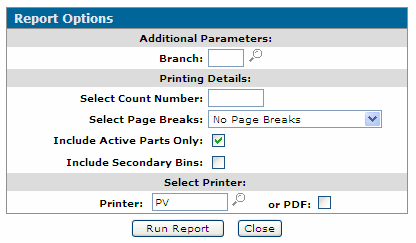
Set your report options in the appropriate fields:
-
Branch—the location to run the report for. Each location must be done separately.
-
Select Count Number—names your count.
-
Select Page Breaks—the type of page breaks on the printed report.
-
Include Active Parts Only—when this option is checked: includes active parts with on hand; includes deactivated parts with on hand; includes active parts with no on hand where OFC is not 5. When this option is unchecked: includes active parts regardless of on hand; includes deactivated parts that have an on hand.
-
Include Secondary Bins—includes parts secondary bin location on the report.
-
-
Click Run Report to create the count.
-
To exit the Selection Criteria - Create Count File tab click Close.
The updated Inventory Count tab is shown.
-
Go to your home screen and ensure the count completes.
Editing an Inventory Count
-
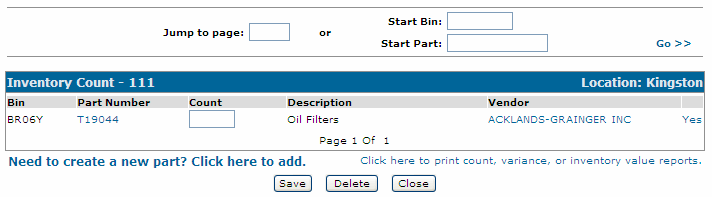
Hover over the desired count number and select Edit from the pop-up menu.
-
Your options to continue your work with this count are:
-
To open the Parts Profile screen, click a Part Number.
-
To update the count for a part, move your cursor into the Count field and enter the number of counted parts.
-
To open the Vendor Profile screen, click a Vendor name.
-
To remove a part from the inventory count, click the Yes link under the Remove field.
-
To add a part to the inventory count, click the Need to create a new part? Click here to add link.
-
To print count, variance or inventory value report, click the Click here to print count, variance or inventory value report link.
Click Save to save changes made to the Inventory Count screen.
Click Delete to delete the selected count.
Click Close to close the Inventory Count screen without saving and return to the Inventory Count screen.
-
Updating an Inventory Count
-
Navigate to Product Support > Parts > Inventory Count.
-
On the Inventory Count tab, fill out the appropriate fields and click Go >>.
The Inventory Count tab refreshes and lists the generated search results.
-
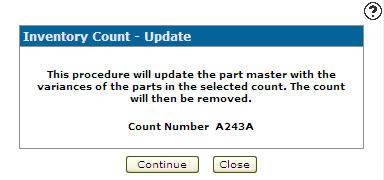
Hover over a Count Number and select Update from the pop-up menu.
-
Click Continue.
-
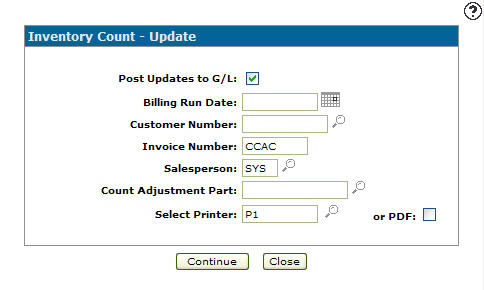
On the Inventory Count - Update screen:
-
To post the inventory count update to the general ledger account, select the Post Updates to G/L checkbox.
-
Enter a Billing Run Date.
-
Enter a Customer Number. A special customer number to be assigned to the inventory count parts invoice.
-
Enter an Invoice Number.
-
Enter the Salesperson assigned to the customer's account.
-
Enter a Count Adjustment Part. A special part number to be used on the invoice for accounting purposes.
-
Select the Printer you wish to use to print out the inventory count reports.
-
Select or PDF to create a PDF of the inventory count reports.
-
-
Click Continue to update the inventory count.
These reports are produced:
BIL900 Sales Analysis Allocation Register BIL919 Sales Analysis Allocation Summary GL9300 S/A Journal PAR014 Parts Department Daily Error and Control Report PAR138 Inventory Variance Report

Screen Description
Search fields on the Inventory Count tab are:
| Field | Description |
|---|---|
| Select Location | Search for inventory count by entering a location. |
| Select Count Number | Search for inventory count by entering a count number. |
Fields on the Inventory Count tab are:
| Field | Description |
|---|---|
| Count Number | The inventory count number. |
| Number of Parts | The number of parts on the inventory count. |
| Number of Verified Parts | The number of parts on the selected inventory count that have had their quantities verified. |
| Location | The location of the inventory count. |