Setting Up a New Consignment
-
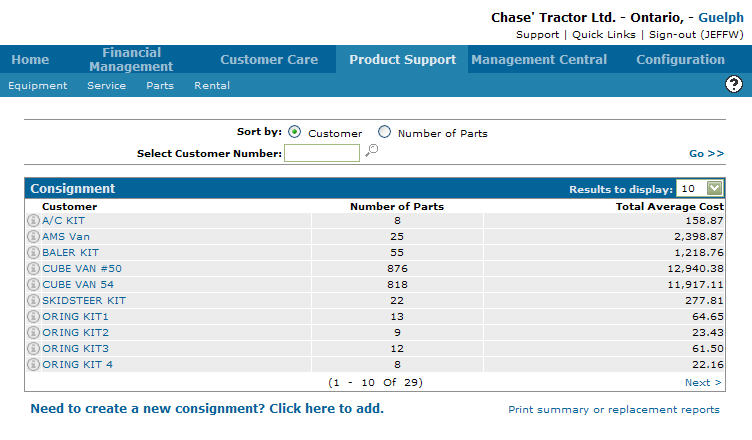
Navigate to Product Support > Parts > Consignment.
The Consignment screen appears.
-
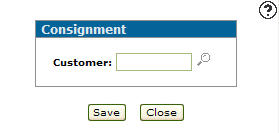
Click the Need to add a new consignment? Click here to add link.
The Consignment screen appears. -
Enter a Customer number.
- or -
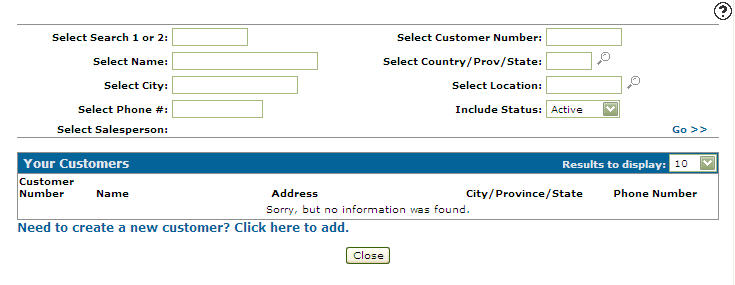
Click the Search icon.
icon.
The Your Customers screen appears. -
Enter the search criteria and click the Go >> link to locate the desired customer.
-
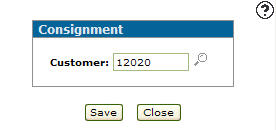
Click the Customer Number, the Consignment screen appears with the selected vendor number in the Customer field.
-
Click the Save button.
The Consignment screen appears. -
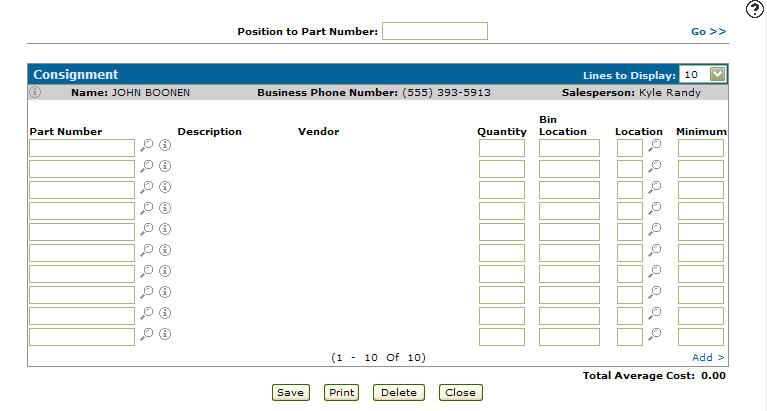
Enter a Position to Part Number.
Note: The Position to Part Number field allows you to page through the list of parts and select a specific part number.
-
Click the Go>> link to generate the search results.
-
Enter a Part Number.
- or -
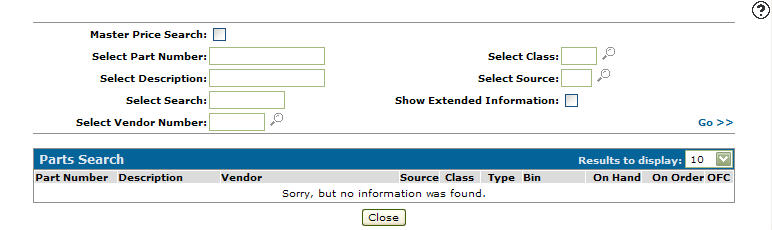
Click the Search icon.
The Parts Search screen appears. -
Enter the search criteria and click the Go>> link to locate the desired part.
-
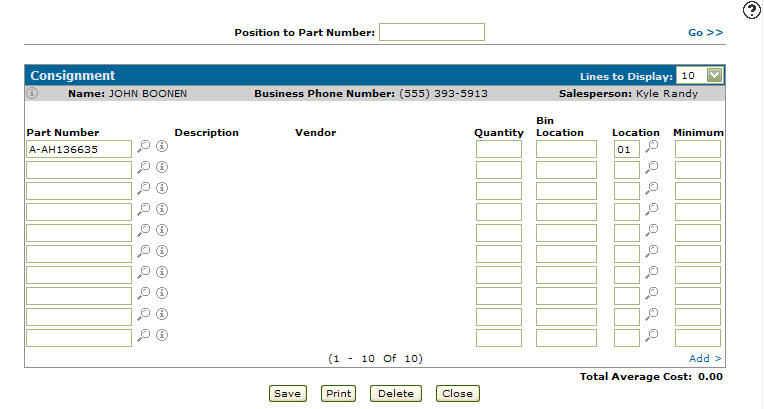
Click the part number, the Consignment screen appears with the selected part number in the Part Number field.
-
Enter a Location number.
- or -
Click the Search icon and select a branch location from the list. -
Enter a Quantity.
-
Enter a Bin Location number.
-
Enter a Minimum on hand quantity.
-
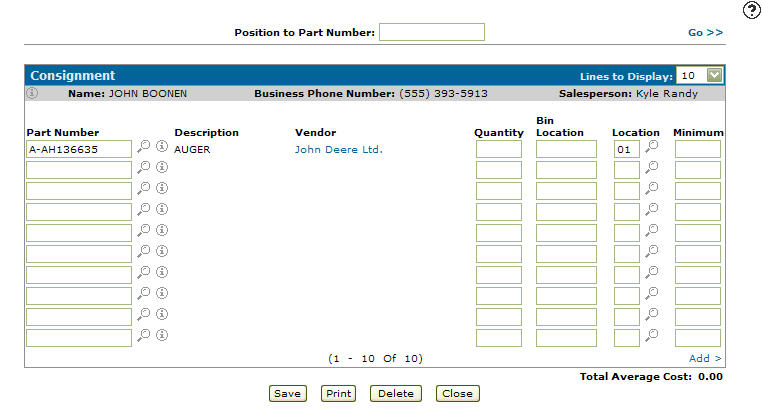
Click the Save button, the system automatically generates the Description and Vendor fields.
-
The Total Average Cost is displayed at the bottom of the search.
To add another part to the list complete steps 9 through 16. -
Complete your work in these ways:
To Do This Reserve the selected parts and change the parts Reserve quantity on the Parts Profile. Click the Save button. Print the selected consignment. Click the Print button. Delete the selected consignment. Click the Delete button. Close the consignment screen without saving. Click the Close button.
Revision: 2026.01