Performing a Part Group File Change
-
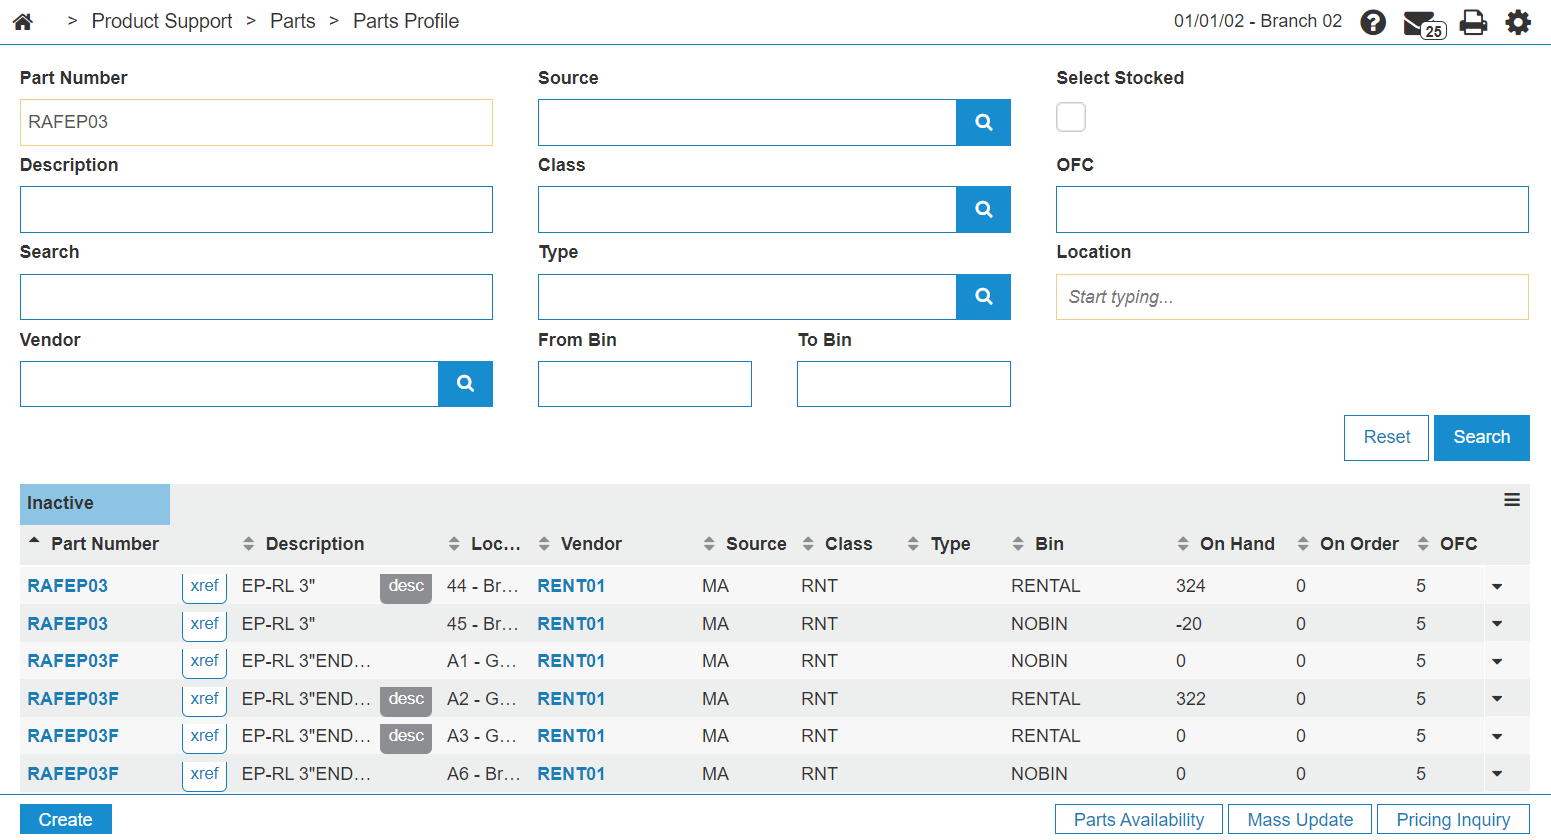
Navigate to Product Support > Parts > Parts Profile, then click Search.
-
Click the Mass Update button.
-
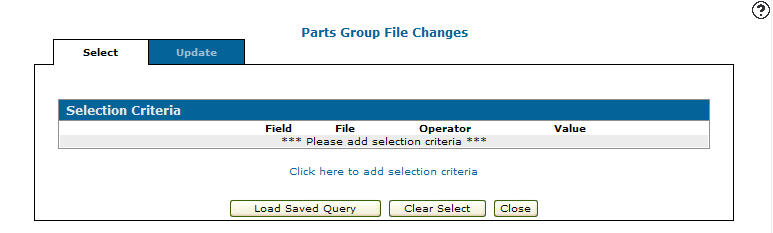
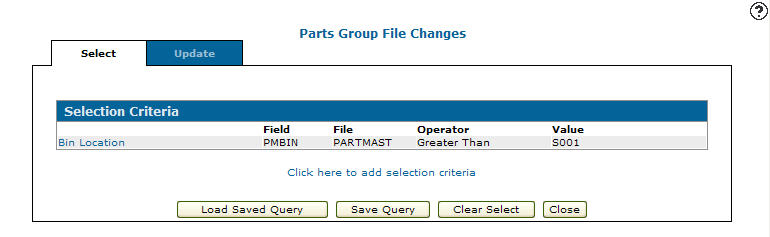
Click Click here to add selection criteria.
-
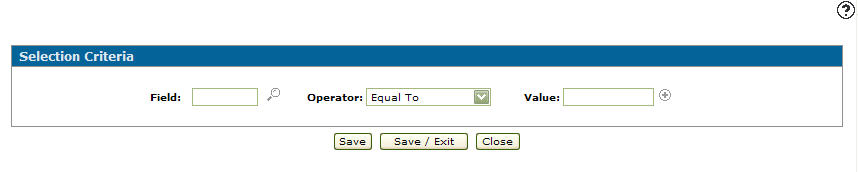
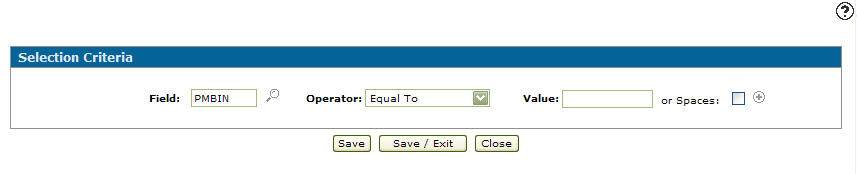
Enter a Field - or - click the Search
 icon to search for and select a field.
 -
Select an Operator from the drop down list and enter a Value.
-
(OPTIONAL) select the or Space checkbox.
-
(OPTIONAL) click on the More
 icon to add more values.
 -
Click Save/Exit to save your selection criteria and return to the Selection Criteria tab.
-
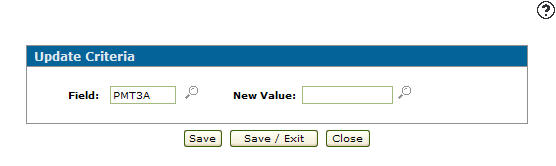
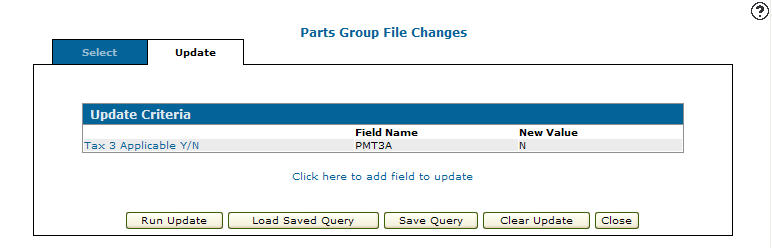
Click the Update tab.
The Update Criteria tab appears.
-
Click Click here to add field to update.
The Update Criteria screen appears.
-
Enter a Field - or - click on the Search
 icon to search for and select a field.
The Update Criteria screen appears with the selected field code in the Field.
-
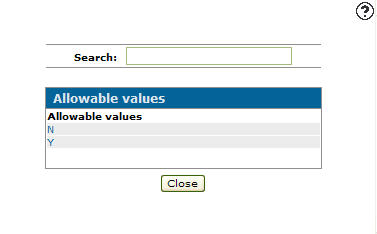
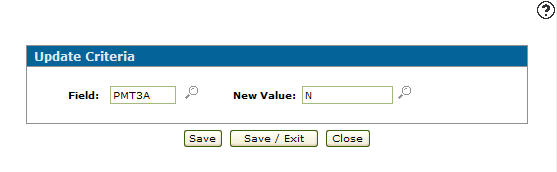
Enter a New Value - or - click the Search
icon if applicable. Some fields only have certain valid values you can use in the New Value field, in which case a Search
 icon appears next to the New Values field. Click the icon to open the Allowable Values screen which lists the allowable values for the selected Field.
 -
Select a value to use on the Update Criteria screen.
-
Click Save/Exit to save your update criteria and return to the Update Criteria tab.
-
To run the selected group file update, click Run Update.
-
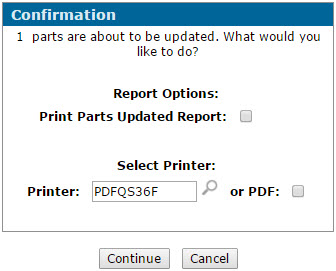
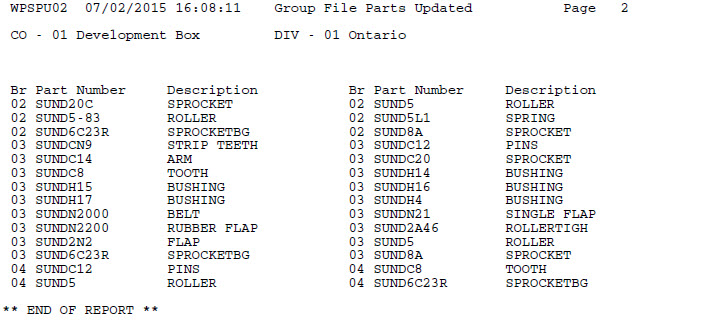
On the Confirmation screen, select whether you want to generate the Group File Parts Updated report with the update, (which lists the part numbers that will be updated), then click Continue to update the parts.
- or -
Click Cancel to stop the procedure.
Revision: 2026.03