Adding a Promotional Discount to a Parts Invoice
-
From any IntelliDealer screen, click the Product Support tab.
The Product Support Quick Links screen will appear.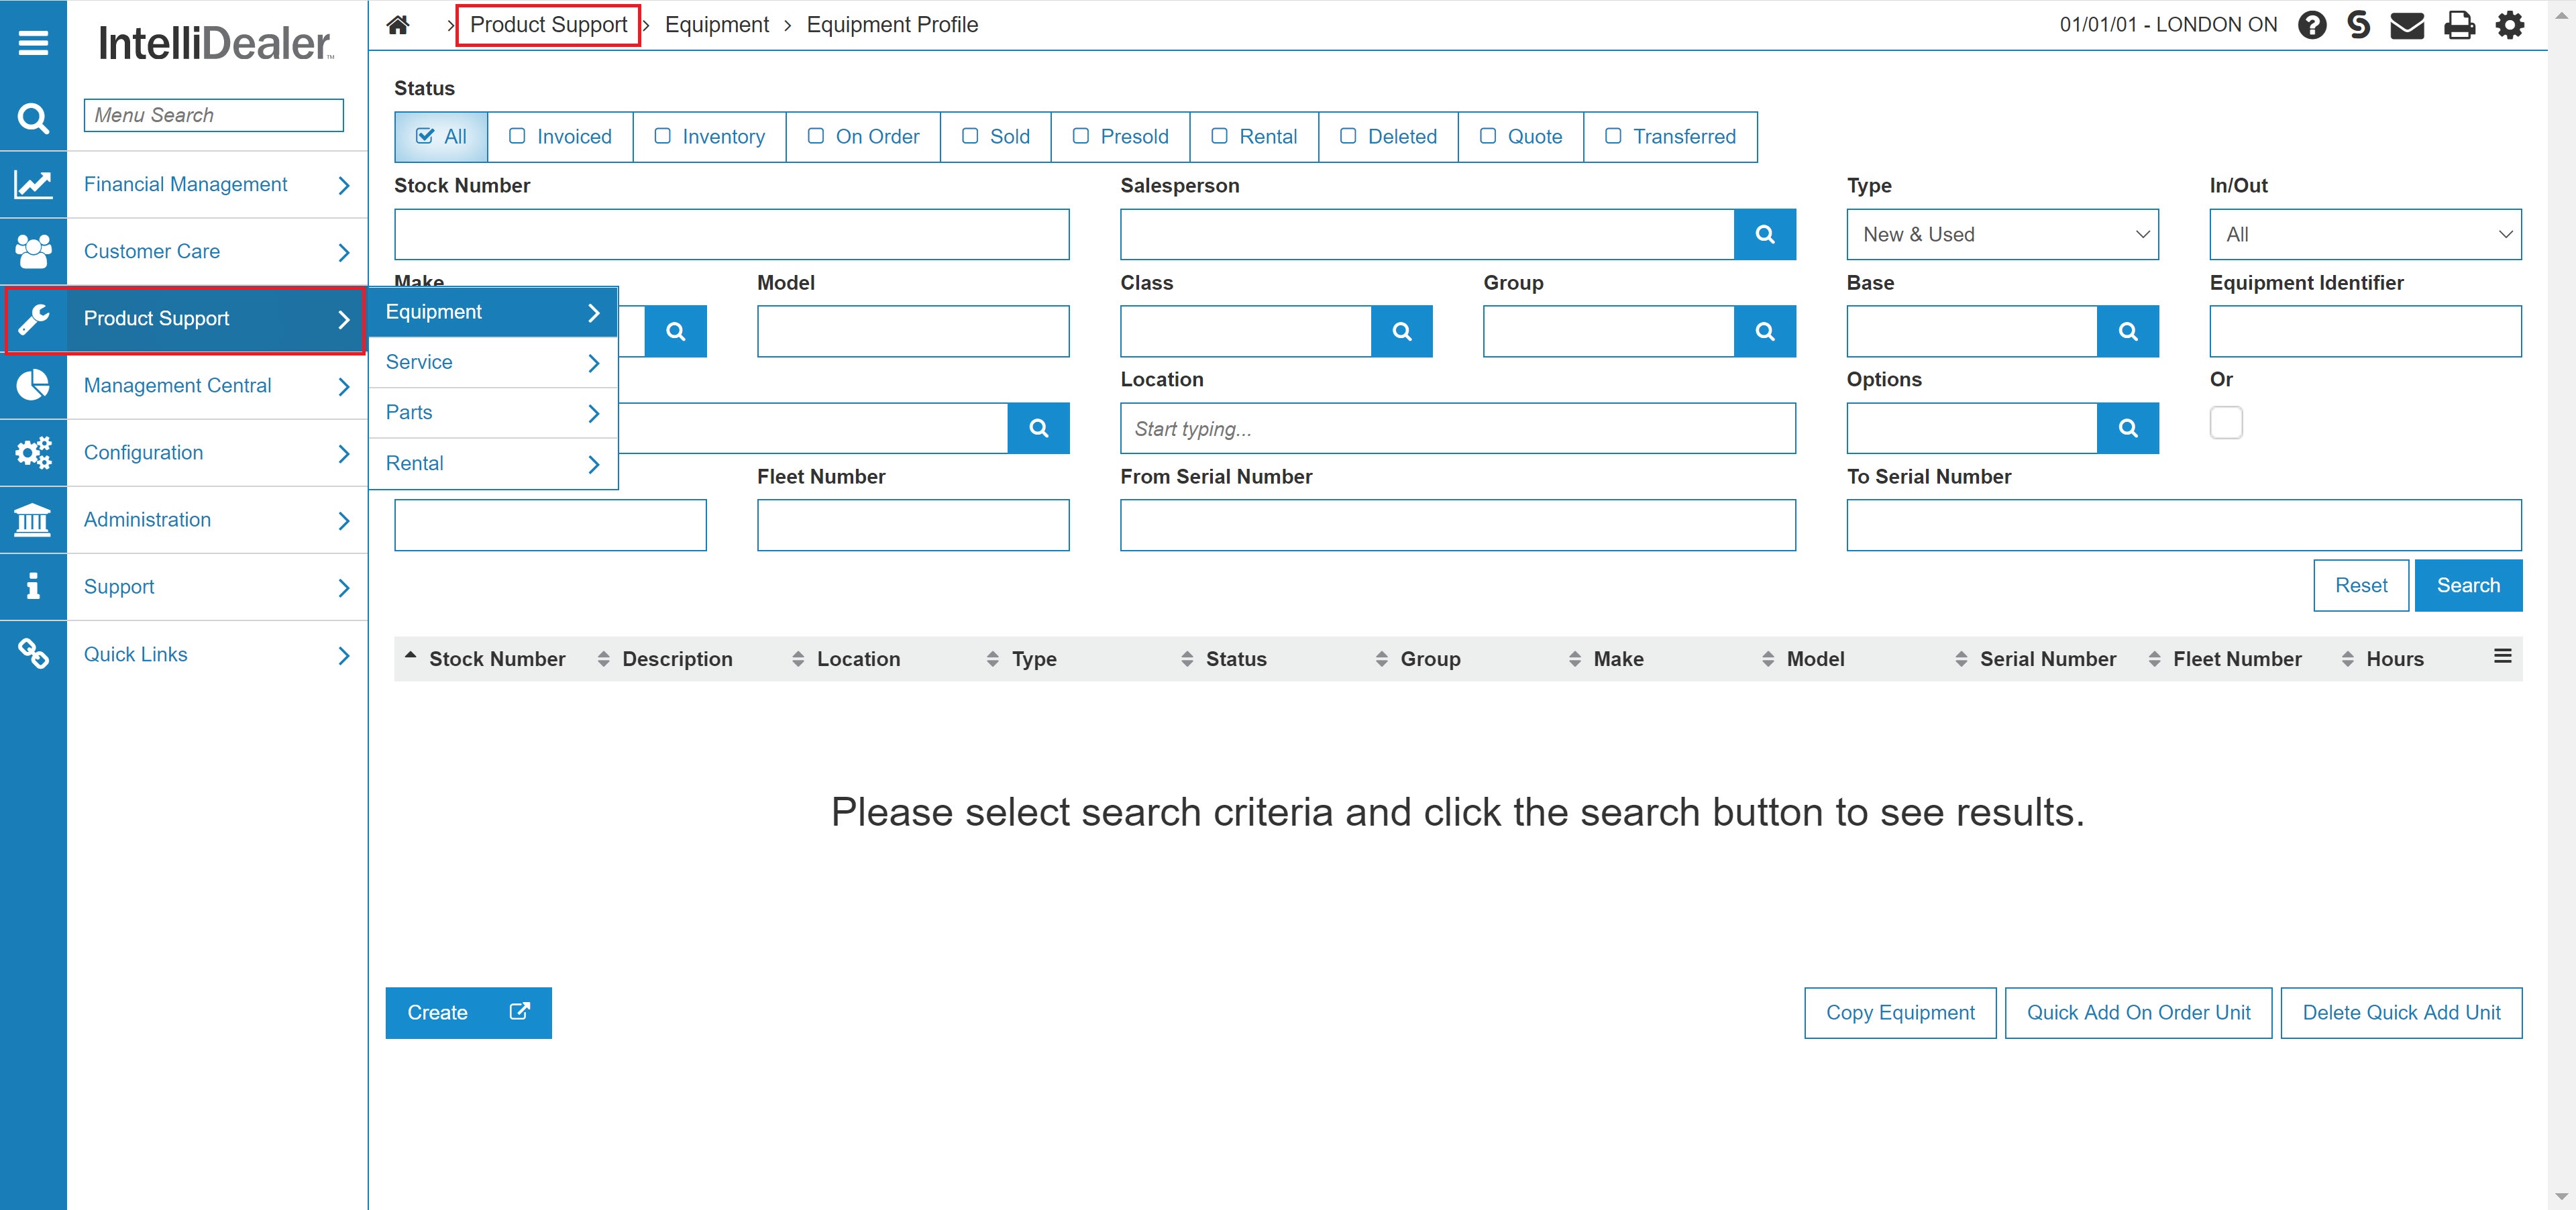
Product Support Quick Links screen
-
From the Parts list, click the
The Your Parts Inventory screen will appear.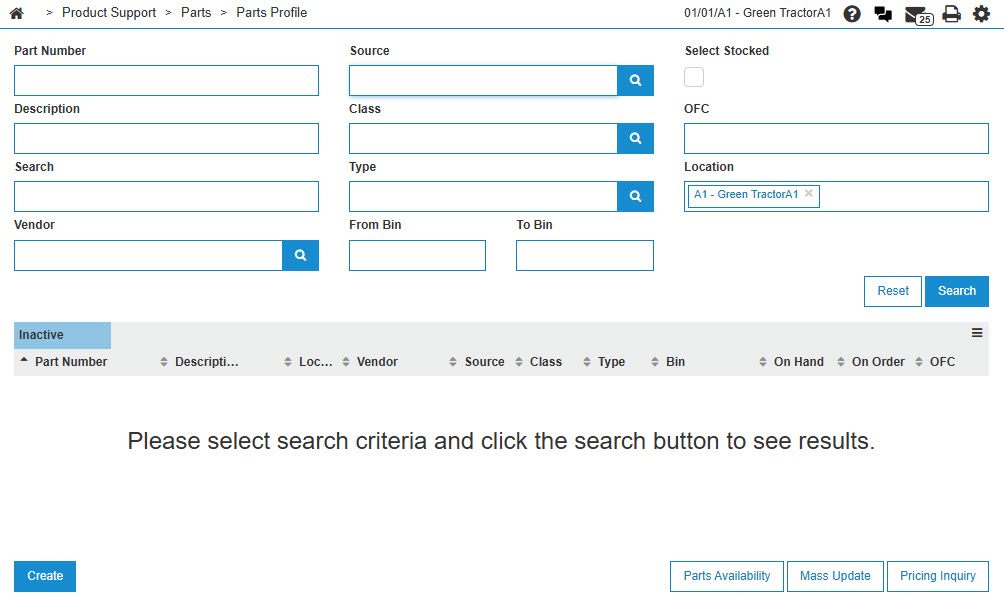
Your Parts Inventory screen
-
On the Your Parts Inventory screen, select the Need to create a new part? Click here to add link.
TheAdd Part screen will appear.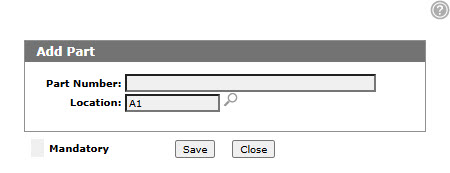
Add Part screen
-
Enter PROMO in the Part Number field.
-
Enter a branch Location.
- or -
Click on the Search icon and select a Location from the Location Selection screen.
 -
Click the Save button.
The Add Part screen will refresh, displaying added information fields.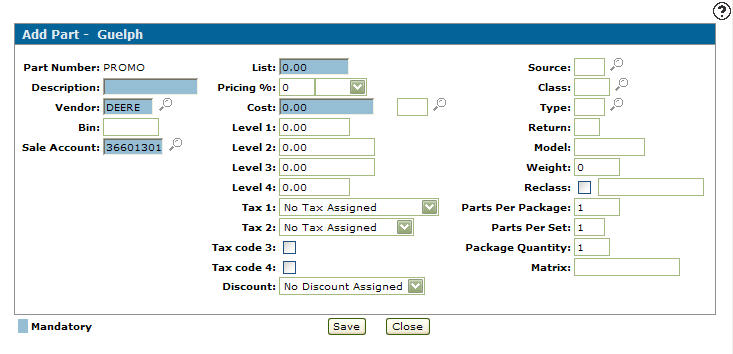
Add Part screen
-
On the Add Part screen, enter PROMOTION in the Description field.
-
Enter GL in the Vendor field.
-
Enter an appropriate Sale Account.
- or -
Click the Search icon the and select an account from theAccount Lookup screen.
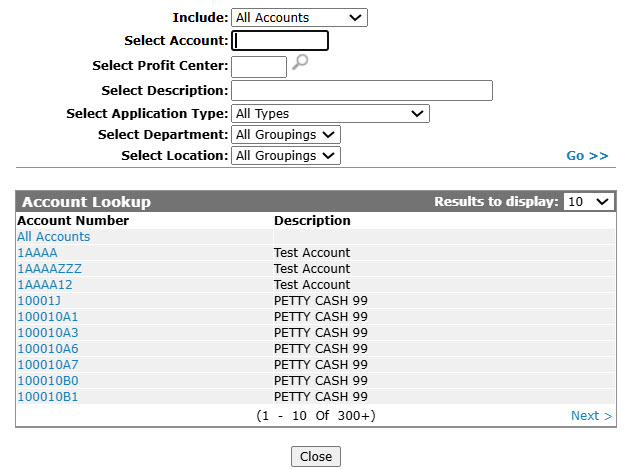
Account Lookup screen
-
Click the Save button.
An Update screen will appear telling you that the vendor changed and new defaults have been loaded.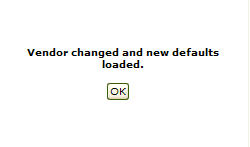
Update screen -
Click the Ok button.
The Add Parts screen will appear.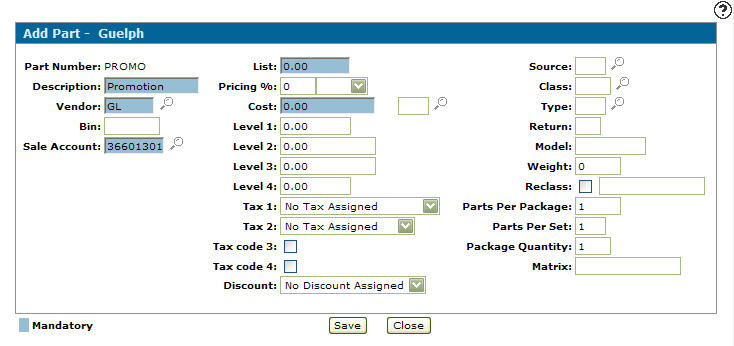
Add Part screen
-
Click the Save button again to create the PROMO part profile.
The Parts Profile screen will appear.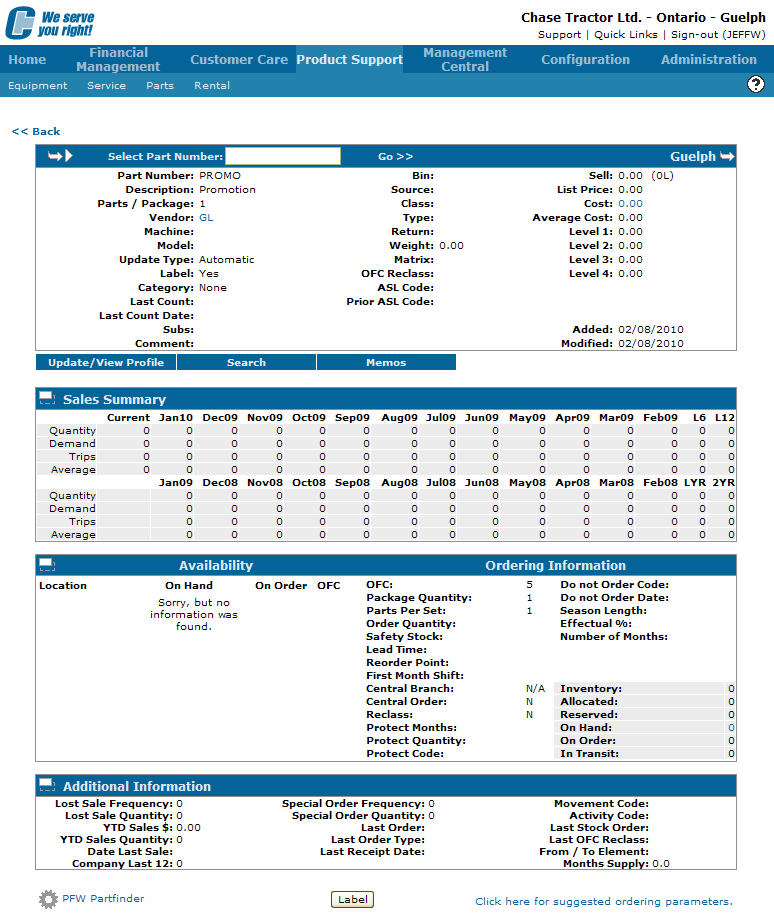
Parts Profile screen
-
From any IntelliDealer screen, click the Product Support tab.
The Product Support Quick Links screen will appear.
Product Support Quick Links screen
-
From the Parts list, click the Parts Invoicing link.
The Parts Invoicing screen will appear.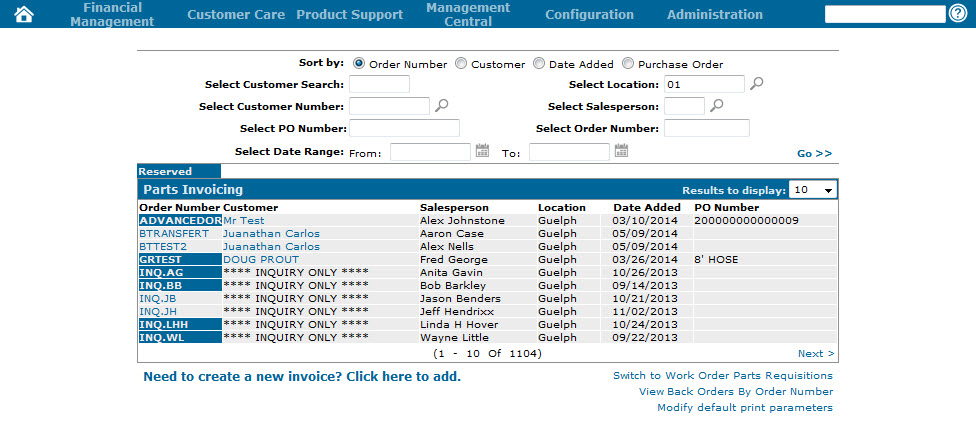
Parts Invoicing screen
-
On the Parts Invoicing screen, click on the Need to create a new invoice? Click here to add link.
The Parts Invoicing Header tab will appear.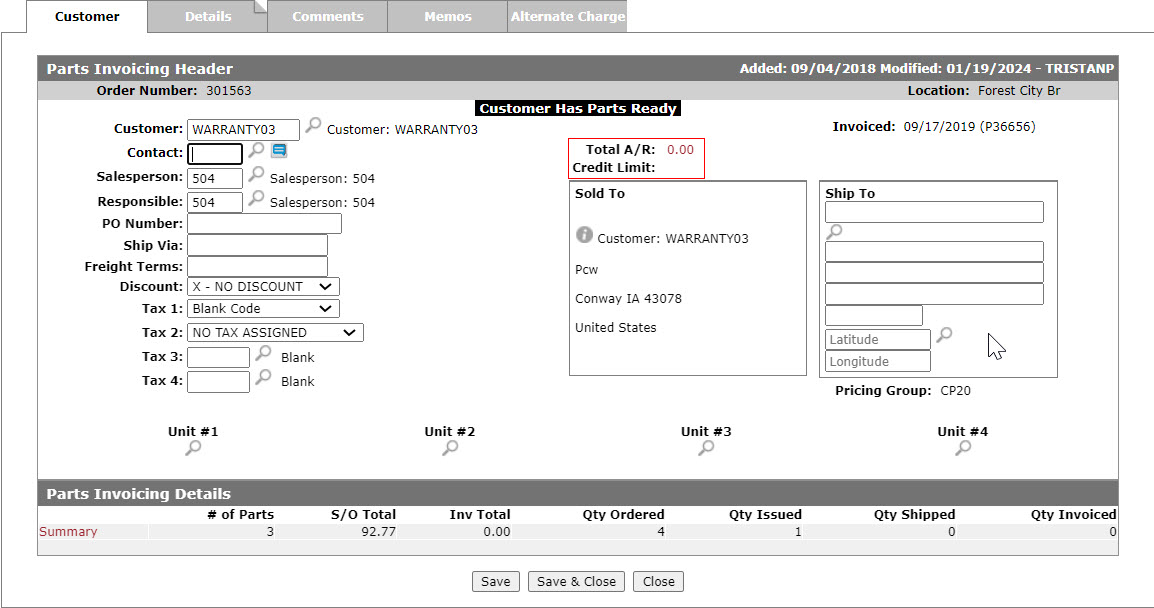
Parts Invoicing Header tab
-
On the Parts Invoicing Header tab, enter a Customer number.
- or -
Click on the Search icon and select a customer from the Your Customer screen.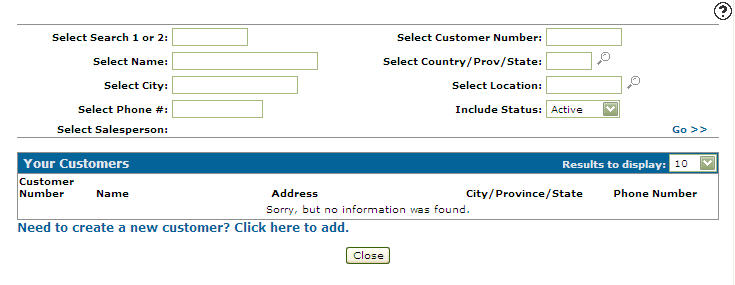
Your Customers screen
-
Enter a Salesperson.
- or -
Click on the Search icon and select a salesperson from the Salesperson Selection screen.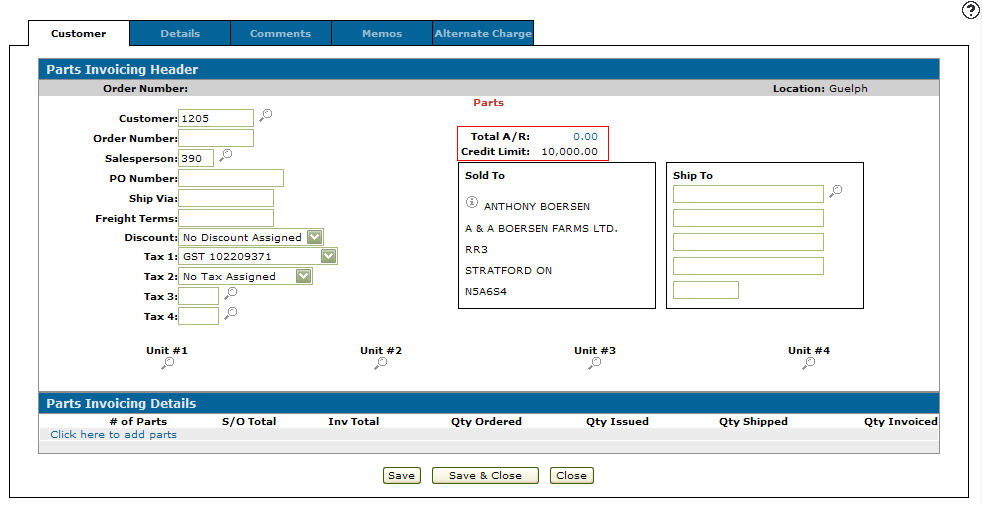
Parts Invoicing Header tab
-
Click on the Details tab.
The Parts Invoicing Details tab will appear.
Parts Invoicing Details tab
-
On the Parts Invoicing Details tab, enter a Cash Code 2.
-
Enter a Part Number.
- or -
Click the Search icon and select a part from the Parts Search screen.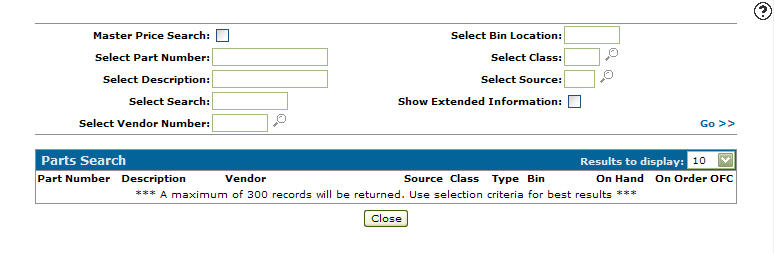
Parts Search screen
-
Enter An Ord and Iss value
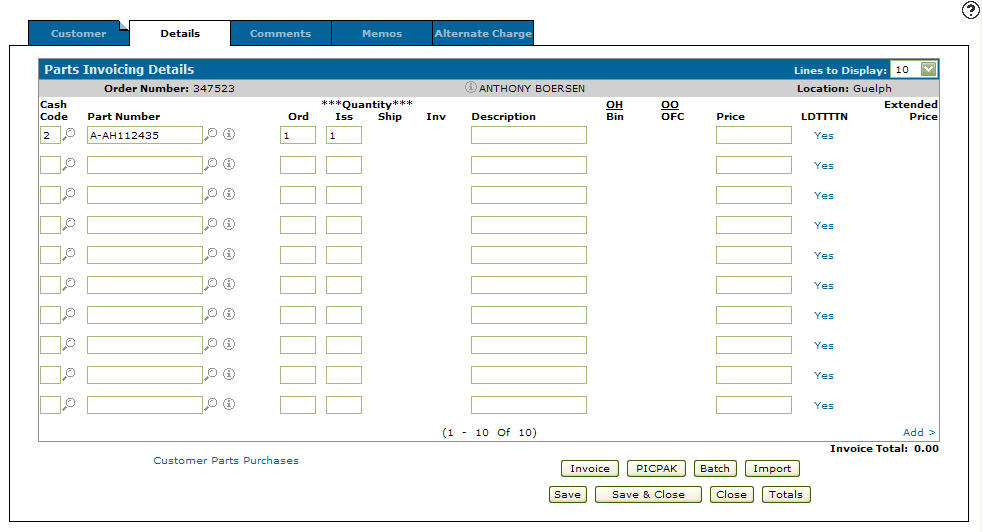 .
.Parts Invoicing Details tab
-
Click the Save button.
The system will populate the remaining fields.
Parts Invoicing Details tab
-
On the next line, enter Cash Code 2.
-
Enter the PROMO Part Number.
-
Enter a negative quantity in the Ord and Iss fields.
-
Calculate and enter the discount amount in the Price field.
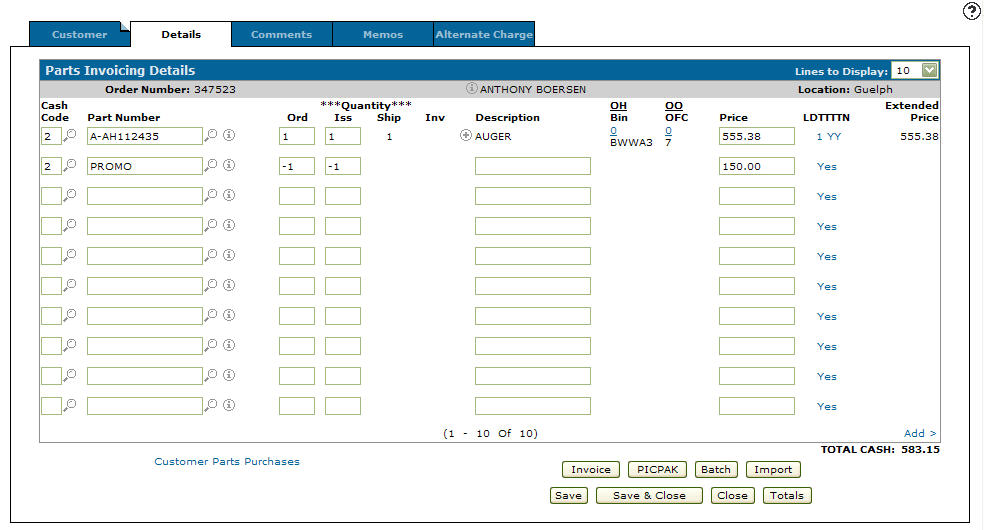
Parts Invoicing Details tab
-
Click the Save button.
The system will populate the remaining fields and apply the promotional discount to the invoice.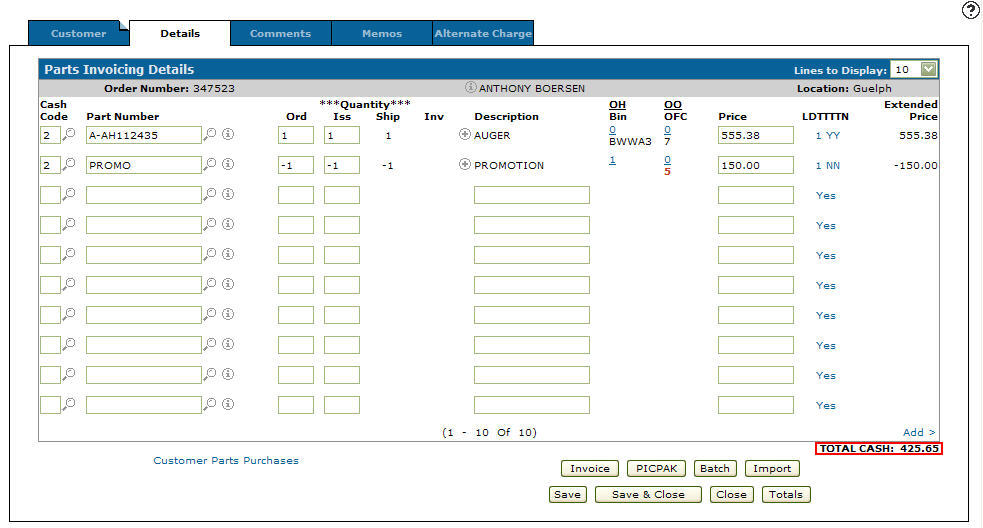
Parts Invoicing Details tab
-
Click the Invoice button to generate the invoice.