DTF Parts Receipt - Assign PO's
Use the DTF Parts Receipt - Assign PO's screen to assign POs to parts on the selected receipt.
On the DTF Parts Receipt screen, click Assign PO's to open the DTF Parts Receipt - Assign PO's screen.
Topics in this section are:
Assigning a PO Number to a Part on a DTF Parts Receipt
-
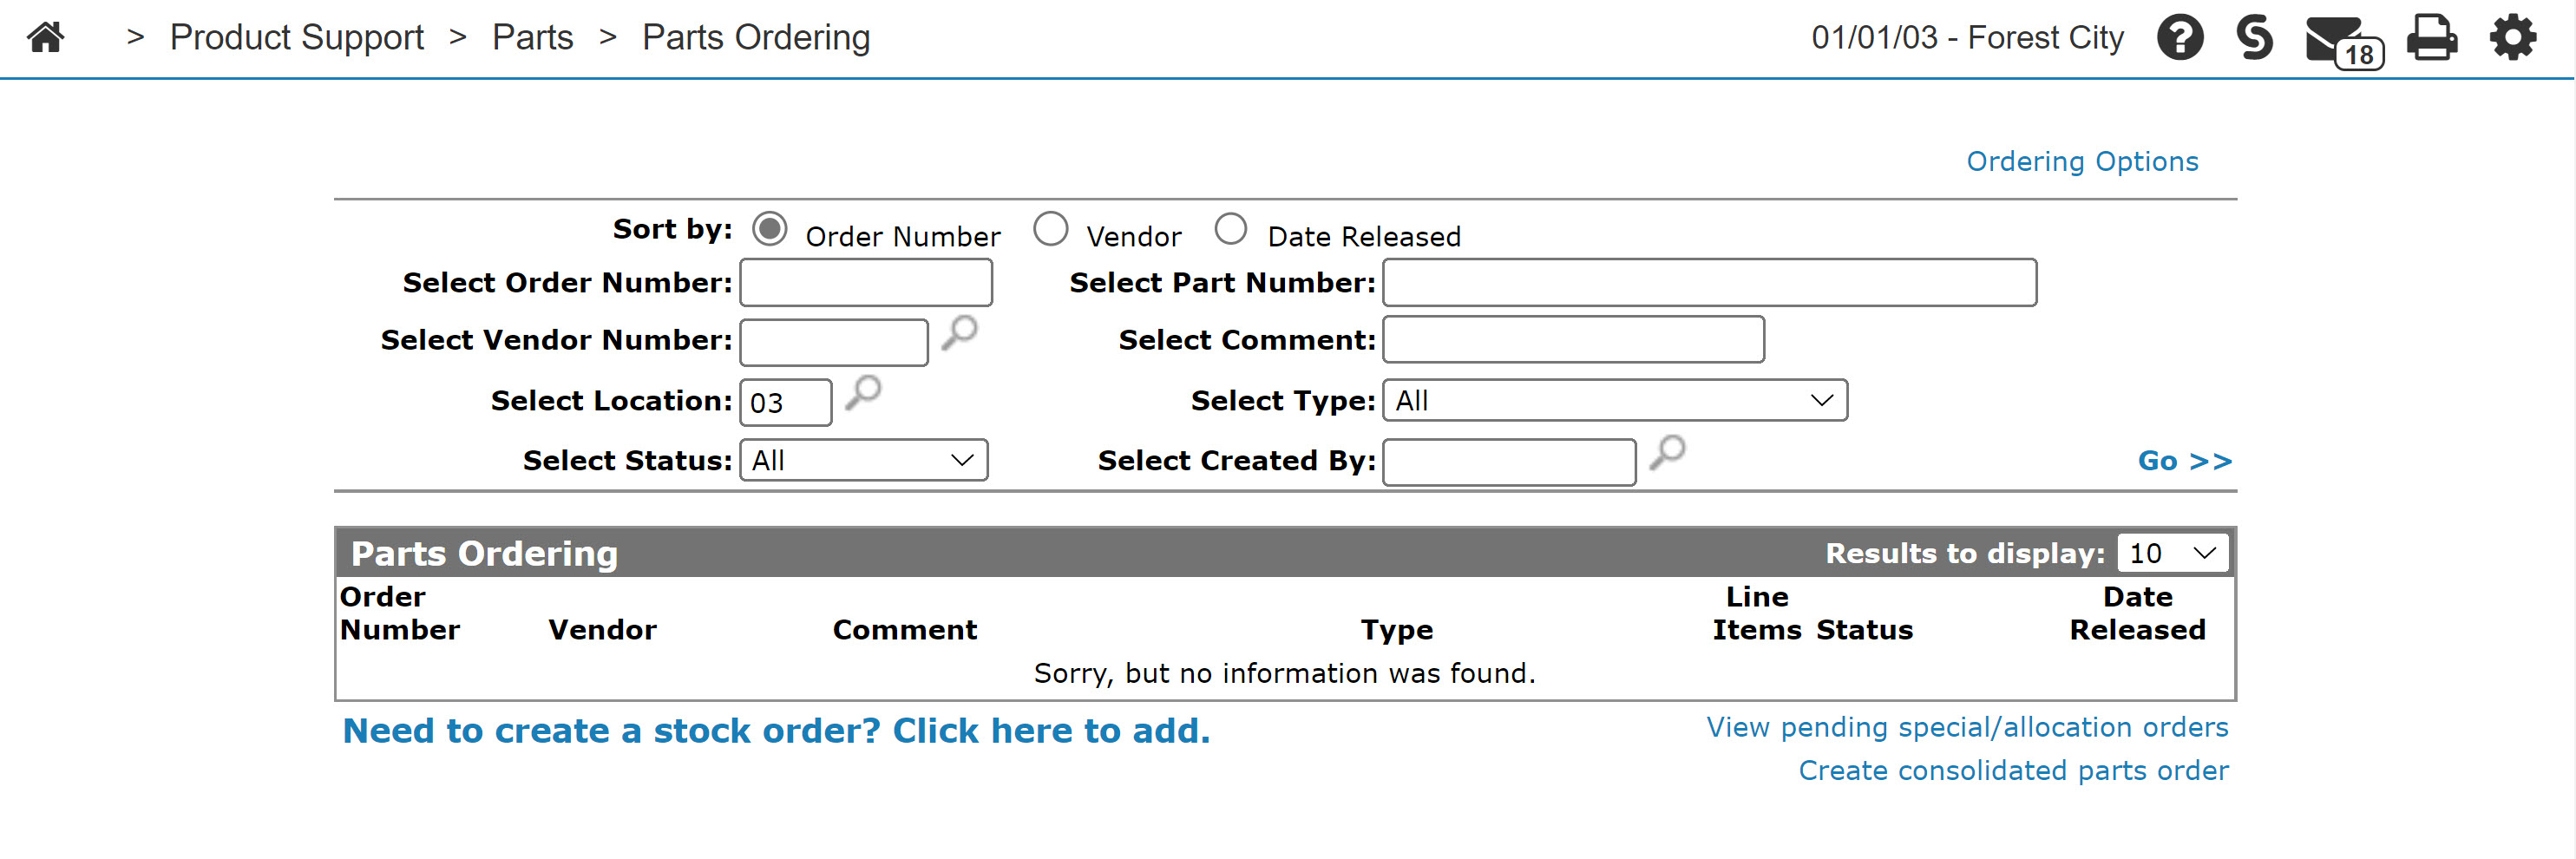
Navigate to Product Support > Parts > Parts Ordering.
-
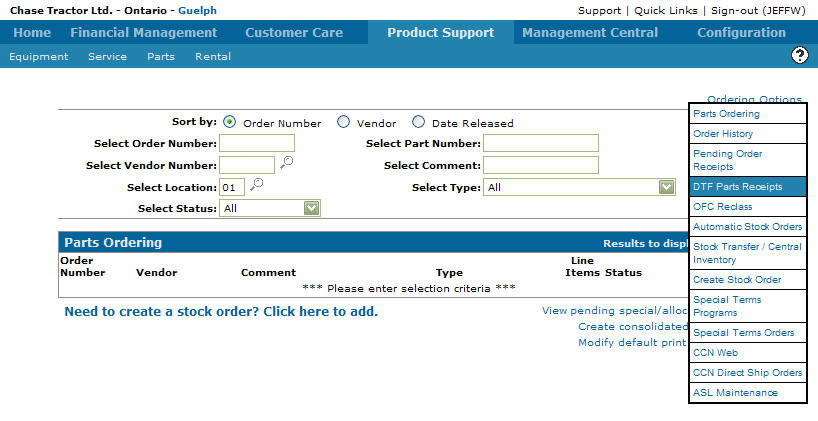
Move the cursor over the Ordering Options link and select DTF Parts Receipts from the pop-up menu.
-
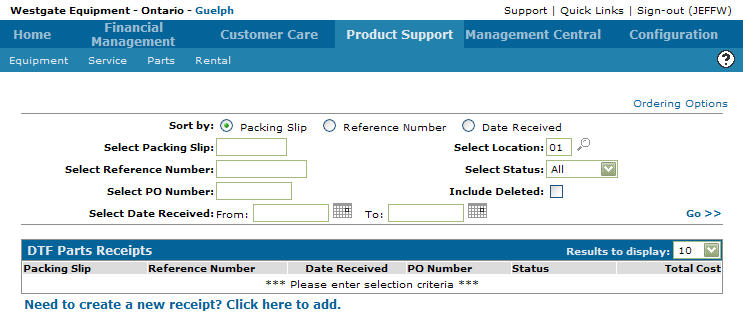
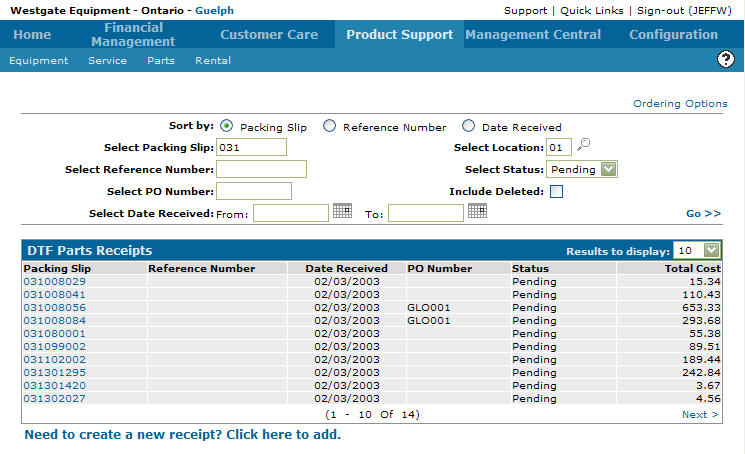
Fill out the appropriate fields and click the Go >> link.
-
Click a Packing Slip.
-
Click Assign PO's.
-
Enter a PO Number for the corresponding part number.
-
Click Save & Close to save the added PO number and return to the DTF Parts Receipt screen.
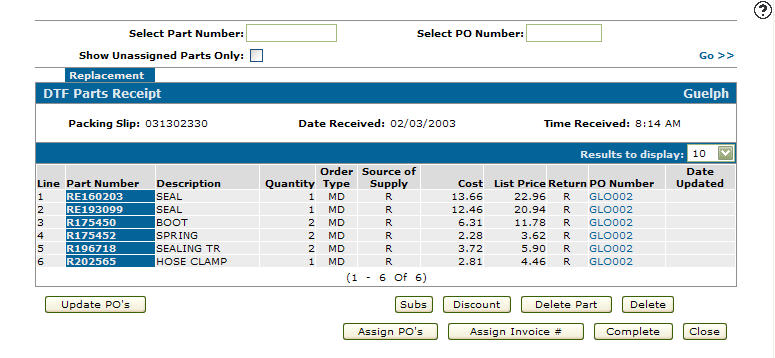
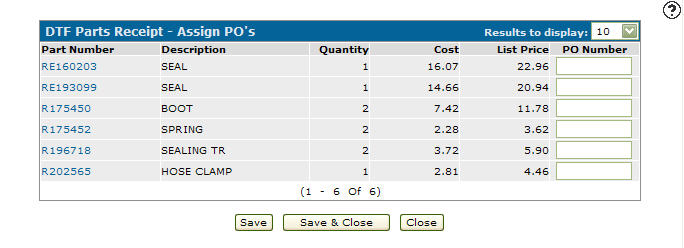
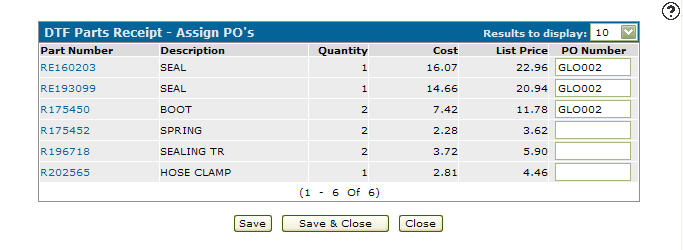
Screen Description
Fields on the DTF Parts Receipt - Assign PO's screen are:
| Field | Description |
|---|---|
| Part Number | The number of the part that is assigned to the selected PO. |
| Description | A brief description of the part. |
| Quantity | The number of parts on order. |
| Cost | The net cost of the part. |
| List Price | The suggested list price of the part. |
| PO Number | The purchase order number assigned to the part. |
Buttons on the DTF Parts Receipt - Assign PO's screen are:
| Button | Description |
|---|---|
| Save | Saves changes on the DTF Parts Receipt - Assign PO's screen. |
| Save & Close | Saves changes on the DTF Parts Receipt - Assign PO's screen and returns to the DTF Parts Receipt screen. |
| Close | Closes the DTF Parts Receipt - Assign PO's screen without saving and returns to the DTF Parts Receipt screen. |
Feature: 1006 - John Deere Parts Receipts
Security: 821 - Access DTF Parts Receipts
Revision: 2026.05