Selling Parts to a Work Order
Use this procedure to sell a stocked or consigned part to a service work order so that the service client is appropriately billed for any parts that were required to complete their repair or maintenance.
-
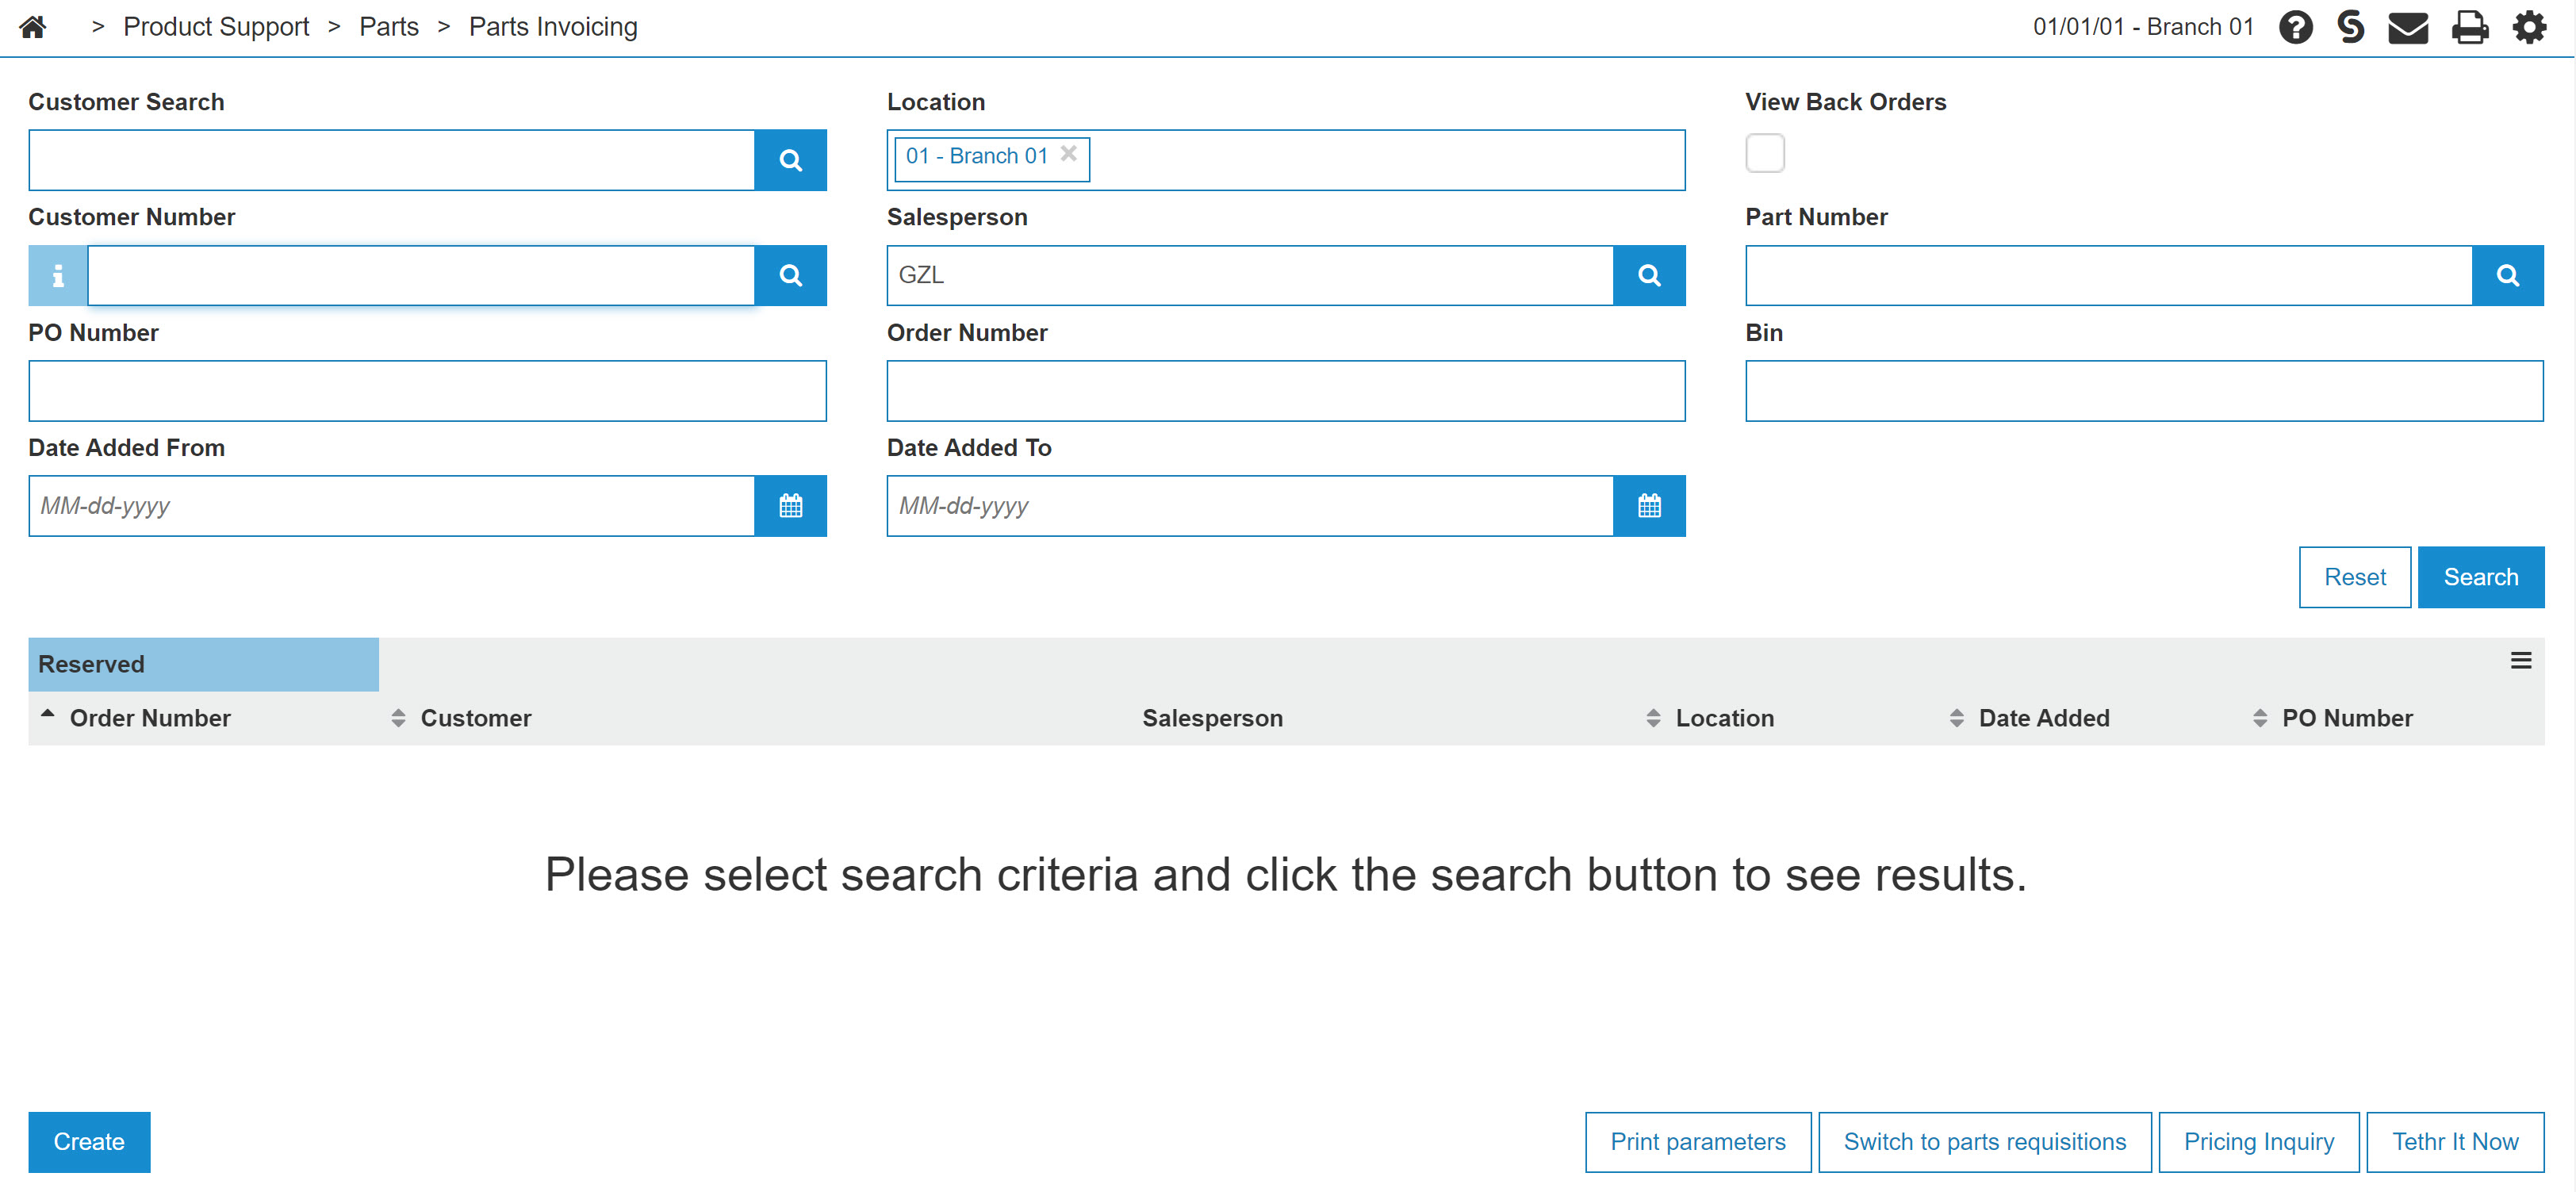
Navigate to Product Support > Parts > Parts Invoicing.
The Parts Invoicing screen appears.
-
Click the Switch to parts requisitions button.
The Work Order Part Requisition screen appears. -
Enter the search criteria and click the Go>> link to locate the desired work order.
 Creating a new requisition
You may conduct a search to locate an existing work order, or you can select the Need to create a requisition? Click here to add link to create a new Work Order Parts Requisition.
-
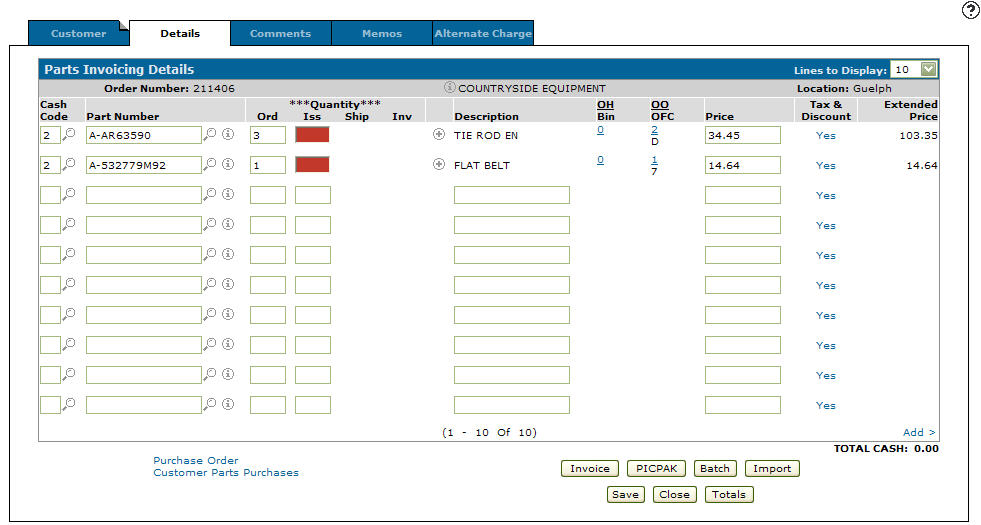
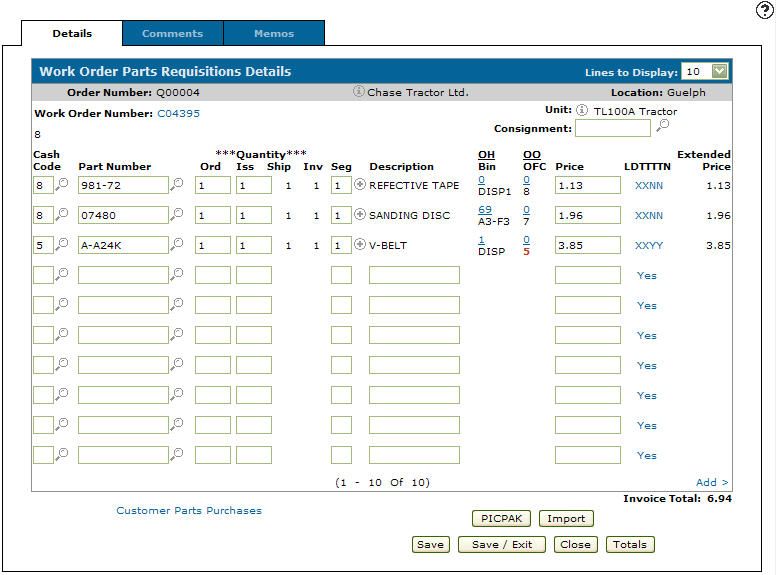
Click an Order Number.
The Details tab appears. -
(OPTIONAL) Enter a Cash Code.
- or -
Click the Search icon and select a cash code from the list.
Note: It is recommended that you retain the Cash Code defaults.
-
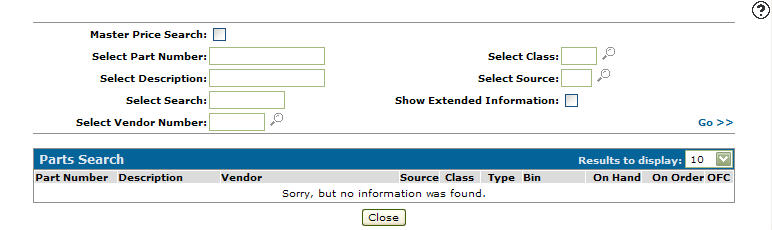
Enter the part number in the Part Number field.
- or -
Click the Search icon to open the Parts Search screen and locate the correct part. -
Enter an Ord quantity.
-
Click the Save button to save the part number and update the information fields with inventory and pricing information about the added part.
For more detailed information about each column and entry on the Parts Invoicing Details tab, review the IntelliDealer Online Help.
Quantity fields
The Iss column lists the quantity of parts that the system can issue to fulfill the need of the parts invoice. If the Iss field is highlighted in red the branch location you are currently in does not have enough stock to fulfill the parts invoice. In this case you need to order the outstanding parts from a vendor, or another branch location.
The Total Charge field lists the total dollar amount of the parts that are able to be shipped on this invoice.
-
Click the Save button.
The Parts Comment screen may appear and display the Part Number and Description.The system automatically updates the remaining fields.
-
Once you have finished adding parts to the invoice you can complete your work in these ways:
To Do This Invoice all the parts and print the invoice. Click the Invoice button. Create and print a Packing Slip. Click the PICPAK button. Produce an invoice during the next billing run. Click the Batch button. Import a parts list from another source. Click the Import button. Save changes to the invoice and continue working. Click the Save button. Save changes to invoice and exit. Click the Save/Exit button. Close the invoice without saving changes. Click the Close button. Display charge, cash, warranty, tax, and discount totals for both the requisition and the invoice. Click the Totals button.


Revision: 2026.01