Crediting a Previously Billed Parts Invoice
To credit a previously billed parts invoice you need to create a special part number PARTSCREDIT within the system.
-
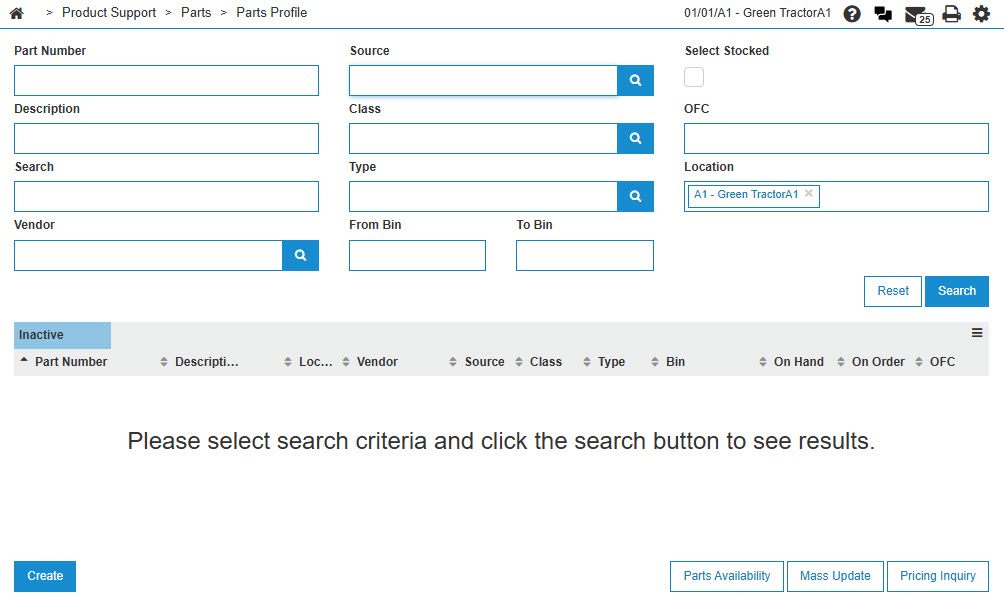
Navigate to Product Support > Parts > Parts Profile.
The Parts Profile listing screen will appear.
-
Click the Need to create a new part? Click here to add link.
The Add Part screen will appear.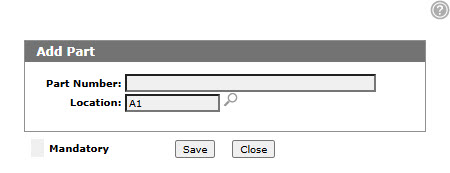
Add Part screen
-
Enter a PARTSCREDIT in the Part Number.
-
Enter a Location.
- or -
Click on the Search icon and select a Location from the Location Selection screen.
 -
Click the Save button.
The Add Part screen will refresh, displaying added information fields.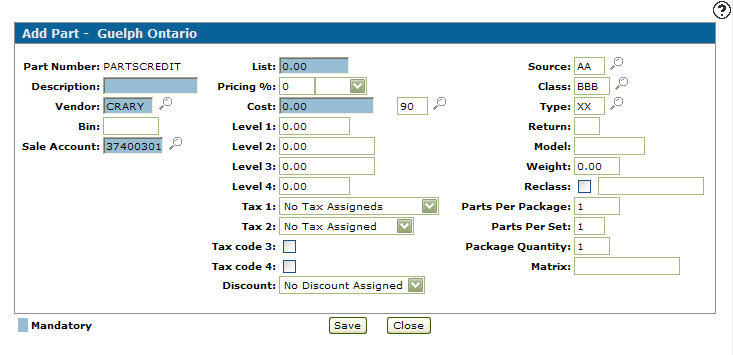
Add Part screen
-
On the Add Part screen, enter PARTS CREDIT in the Description field.
-
Enter GL in the Vendor field.
-
Enter the account number you wish to credit in the Sales Account field.
-
Enter 99 in the Source field.
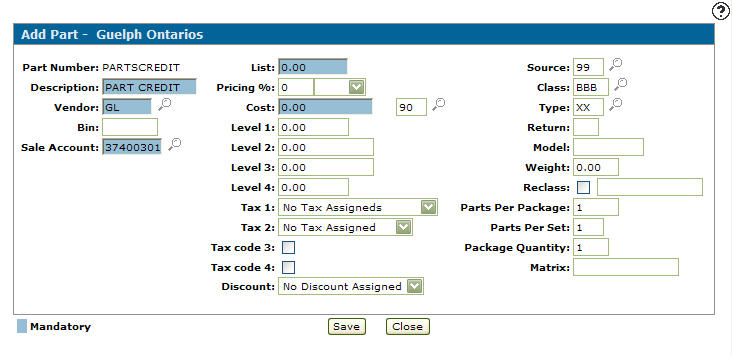
Add Part screen
-
Click the Save button.
The Confirmation screen will appear.
Confirmation screen
-
On the Confirmation screen, click the Ok button.
The Add Part screen will reappear.
Click on the Save button a second time to create a parts profile for the special part number (PARTSCREDIT).
The Parts Profile screen will appear.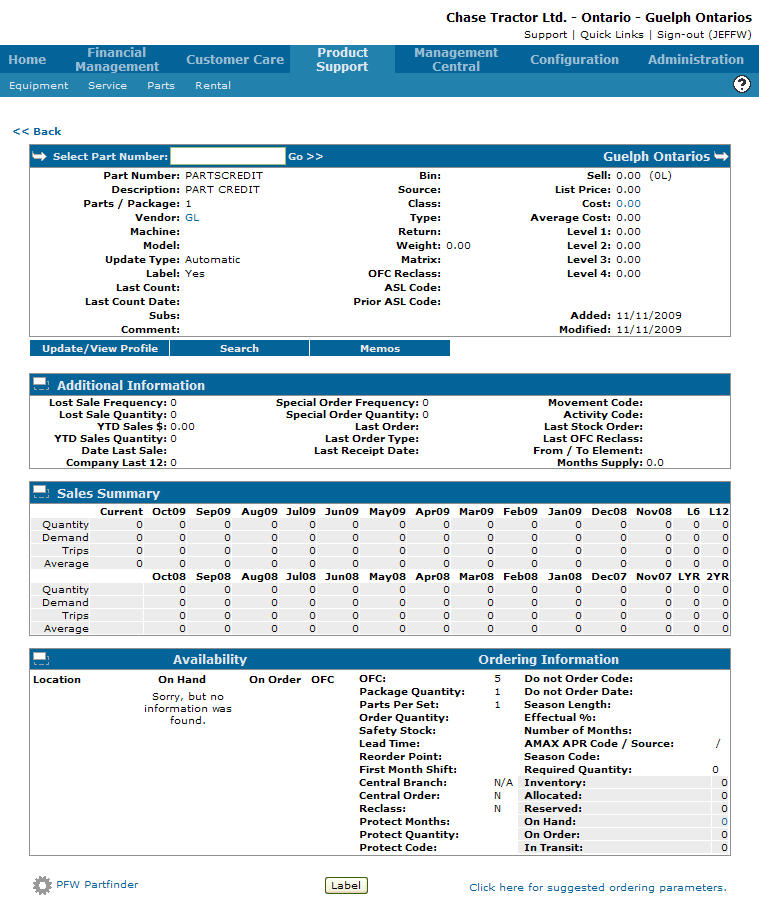
Parts Profile screen
-
Navigate to Product Support > Parts > Parts Invoicing.
The Parts Invoicing screen will appear.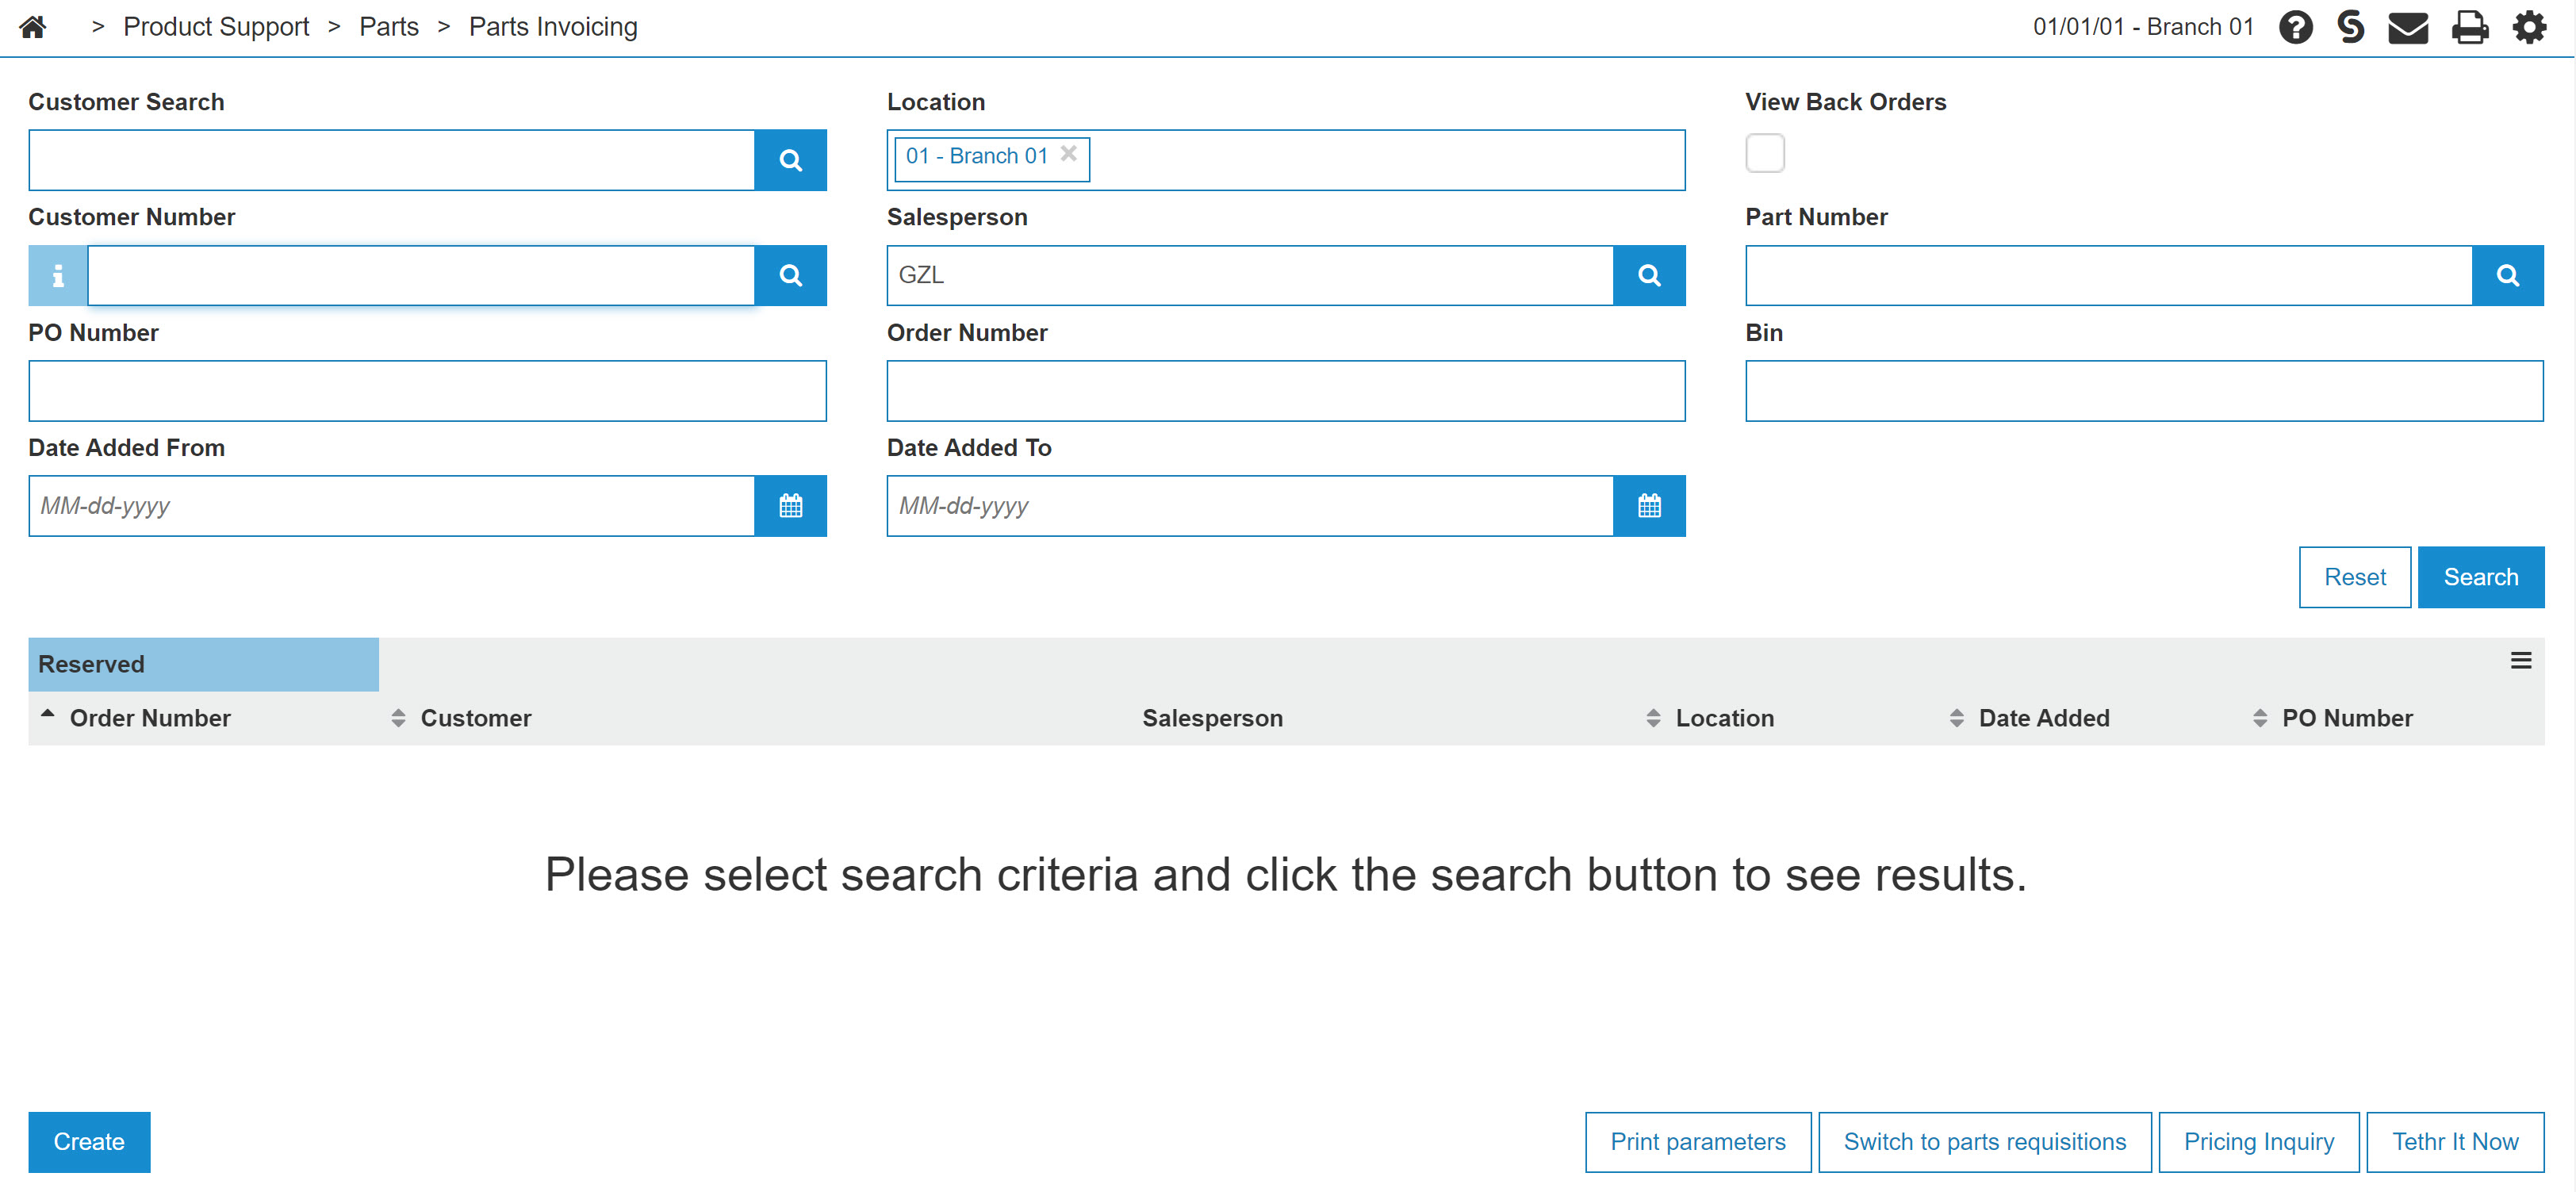
Parts Invoicing screen
-
On the Parts Invoicing screen, click on the Need to create a new invoice? Click here to add link.
The Customer - Parts Invoicing Header tab will appear.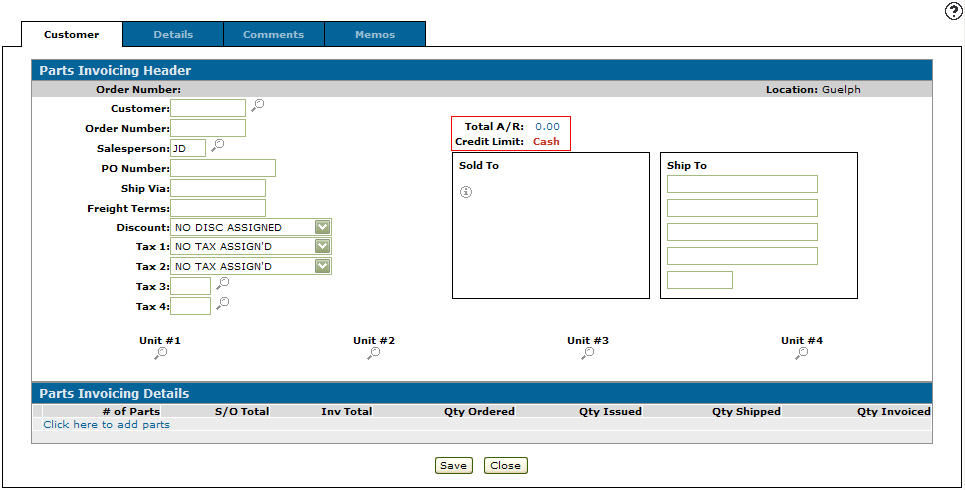
Customer - Parts Invoicing Header tab
-
On the Customer - Parts Invoicing Header tab, enter the as customer number that was used on the original parts invoice in the Customer field.
-
Enter the original Salesperson.
Note:
Ensure that the original tax codes used on the parts invoice are entered.
Customer - Parts Invoice Header tab
-
Click on the Details tab.
- or -
Click on the Click here to add parts link.
The Parts Invoicing Details tab will appear.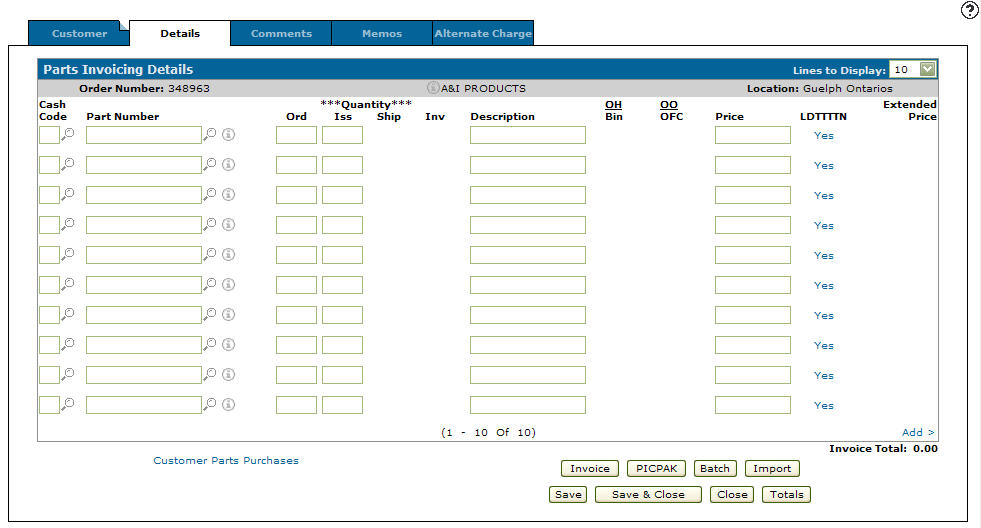
Parts Invoicing Details tab
-
On the Parts Invoicing Details tab, enter a 1 in the Cash Code field.
-
Enter PARTSCREDIT in the Part Number field.
-
Enter -1 in both the Ord and Iss fields.
-
Enter the total amount (non-taxable) of the original parts invoice you wish to credit into the Price field.
In this example we entered $ 500.00. -
Click on the Save button.
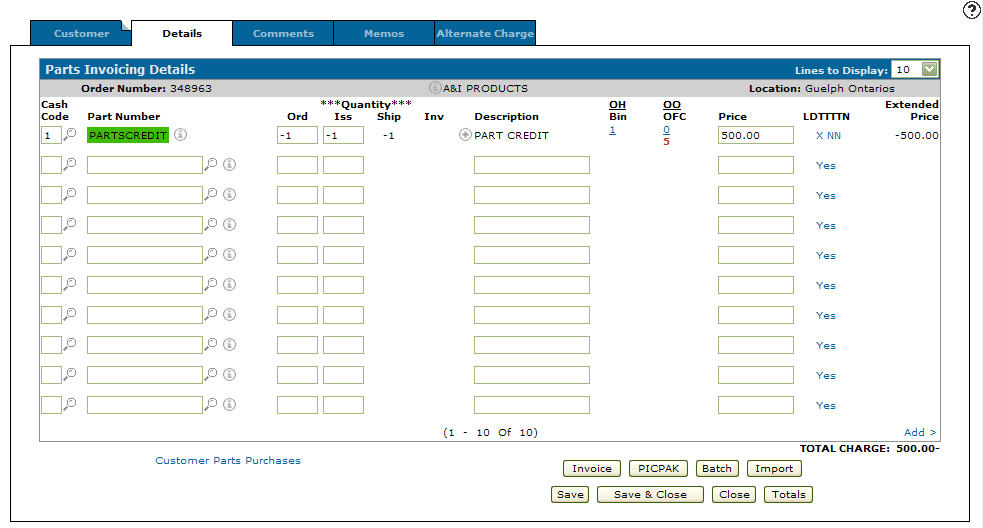
Parts Invoicing Details tab
-
Click the Invoice button or Batch button in order to invoice the credit parts invoice order.
-
The invoice will display the credit after a Parts Billing Run is completed.
-
The amount was been relieved from the customer’s A/R (credit) and posted the debit to our Other Parts sale account not affecting the parts inventory account.