Adding Parts to a Group Order
-
Navigate to Product Support > Parts > Parts Invoicing.
TheParts Invoicing screen will appear.
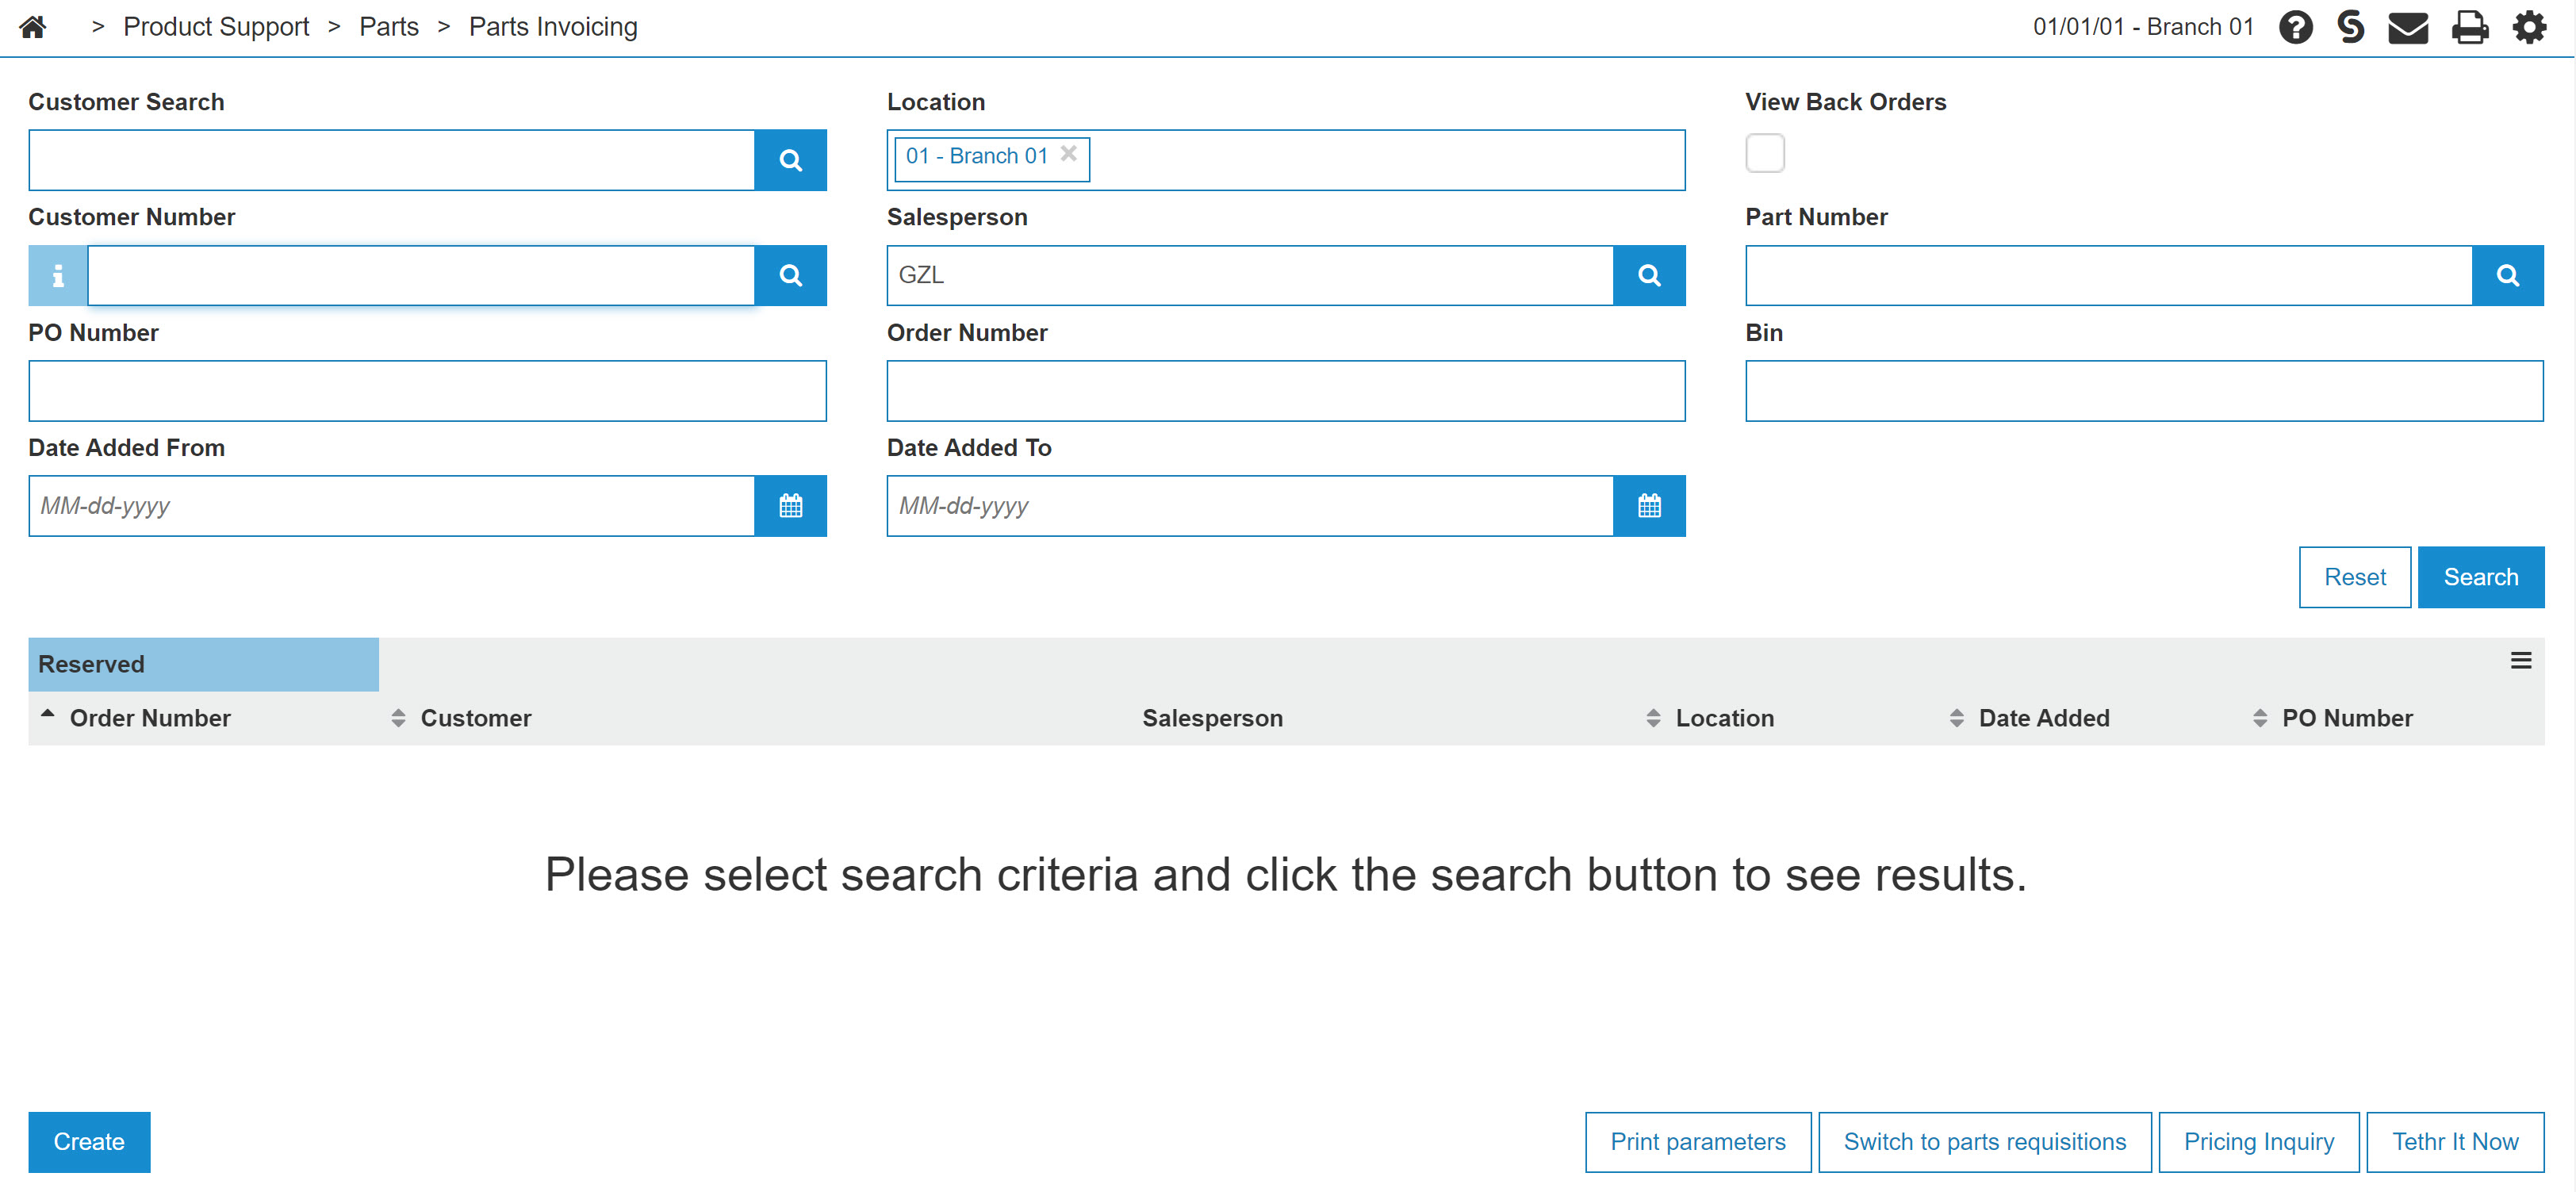
Parts Invoicing screen
-
On the Parts Invoicing screen, click the Need to create an invoice? Click here to add link.
The Customer - Parts Invoicing Header tab will appear.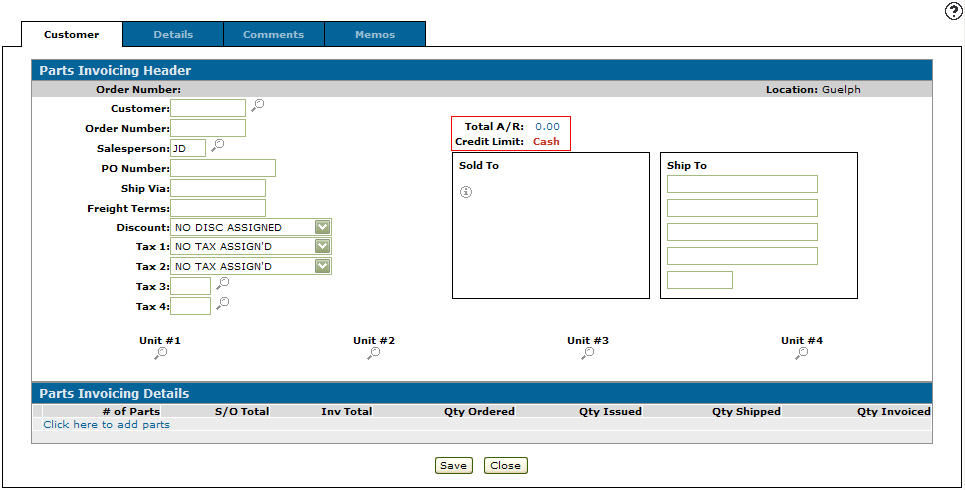
Customer - Parts Invoicing Header tab
-
On the Customer - Parts Invoicing Header tab, type in a Customer number.
- or -
Click on the Search icon.
icon.
The Your Customers screen will appear.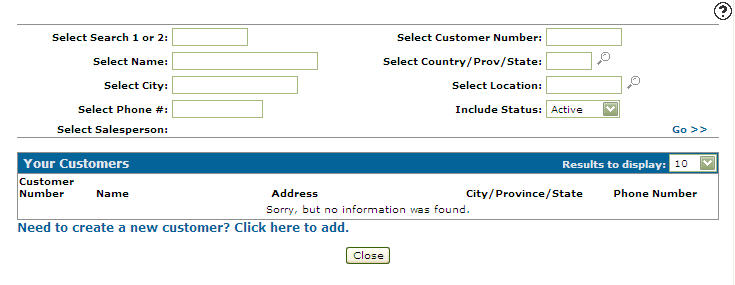
Your Customers screen
-
Enter the search criteria and click the Go>> link to locate the desired customer.
-
Click on the customer name, the Customer - Parts Invoicing Header tab will appear with the selected customer number in the Customer field and the customers Sold to address filled out.
-
Click on the Save button, the system will automatically generate an Order Number.
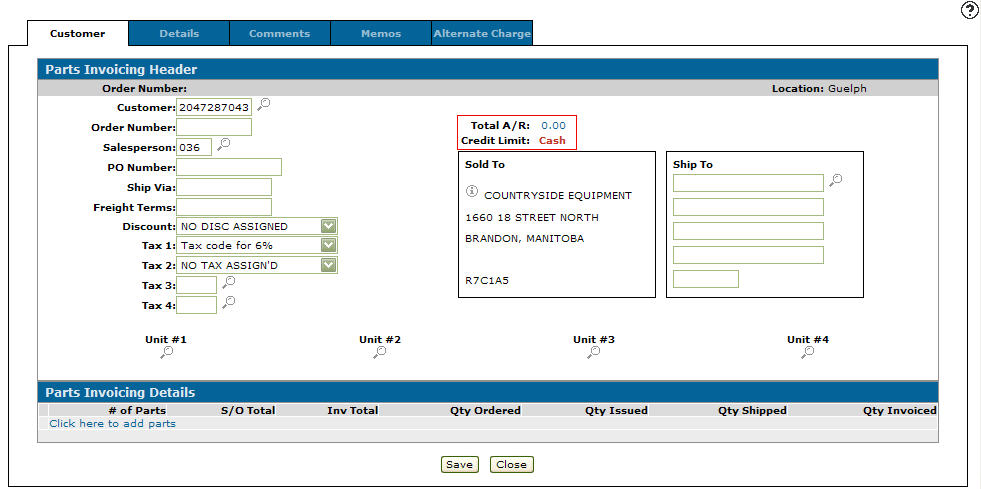
Customer - Parts Invoicing Header tab
-
Select the Click here to add parts link.
- or -
Click the Details tab.
The Parts Invoicing Details tab will appear.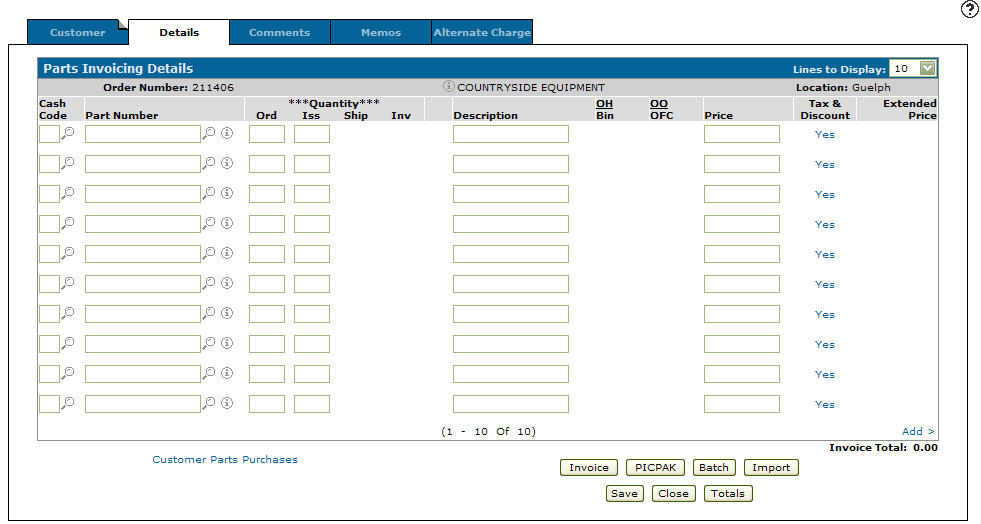
Parts Invoicing Details tab
-
On the Parts Invoicing Details tab, enter a Cash Code.
- or -
Click on the Search icon and select a cash code from the list. -
Enter a Part Number.
- or -
Click on a Search icon.
The Parts Search screen will appear.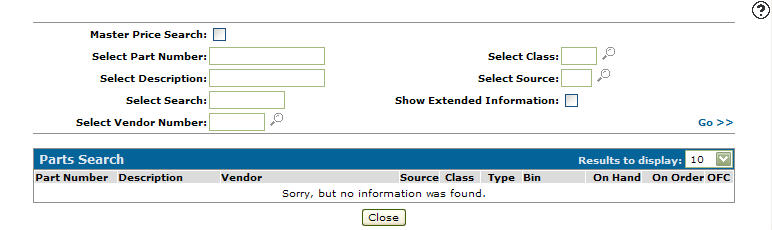
Parts Search screen
-
Enter the search criteria and click the Go>> link to locate the desired part.
-
Click on the part number, the Parts Invoicing Details tab will appear with the selected part number in the Part Number field.
-
Enter an Ord quantity.
-
Click on the Save button, the Parts Invoicing Details tab will appear and automatically refresh the remaining fields.

Parts Invoicing Details tab
-
On the Parts Invoicing Details tab, if there are parts required that exceed the available on hand quantity (ORD field exceeds ISS field) then the ISS field will be highlighted in red.
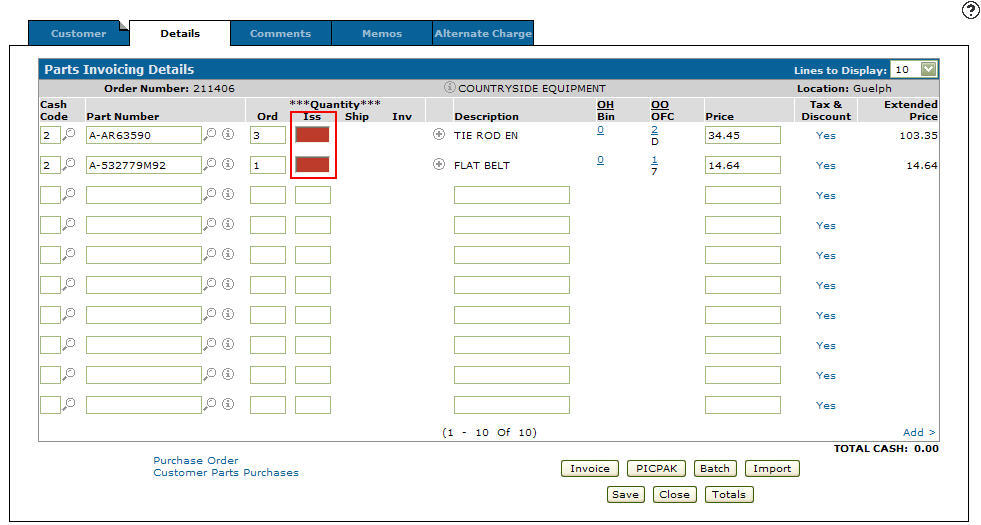
Parts Invoicing Details tab
-
Move the cursor over the Purchase Order link and select Create from the pop-up list.
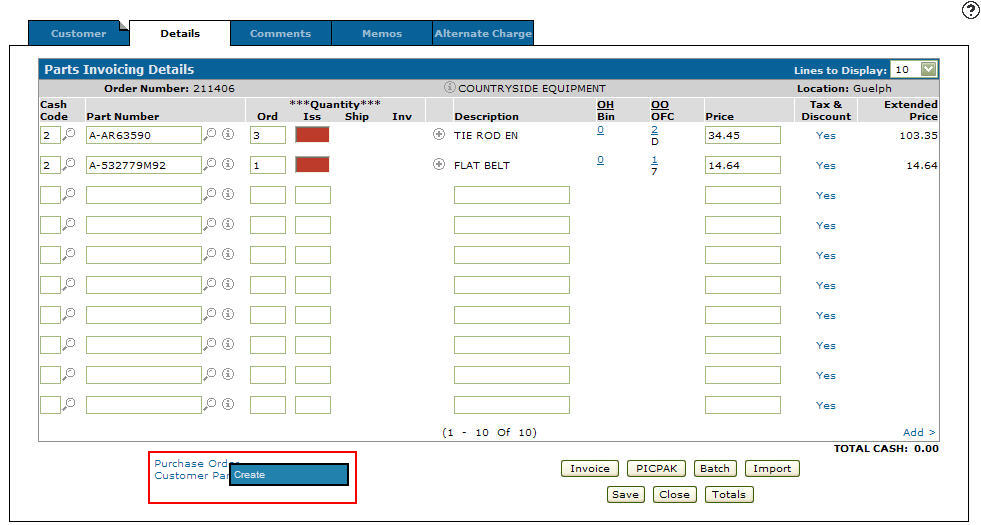
Purchase Order - Create link
-
The Create Purchase Order screen will appear.
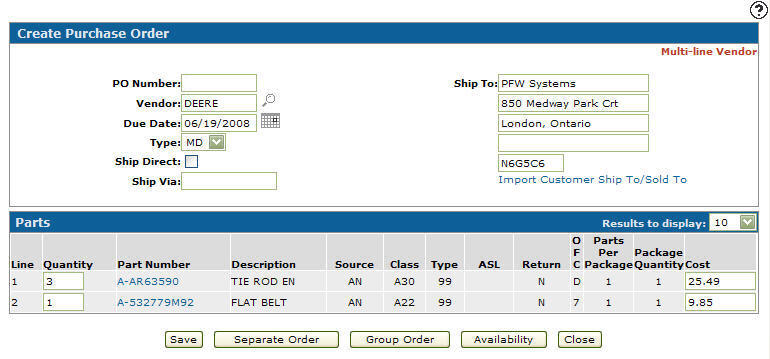
Create Purchase Order screen
-
On the Create Purchase Order screen, select the appropriate Vendor and Type.
Note:
Type codes (MD, FI, T$, etc) are typically used to represent different shipping priorities (e.g. Regular Ground, Next Day Air, Second Day, etc). This gives the additional flexibility of separating parts for each type of order that needs to be placed. -
Click on the Group Order button to add these parts to the group order file for the Vendor and Type specified.
The Parts Invoicing Details tab will appear.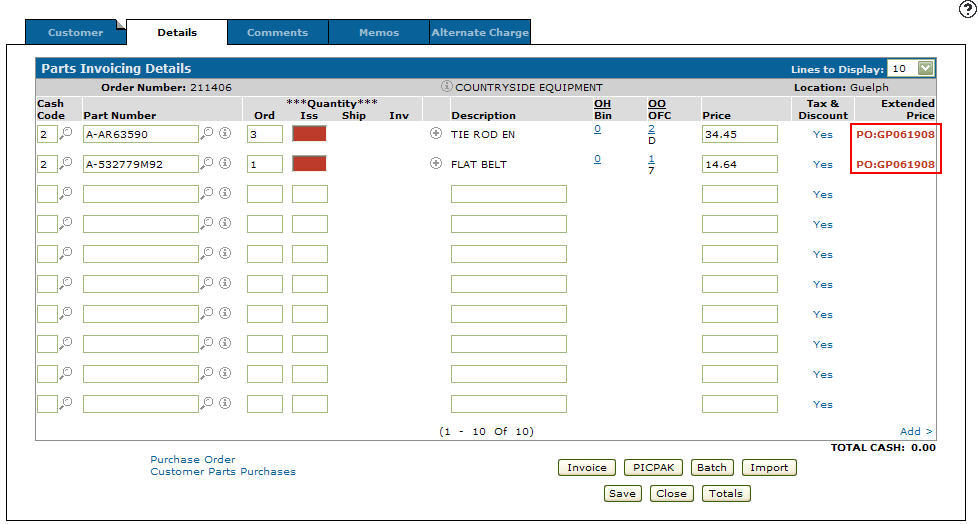
Updated Parts Invoicing Details tab
-
The Extended Price field has now changed to display a PO number indicating that the part is on a group order and the date the group order was created. The PO number displayed is in the format GPMMDDYY indicating that the part was added to the group order on that month, day, and year. Once the group order is reviewed and released, this field will show the actual PO number.
-
Click on the Save/Exit button to save changes made to the Parts Invoicing Details screen.